
Short-sleeved Flashback Tee!
Spring is here and I've been starting to think about the boy's warm-weather wardrobe. Starting with a short-sleeved Flashback Tee!

Array

Array

Array

Array
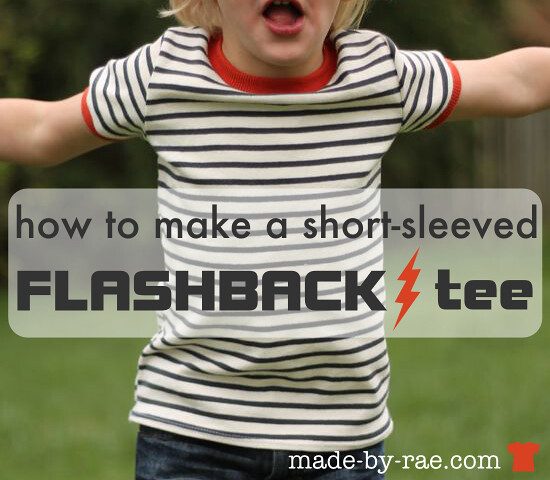
The one was made with the size 5T of the Flashback Tee Sewing Pattern and an organic 1x1 rib knit from Near Sea Naturals. Love the stripes and how super-soft this is. Elliot LOVES it. He's just turned five a couple weeks ago so the fit is just a little big. Room to grow for my average-sized kid. Although he's looking rather skinny in these pictures. No more baby fat, waaaah!
Making a short-sleeved tee from a long-sleeved pattern is so easy! And it's no big secret: you could do this with ANY long-sleeved pattern piece.
Here's a quick how-to:
Array

Array
Step 1: Cut the sleeve pattern piece
You need to shorten the sleeve pattern piece (which is for a long-sleeved tee) to a short sleeve pattern piece. For toddlers, this means cutting the pattern off somewhere between 1 (for the smaller sizes) and 2 inches (for the larger sizes) below the armpit. It doesn't really have to be exact; you can always start longer and cut more off if you don't like how it looks. But to me a skinny tee looks silly with a longer sleeve.
Important: make sure that your new line is perpendicular to the grain/fold line.
Note: With this tee I trimmed an additional 1/2" off before adding the cuff, so If you do the math that's the same as cutting it 1.5" below the armpit to start with for the 5T size.
OK, so now you need to cut out your two sleeve pieces on the fold with your new short-sleeve pattern piece, and cut the rest of the pieces of the shirt as usual.

Array
Step 2: Assemble the tee
Sew the tee together according to the instructions, except leave the ends of the sleeves for now. I'd suggest trying the tee on your child at this point to see how long the sleeve looks. Trim the sleeve more if necessary, and don't forget that the cuff will add another 1/2" yet.
If you want to, though, you could just hem the sleeves now and be done!
Step 3: Cut the cuff pieces
Cut two 2" wide strips of rib knit for the sleeve cuff. The folded length of the cuff pieces should be 1" shorter than the width of the folded sleeve (see photo). This will make it nice and fitted on the arm.

Array
Step 4: Sew the ends of the cuff together
I used a 1/4" seam allowance here.

Array
Step 5: Attach the cuffs to the sleeve
Follow the instructions to attach the cuff as given in the sewing instructions, but use a 1/4" seam allowance.

Array
Voila! Finished short sleeved tee!
Step 6: Put on child so he can go pester his sister.

Array

Array