Big Butt Baby Pant Trickiness

bigbutttrickyseam1.png
I have been so thrilled by the response to the Big Butt Baby Pants Sewing Pattern.  Overwhelmed really.  It's hard to explain to people who aren't a part of the online sewing scene how supported I feel by everyone who reads my blog, sends me an encouraging email, or buys a pattern. So I just need to share that here and say thanks. And then on top of that you guys post your pictures which is just so much fun for me to see. It just blows me away.  I mean, how awesome are these?

Row 1: 1. Linen big butt baby pants, 2. kcwc 2, 3. Liberty for Target Big Butt Baby Pants, 4. Big Butt Baby Pants,Row 2: 5. Deer Butt, 6. KCWC: B3P pants close-up, 7. Big Butt Baby Pants Back view, 8. big butt baby pants and kimono set,Row 3: 9. babypants4, 10. Her ginormo-booty makes me laugh, 11. open open open, 12. big butt baby pants,Row 4: 13. 031, 14. big butt baby pants by Made by Rae, 15. Baby pants, 16. Rae's Big Butt Baby Pants 12m - 2T

As more and more of you have made these, I've gotten a few (very sweet) emails asking how to get that crotch to be less wonky.  For those of you who have made these pants, you probably know what I'm talking about.  If you haven't made them, there's sometimes a bit of puckering at the bottom of the rear panel. It really doesn't show up once the pants are on the baby, but it's still a little annoying.  Here's a picture of a pair I posted earlier this year that illustrates what I'm talking about:
 see it there, that little pucker at the crotch?
As I worked on samples for the pattern, I found I was able to solve this problem just by stretching the fabrics out a little while sewing the leg seams (as explained in the pattern), but that doesn't always seem to work for everyone.  So I wanted to put together a quick post to show you a method that might help avoid that crotch wonkiness altogether. You'll need to own the Big Butt Baby Pants Pattern for this to make any sense, so open up your PDF, grab your pattern, or buy one here!

This fix involves a slight change in how you sew the rear seams, which is the very first part of the sewing instructions. Turn to page 3 to where it says:

Sew Rear Seams 

In step 1 of the pattern there is a diagram which shows you how to line up your panels by overlapping the dots. Go ahead and line up your panels just like that.
HERE'S WHAT YOU'LL NEED TO CHANGE: There's also an arrow in that same diagram pointing to the very edge of the center of the rear panel (right where it lines up with a corner of the main panel) that says "Start Sewing Here" and we're NOT going to do that. So just ignore that pesky little arrow.
Instead, skip the first 1/2" from the edge (shown in red in the new diagram below) and start stitching at the black dot (see below), sewing up toward the waistband as shown by the black dashed arrow in the diagram below and rotating the rear panel as indicated in the pattern.  Repeat for the other rear seam.
Leaving that 1/2" unsewn at the bottom of the rear seams is going to give the rear edge alot more flexibility when it comes time to sew the leg seam.  Here's how the bottom of the rear panel will look (more or less) once you've sewn and topstitched both rear seams:
The rear seams shown from the right side (above) and wrong side (below)
I got a little too close to the edge on the right seam in the picture above; I probably should have started a little further up, but whatevs.
Now you can continue sewing the front seam and leg seam as instructed. You should find that you have enough flexibility to be able to sew the leg seam without puckering. Note that the edges might not line up as smoothly in shape this way as the corners stick out a little more.  It's still very important to center the front seam on the center of the rear panel so that everything lines up properly, and it never hurts to pin excessively:
One more thing: make sure that as you sew the leg seam that you "catch" all the ends of those rear seams. Since they now begin 1/2" away from the edge and the leg seam allowance is 1/2", this shouldn't be difficult, but if you don't you'll get little holes at the ends of the seams.  Here's what it should look like when the leg seam is finished:
You can see that I didn't catch the top stitching on the left rear seam, but that's OK since I got the seam itself.

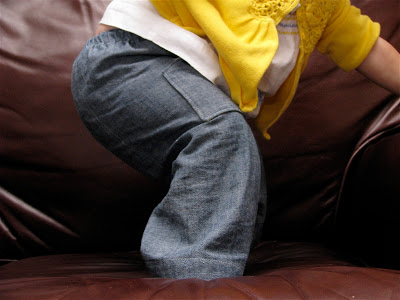
If you find that sewing the rear seams like this makes the front of the pants longer than the back or vice versa (causing there to be a little extra on one side at the cuff), just trim it off so that it's even.  Occasionally when the top fabric stretches more than the fabric on the bottom, I end up with a little extra, and that's what I do. Campy? Yes. But that's how I roll, people.I do want to say though that this usually only happens when my rear seam allowances are a little off.  In this case the legs did come out the right length (yay!):

at this point you would finish the pants up as instructed in the pattern
the finished product (these were also blogged here)
I really hope this helps some of you create a better-looking pair of baby pants. Feel free to leave a comment on this post if you have other helpful hints or information others would find useful.
And as always, please add your pictures to the Big Butt Baby Pants Flickr Pool so we can all enjoy your cute creations!