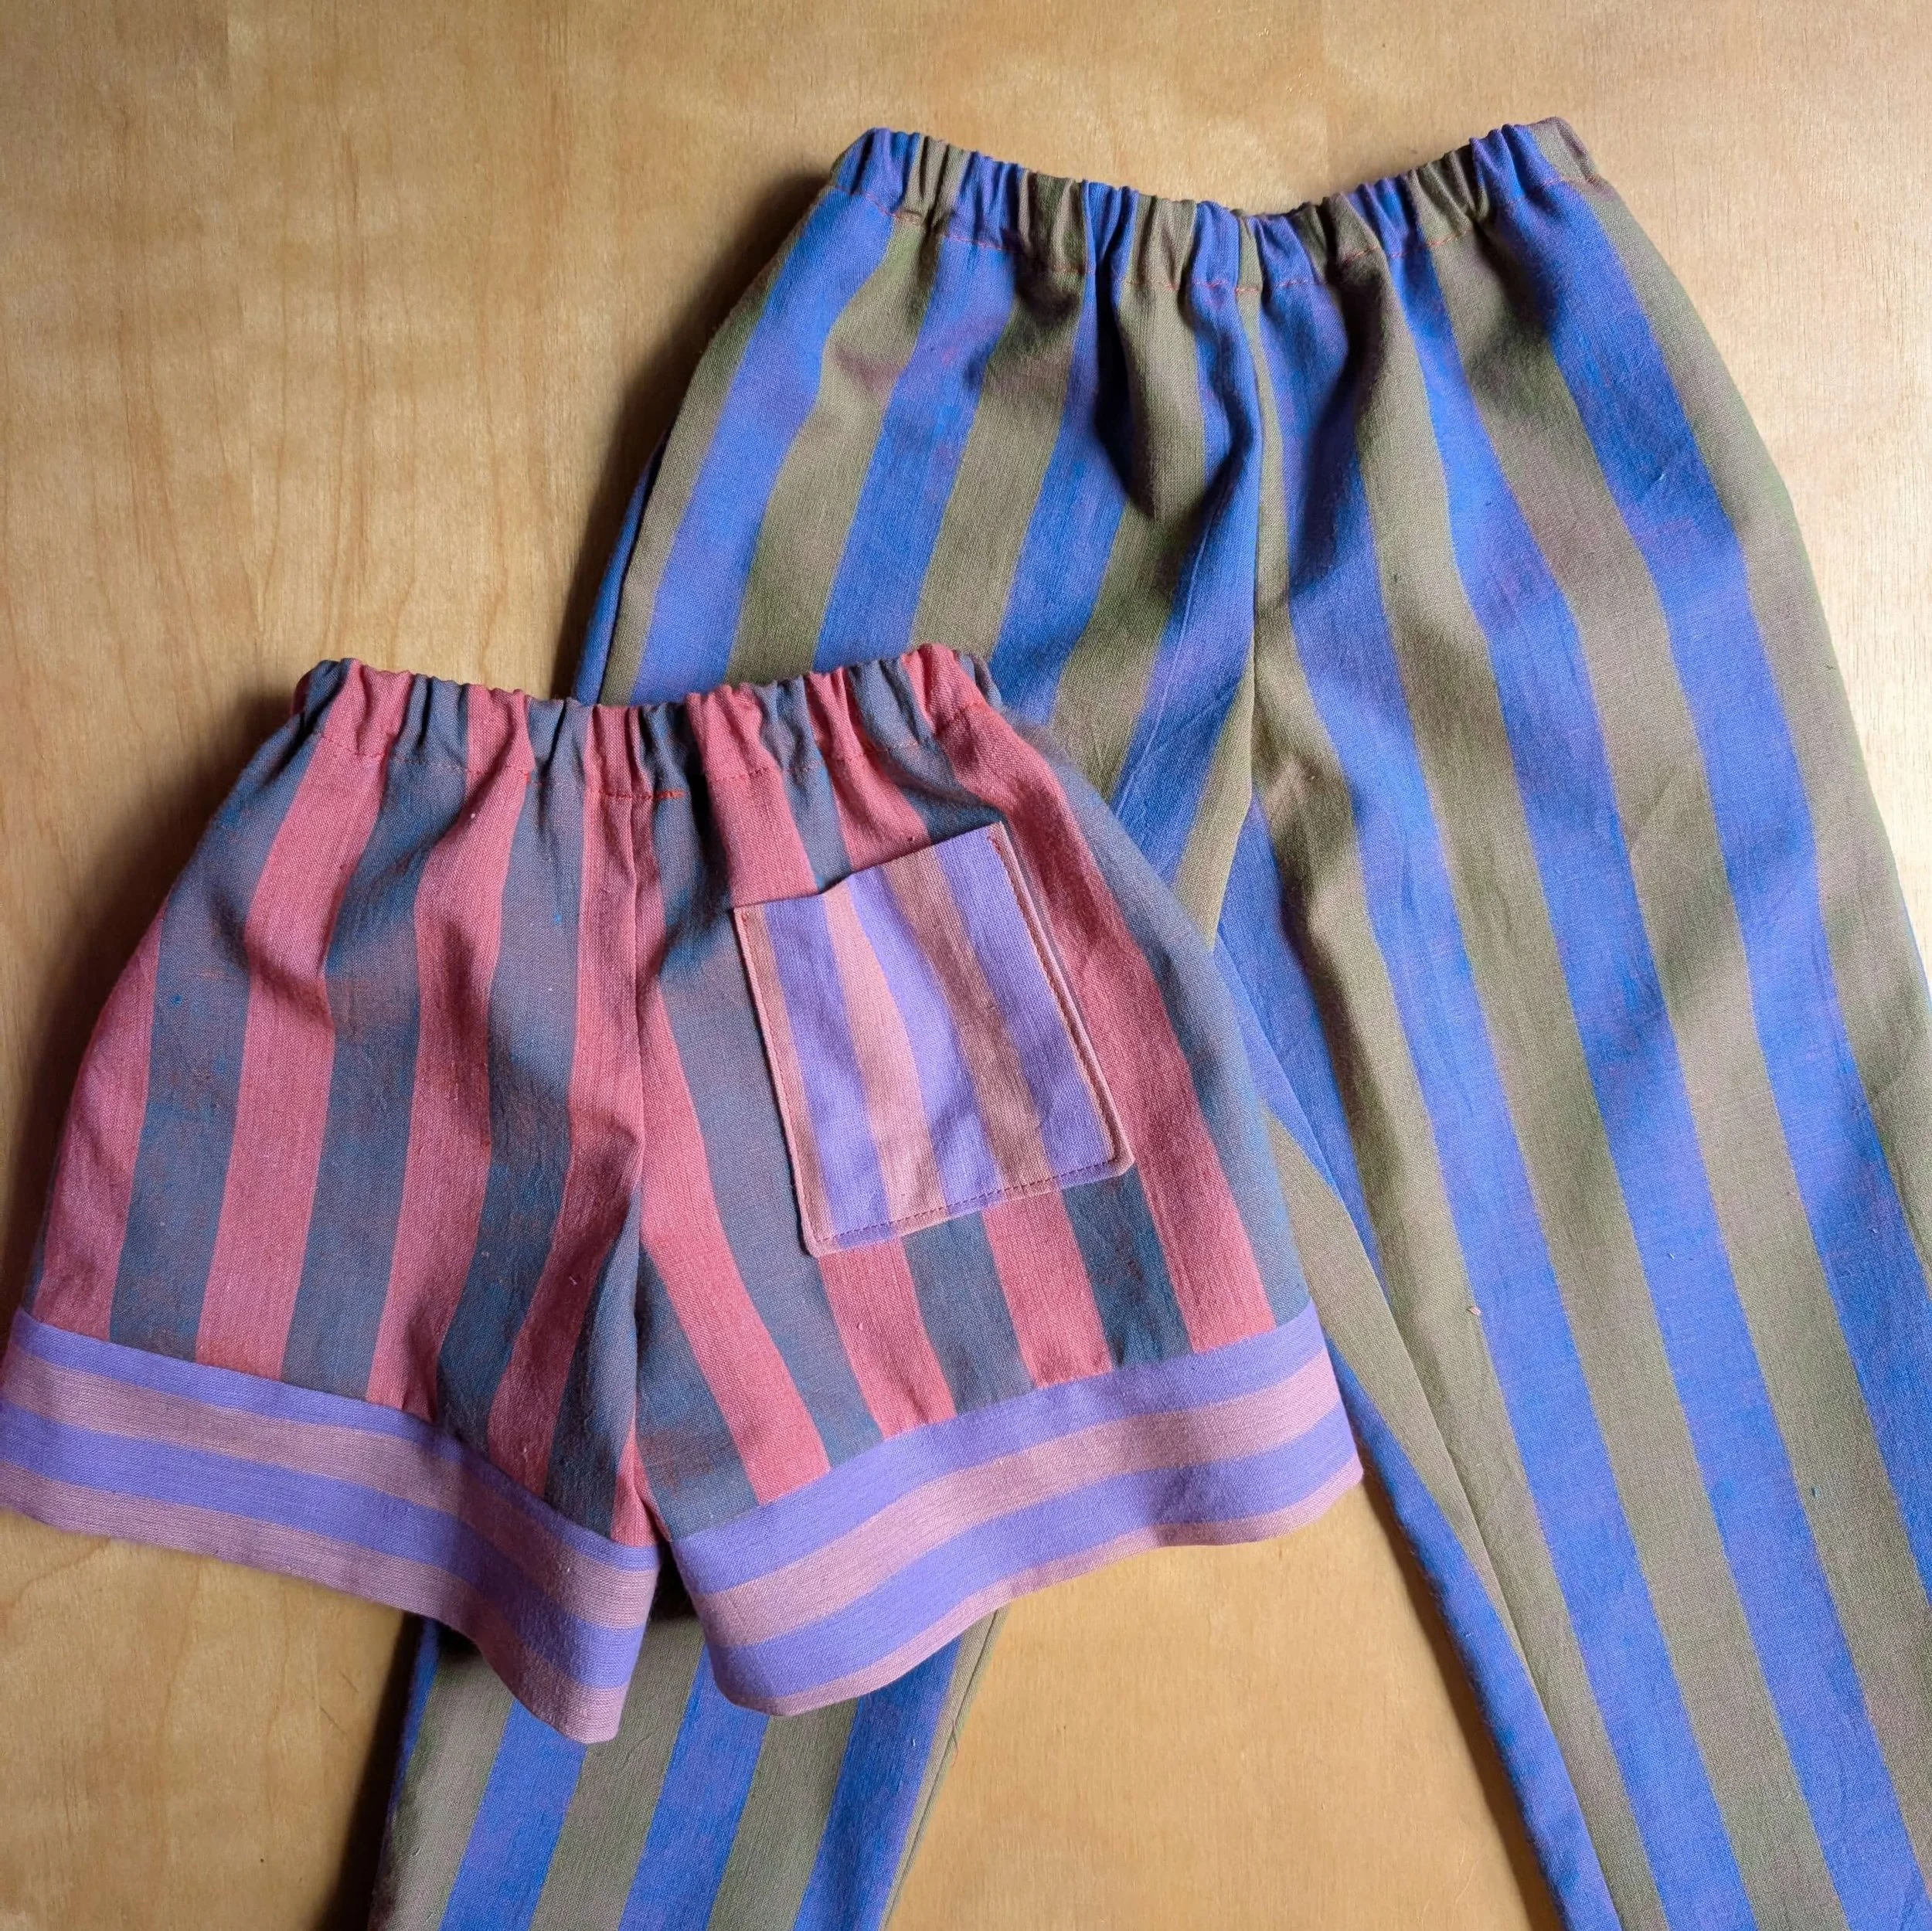
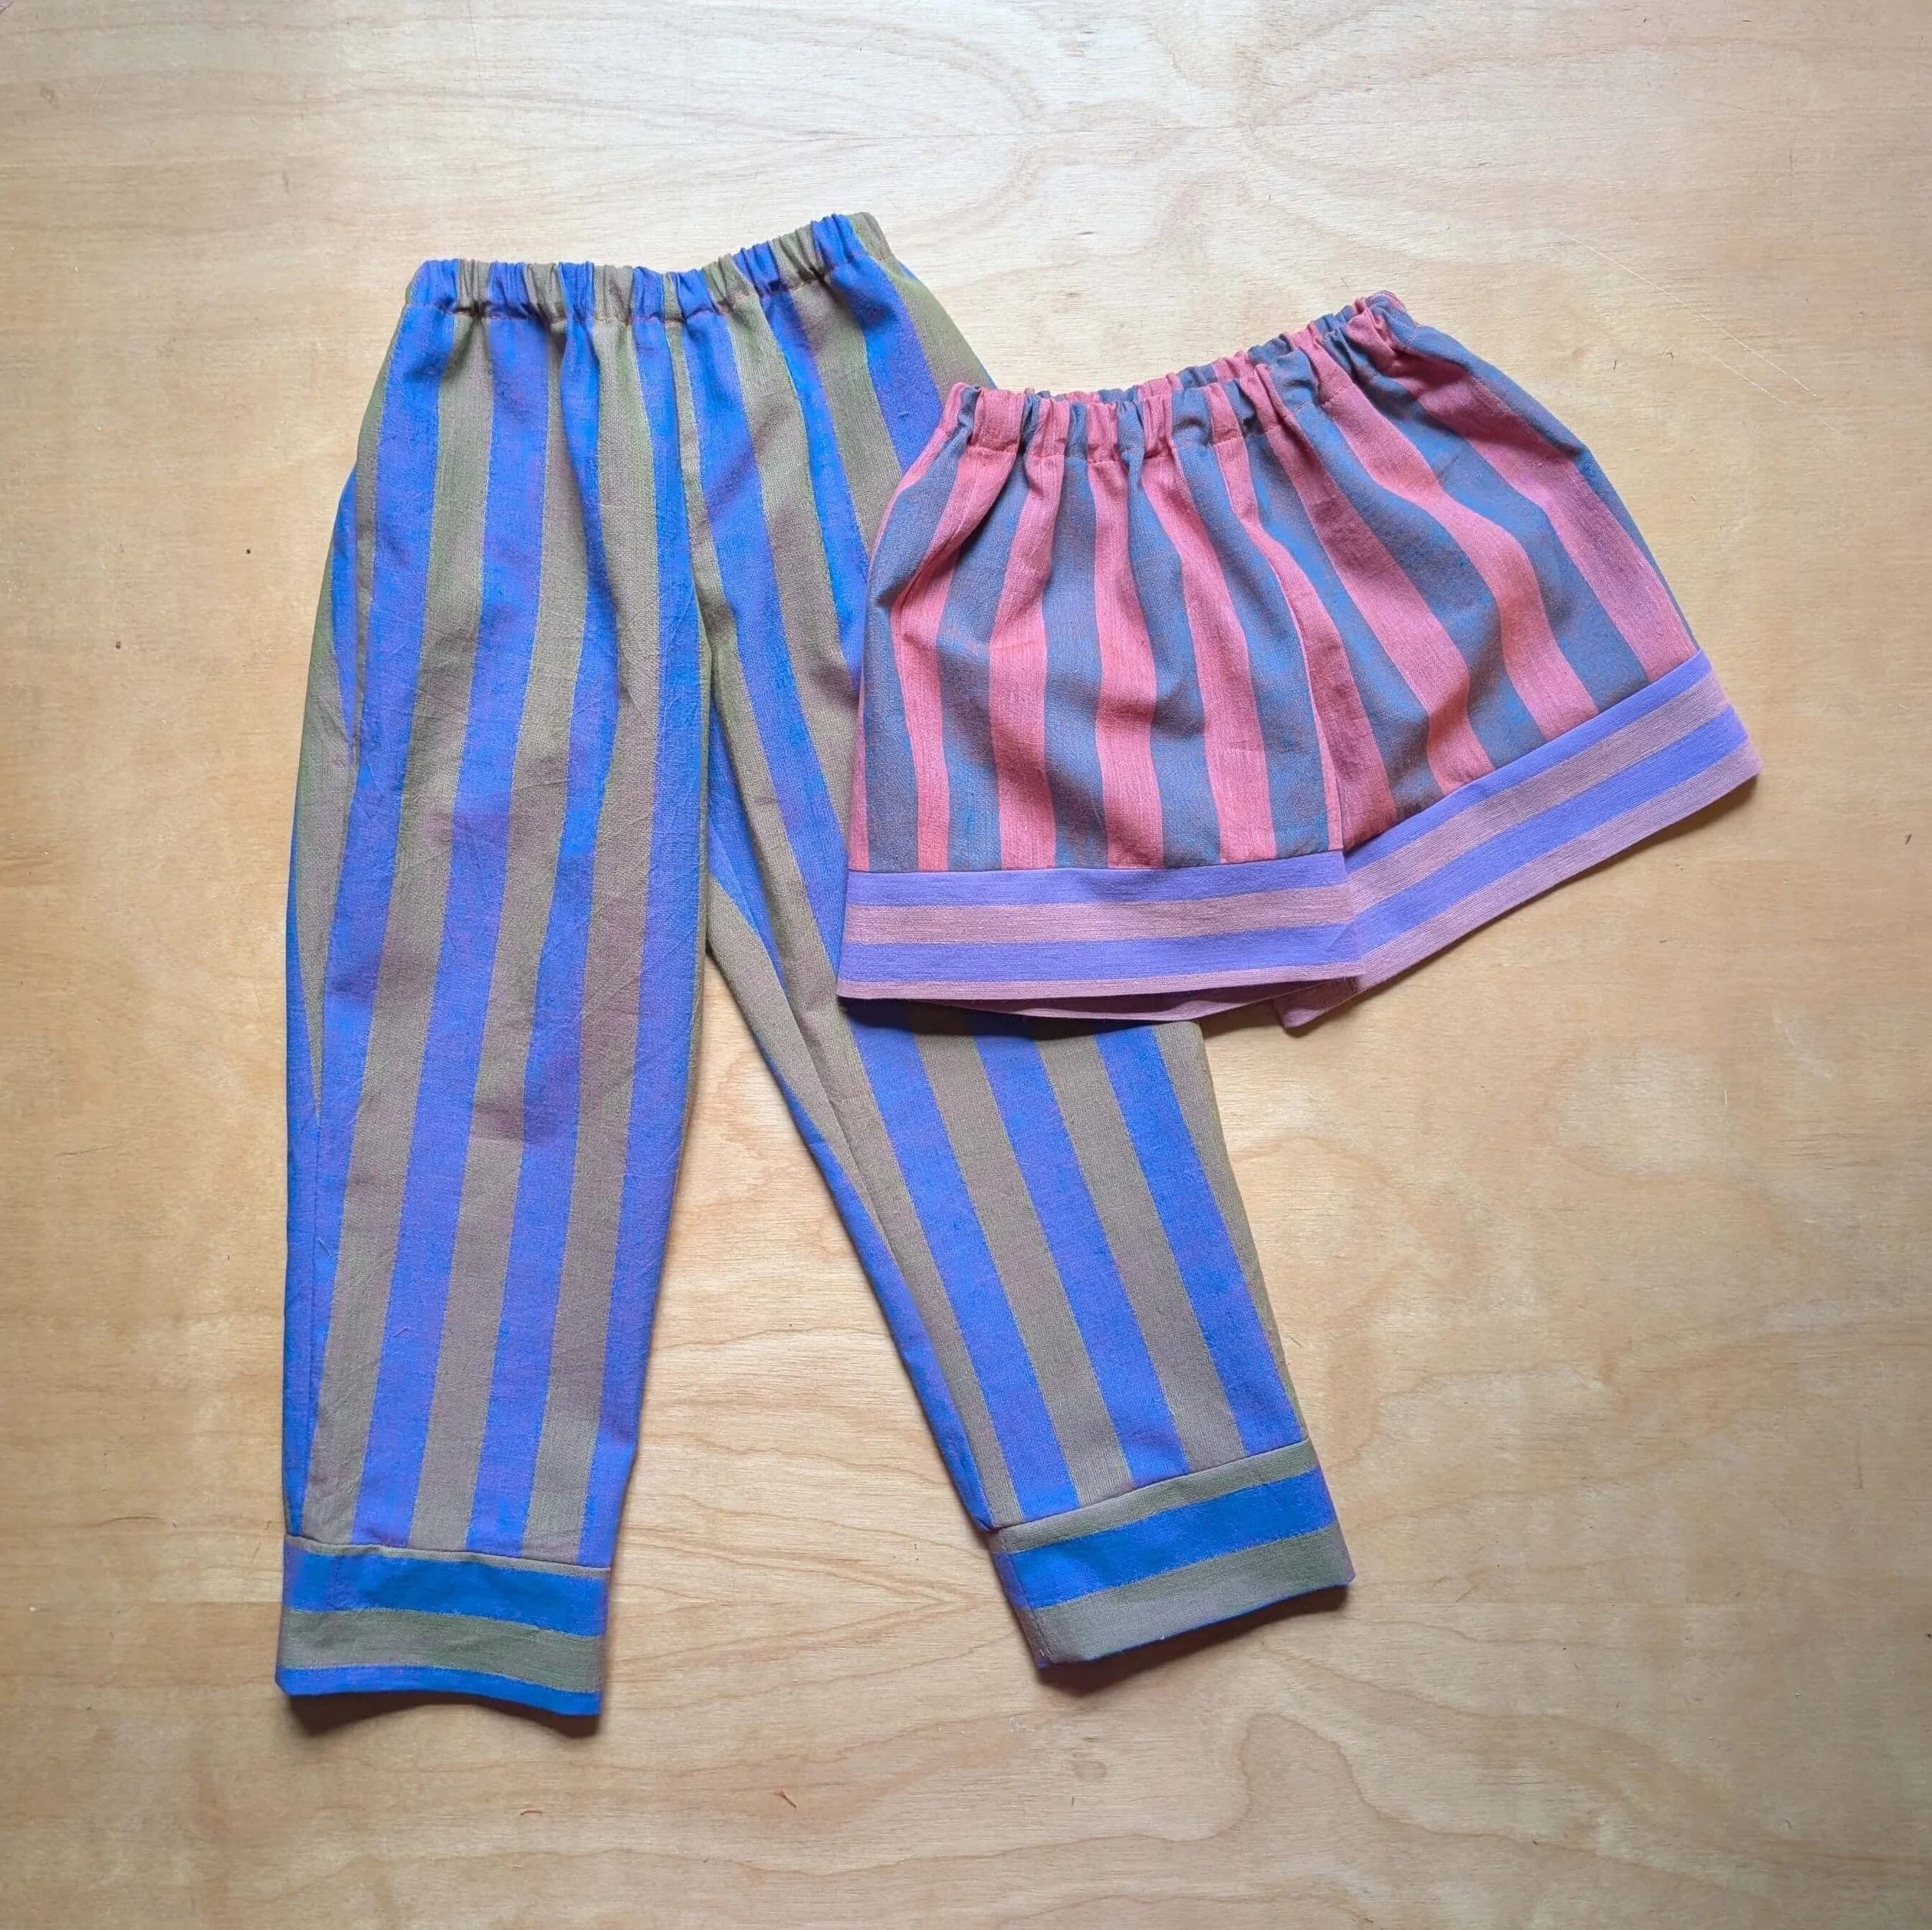
JASPER PAJAMA PANTS & SHORTS
-
Jasper is a basic pajama pant and shorts pattern with an elastic waist and double-folded cuffs. Two easy pocket options are also included: a patch pocket and side inseam pockets (both optional).
-
• woven fabric
2 - 4 yards [2.5-3.5m] (44”-wide/1.1 m-wide) - for pants
2.5 - 3.5 yards [2-3 m] (54”-wide/1.4m-wide) - for pants
• 1 or 1.25 inch [25 or 32mm] wide elastic
• coordinating thread
-
Woven light to medium weight fabrics such as linen, cotton lawn, yarn-dyed cottons, voile, double gauze, poplin, shirting, shot cotton, chambray.
-
Use your hip measurement to select your size from the Size Chart - note that the measurements provided are the maximum suggested body measurement for that size. Waist and full chest measurements are also provided for reference.
Adjusting Rise:
You may find it helpful to compare the front and back rise measurements of a favorite pair of pajama pants, shorts, or lounge pants before you cut into your pieces. If you want to increase or decrease the front or back rise, lines are provided on the pattern to add/subtract rise.
Adjusting Length:
Jasper is drafted for a height of 5’6.” Inseam and outseam lengths are provided in the finished measurement chart, and lines are provided on the pants pattern pieces to add or subtract length if you prefer longer or shorter pants. For shorts, add or subtract length at the bottom of the shorts hem.
Hint: You can also add or subtract overall length by adding or subtracting height to the cuff piece, or omitting the cuff piece altogether.
-
To make a quick muslin to check fit, cut out two fronts and two backs.
Baste the center crotch seams, side seams, and inseams together (steps 2-4), then follow the instructions in step 5 to create the elastic waistband and the instructions in step 6 to add the folded cuffs. Try the garment on to evaluate fit. You can choose a different size, or adjust the length or rise using the lines on the pattern pieces if necessary.

Once you have chosen a size, I recommend tracing your pattern pieces using swedish tracing paper rather than cutting into your pattern sheets.
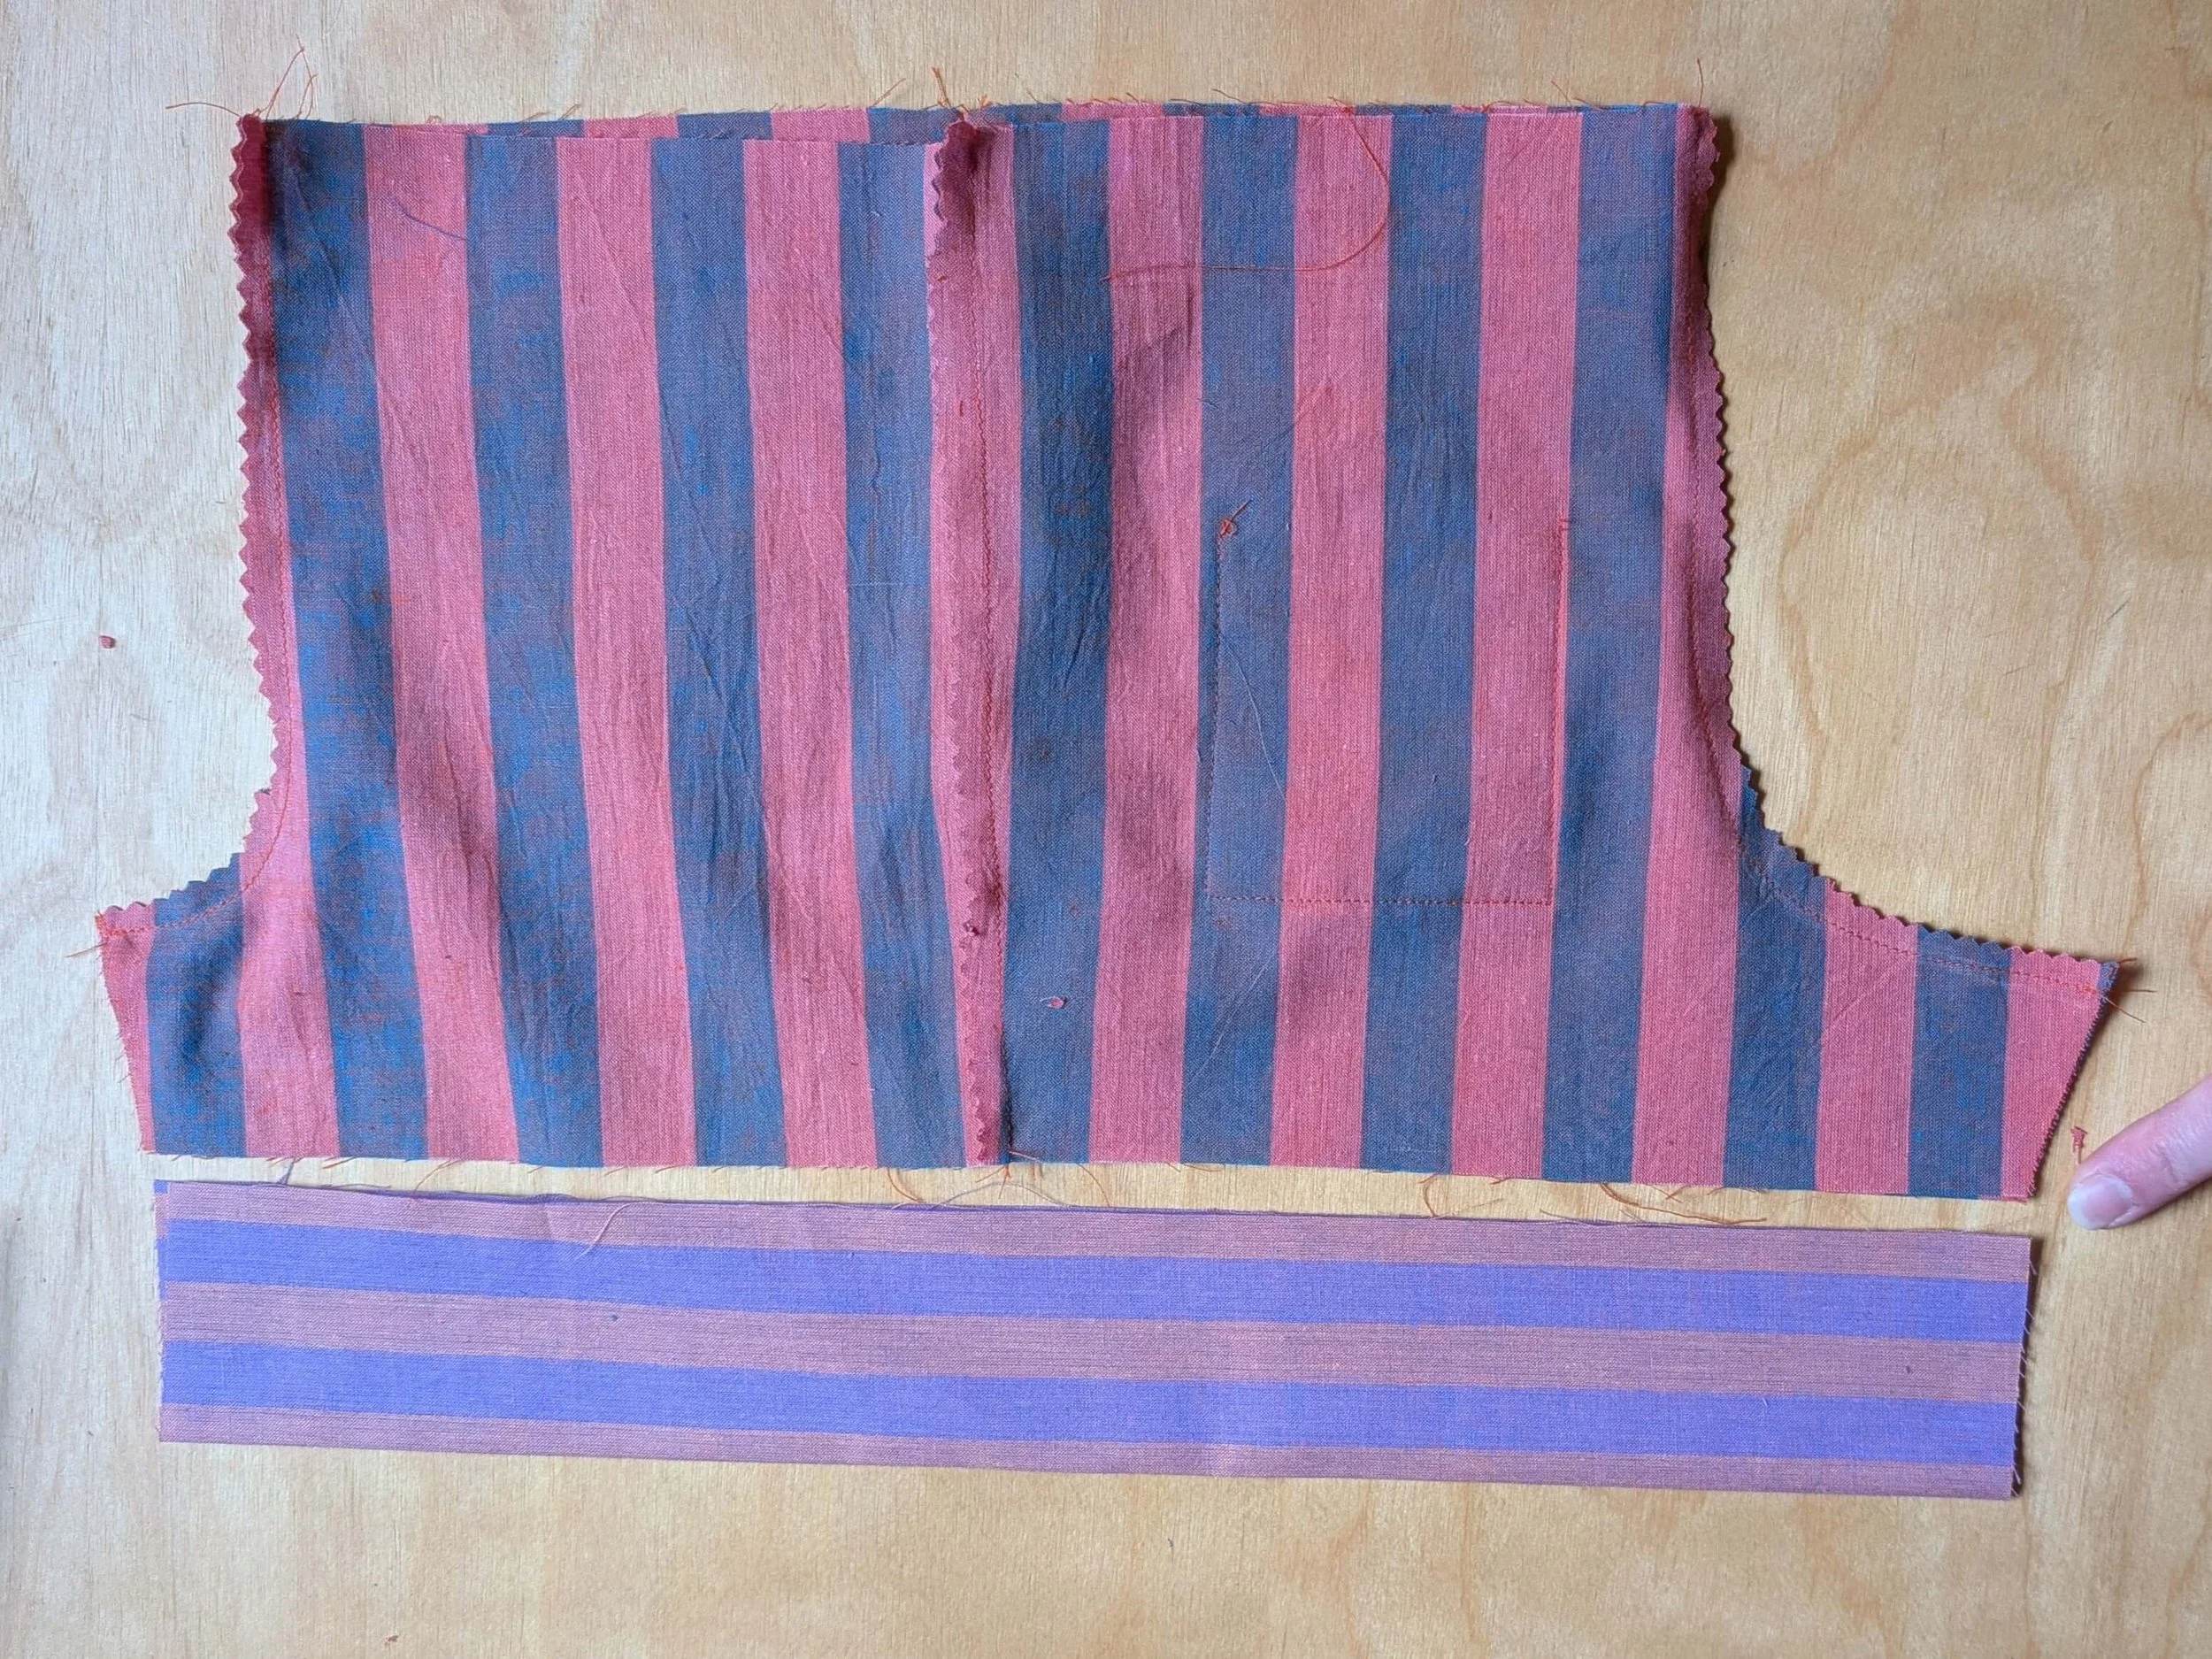
FOR PATCH POCKETS
Patch pockets can be added at any time in the construction; however, I suggest either attaching them to the main pant pieces before sewing the main pieces together, or waiting until the shorts or pants are finished so you can try them on and position the pockets at your preferred location(s).
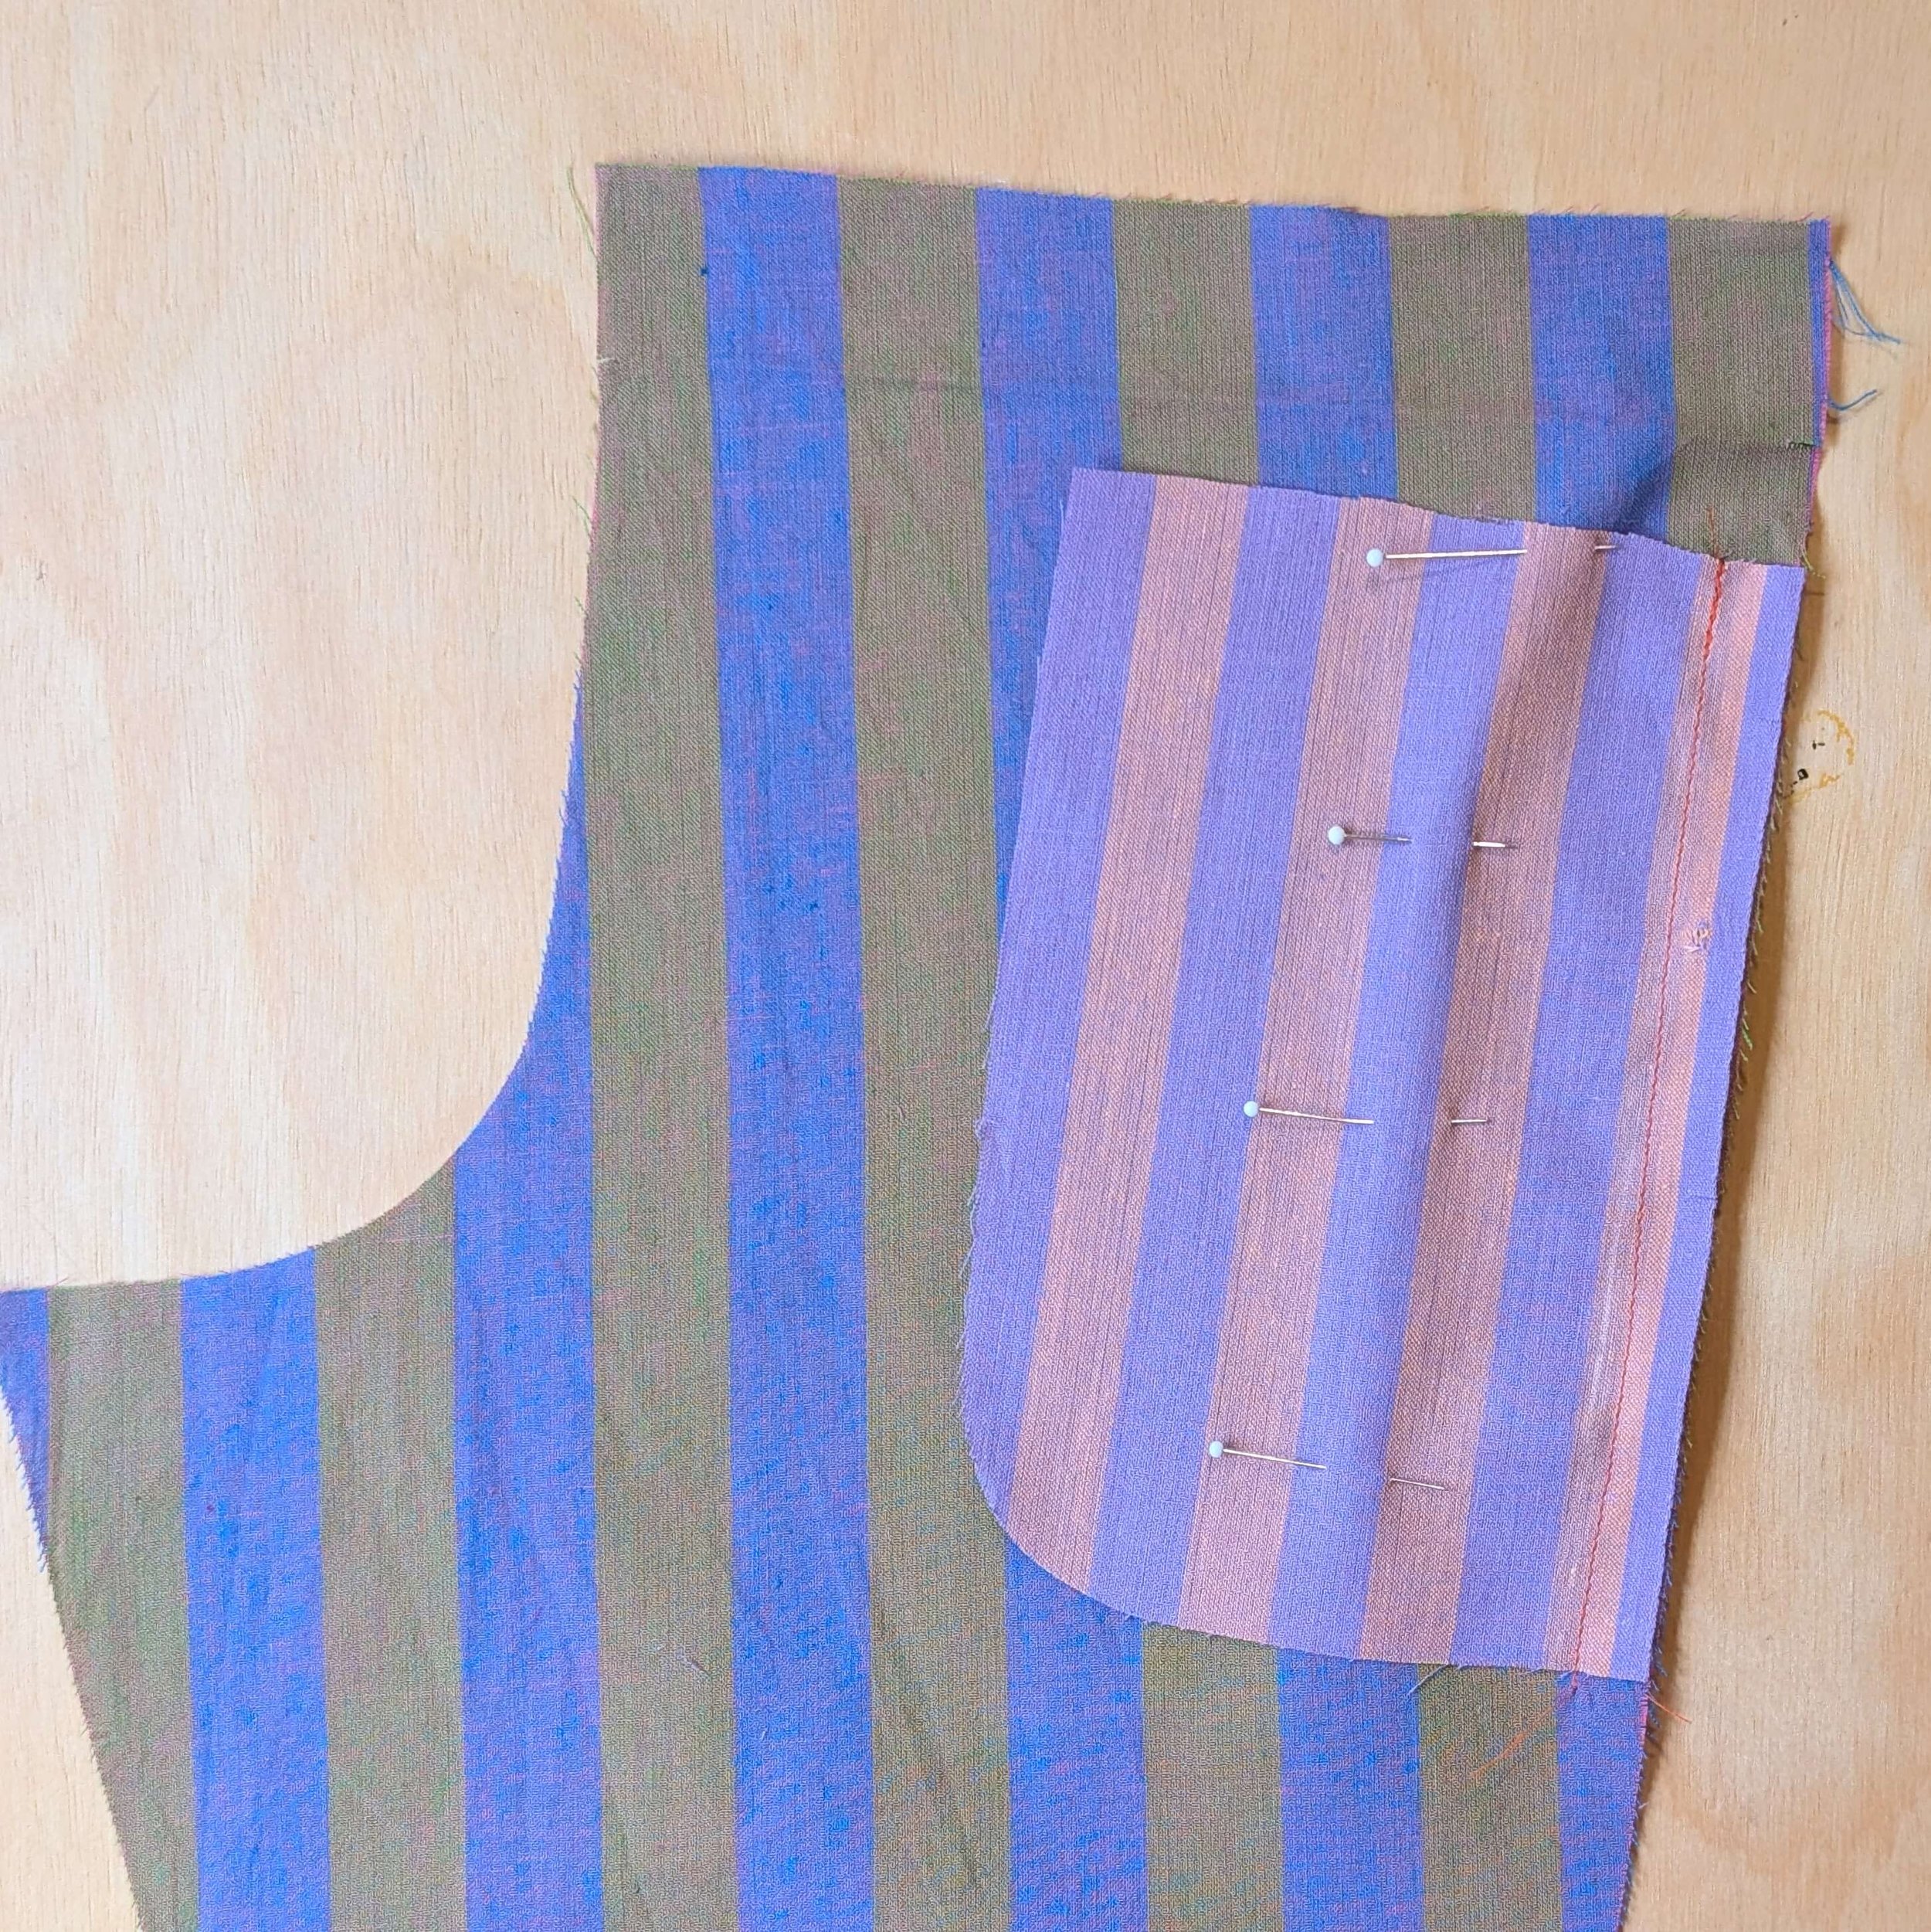
Cut one rectangle 7” wide by 14” tall for each patch pocket you would like.
Fold rectangle in half with right sides together and pin corners.
Sew around unfolded edges, leaving a 2” [5 cm] gap unsewn.
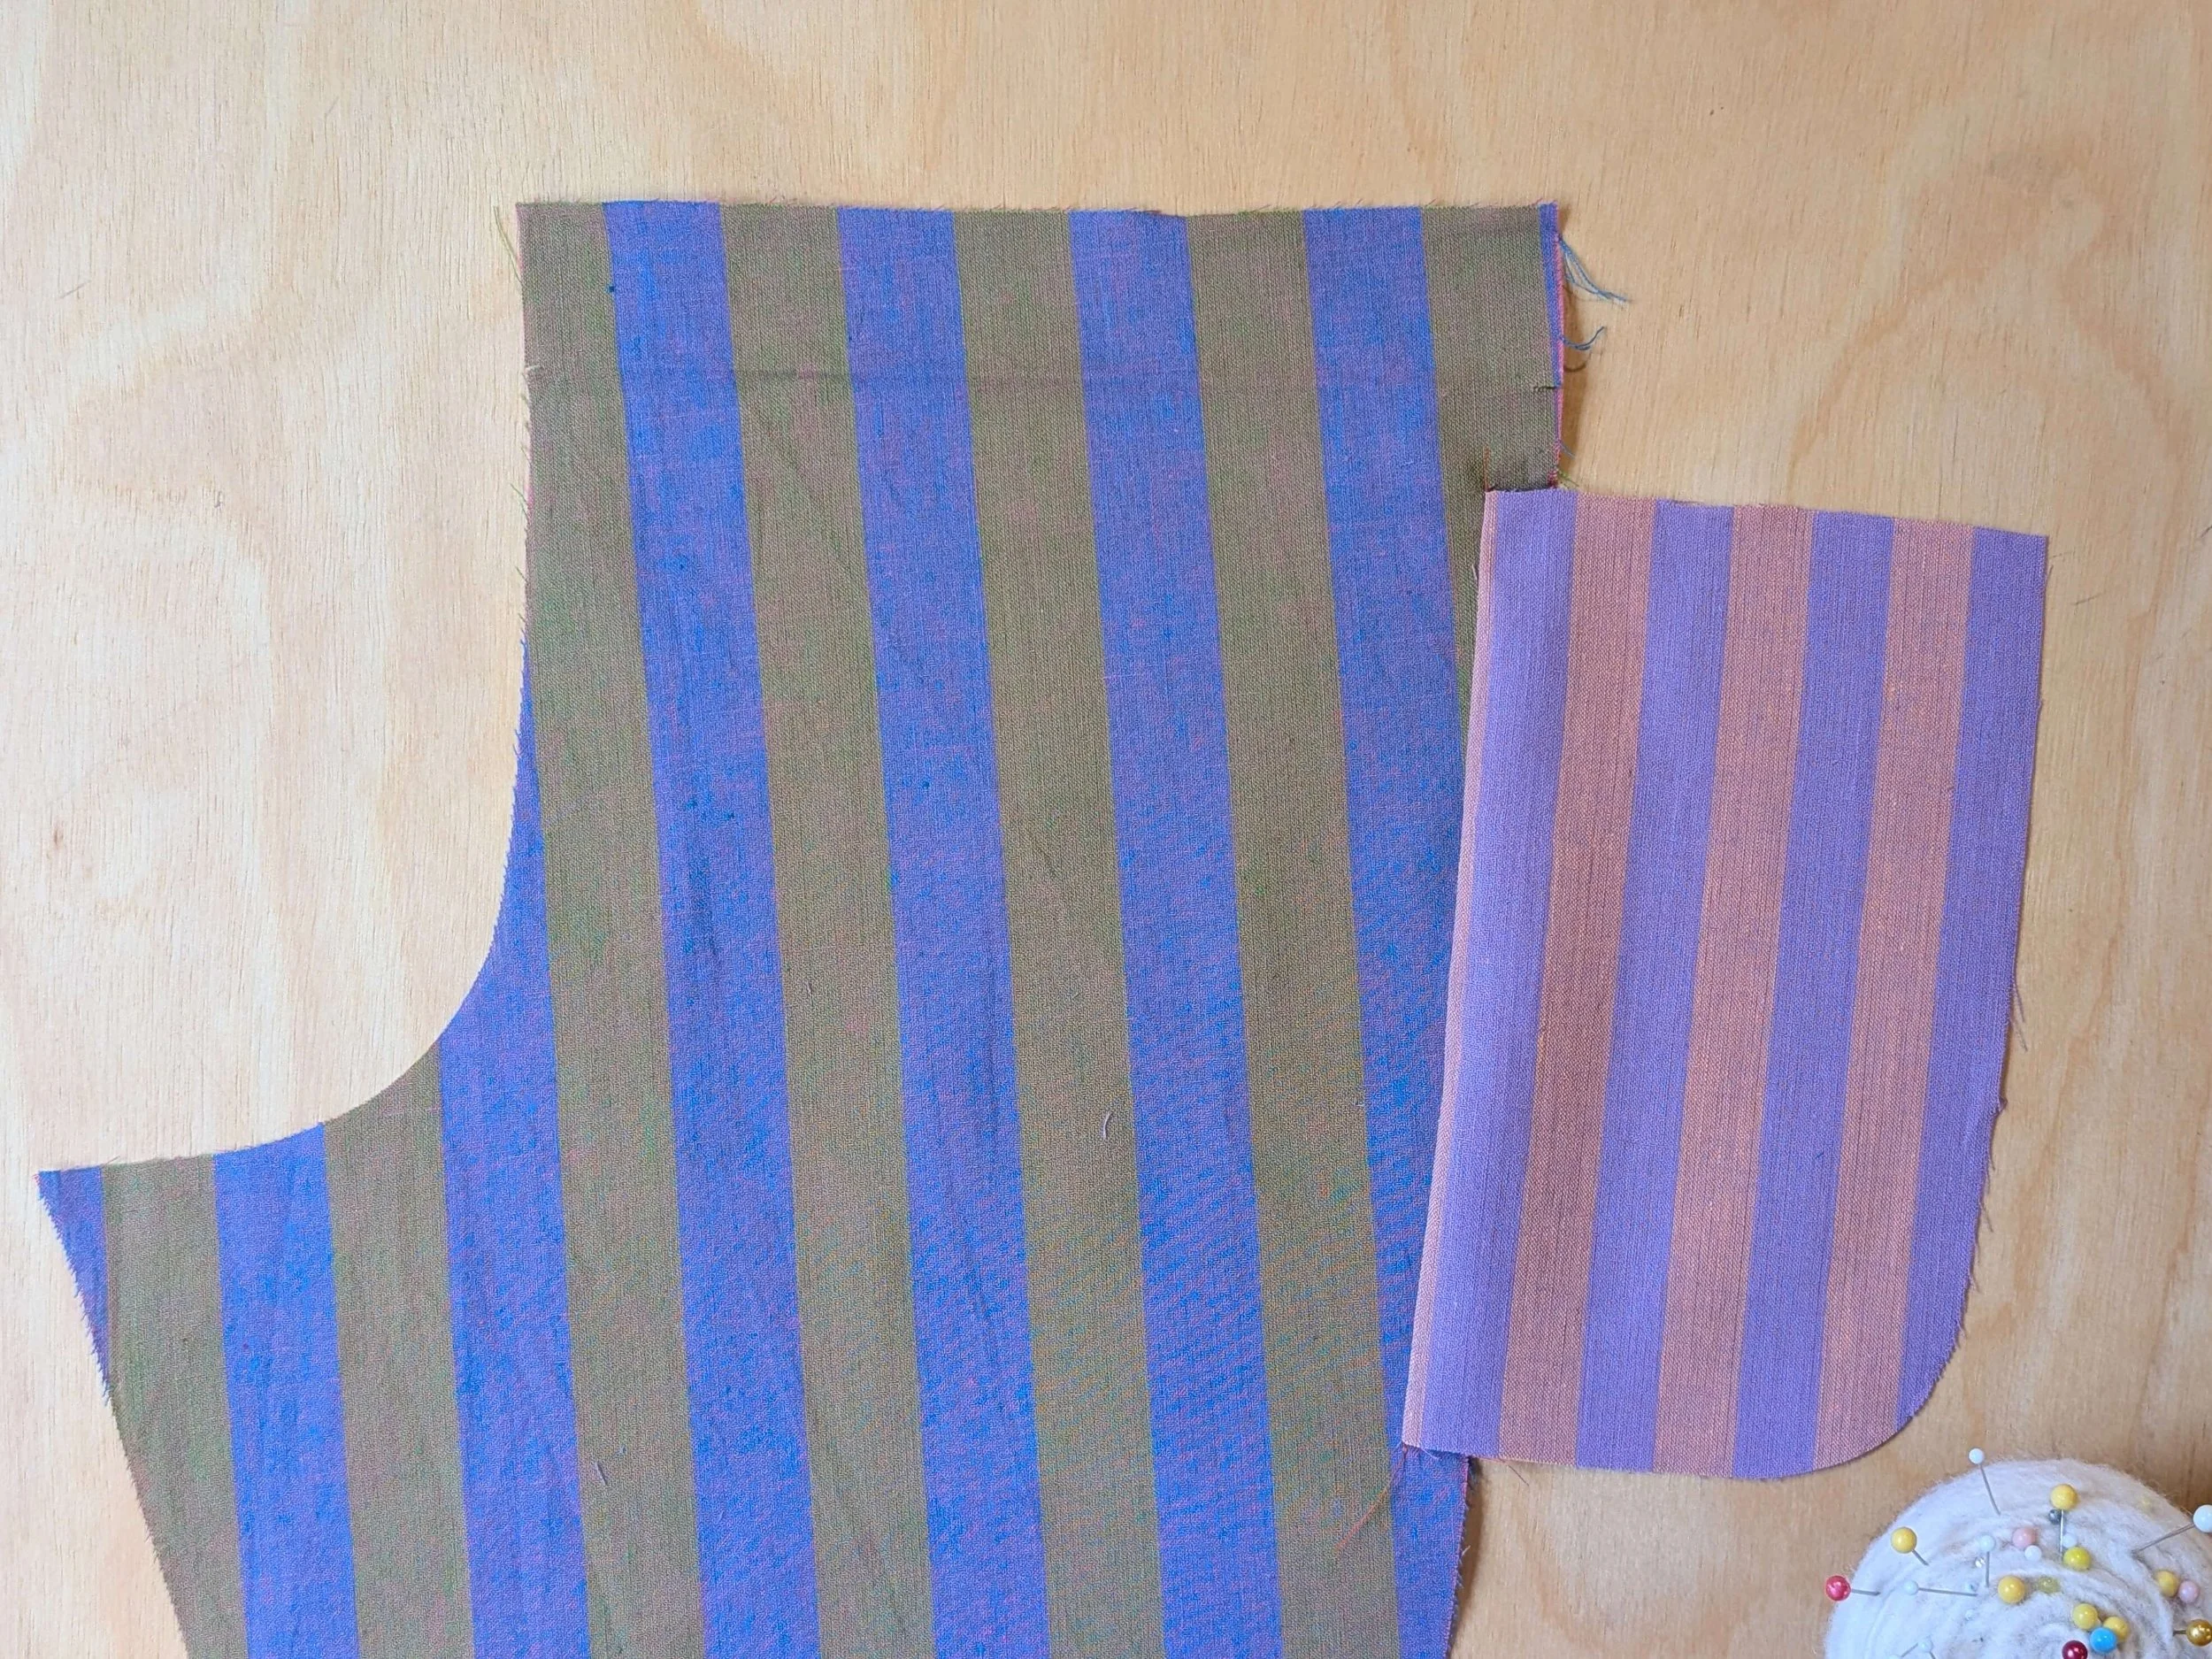
Clip corners and turn pocket right side out.
Press.
Pin pocket to shorts or pants at desired location. Sew around sides and bottom of pocket to secure in place.

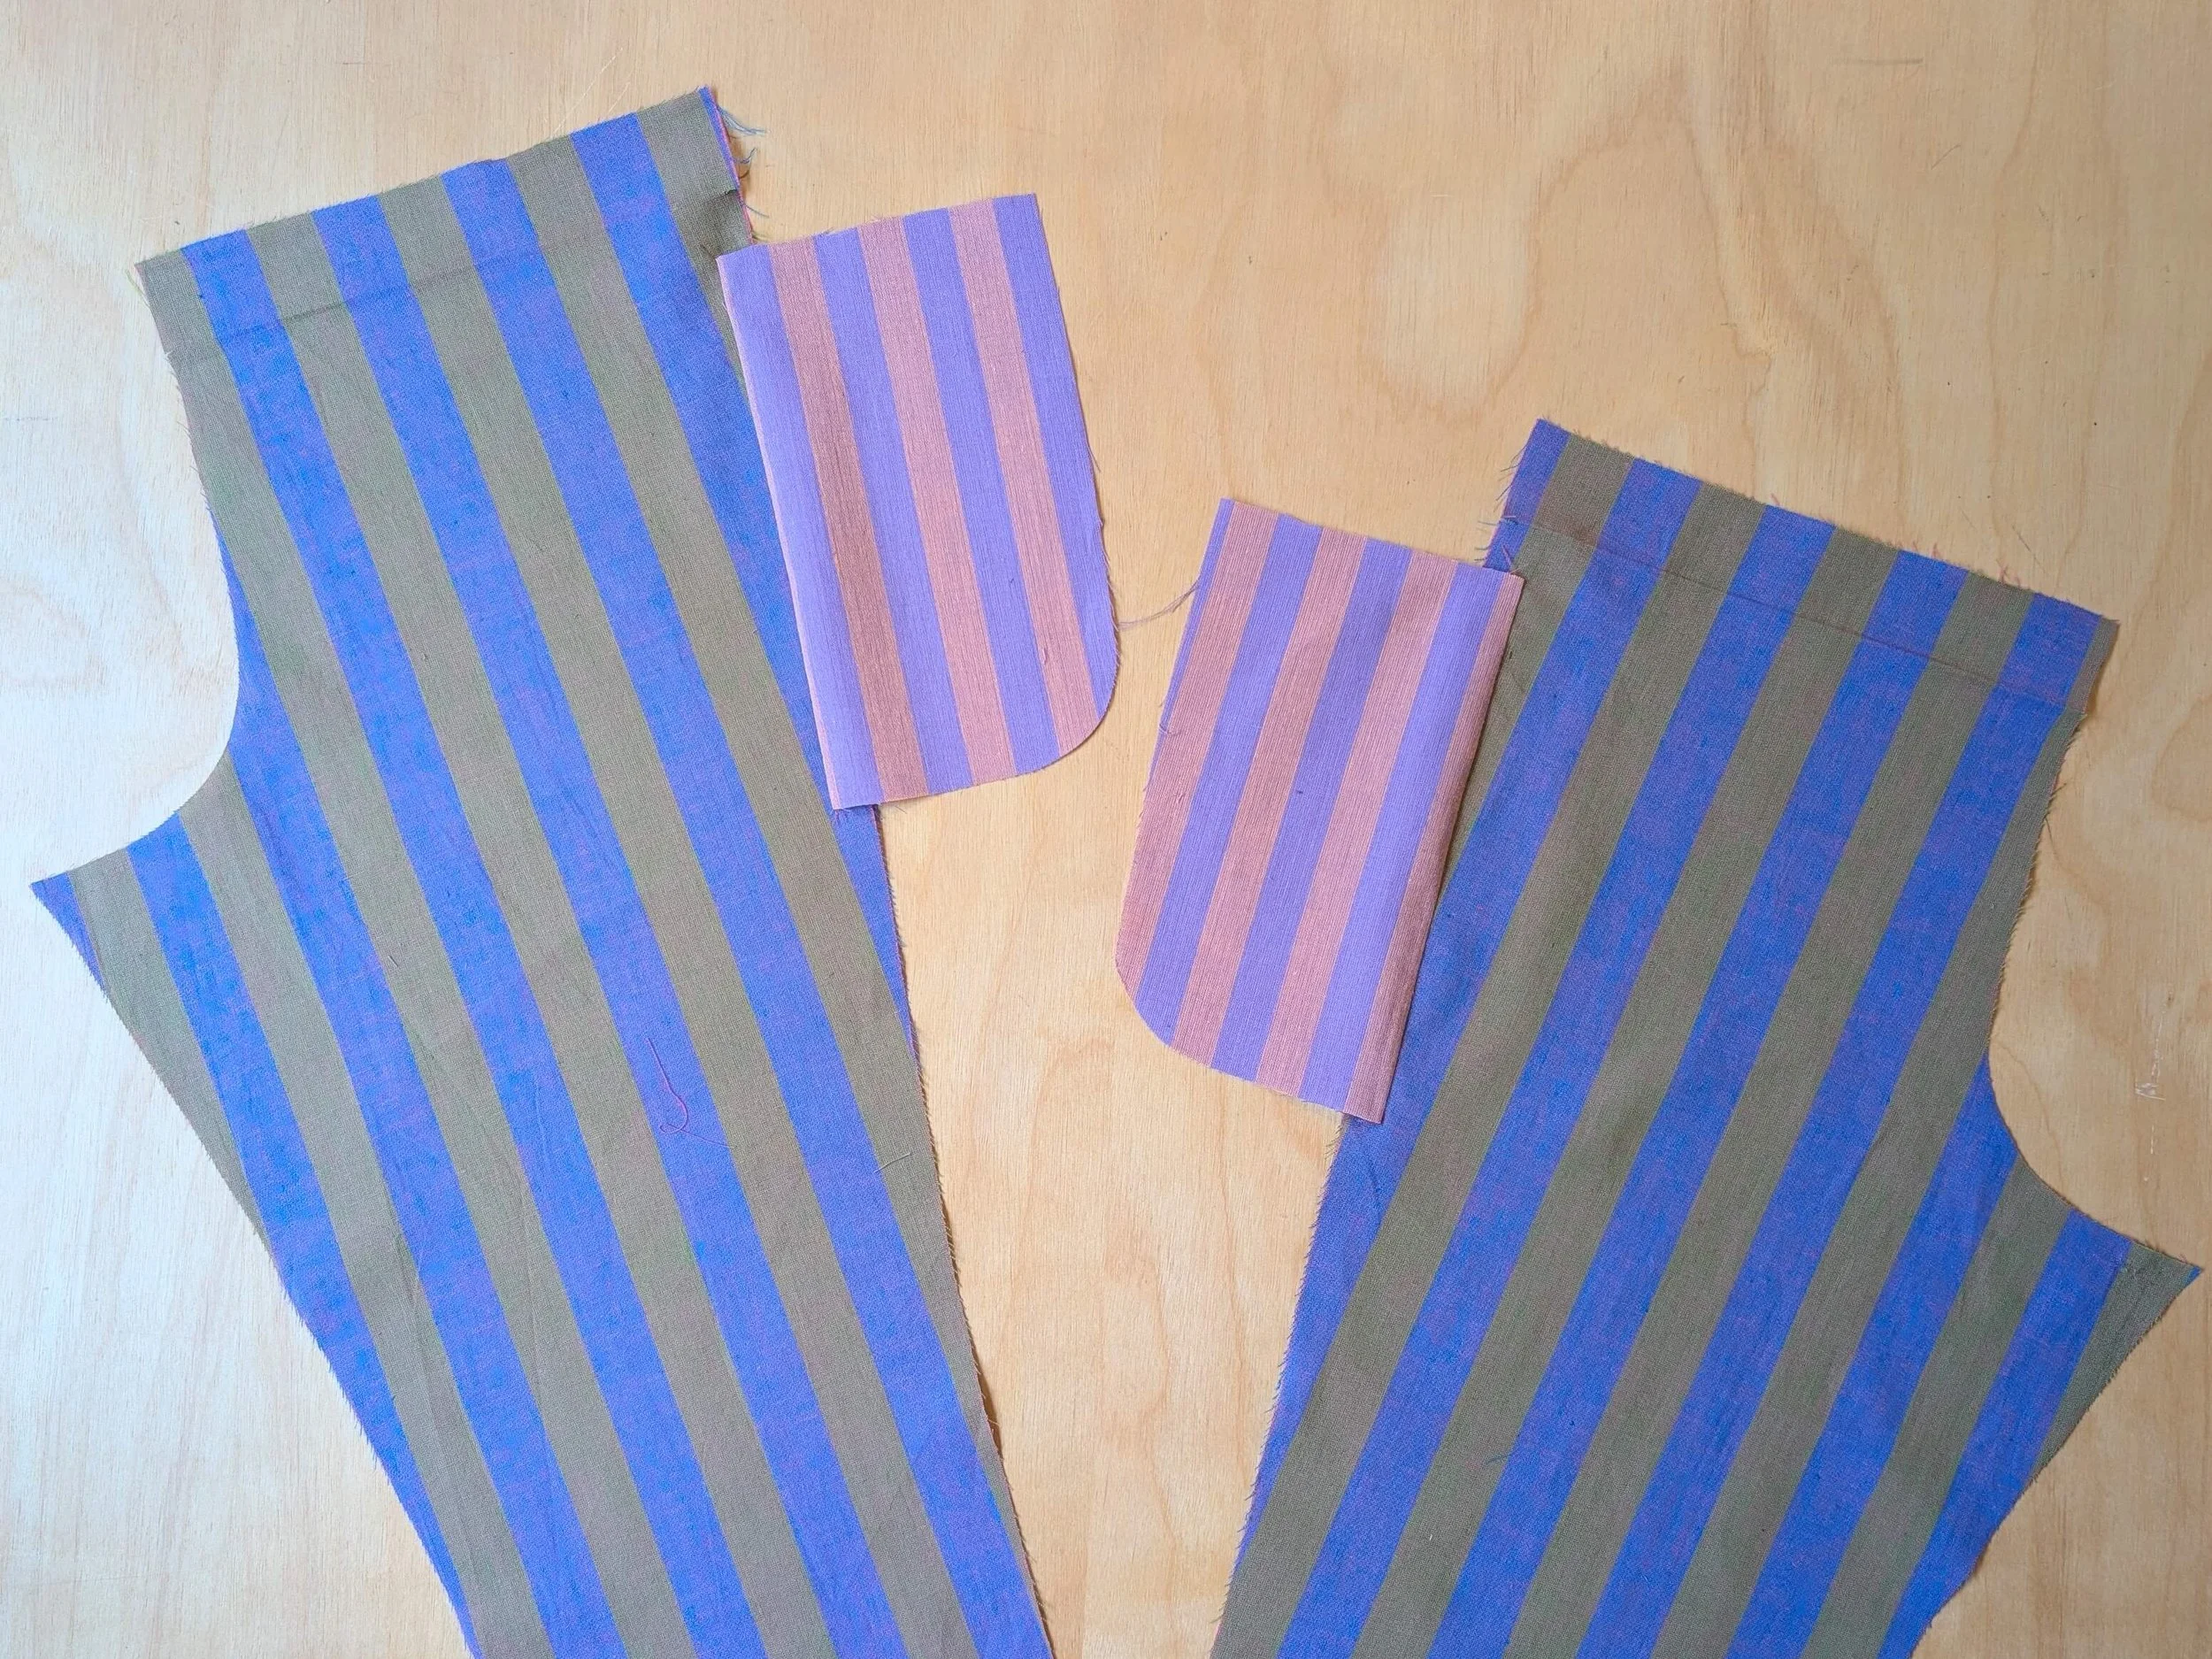
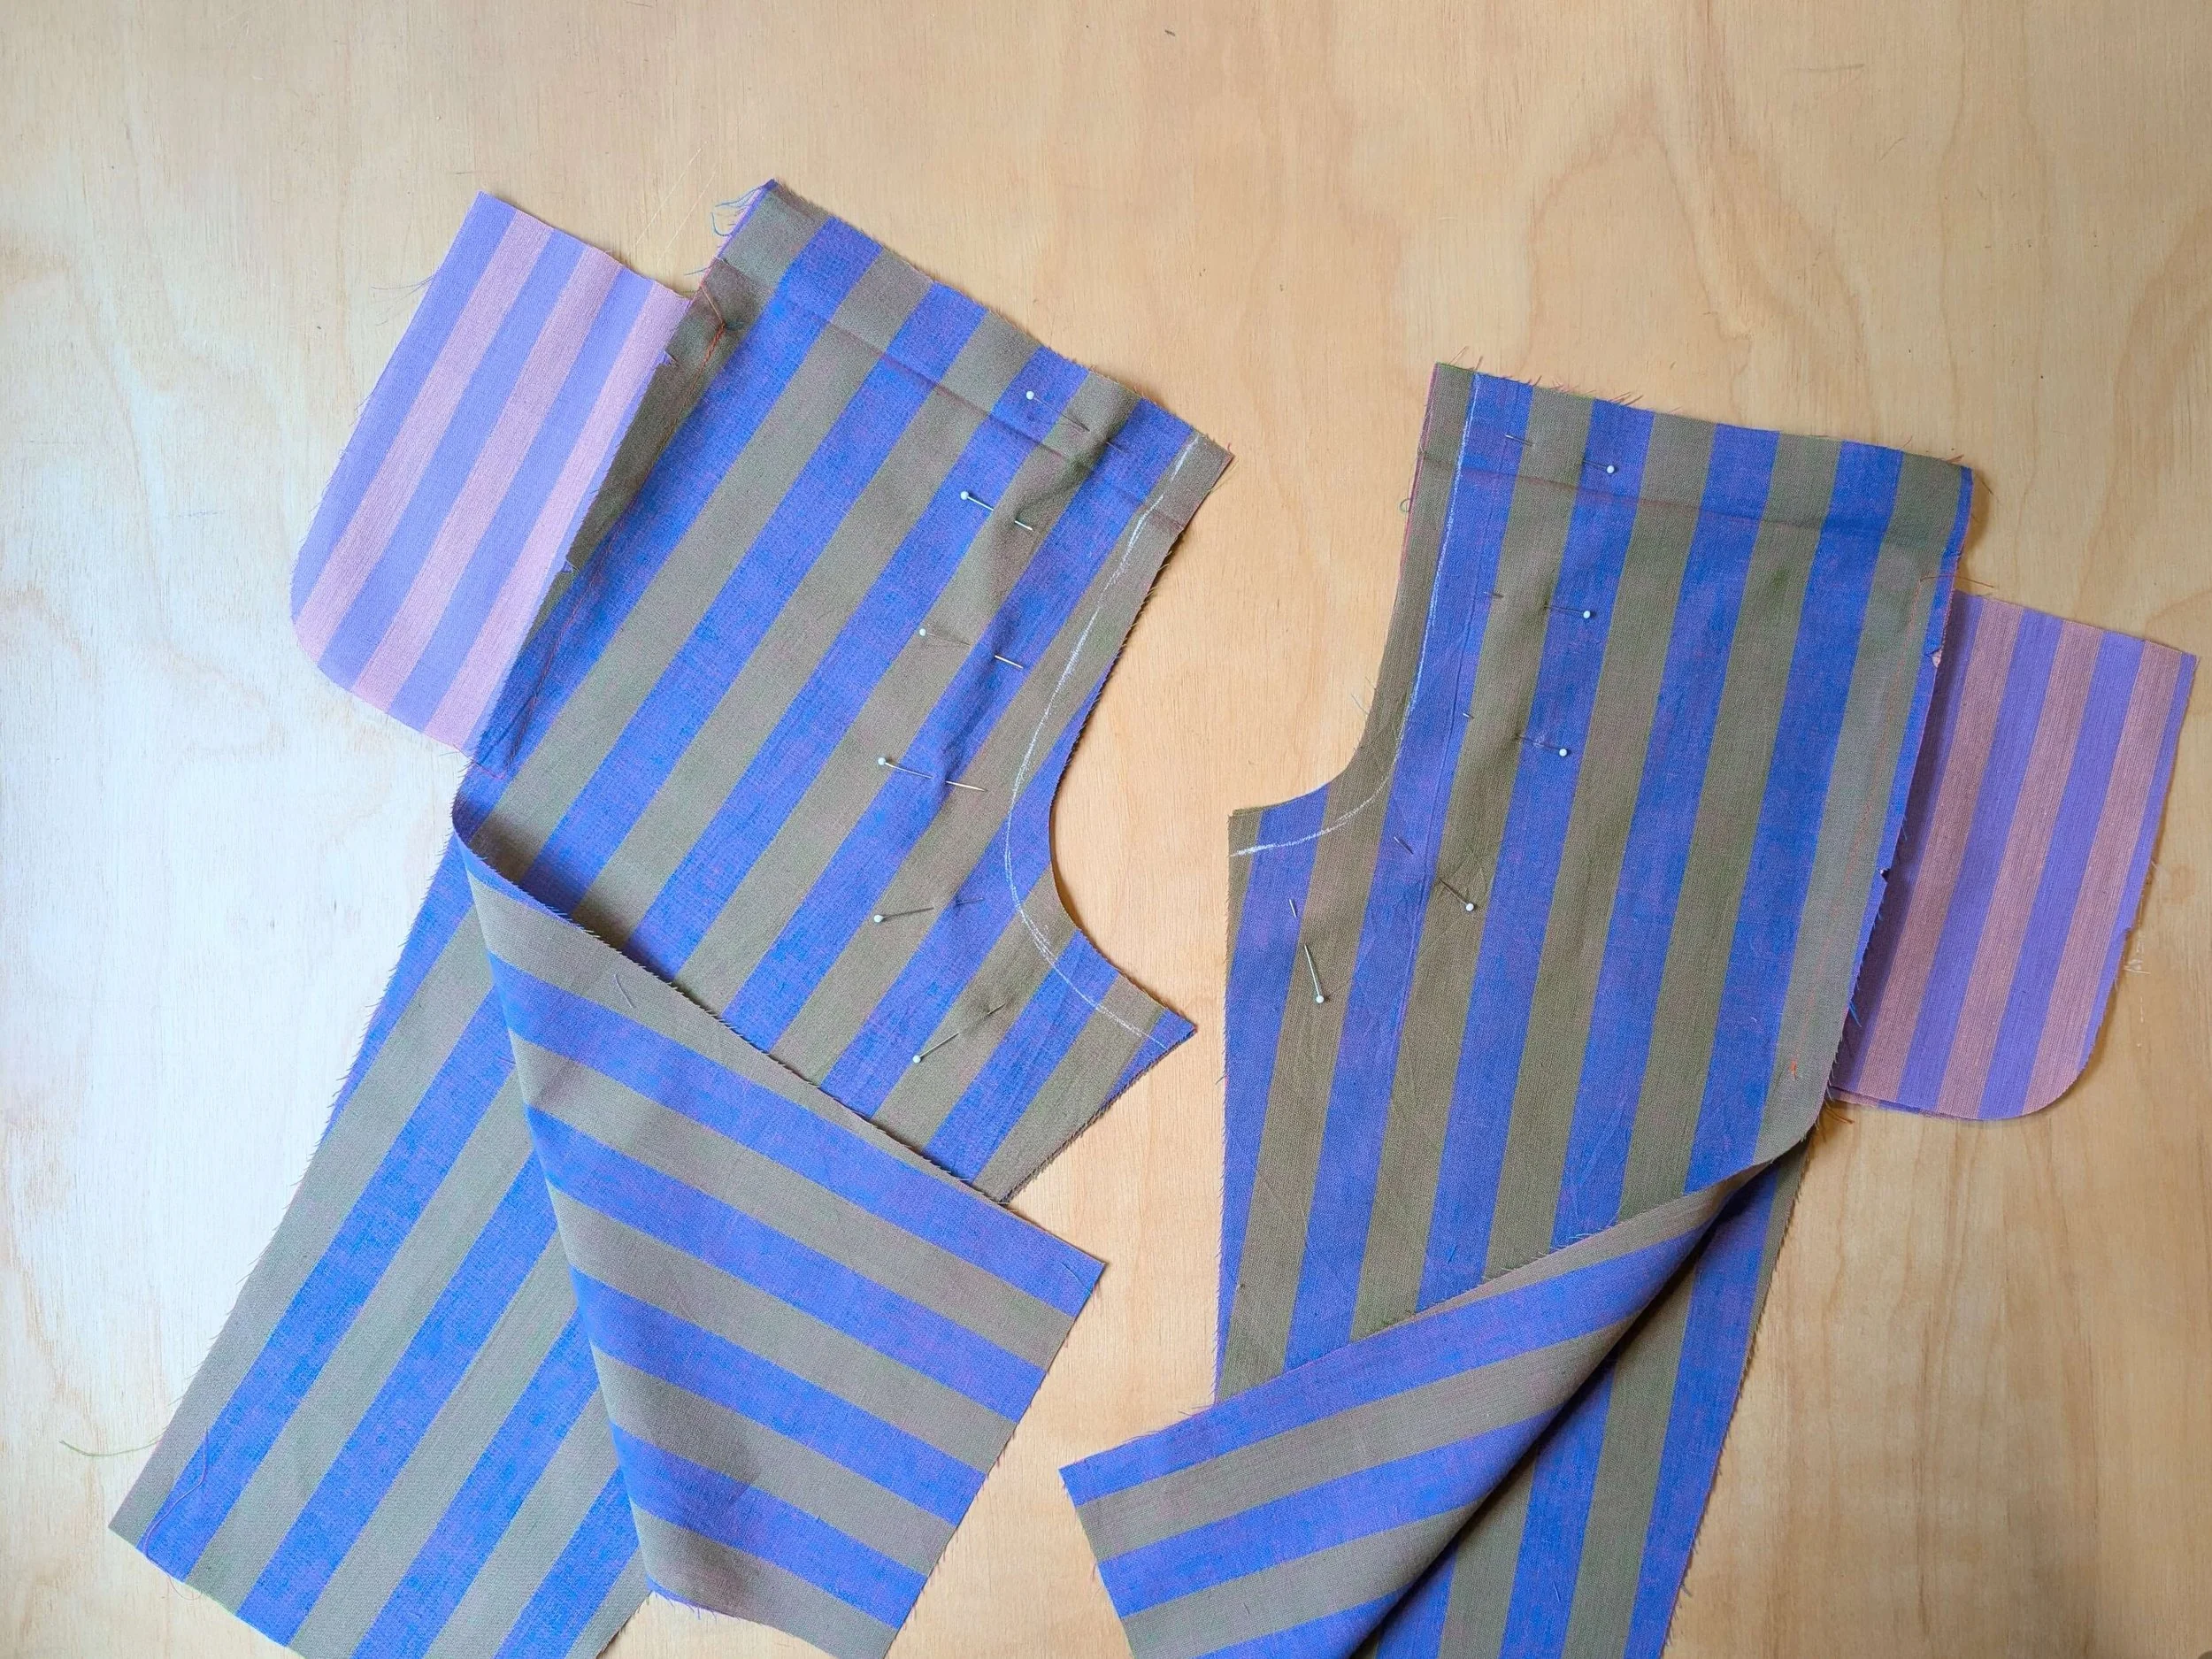
CUTTING INSTRUCTIONS
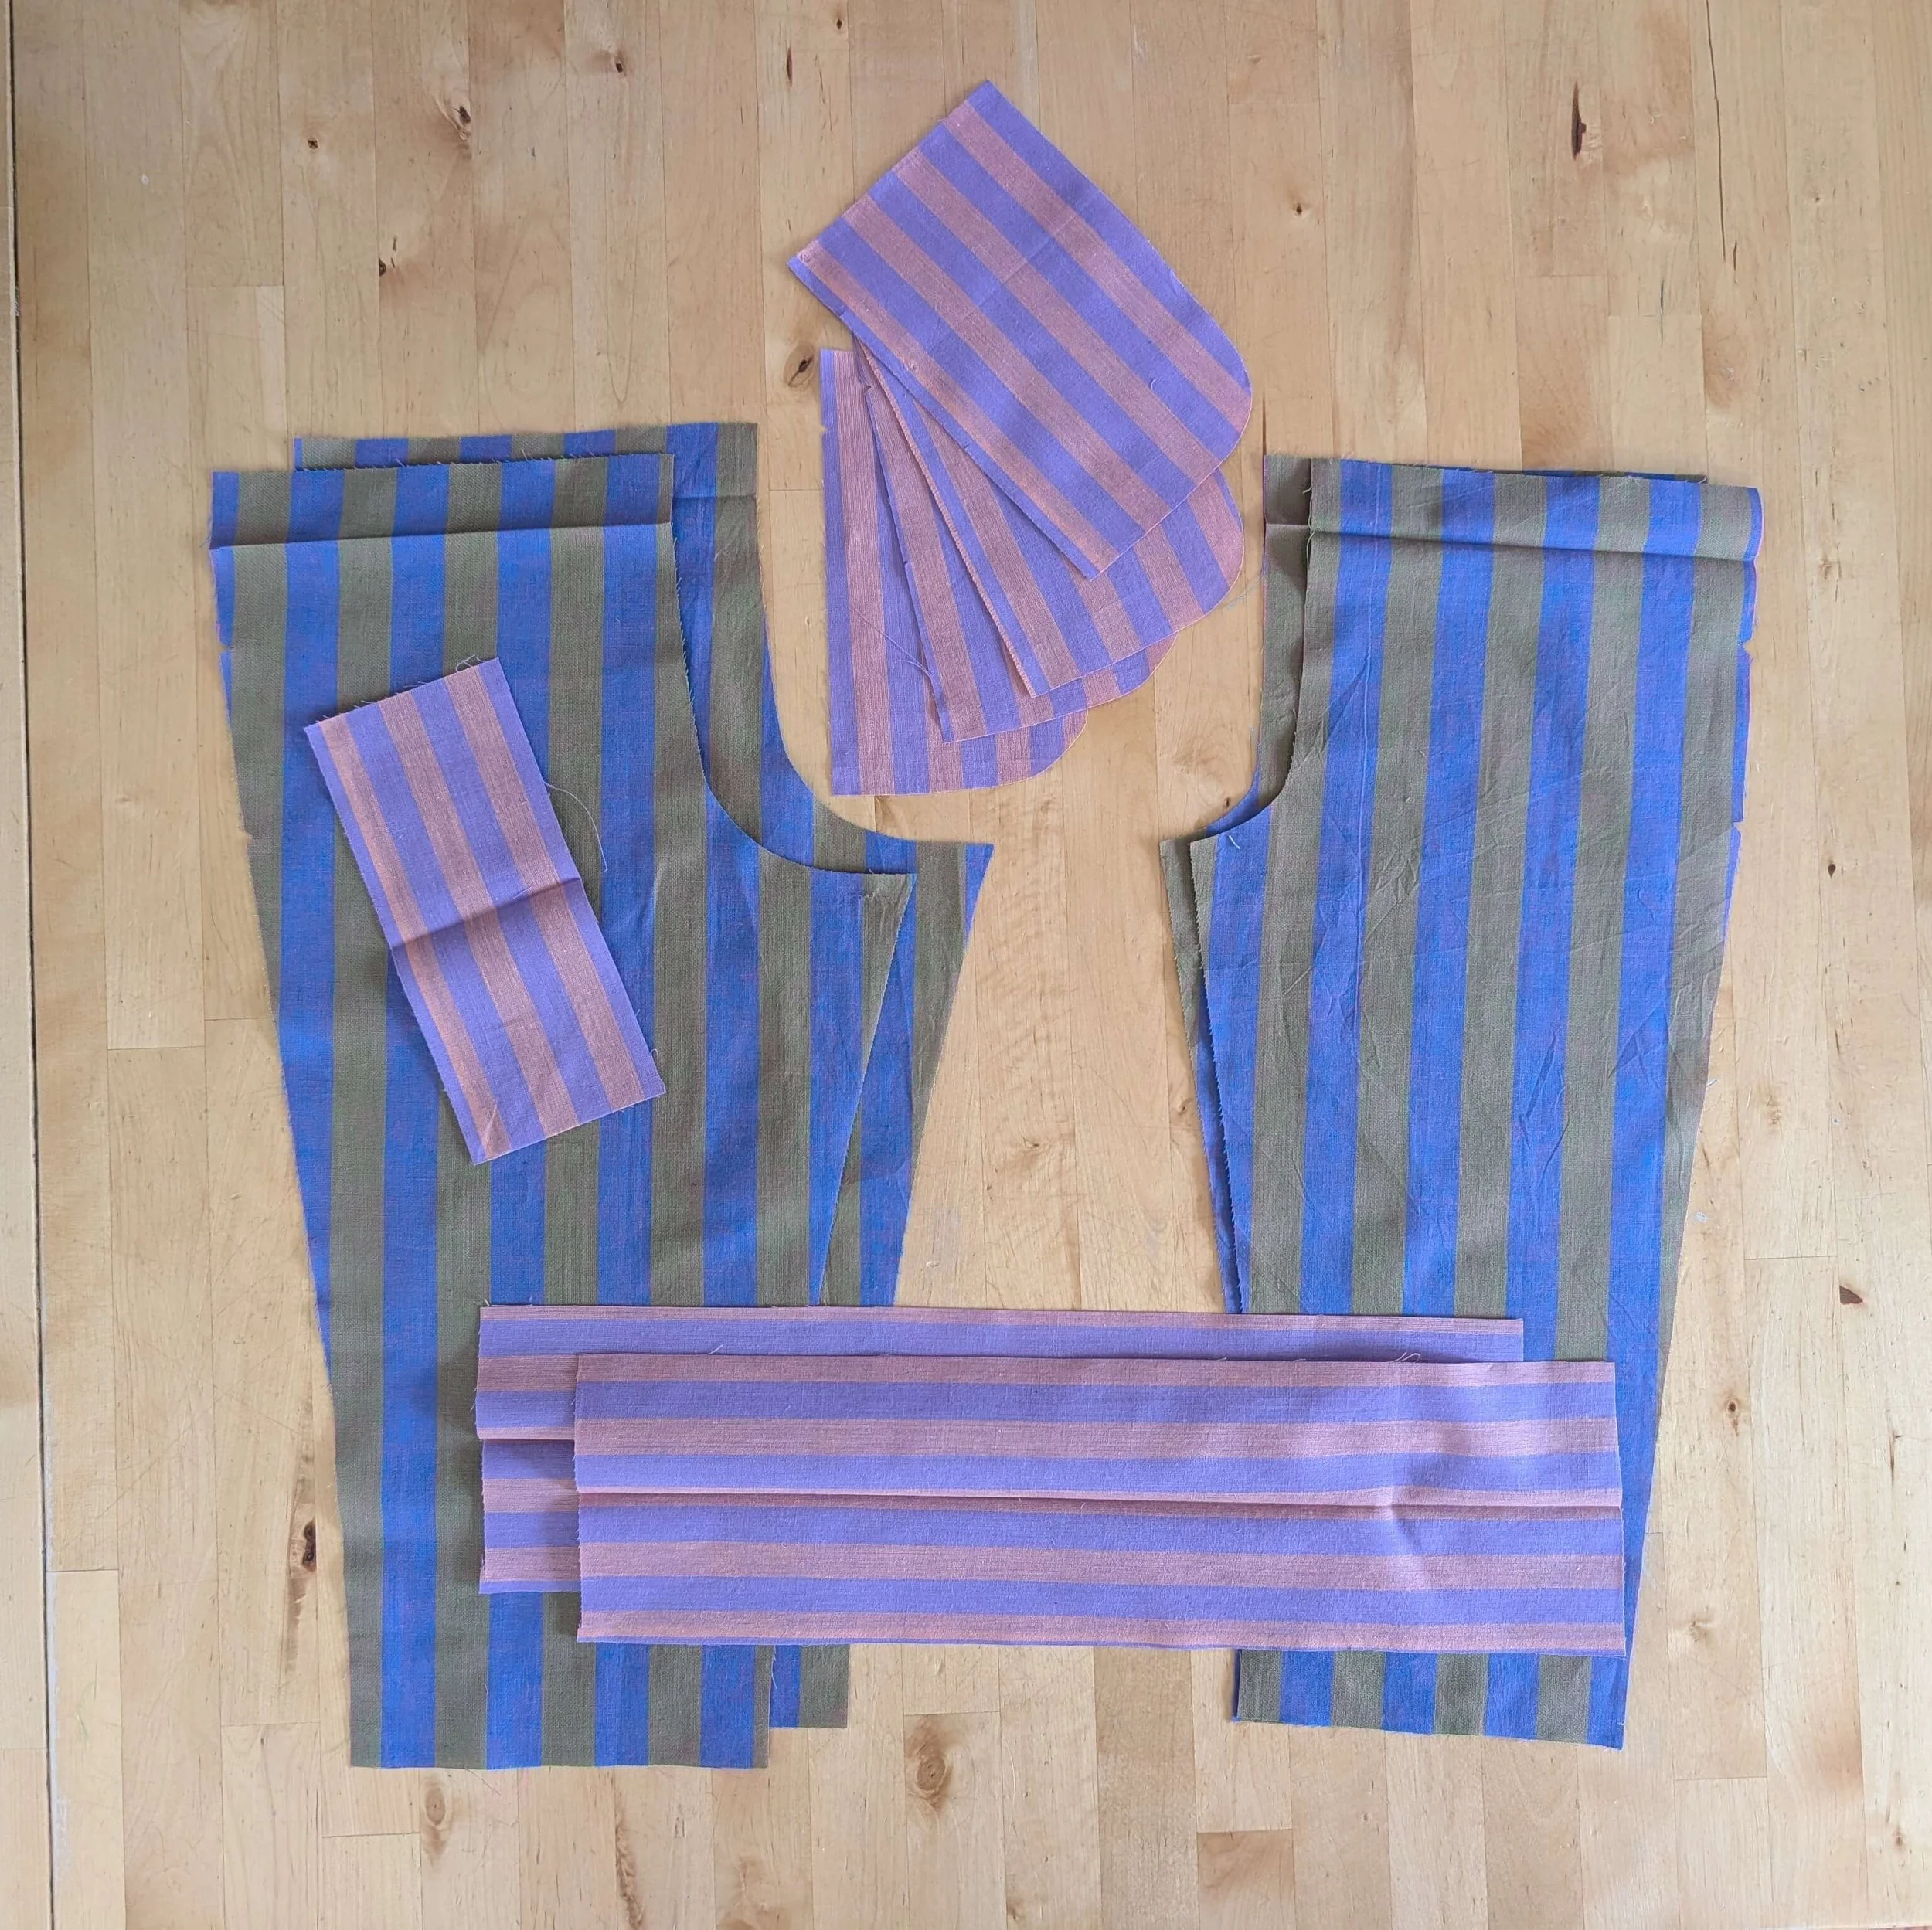
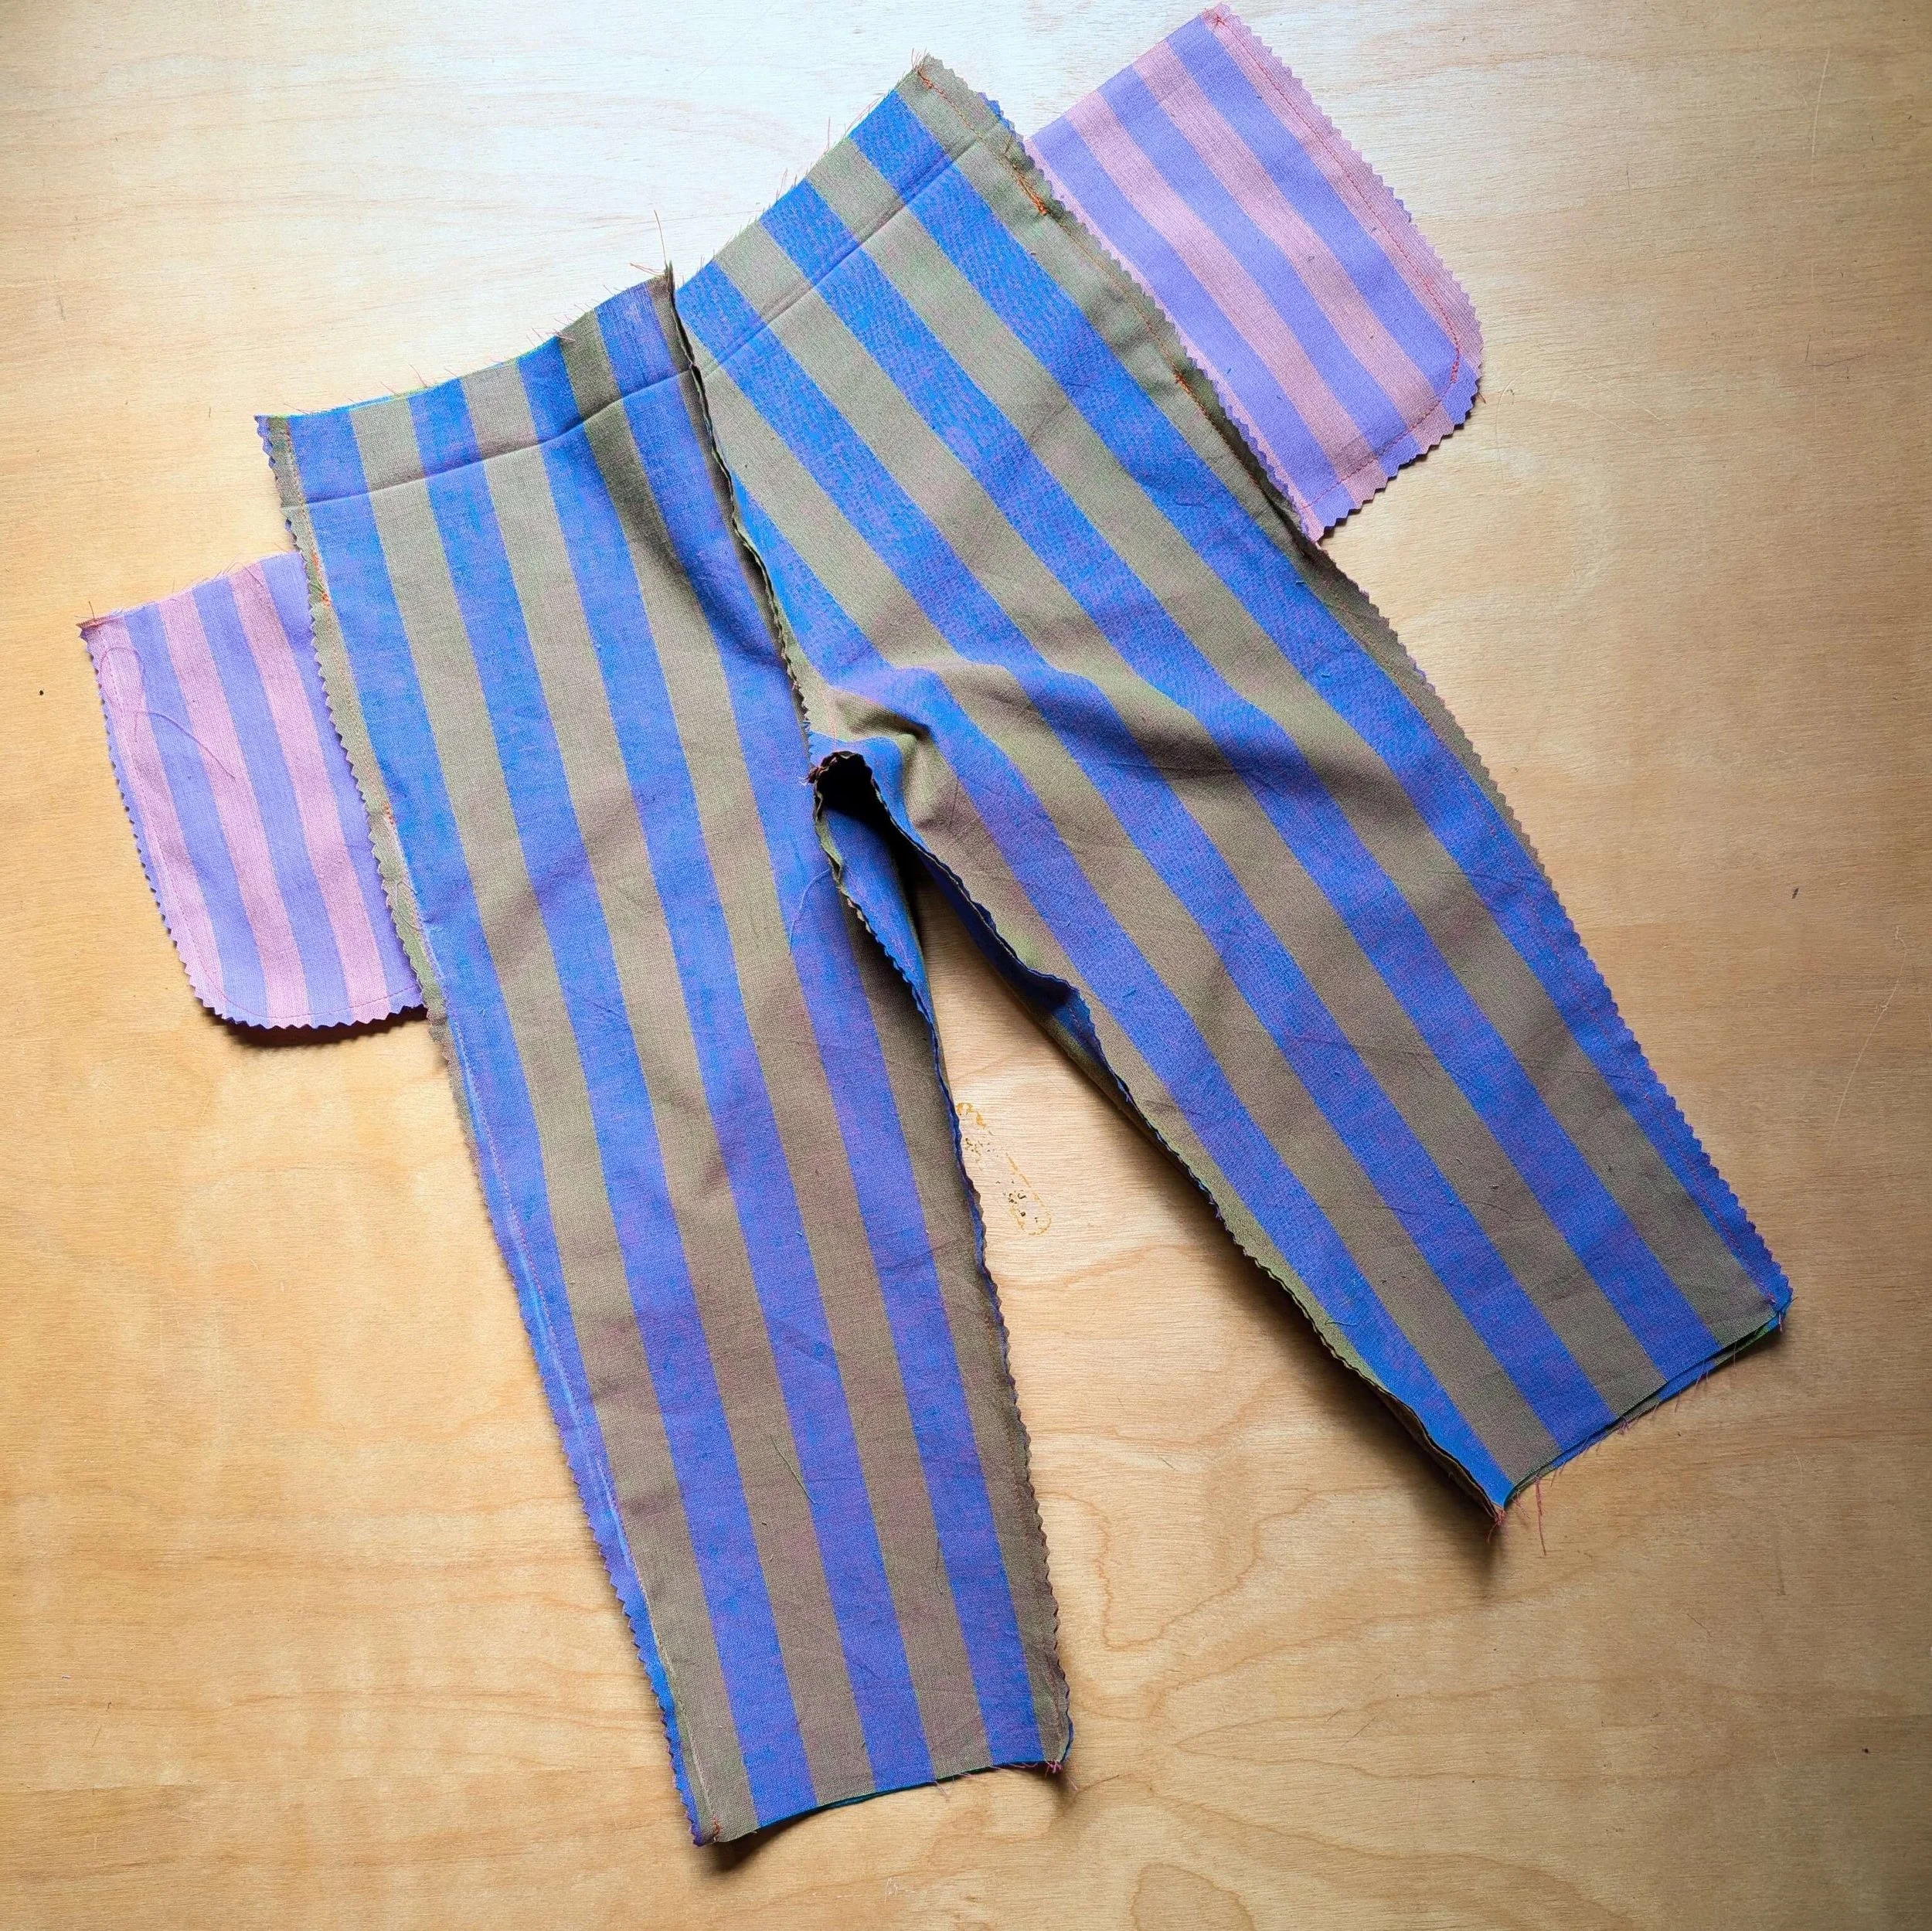
FOR PANTS: cut 2 fronts, 2 backs, 2 cuffs, and any optional pockets (4 inseam pockets shown here)
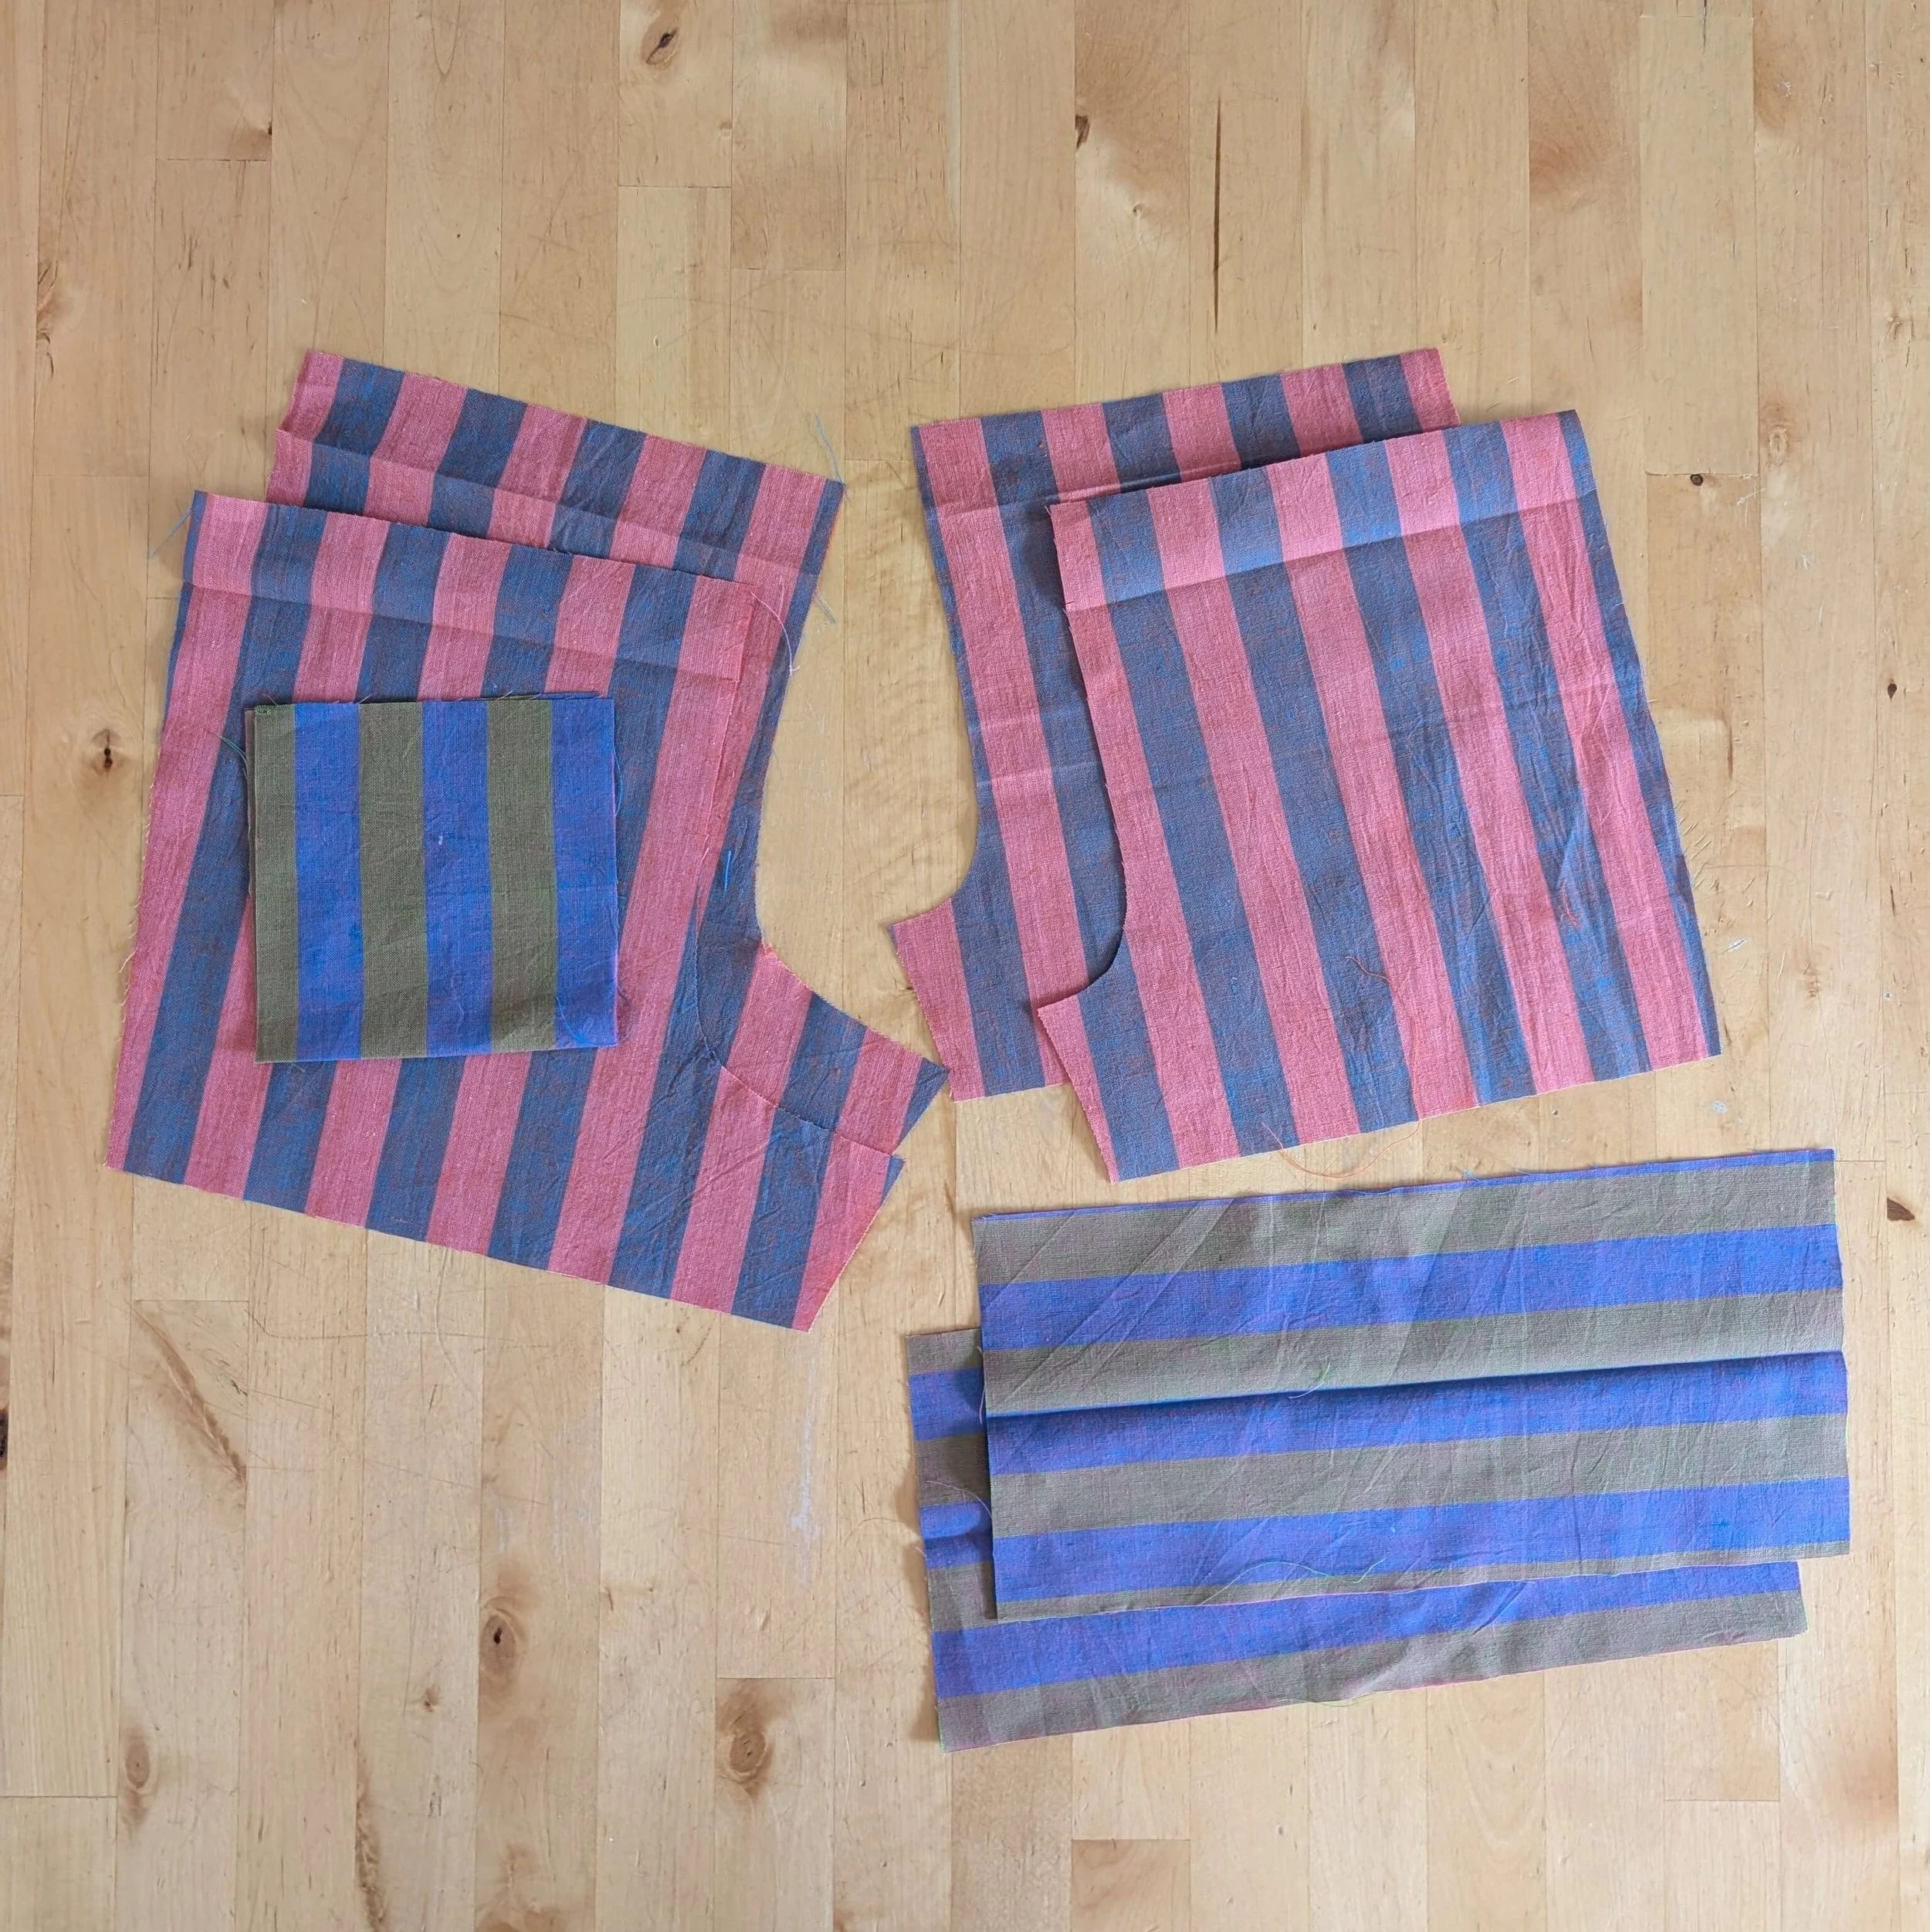
FOR SHORTS: cut 2 fronts, 2 backs, 2 cuffs - shorts, and any optional pockets (1 patch pocket shown here)
Remember to include notches for pockets. After cutting out your pieces, I recommend using your iron to mark waistband lines (fold and press along finished waistband line) and cuff centers (fold and press along center fold lines.
SEWING INSTRUCTIONS
All seams are sewn with 1/2” [12 mm] allowance and with right sides together unless otherwise indicated. Trim, press and finish each seam after you sew it unless you are making a muslin/toile.
My favorite seam finishes can be found here.
STEP 1. Attach inseam pockets (optional)
Proceed to step 2 if you are not using inseam pockets.
Pin each pocket to a FRONT PANT or BACK PANT, aligning notches at the sides. Sew together with a ⅜ inch [10mm] seam (Note seam allowance!!).

Press pocket and seam allowances away from pants.
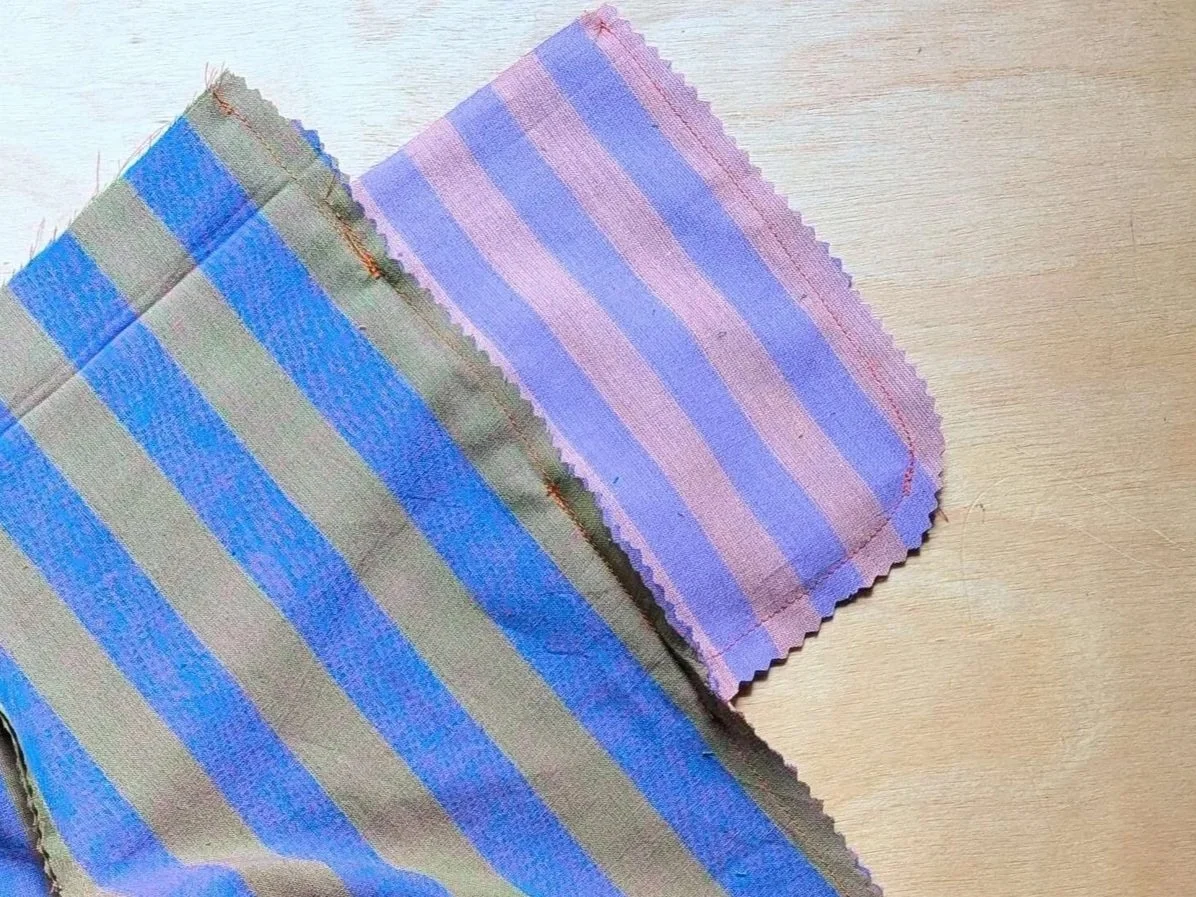
STEP 2. Sew center seams
Pin the two FRONTS together and the two BACKS together along the center crotch curves. Sew the center seams together as shown. IMPORTANT: Do not continue down the leg.
(for shorts)
(for pants)
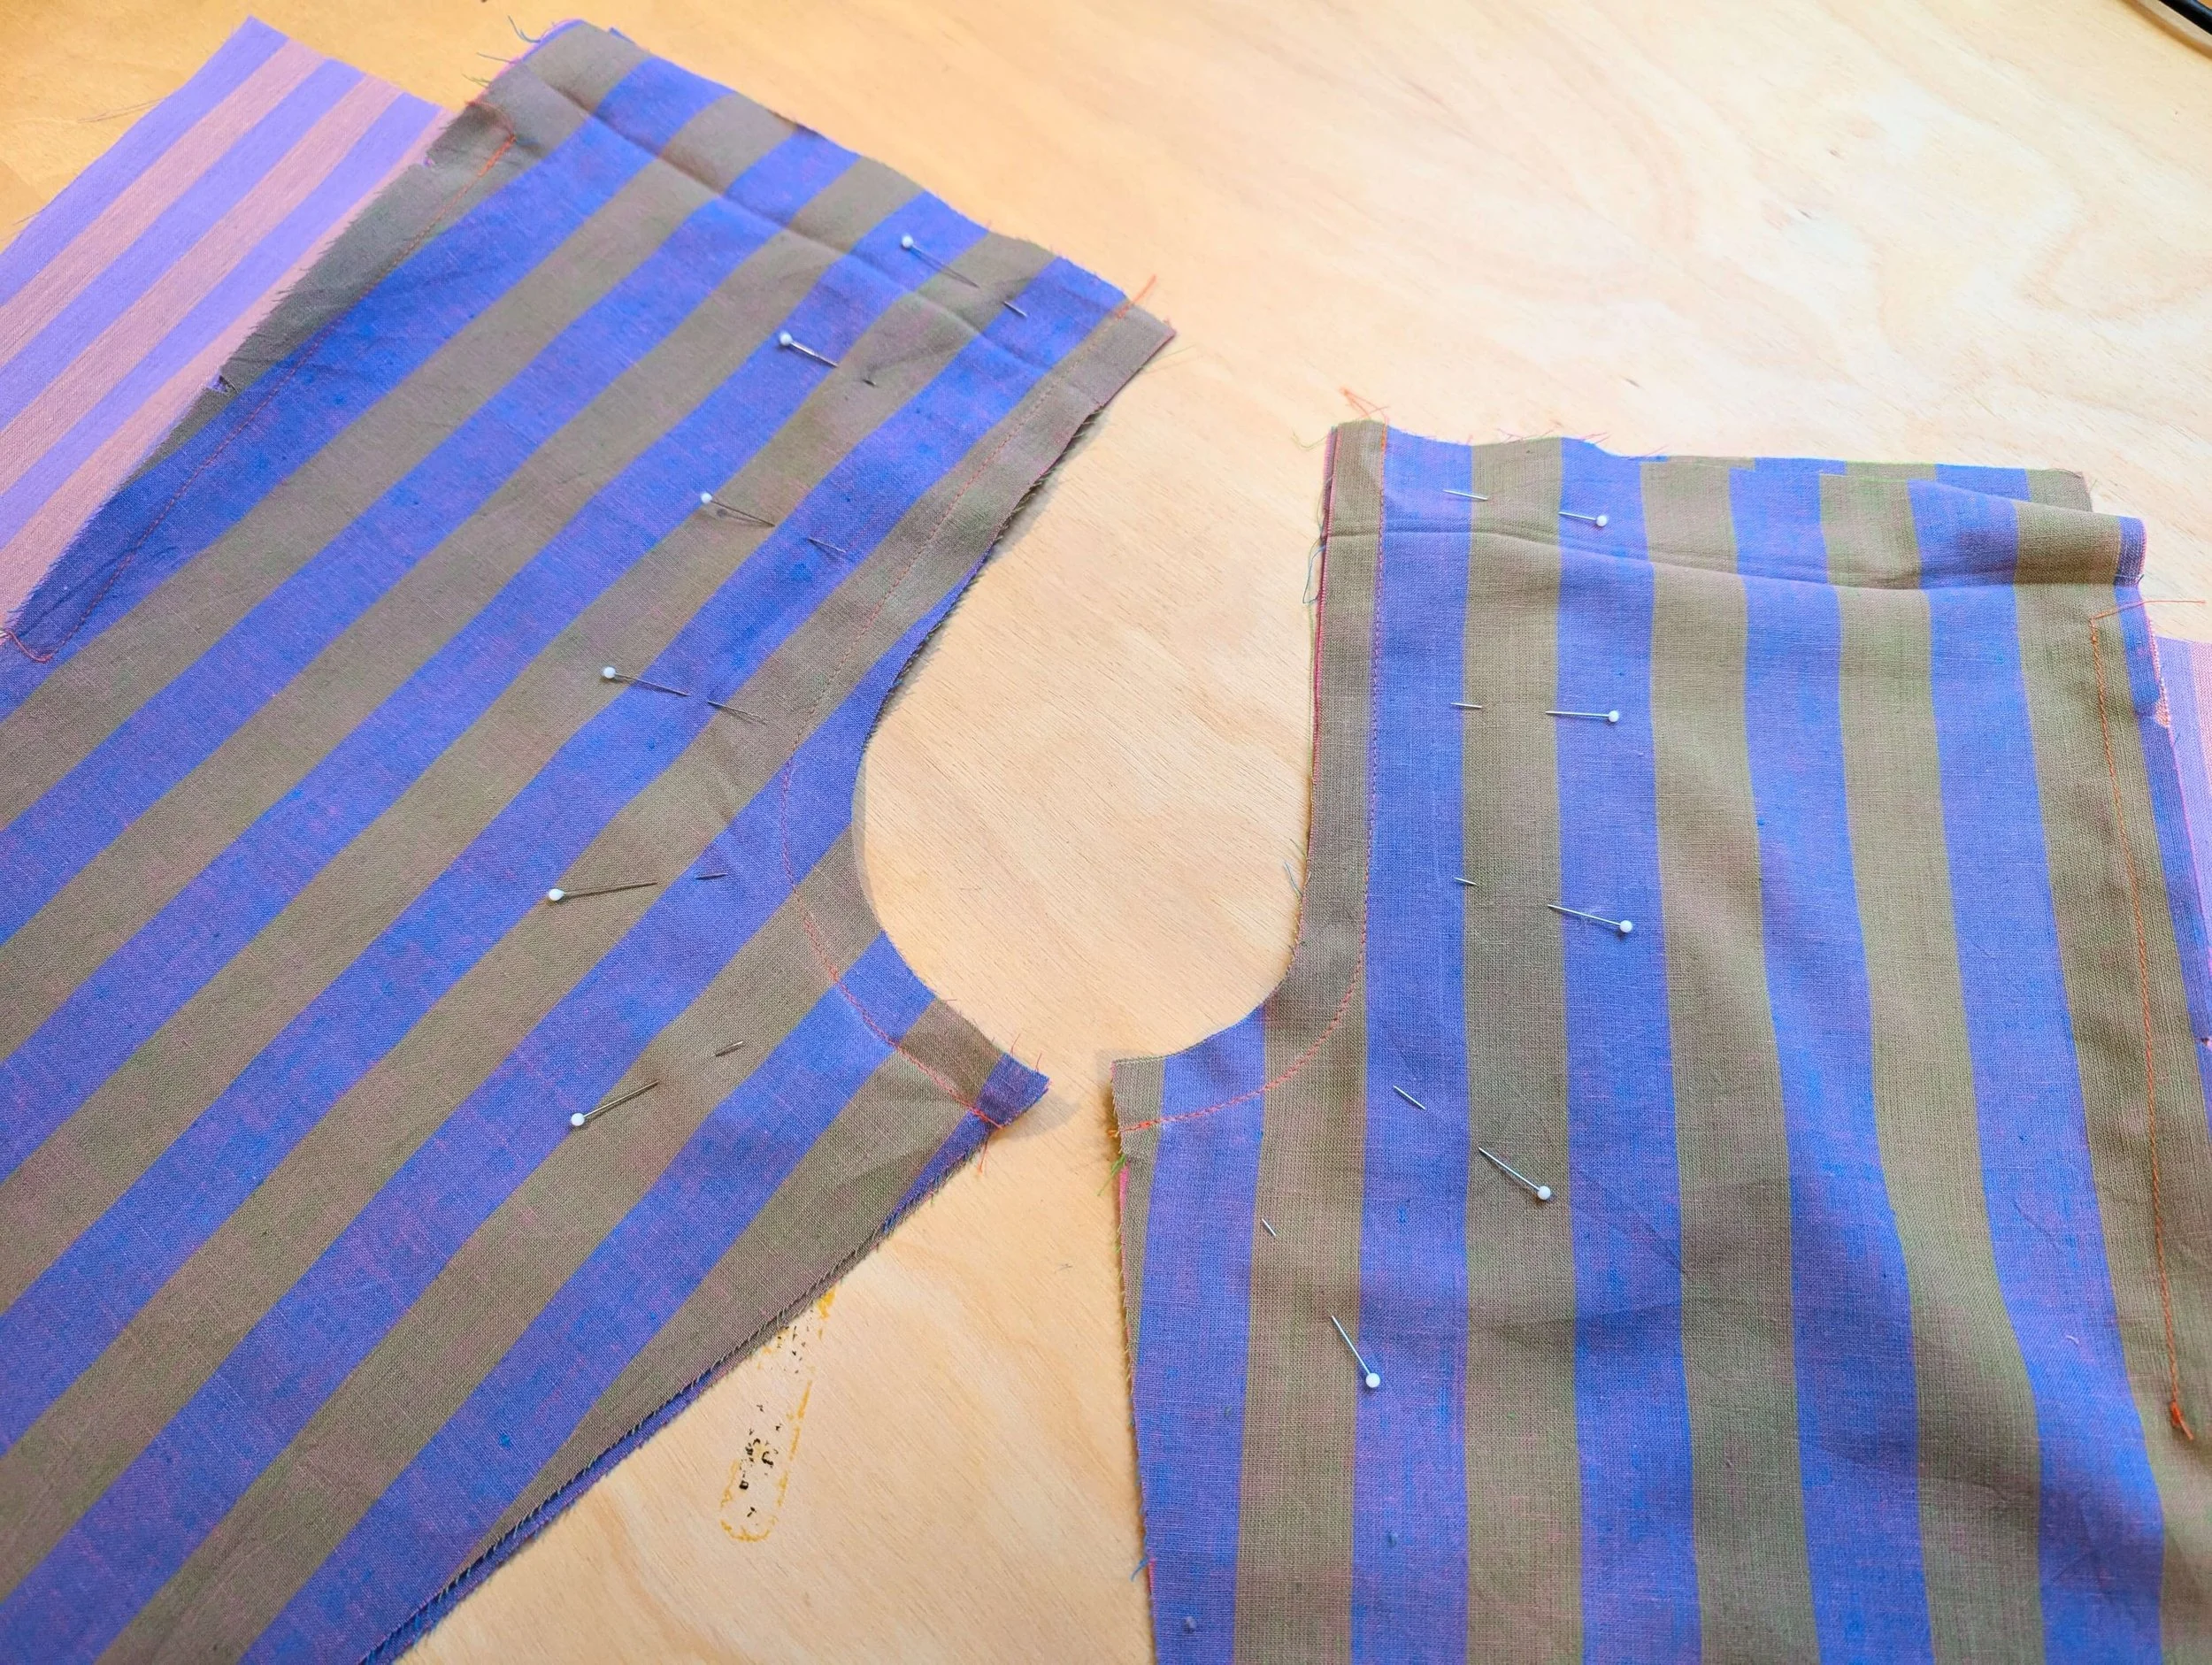
Trim and press seam allowances to one side and finish as desired.
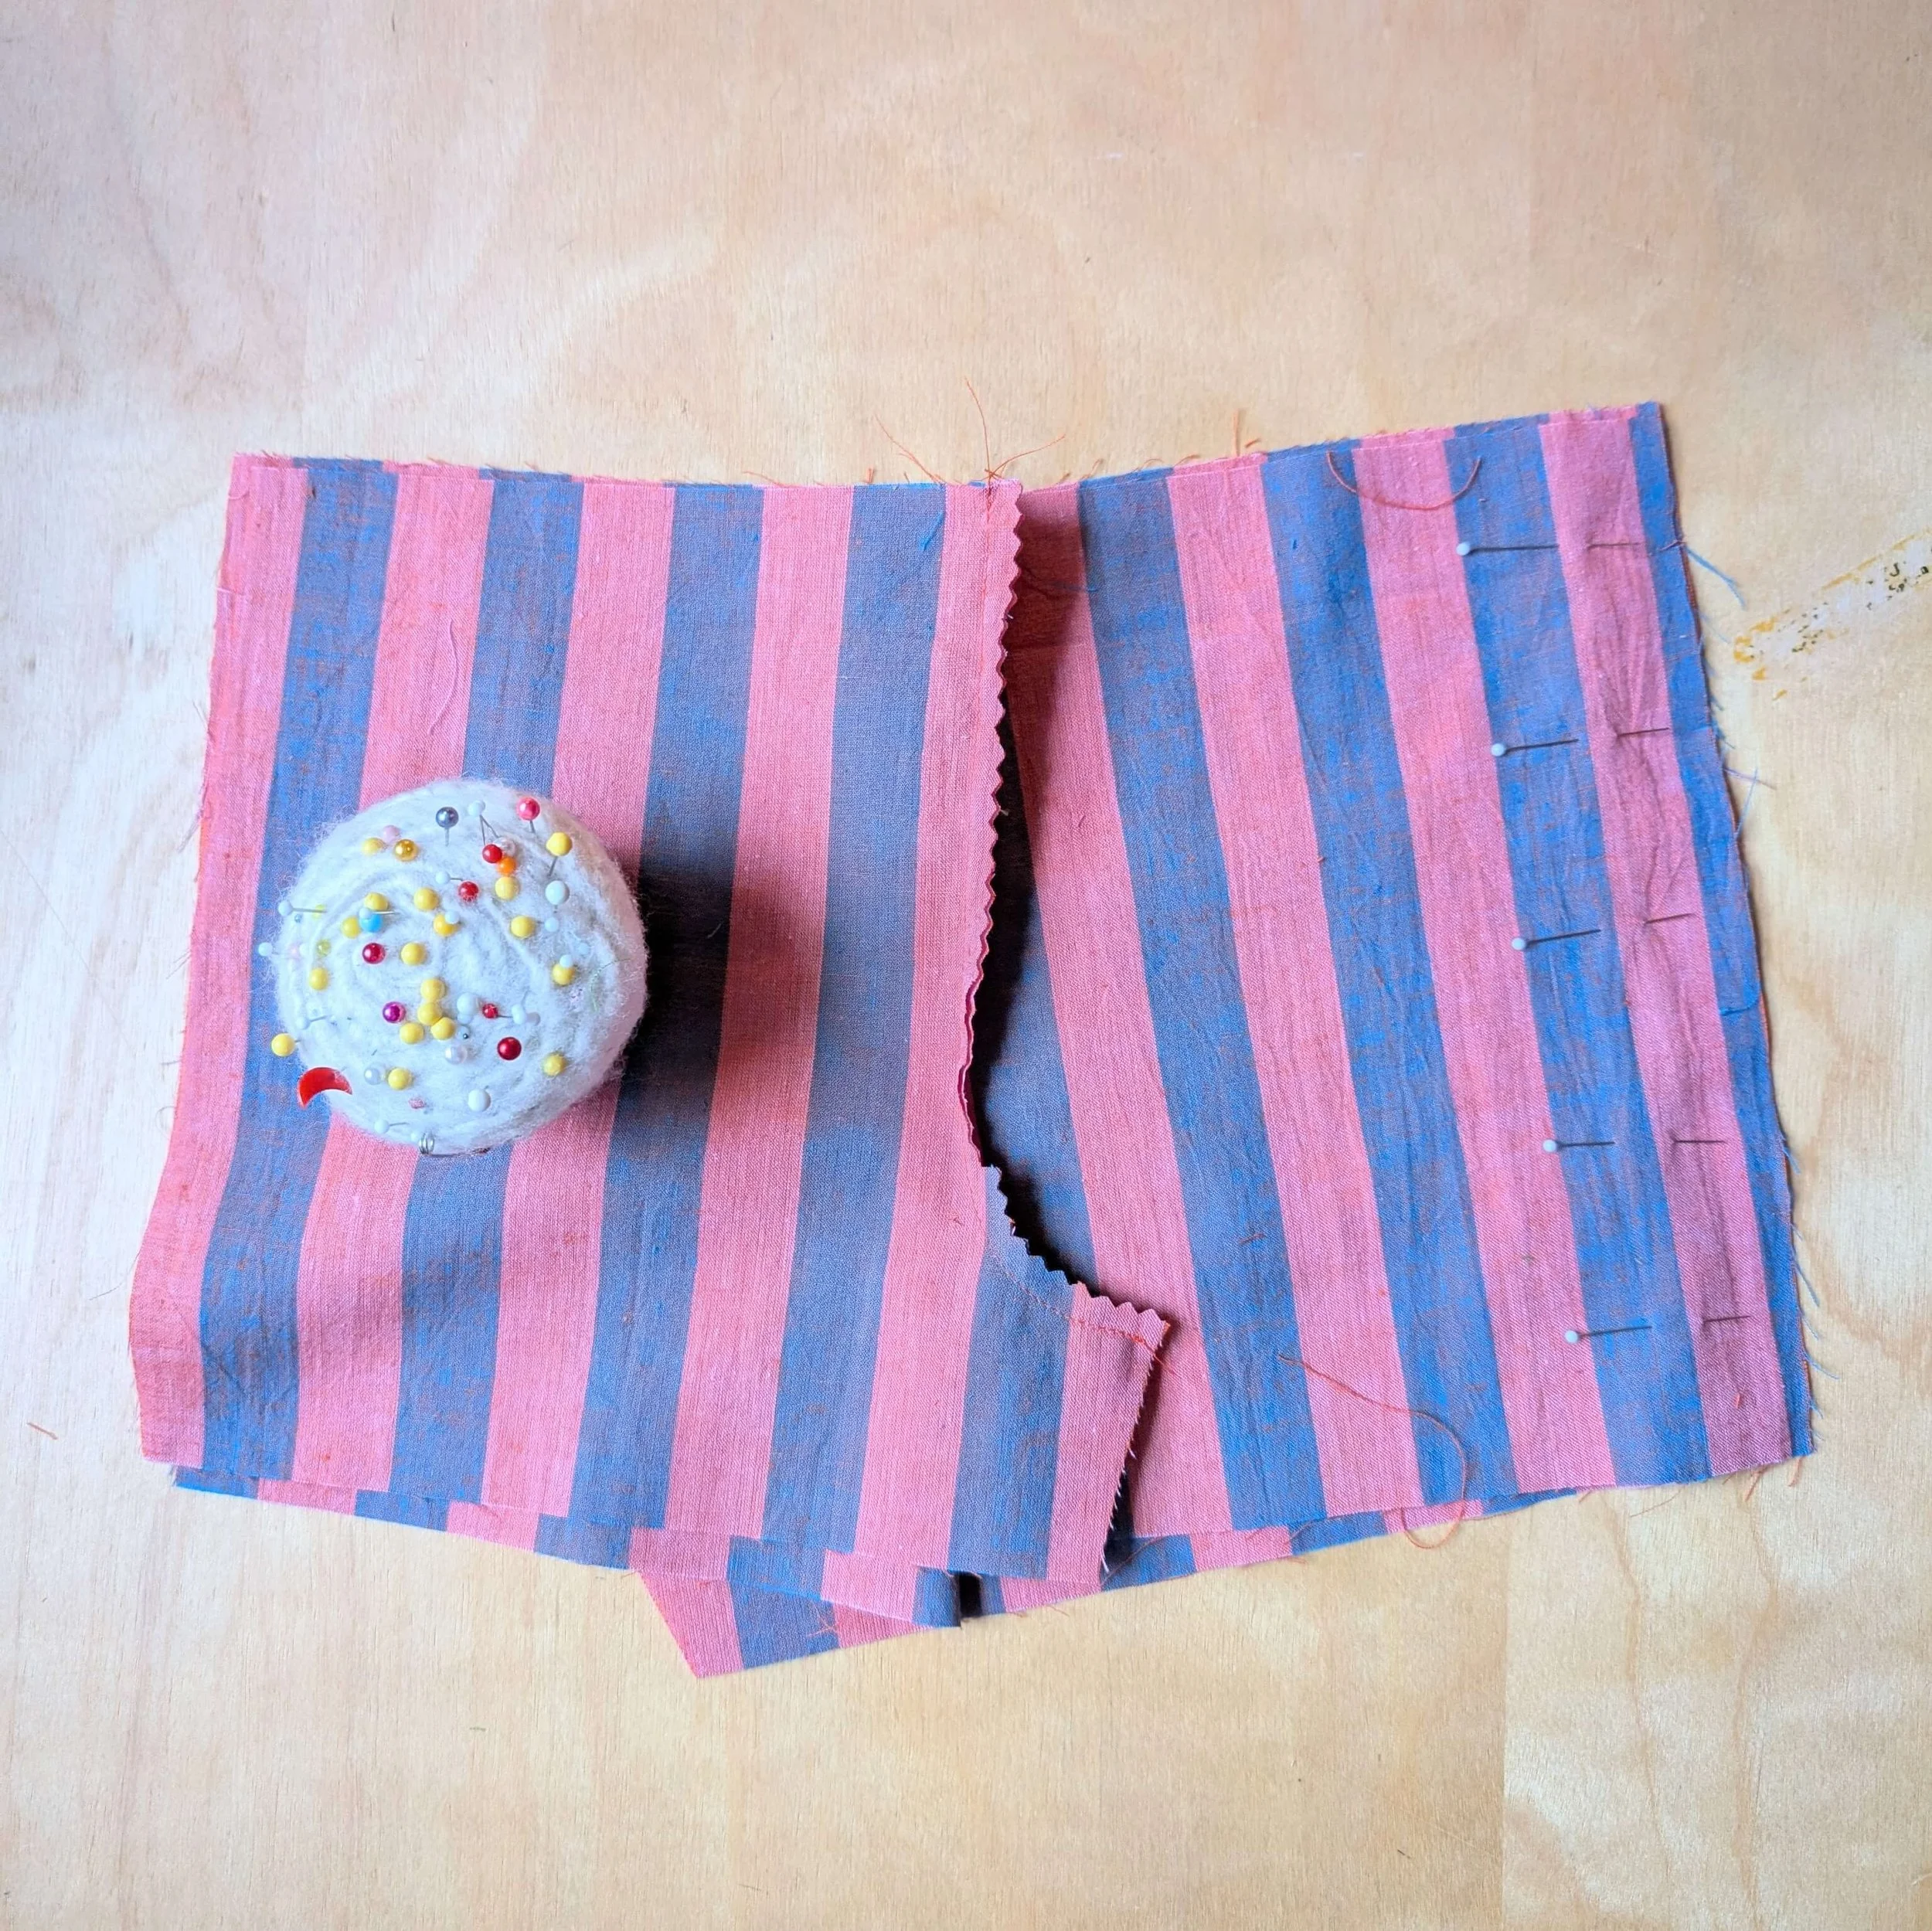
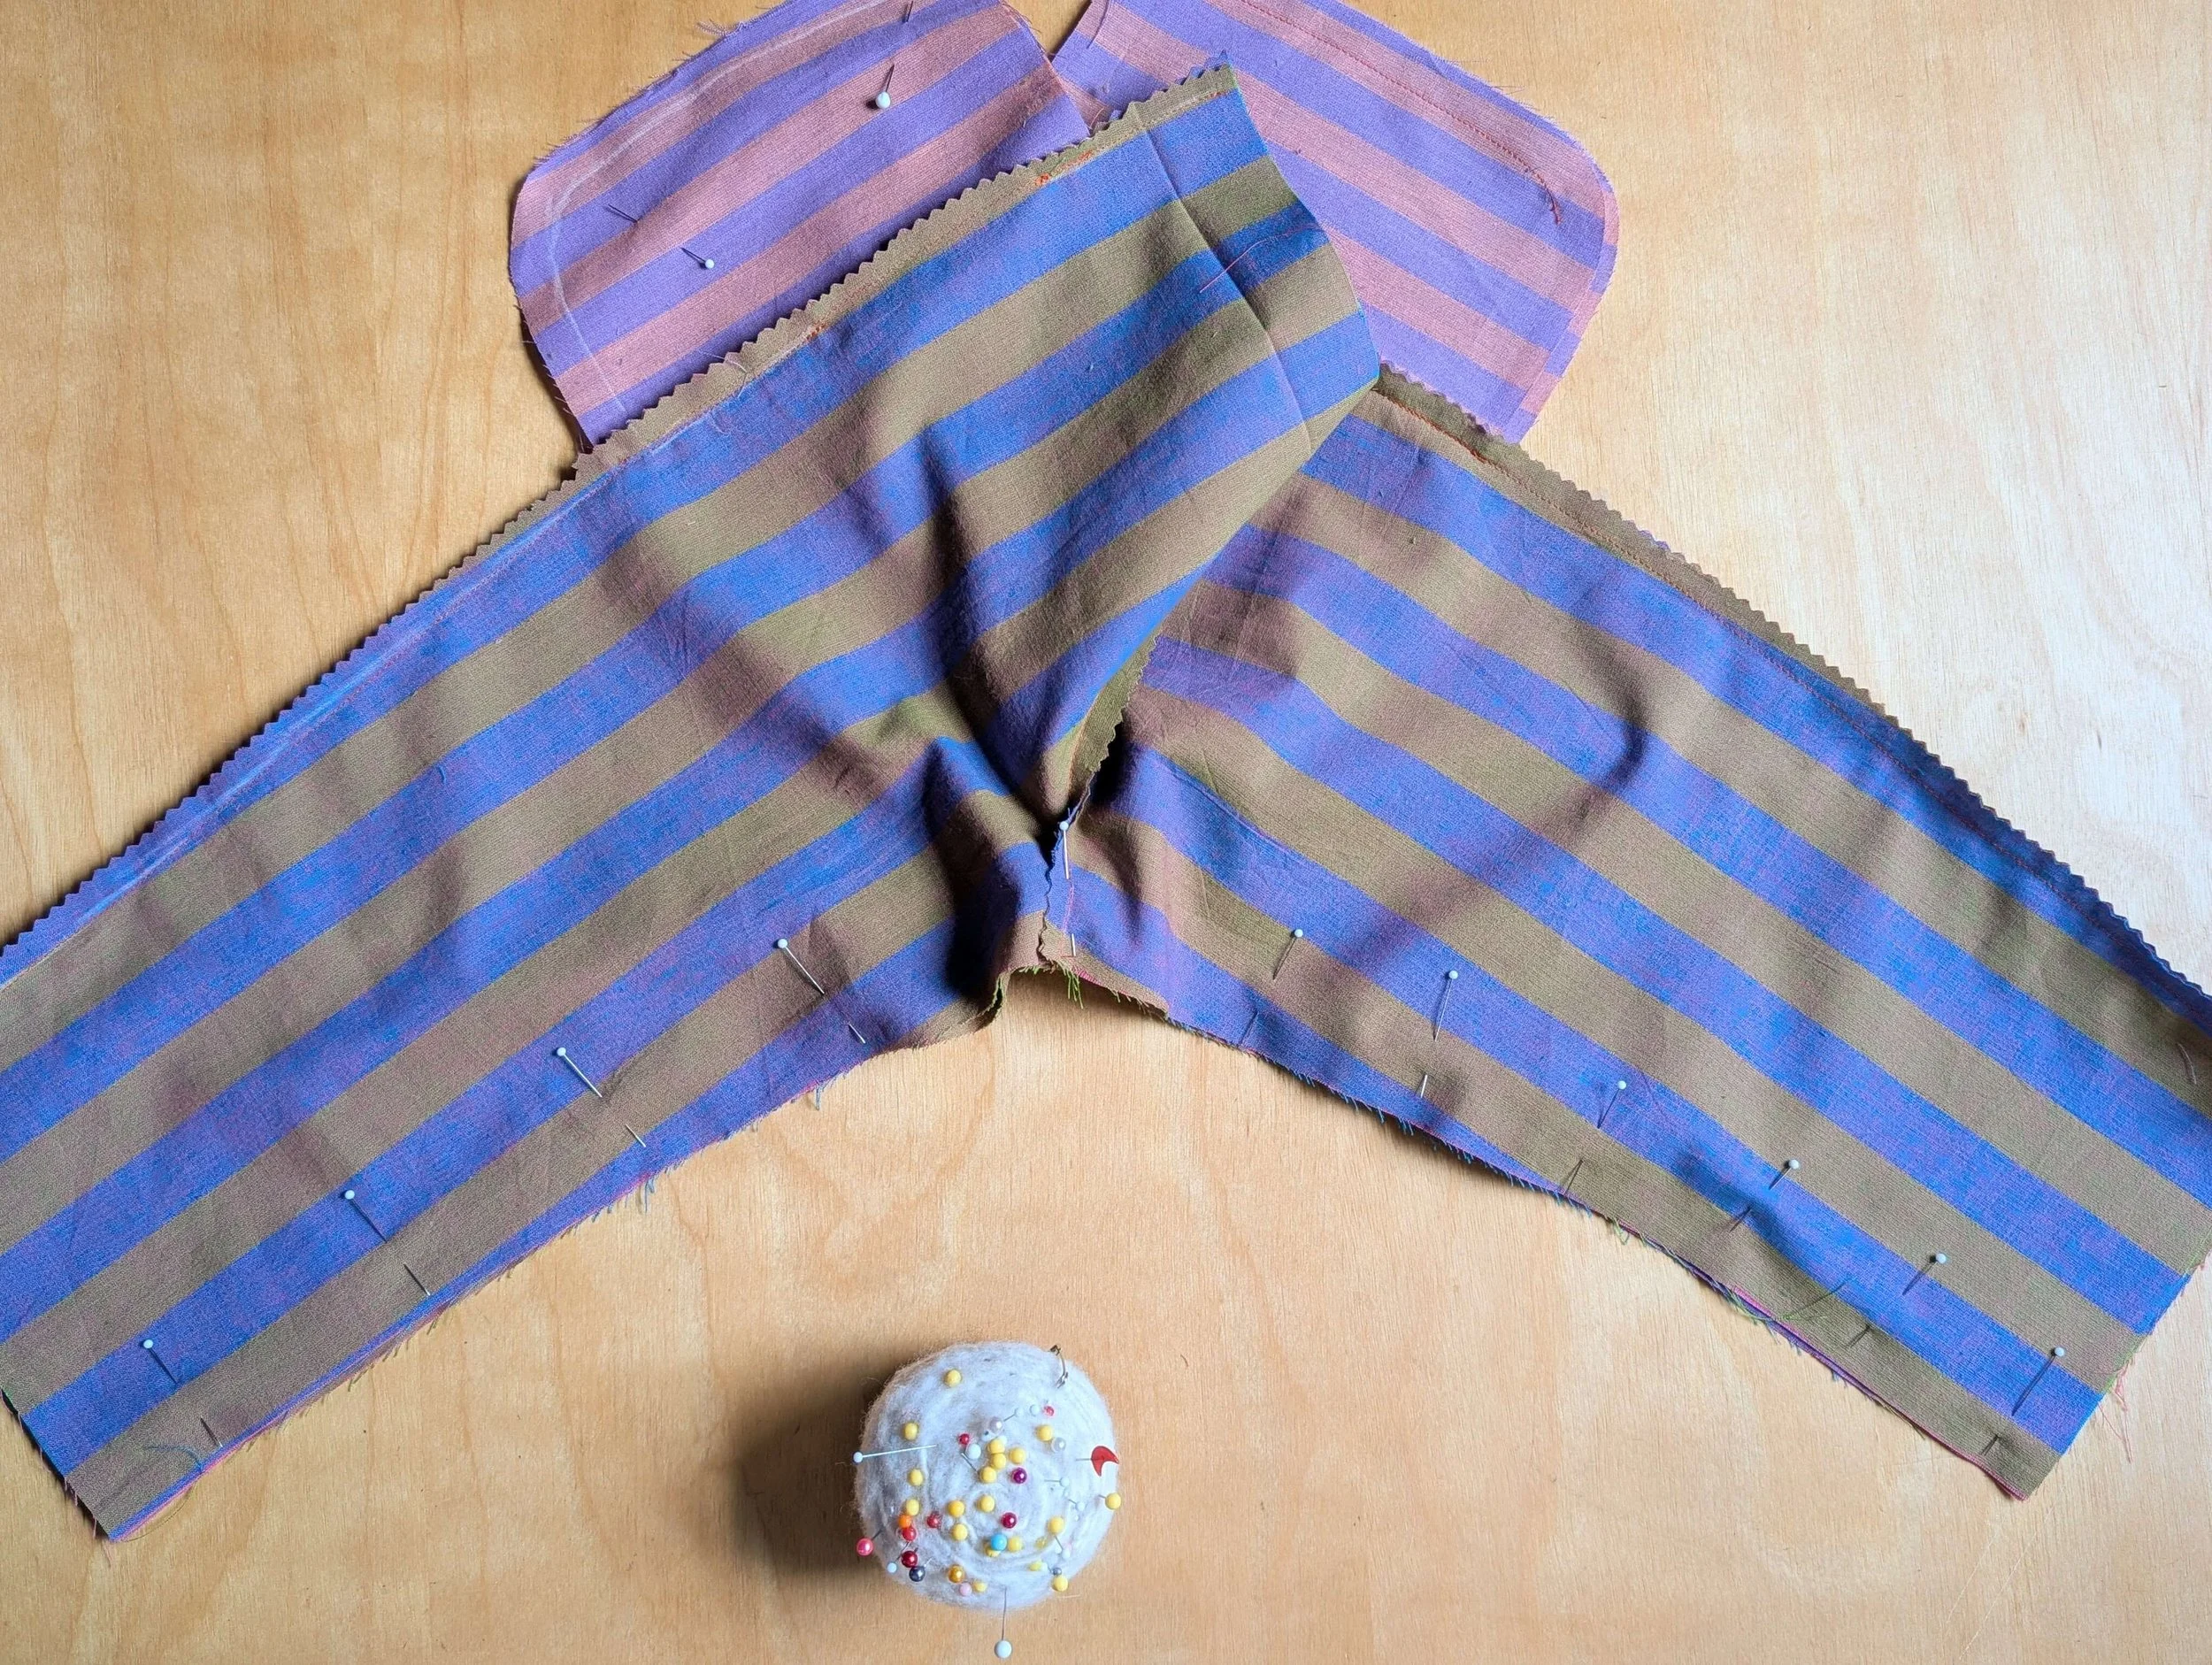
STEP 3. Sew side seams
Without pockets: (if you are using inseam pockets, skip to next section)
Pin and sew the front and back pieces together along the sides from top to bottom. Press seam allowances towards back and finish as desired.
With pockets: (note – if you are not using pockets, skip to Step 4)
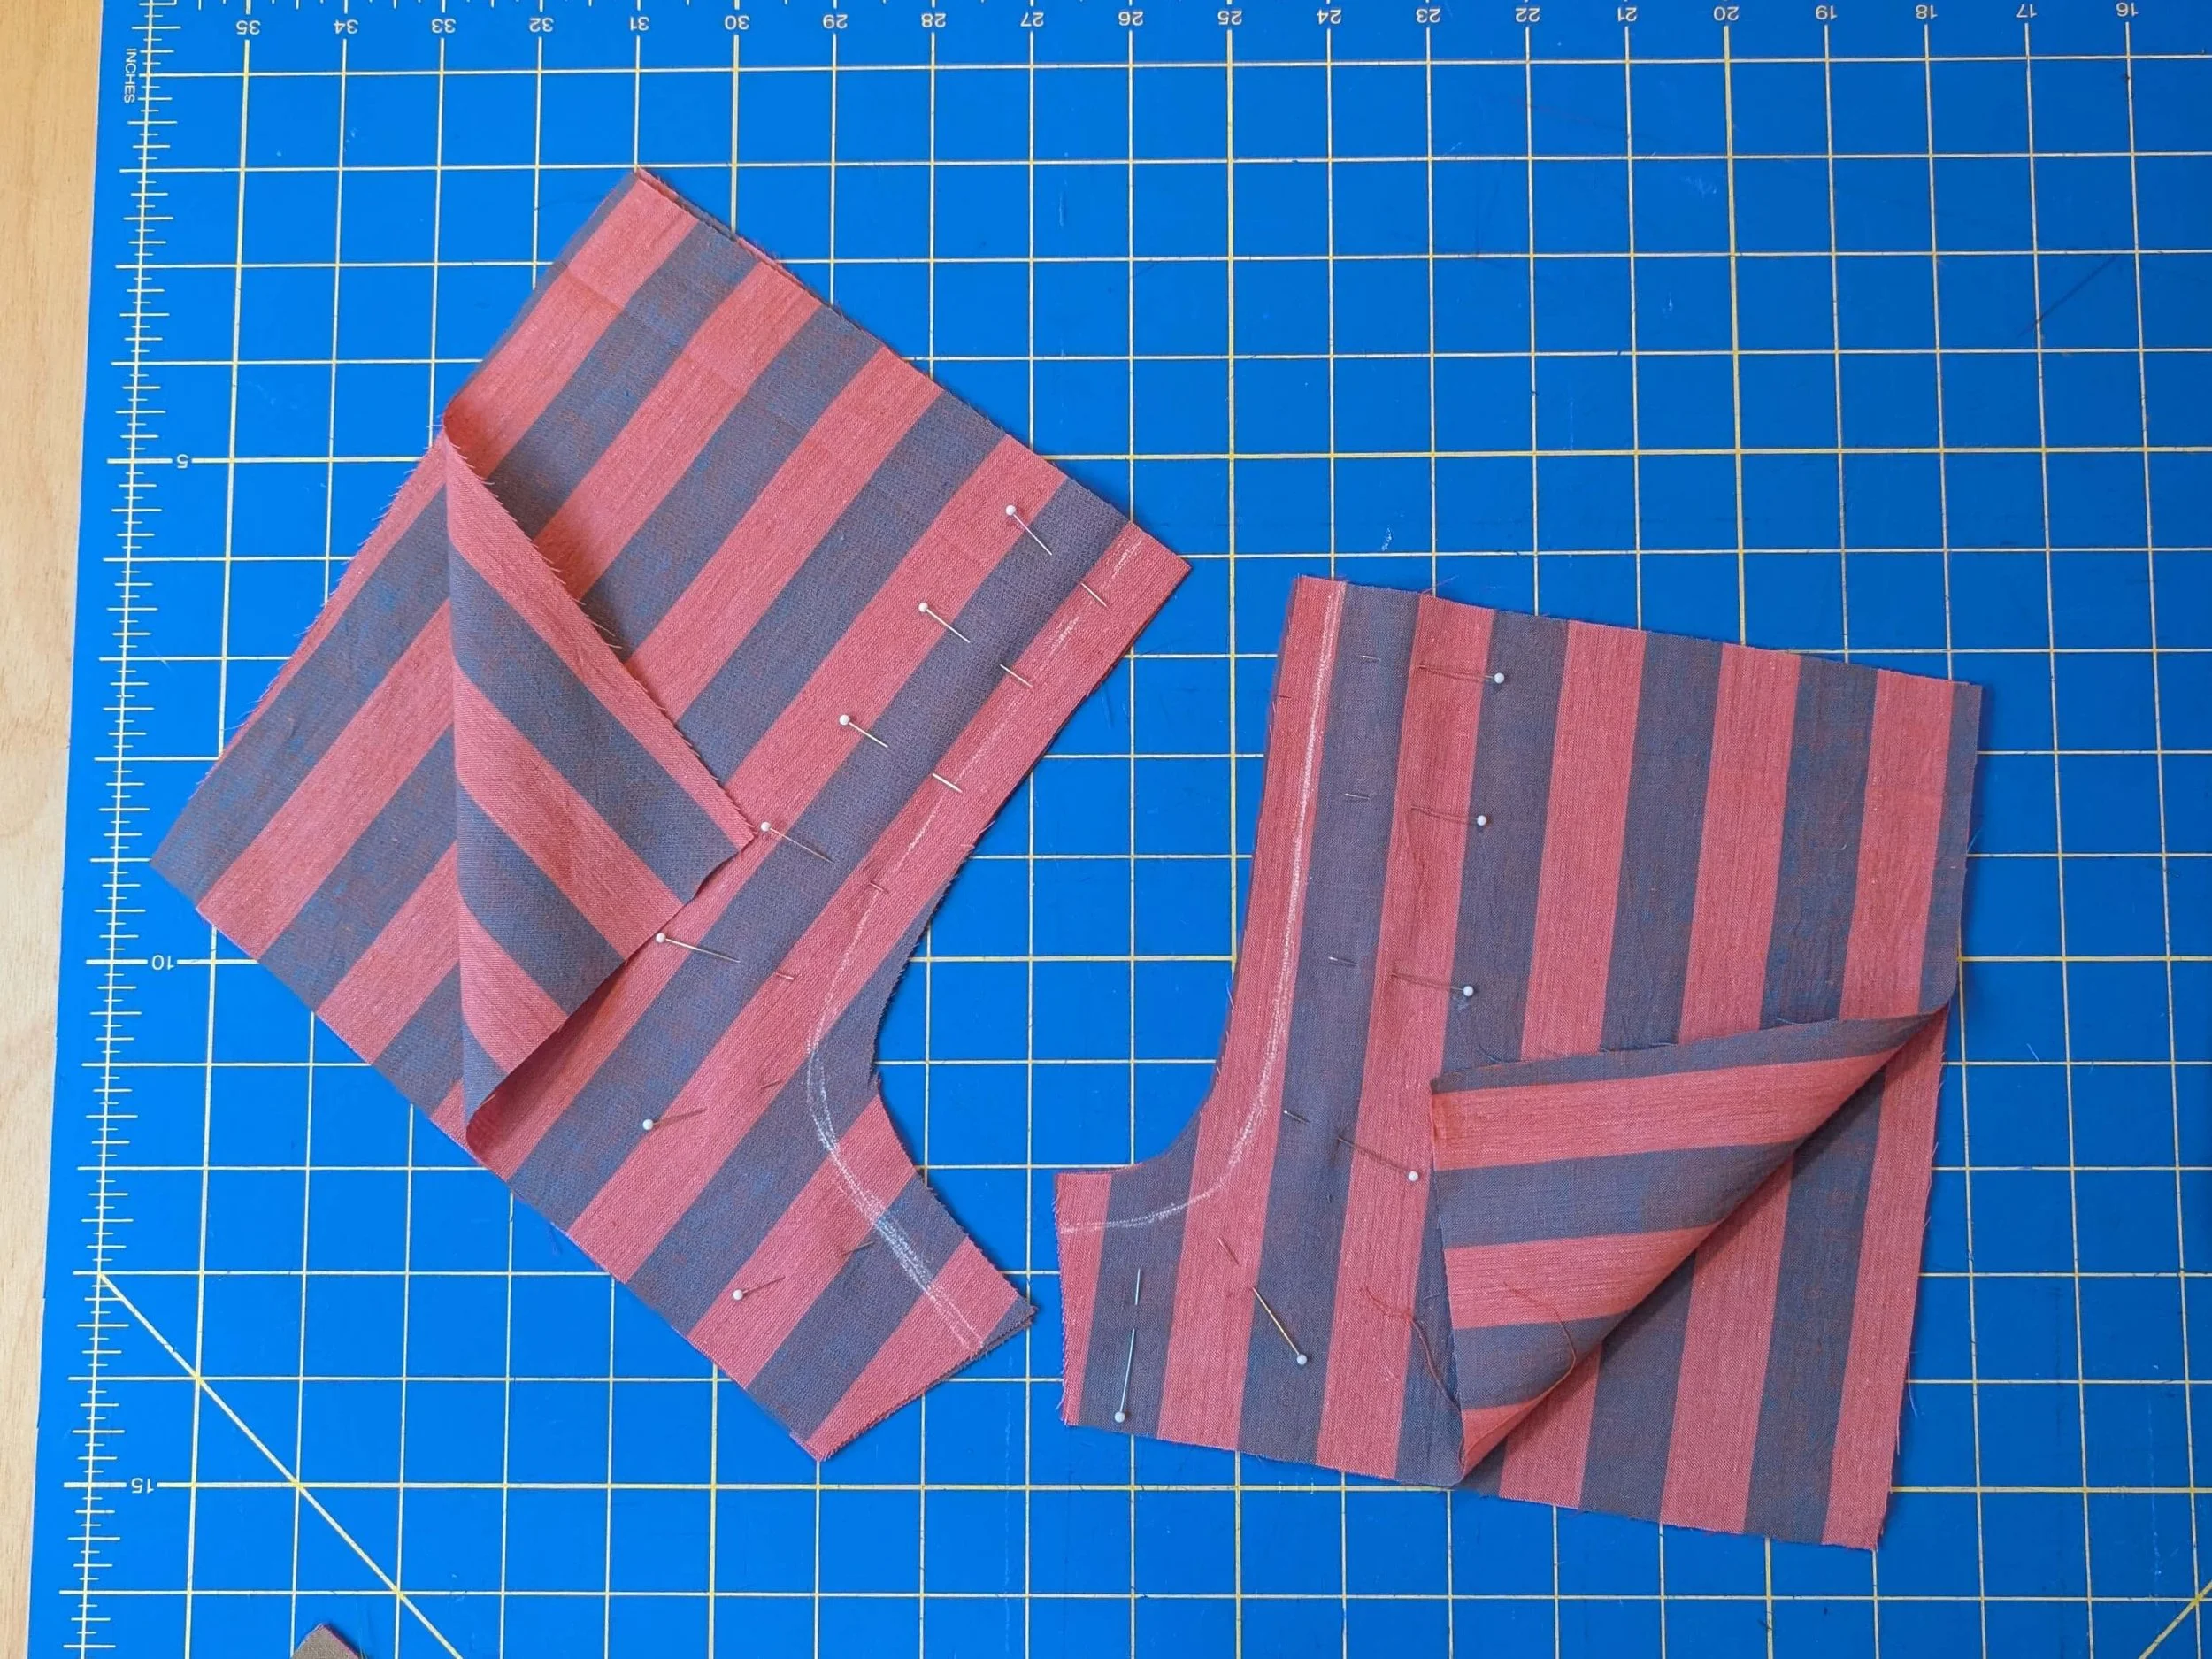
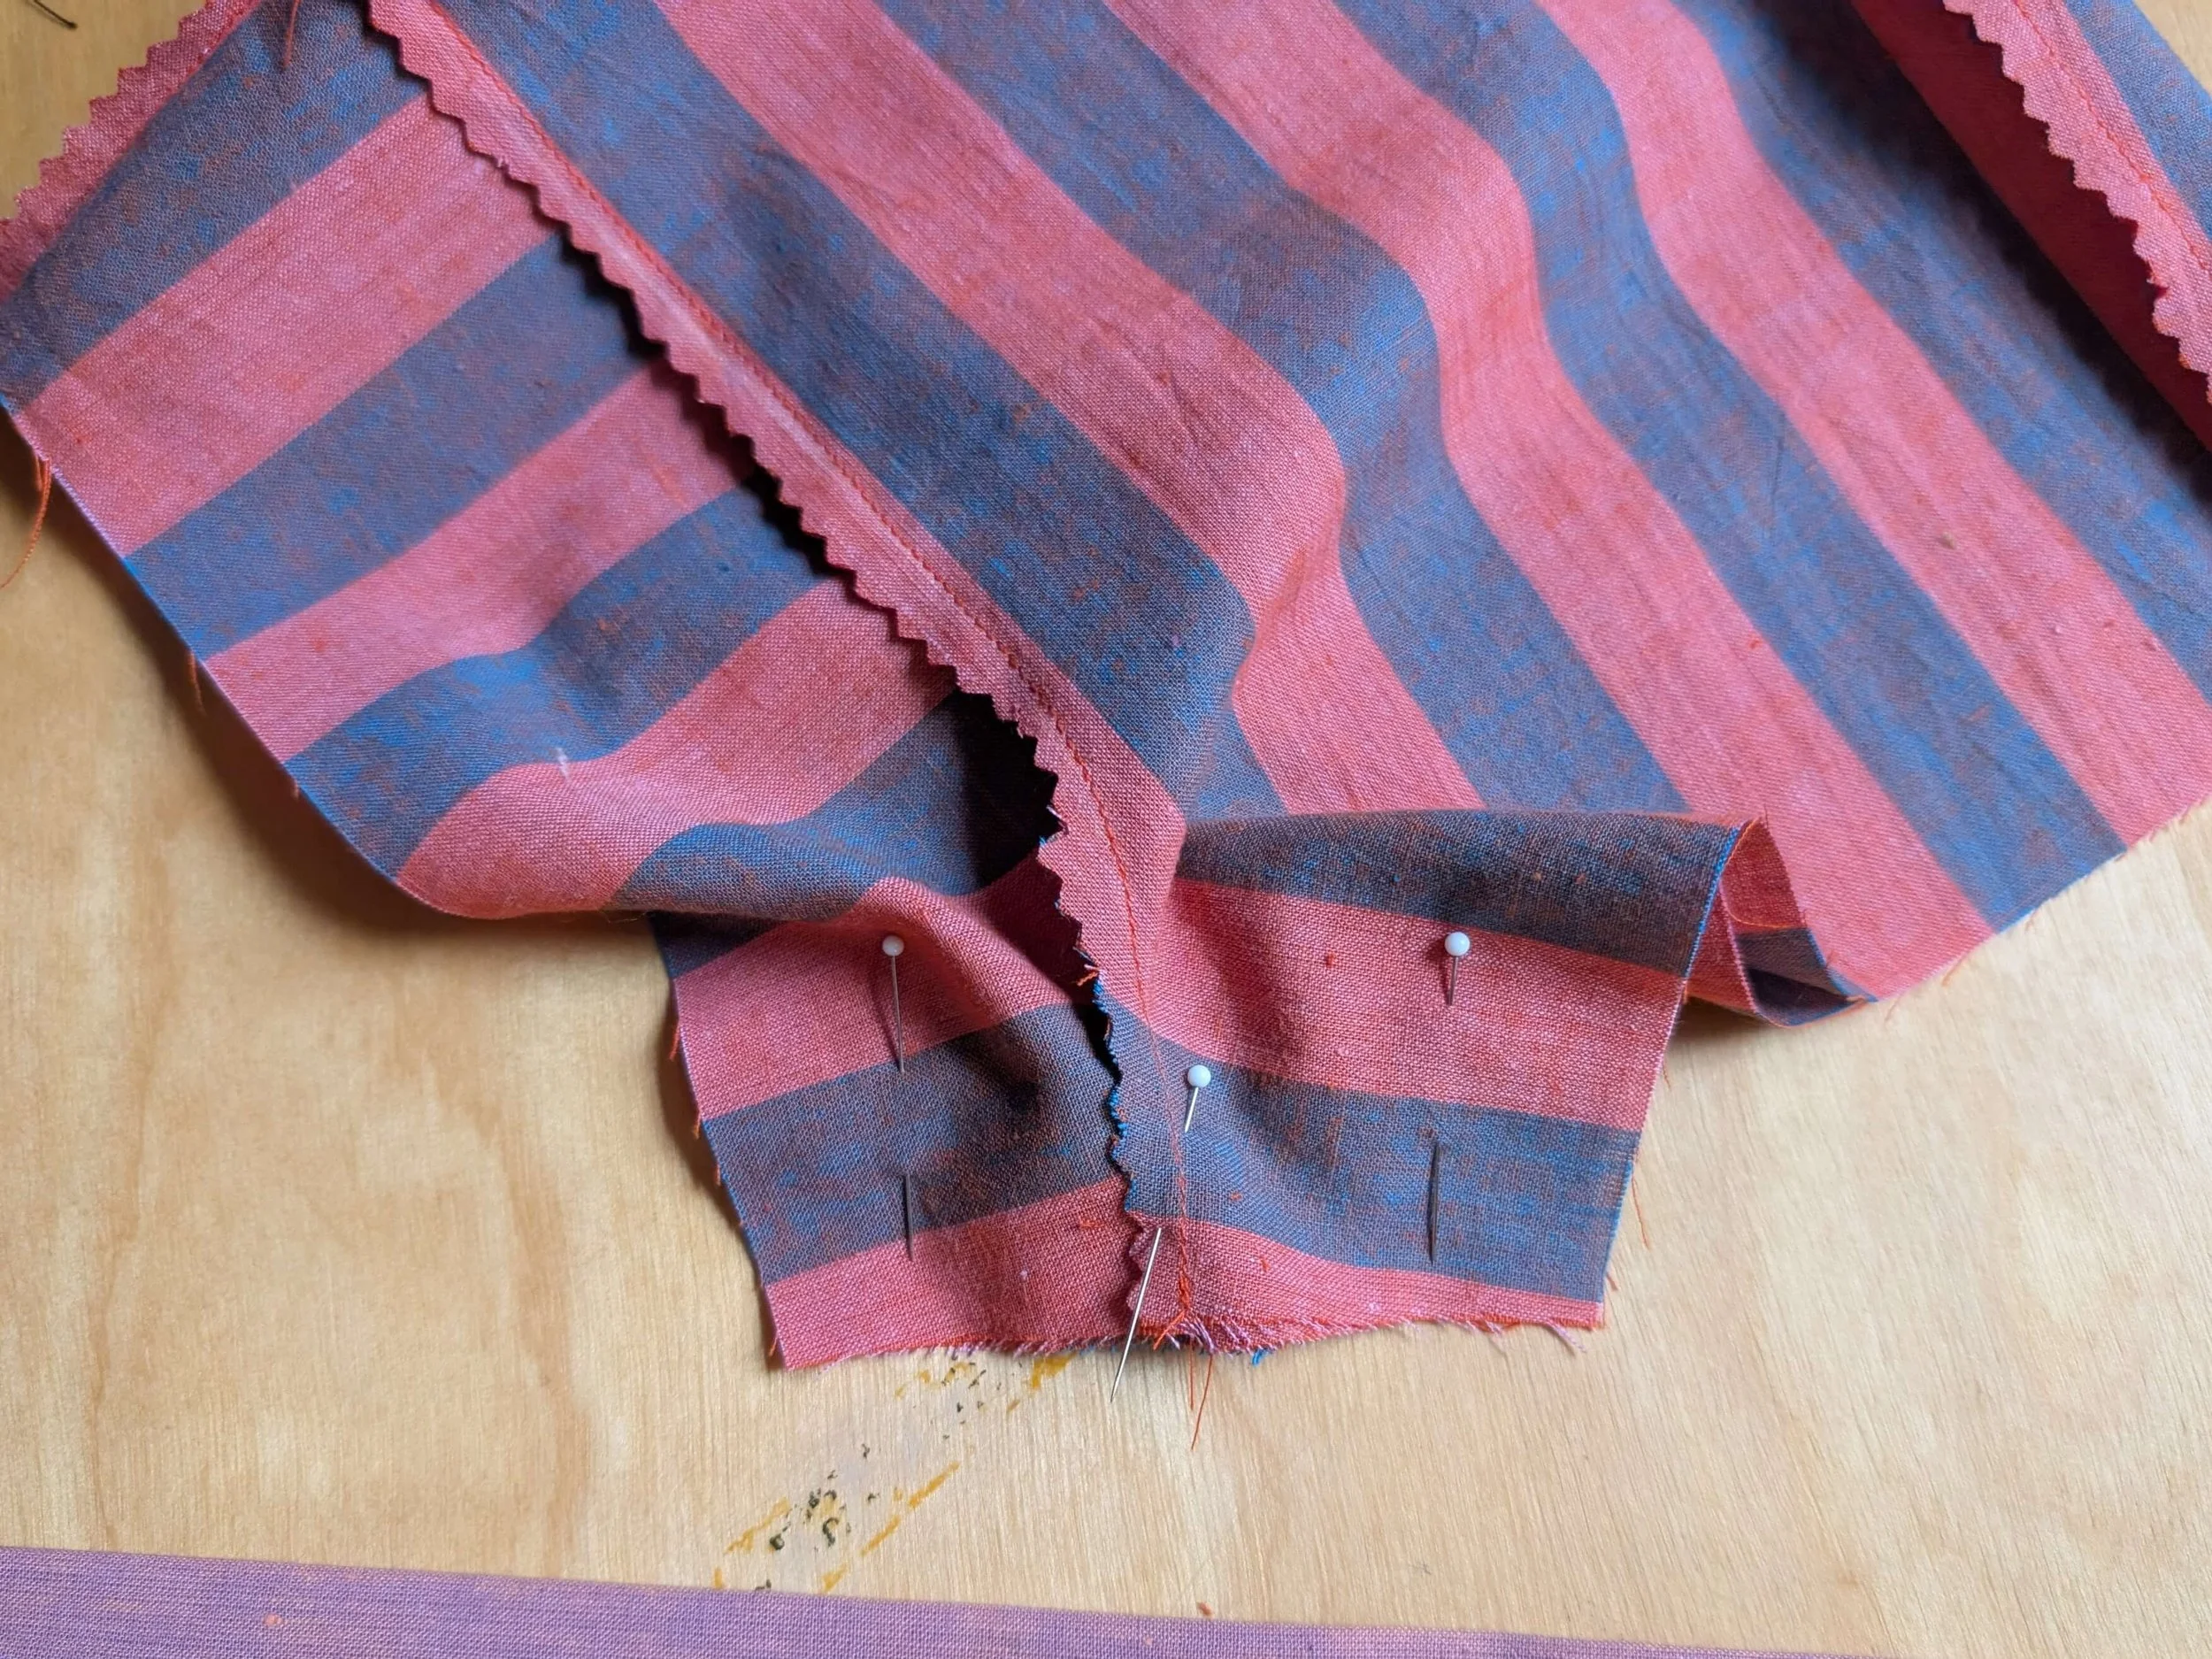
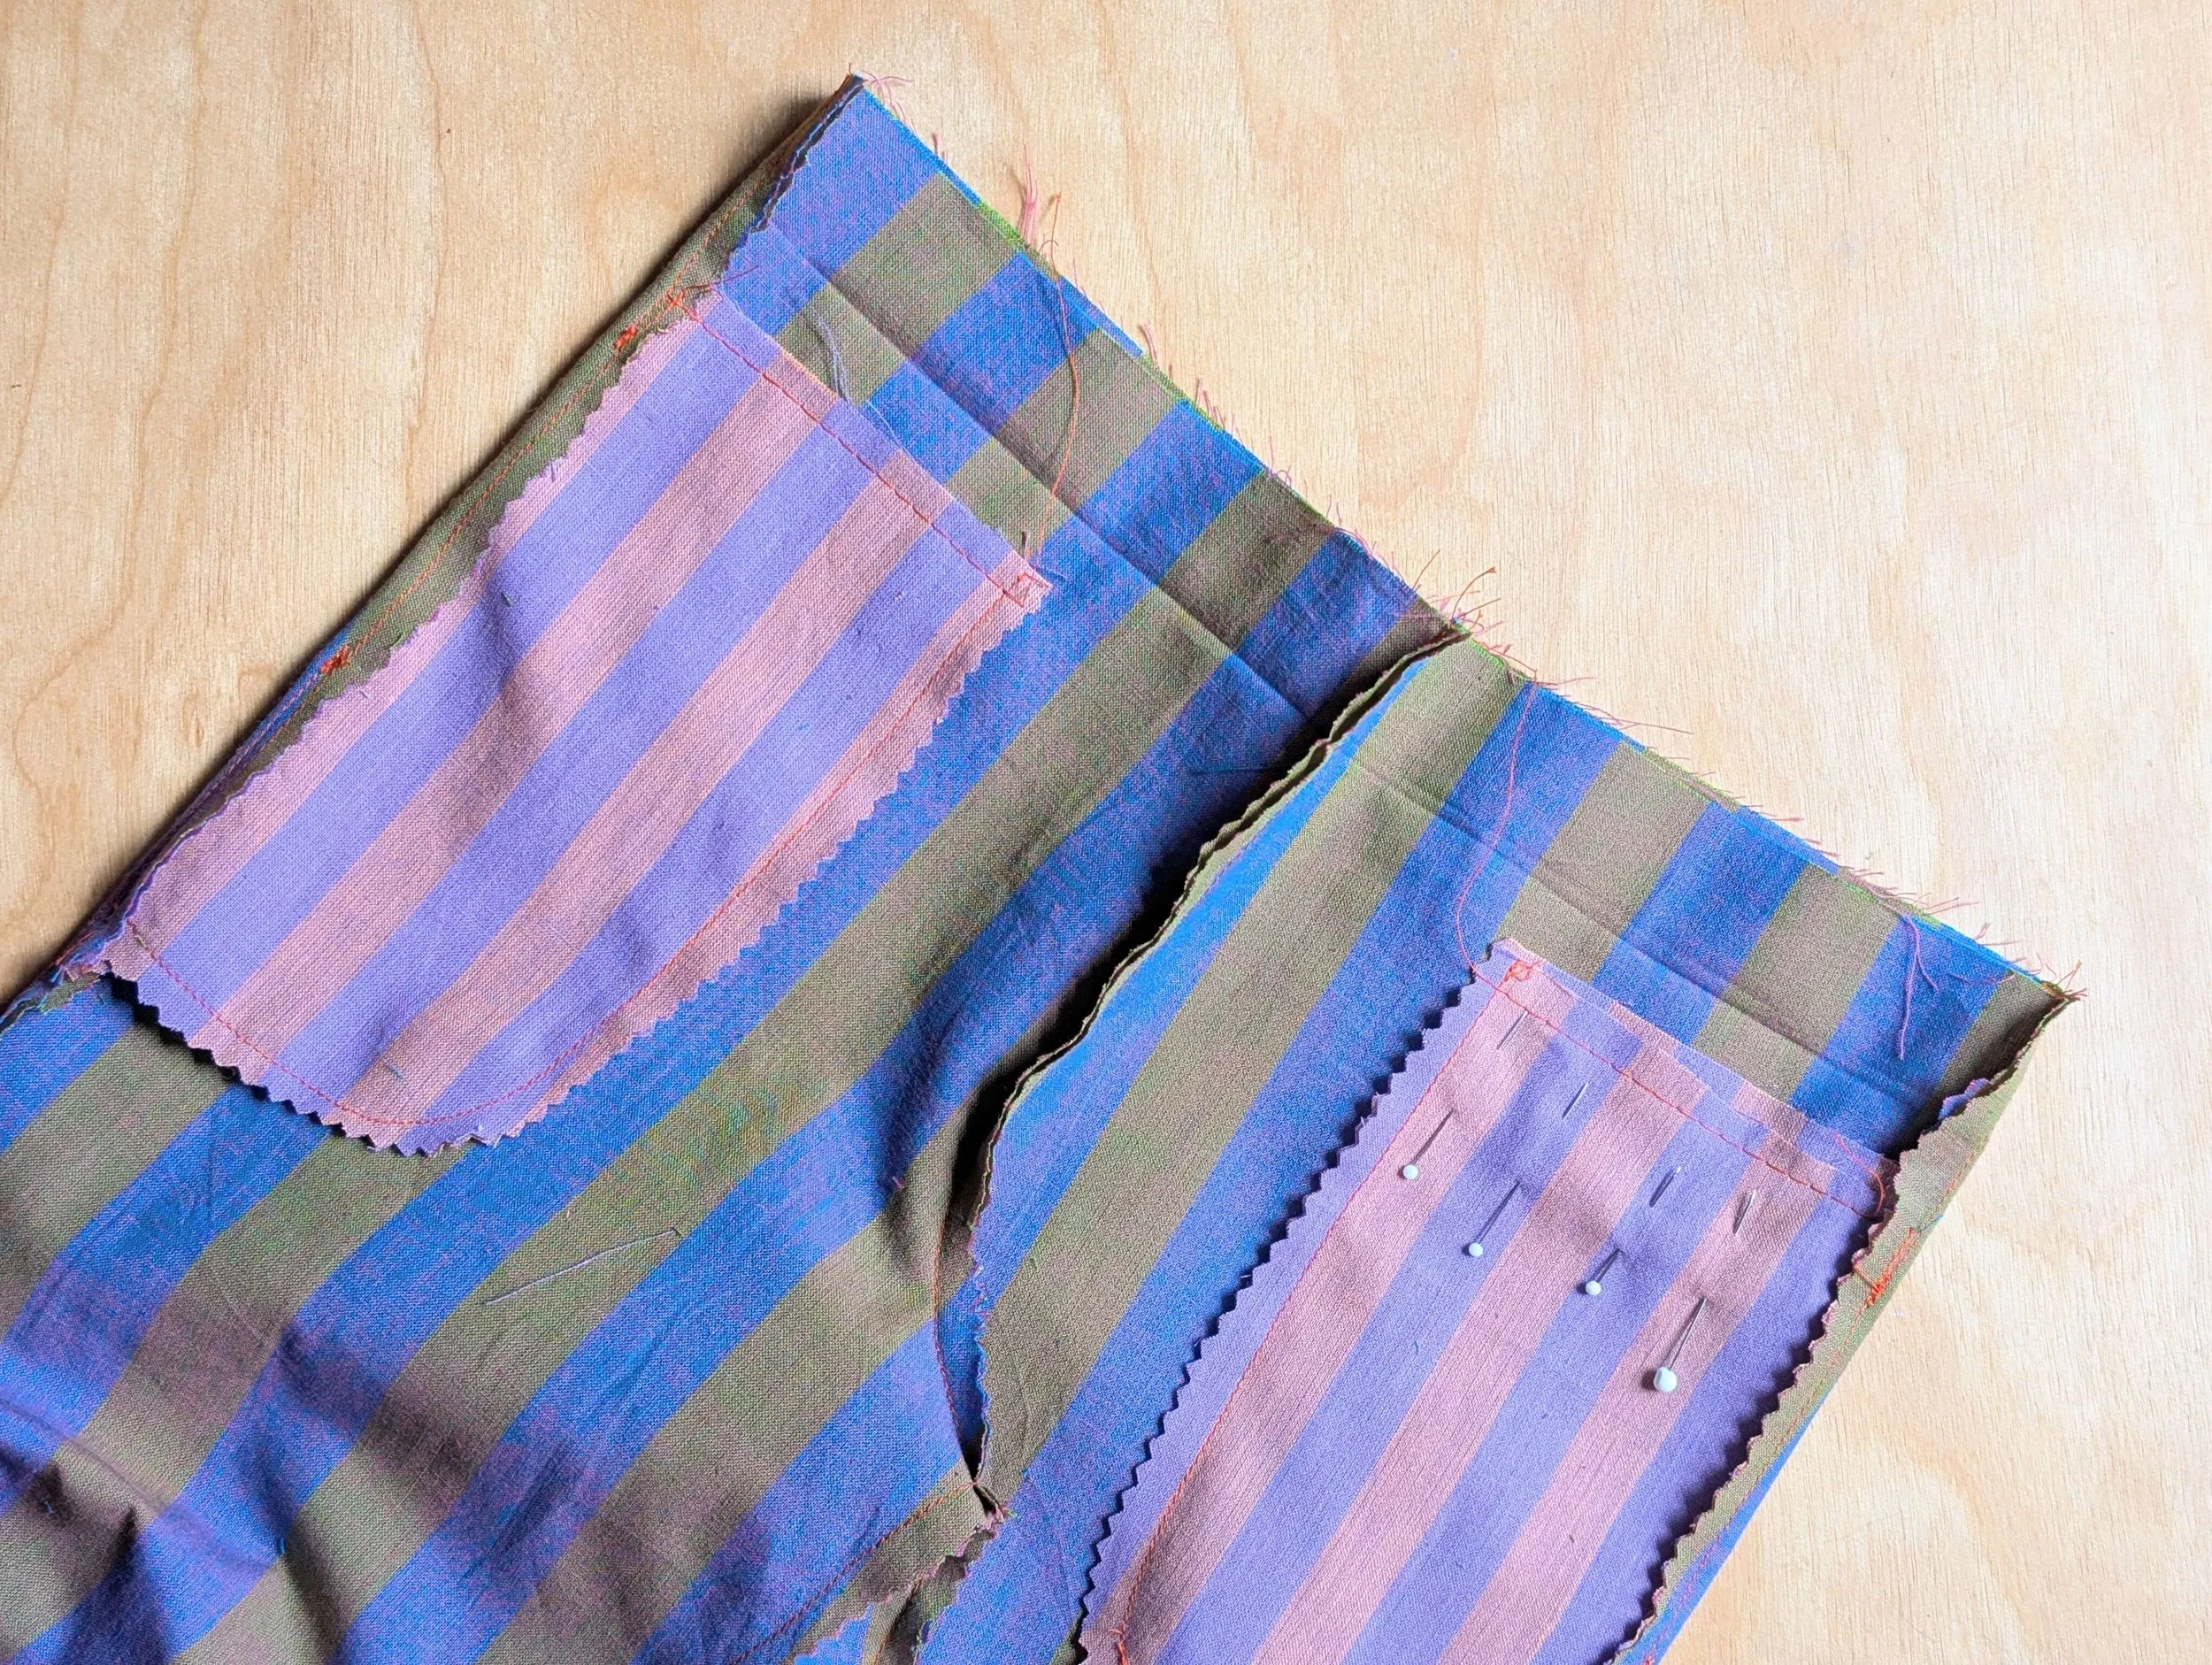
Pin the front and back pieces together at the sides. Sew the sides together from the top edge to the first pocket notch, and from the second notch to the hem as shown, leaving a gap between the notches for the pocket opening.
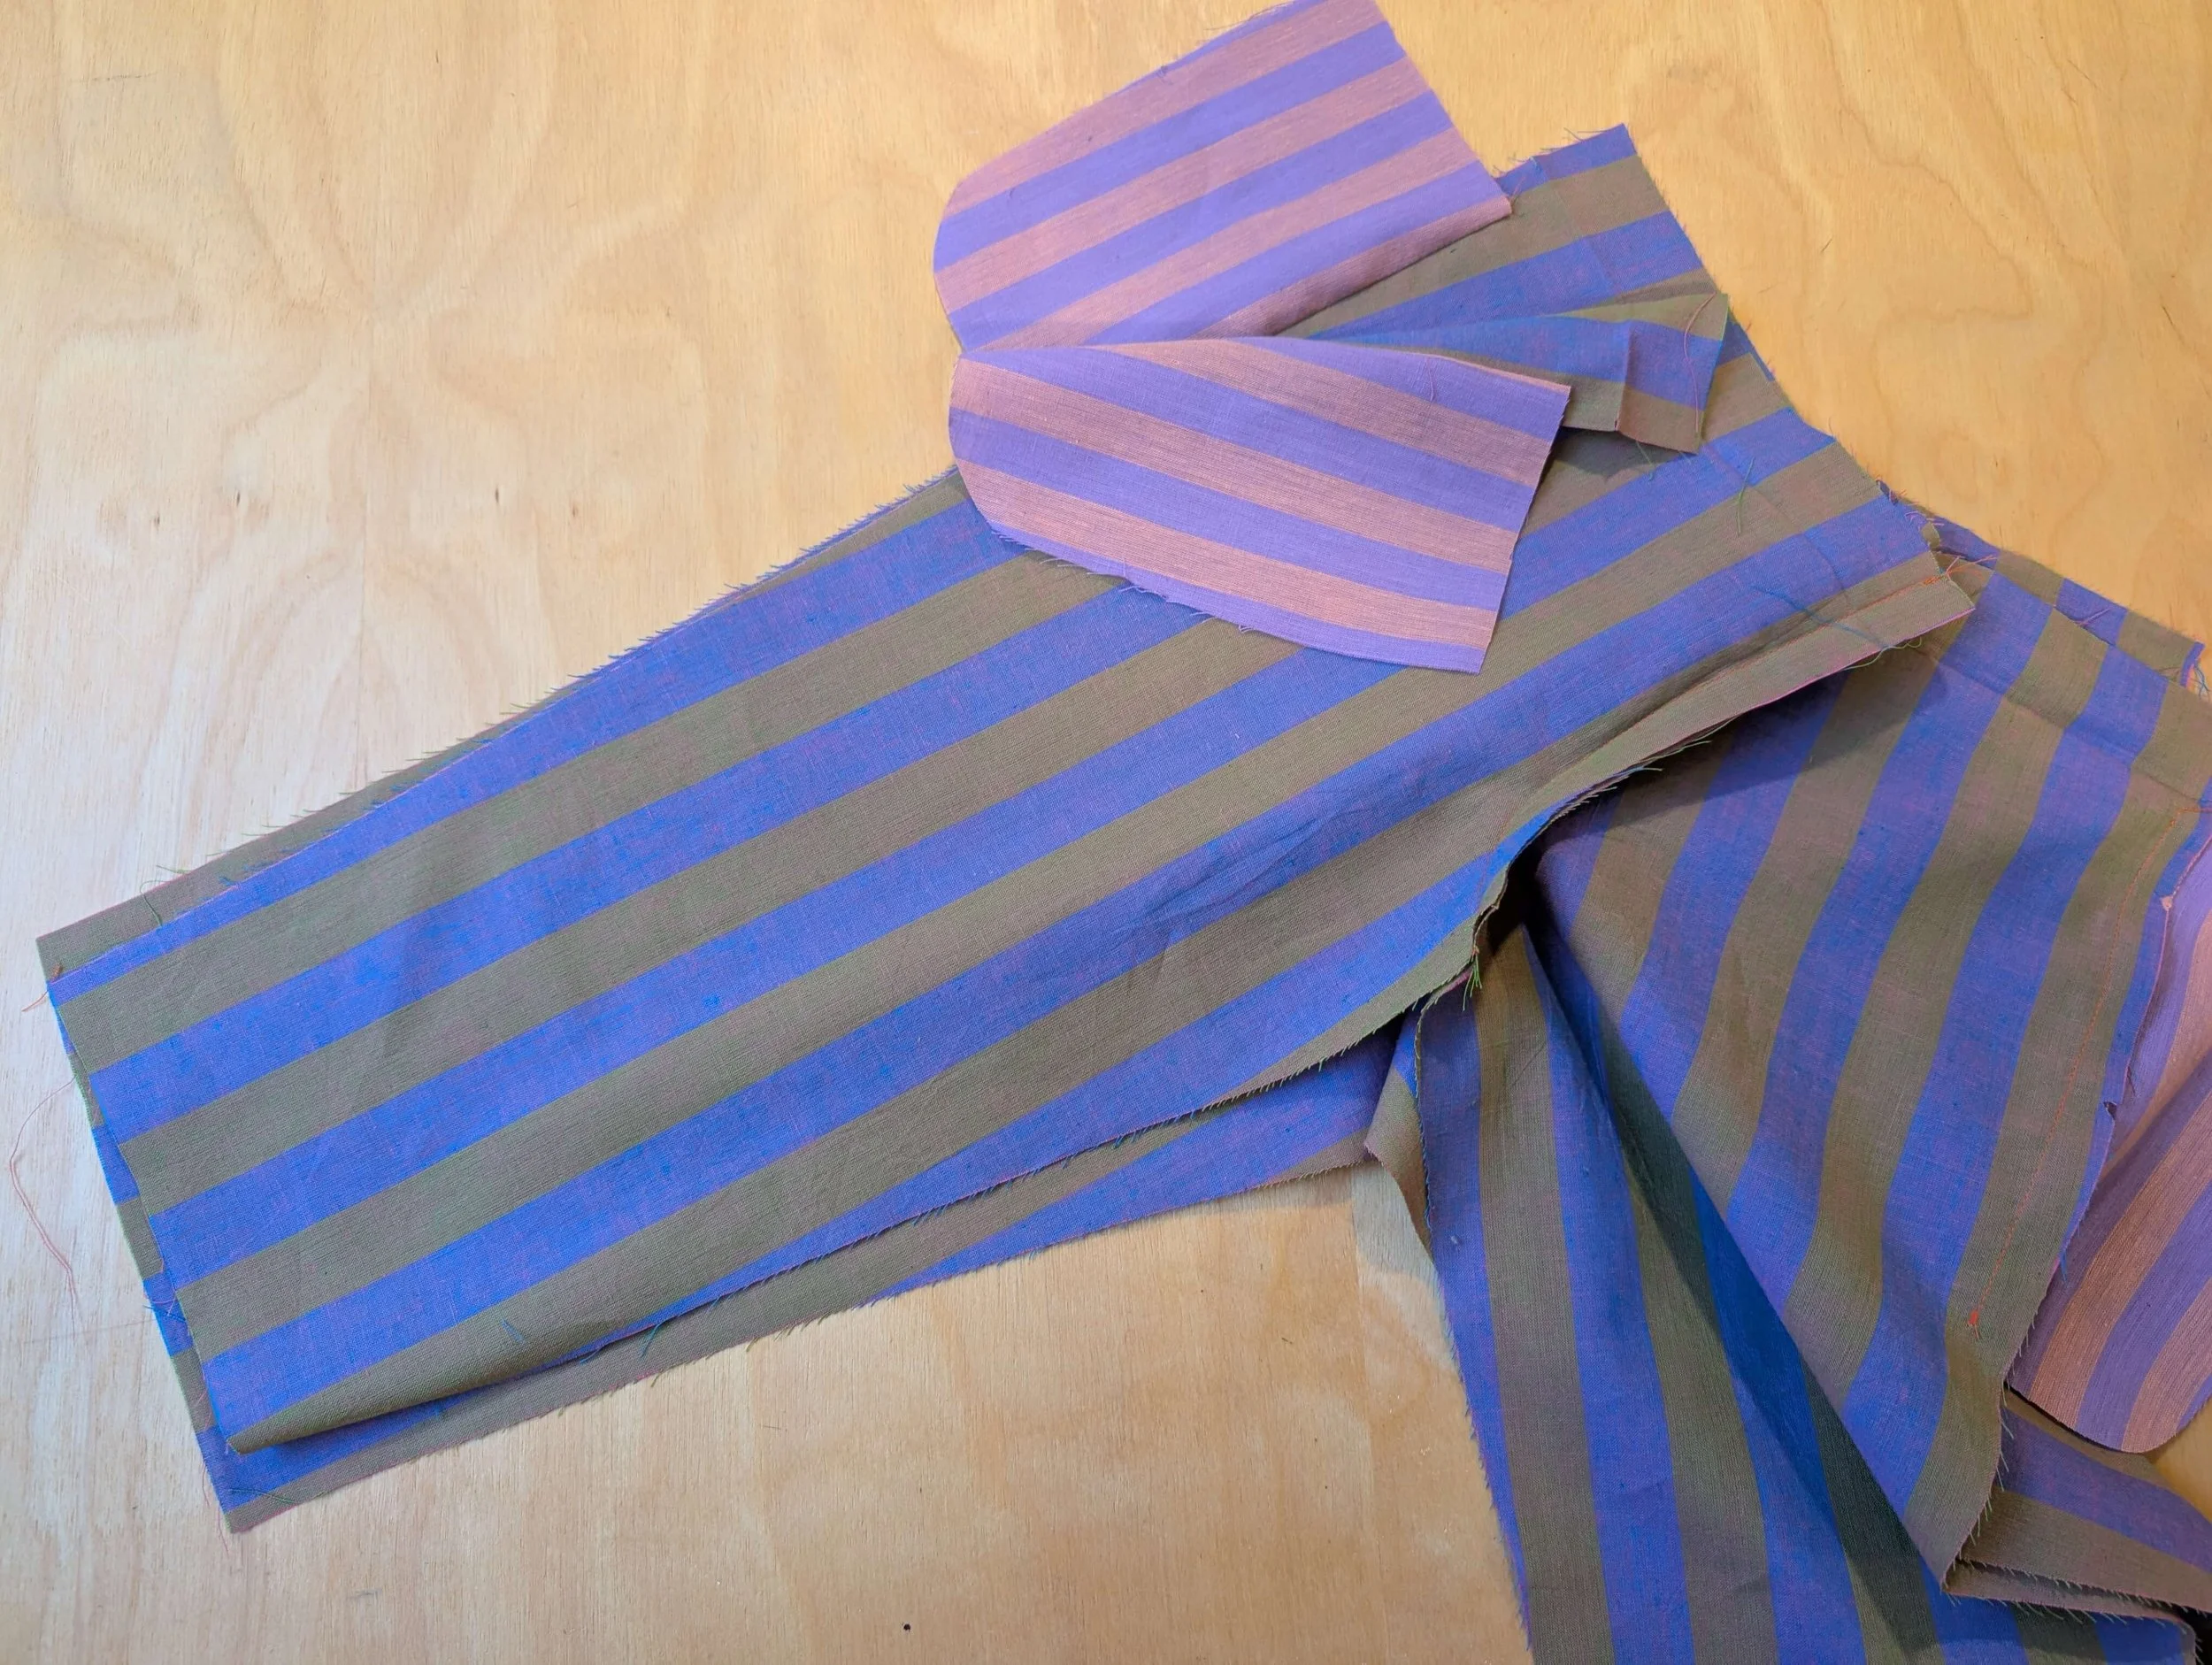
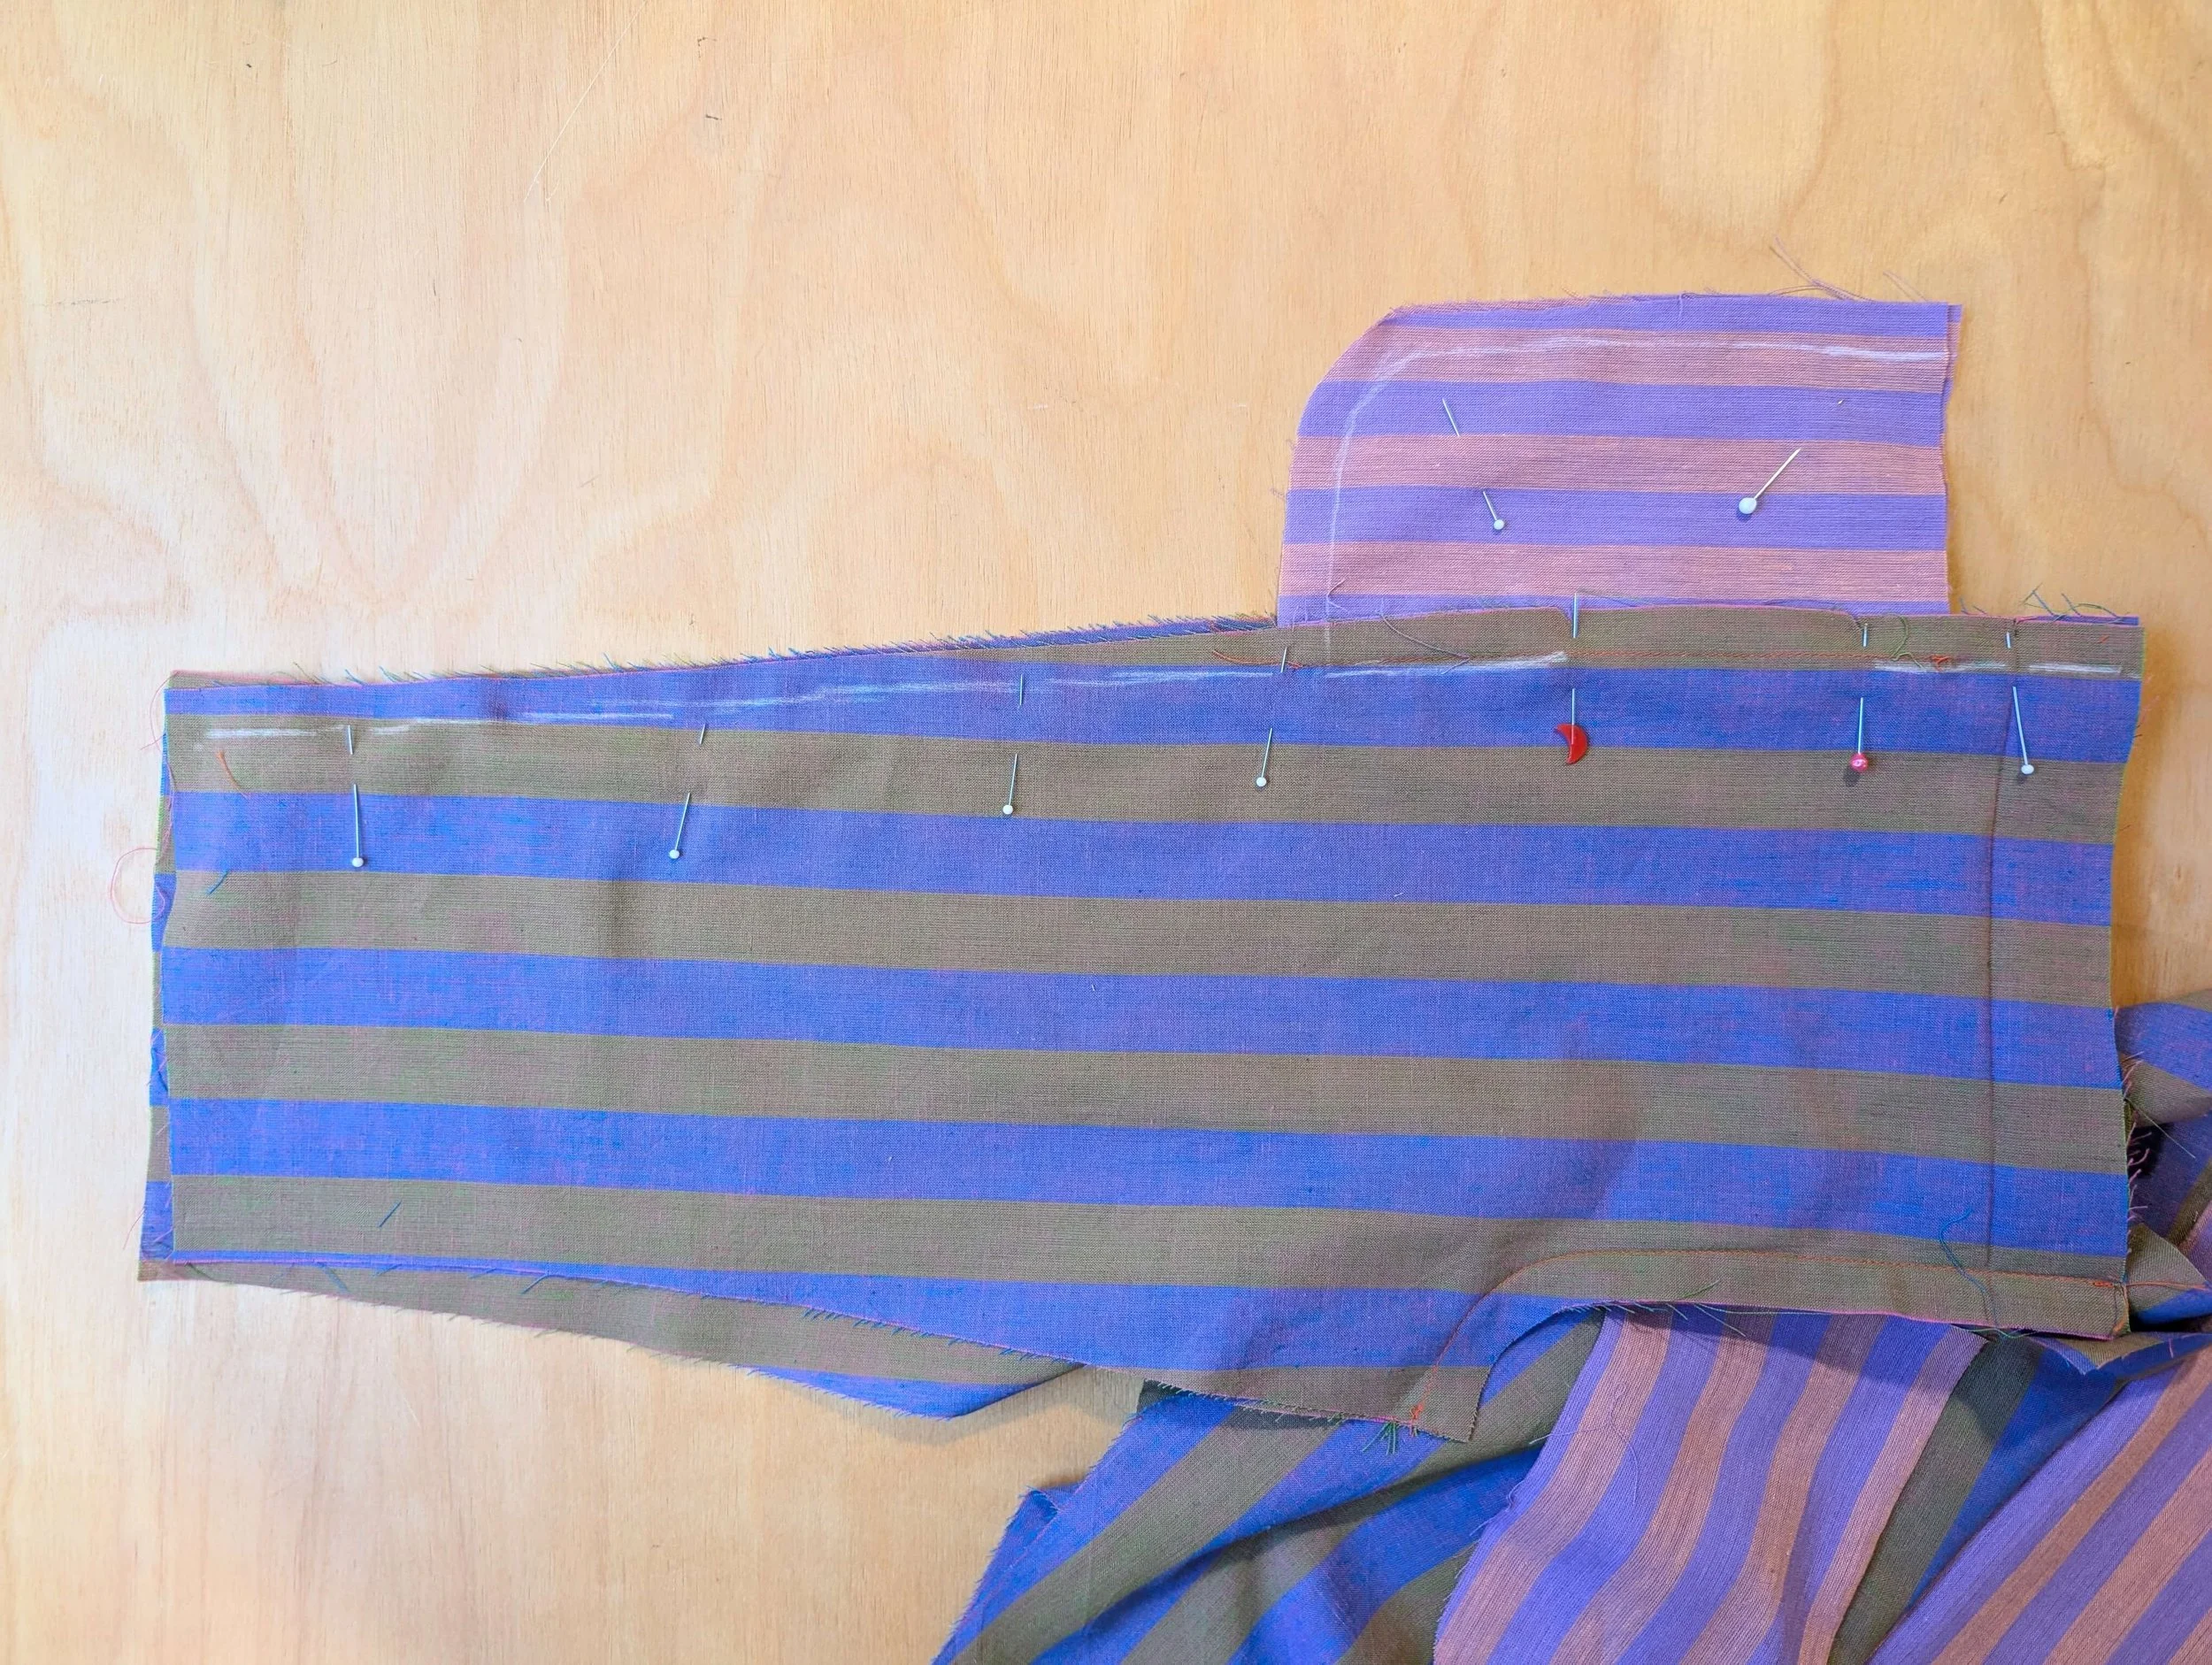
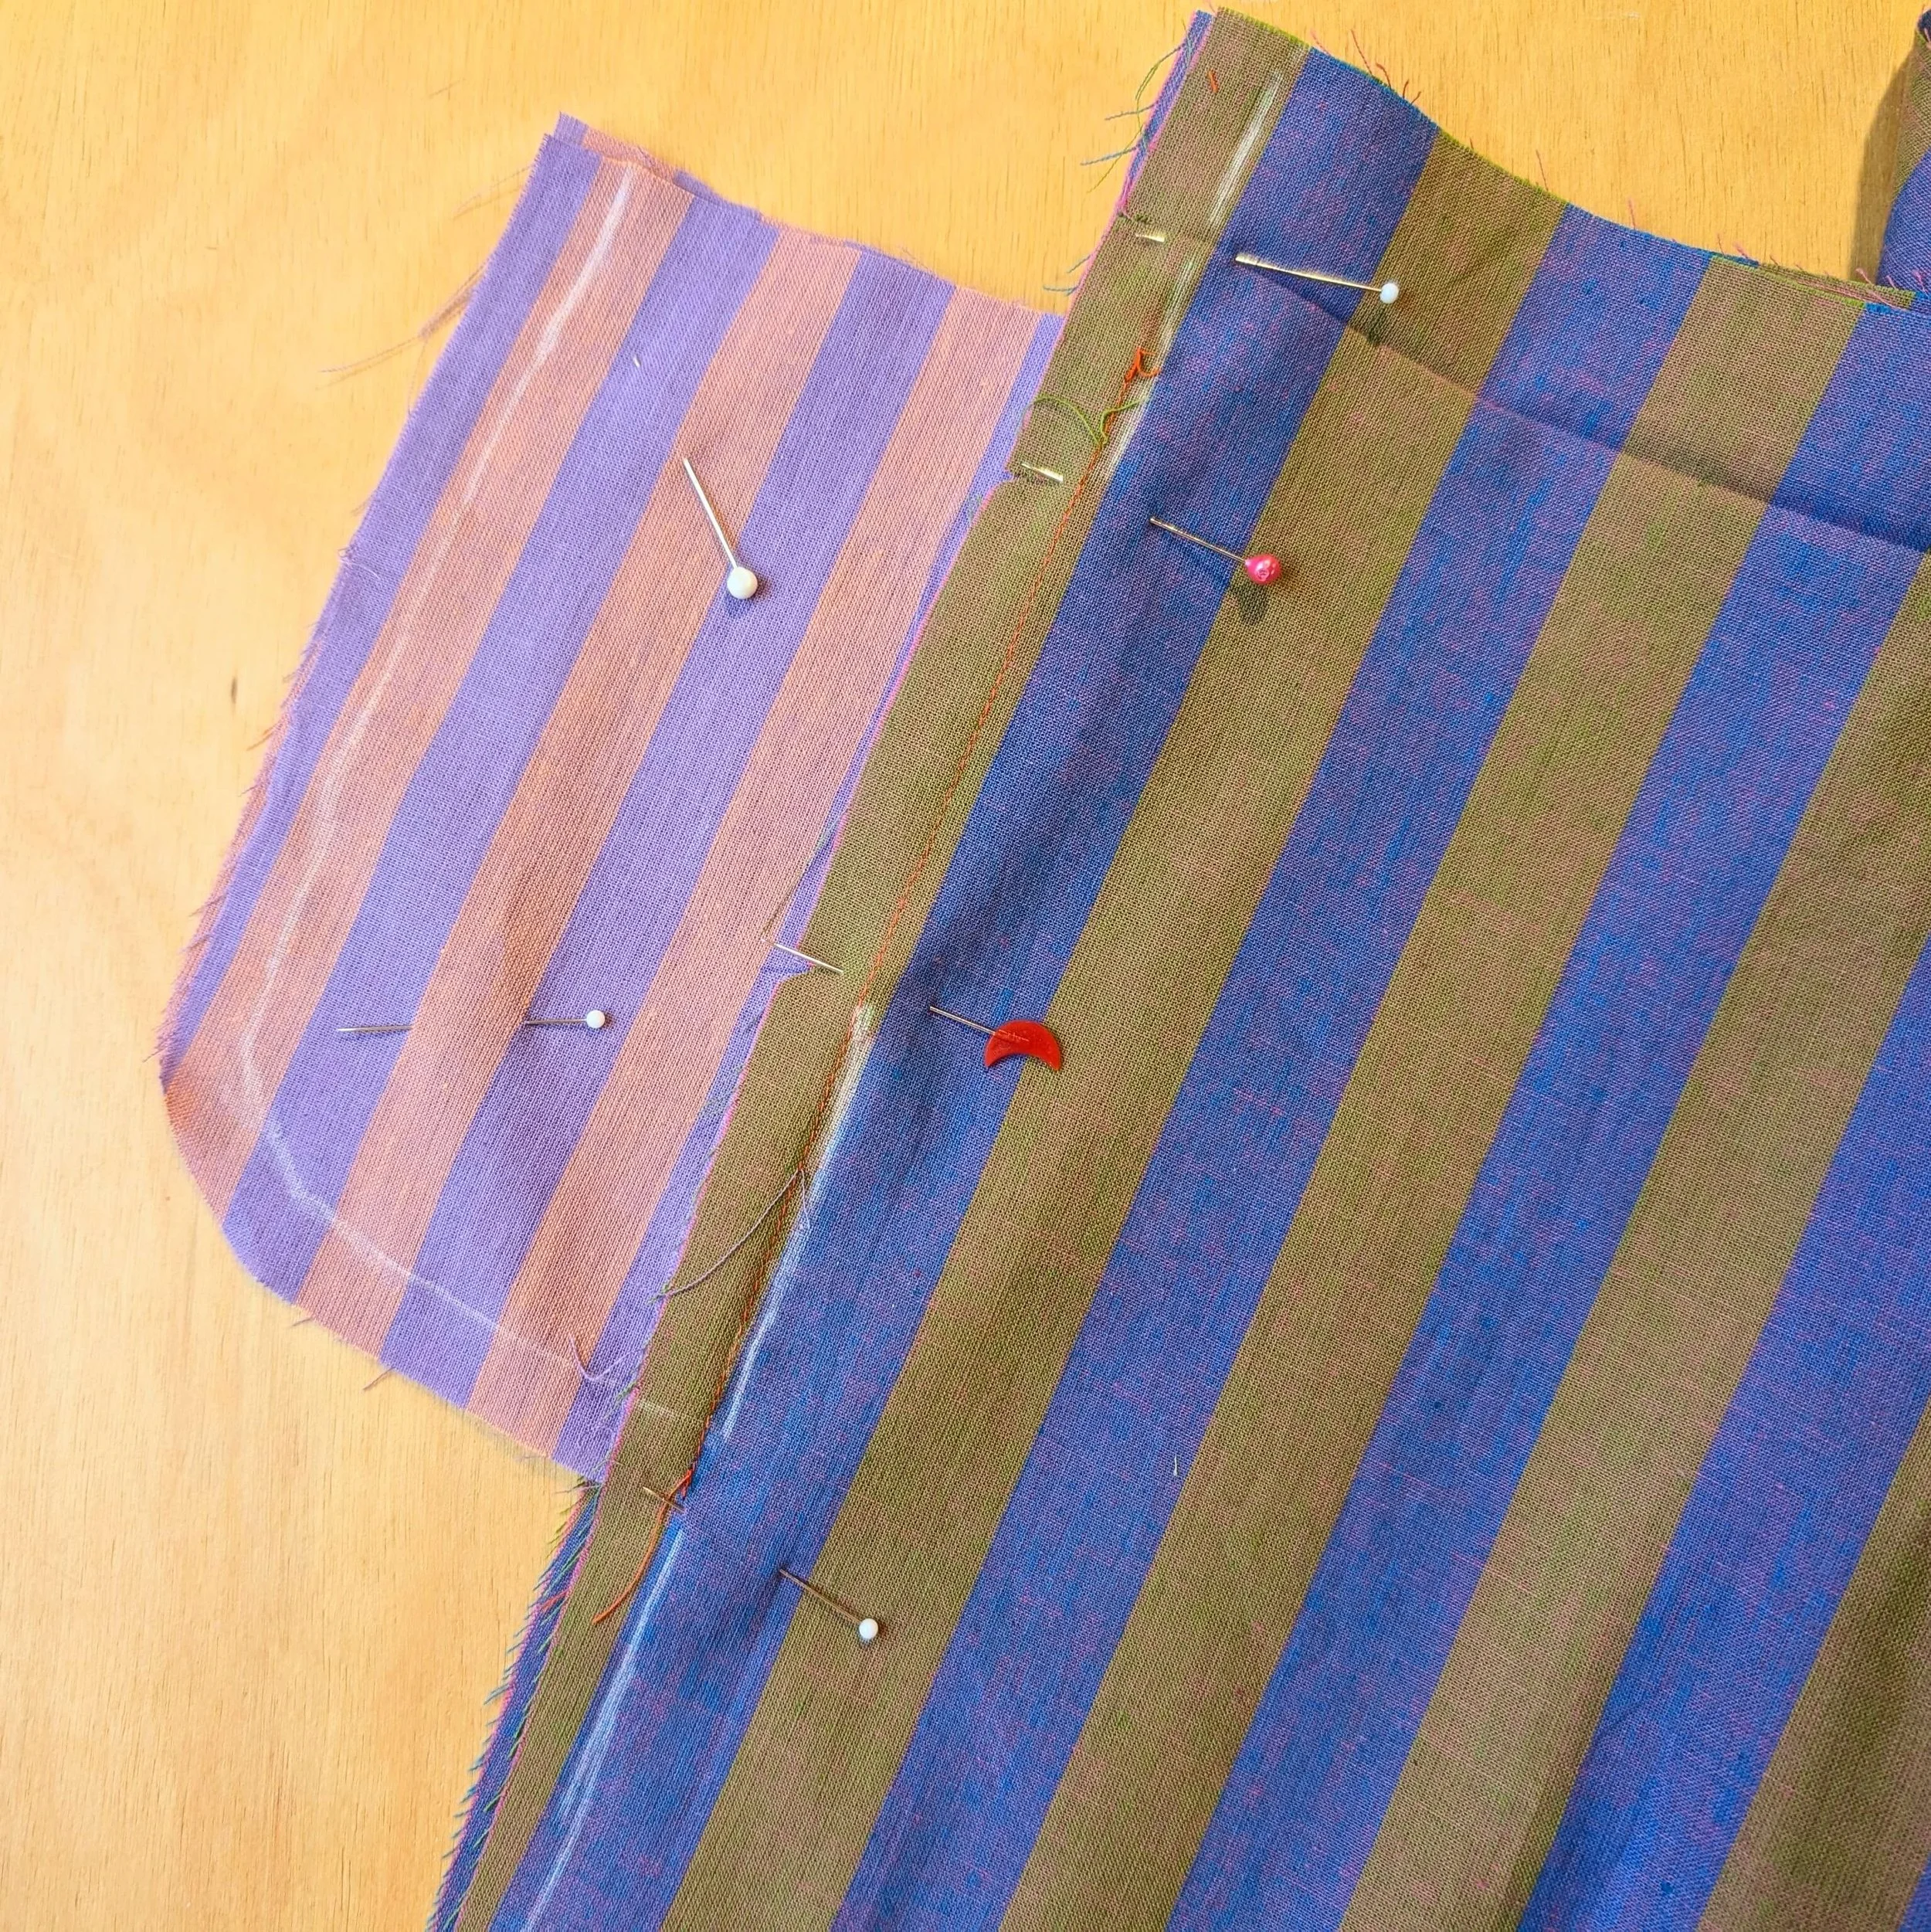
In the image above, the white chalk marks indicating where you should sew. Leave a gap for the pocket opening (shown here between the two red pins). The red stitching shown is from the previous step where the pockets were attached.
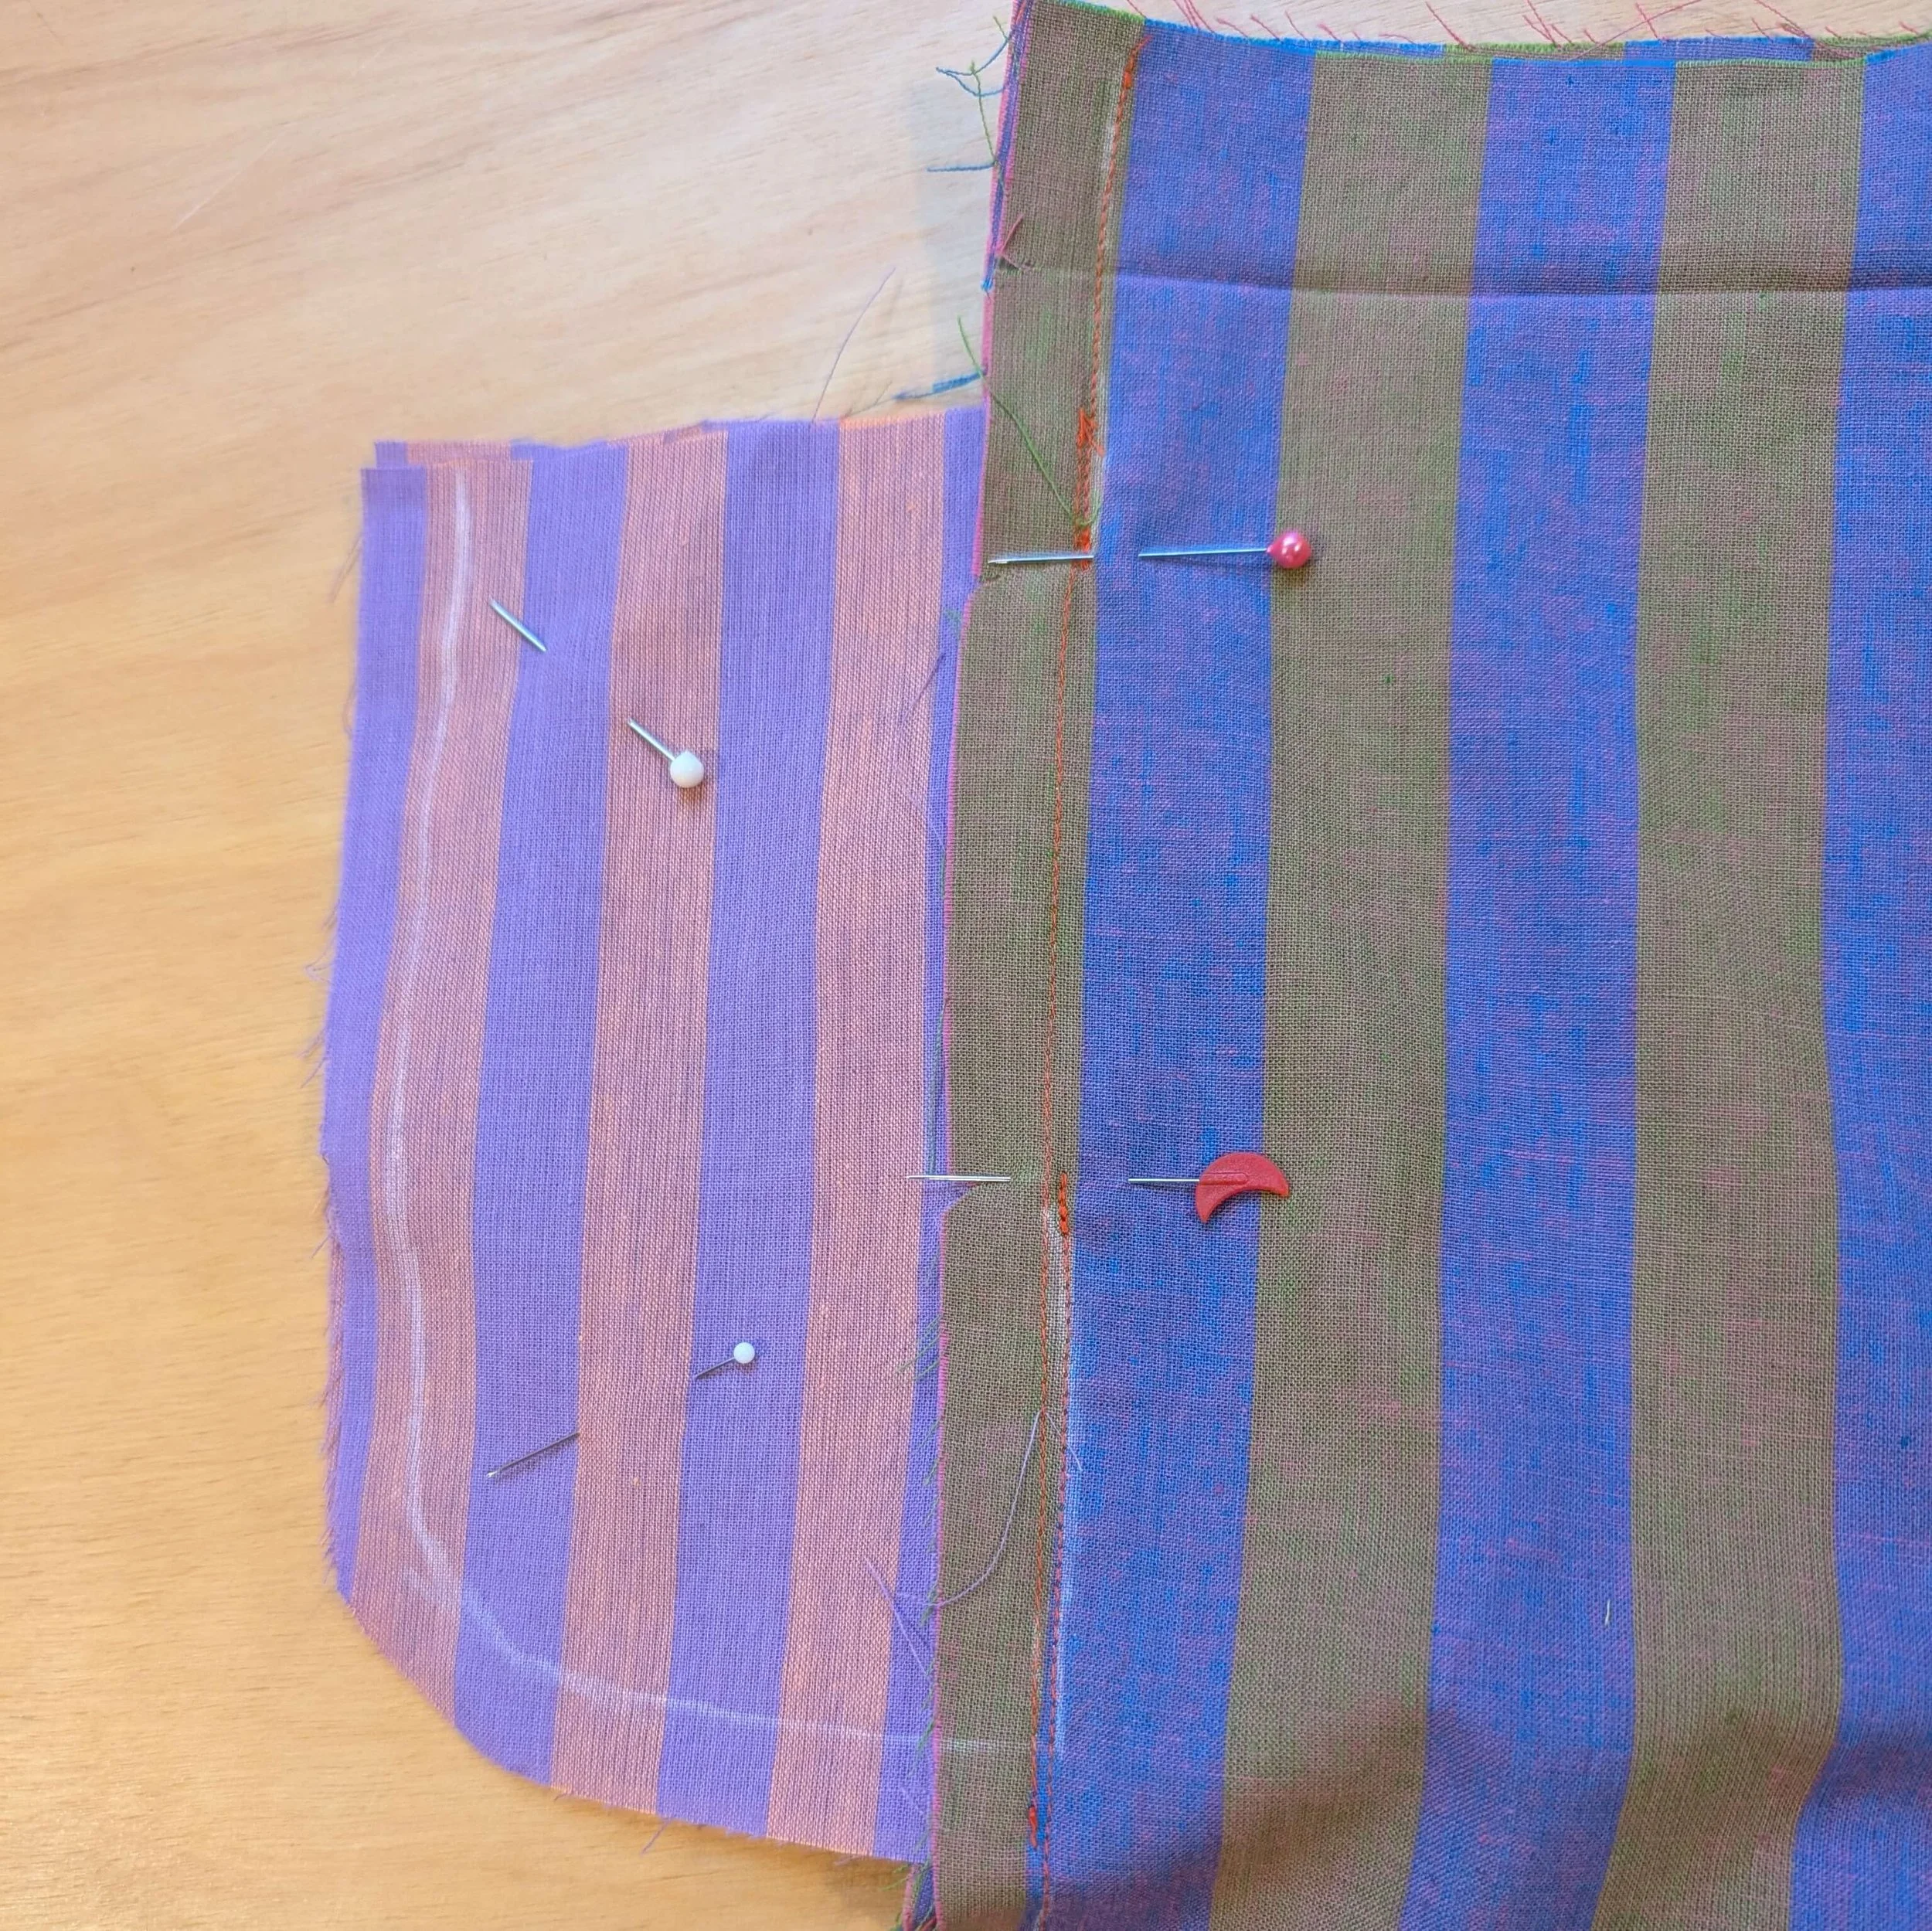
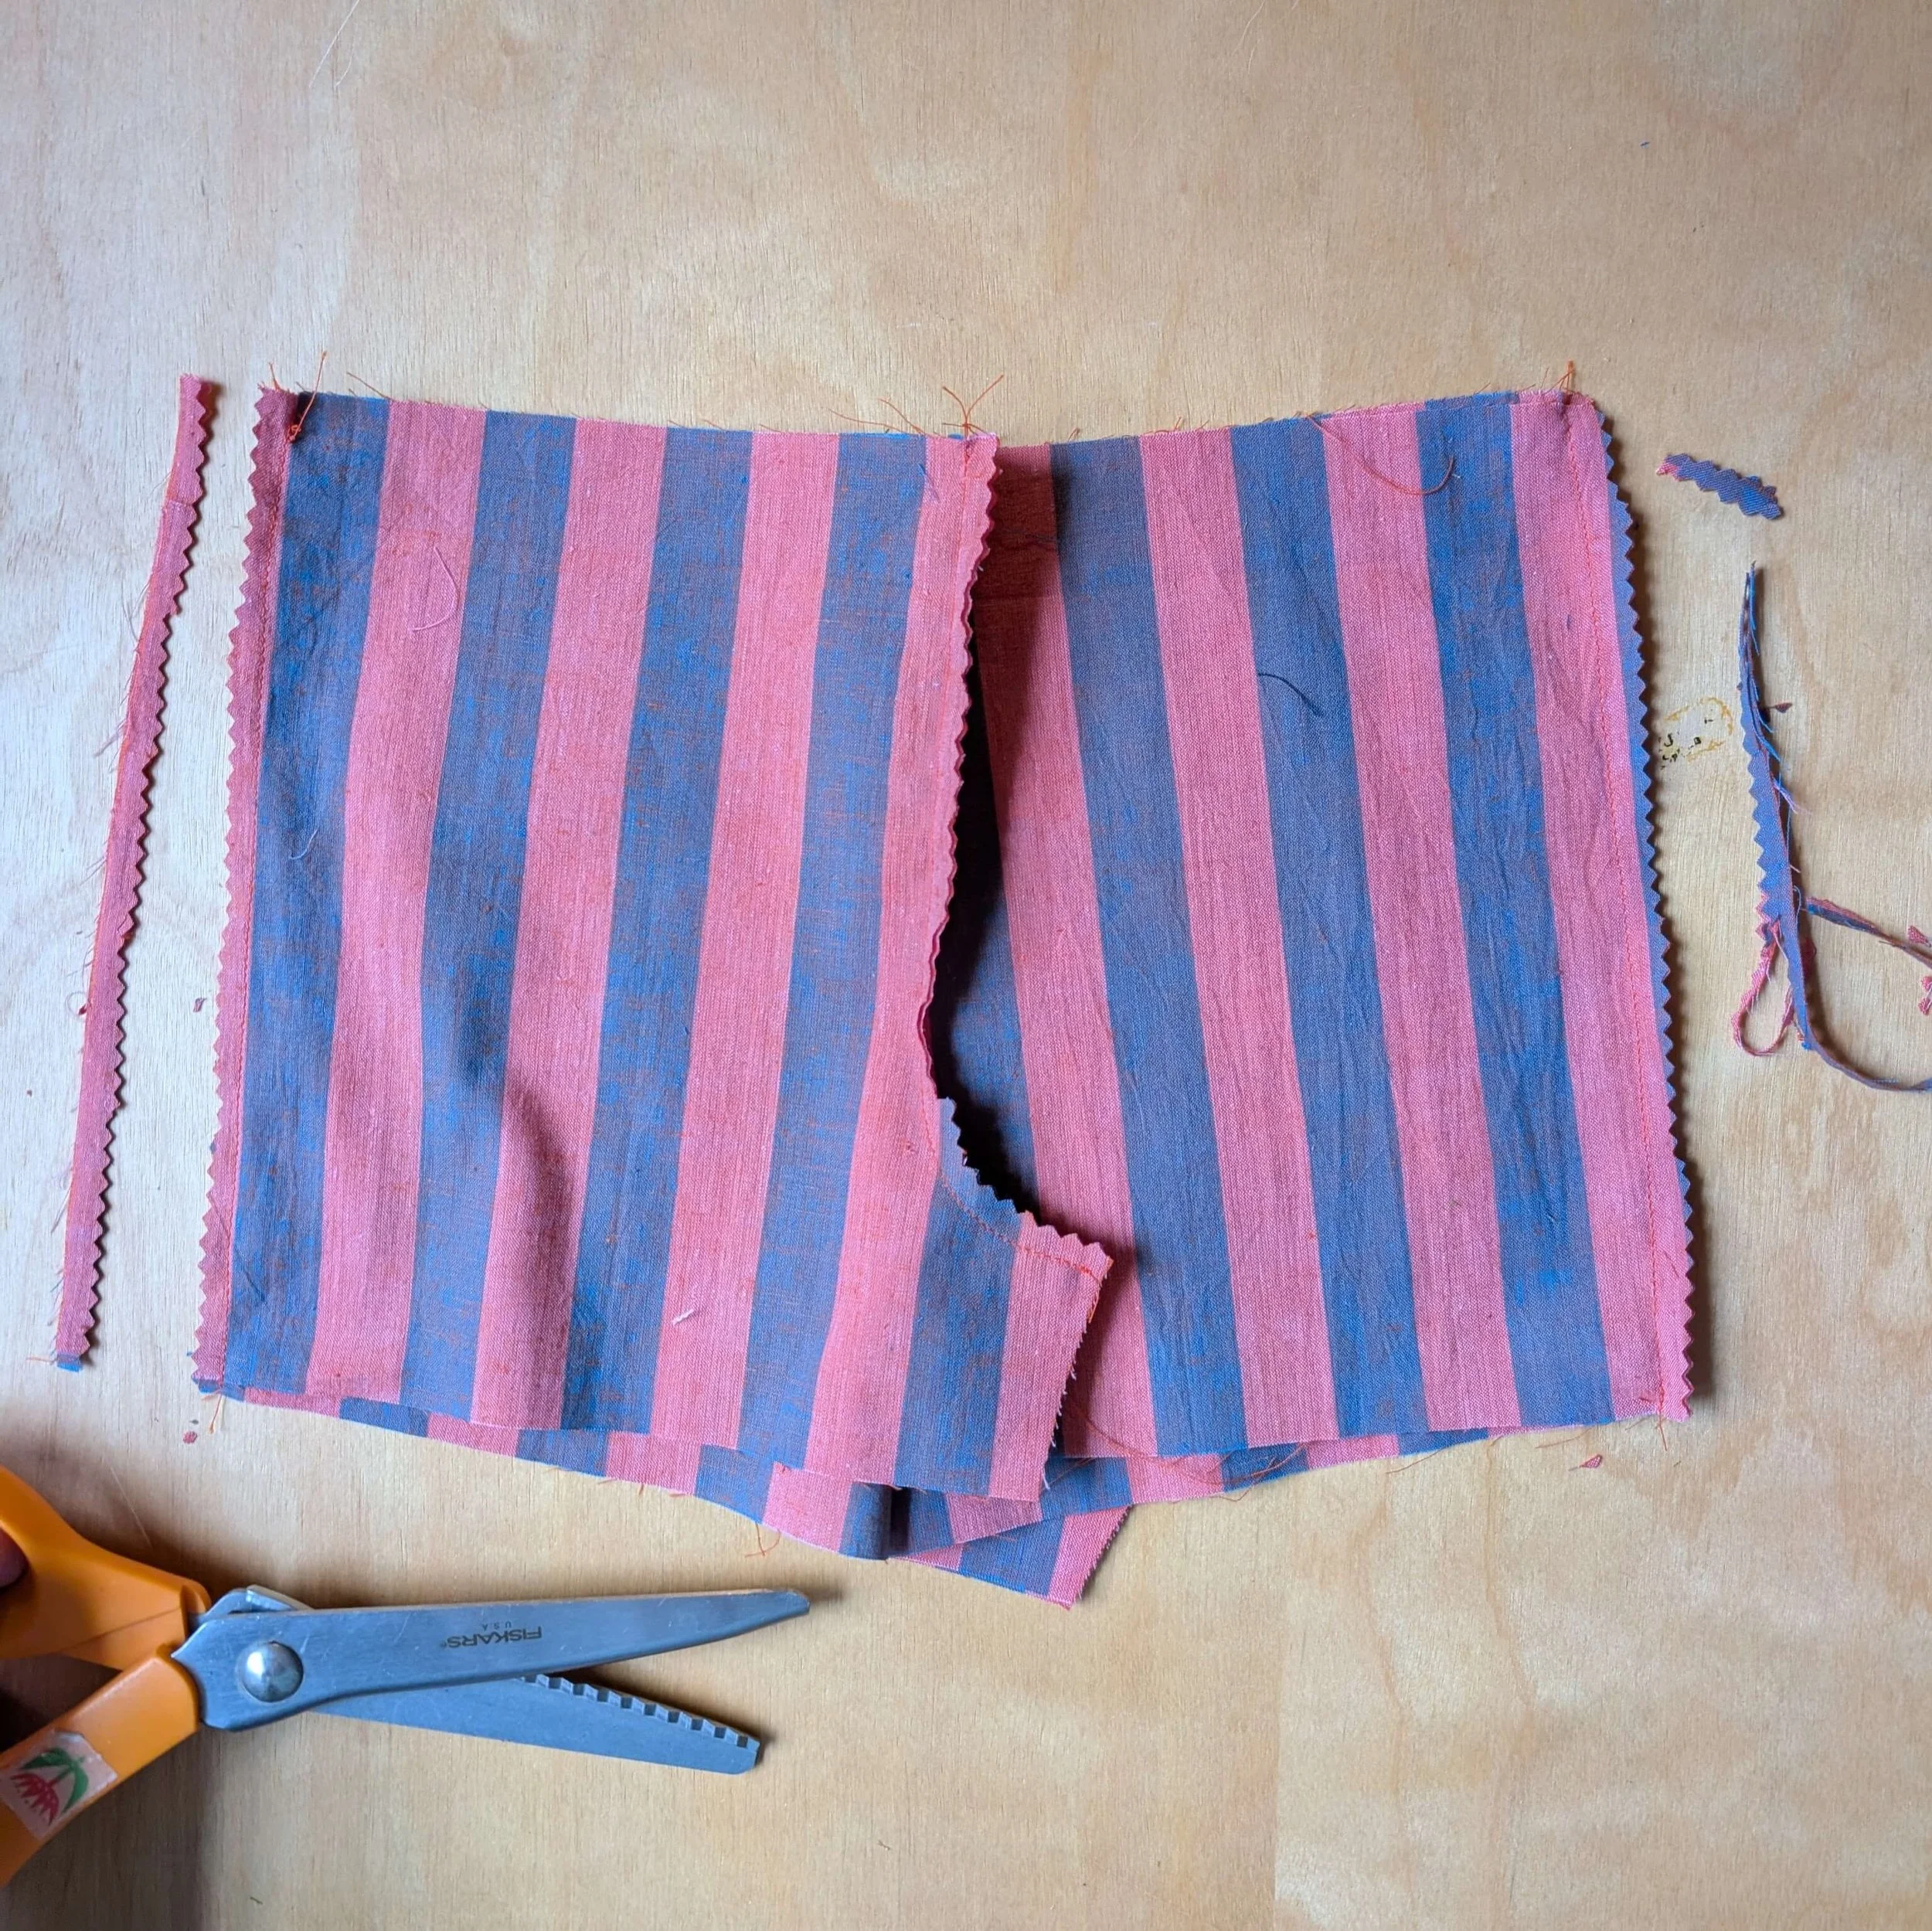
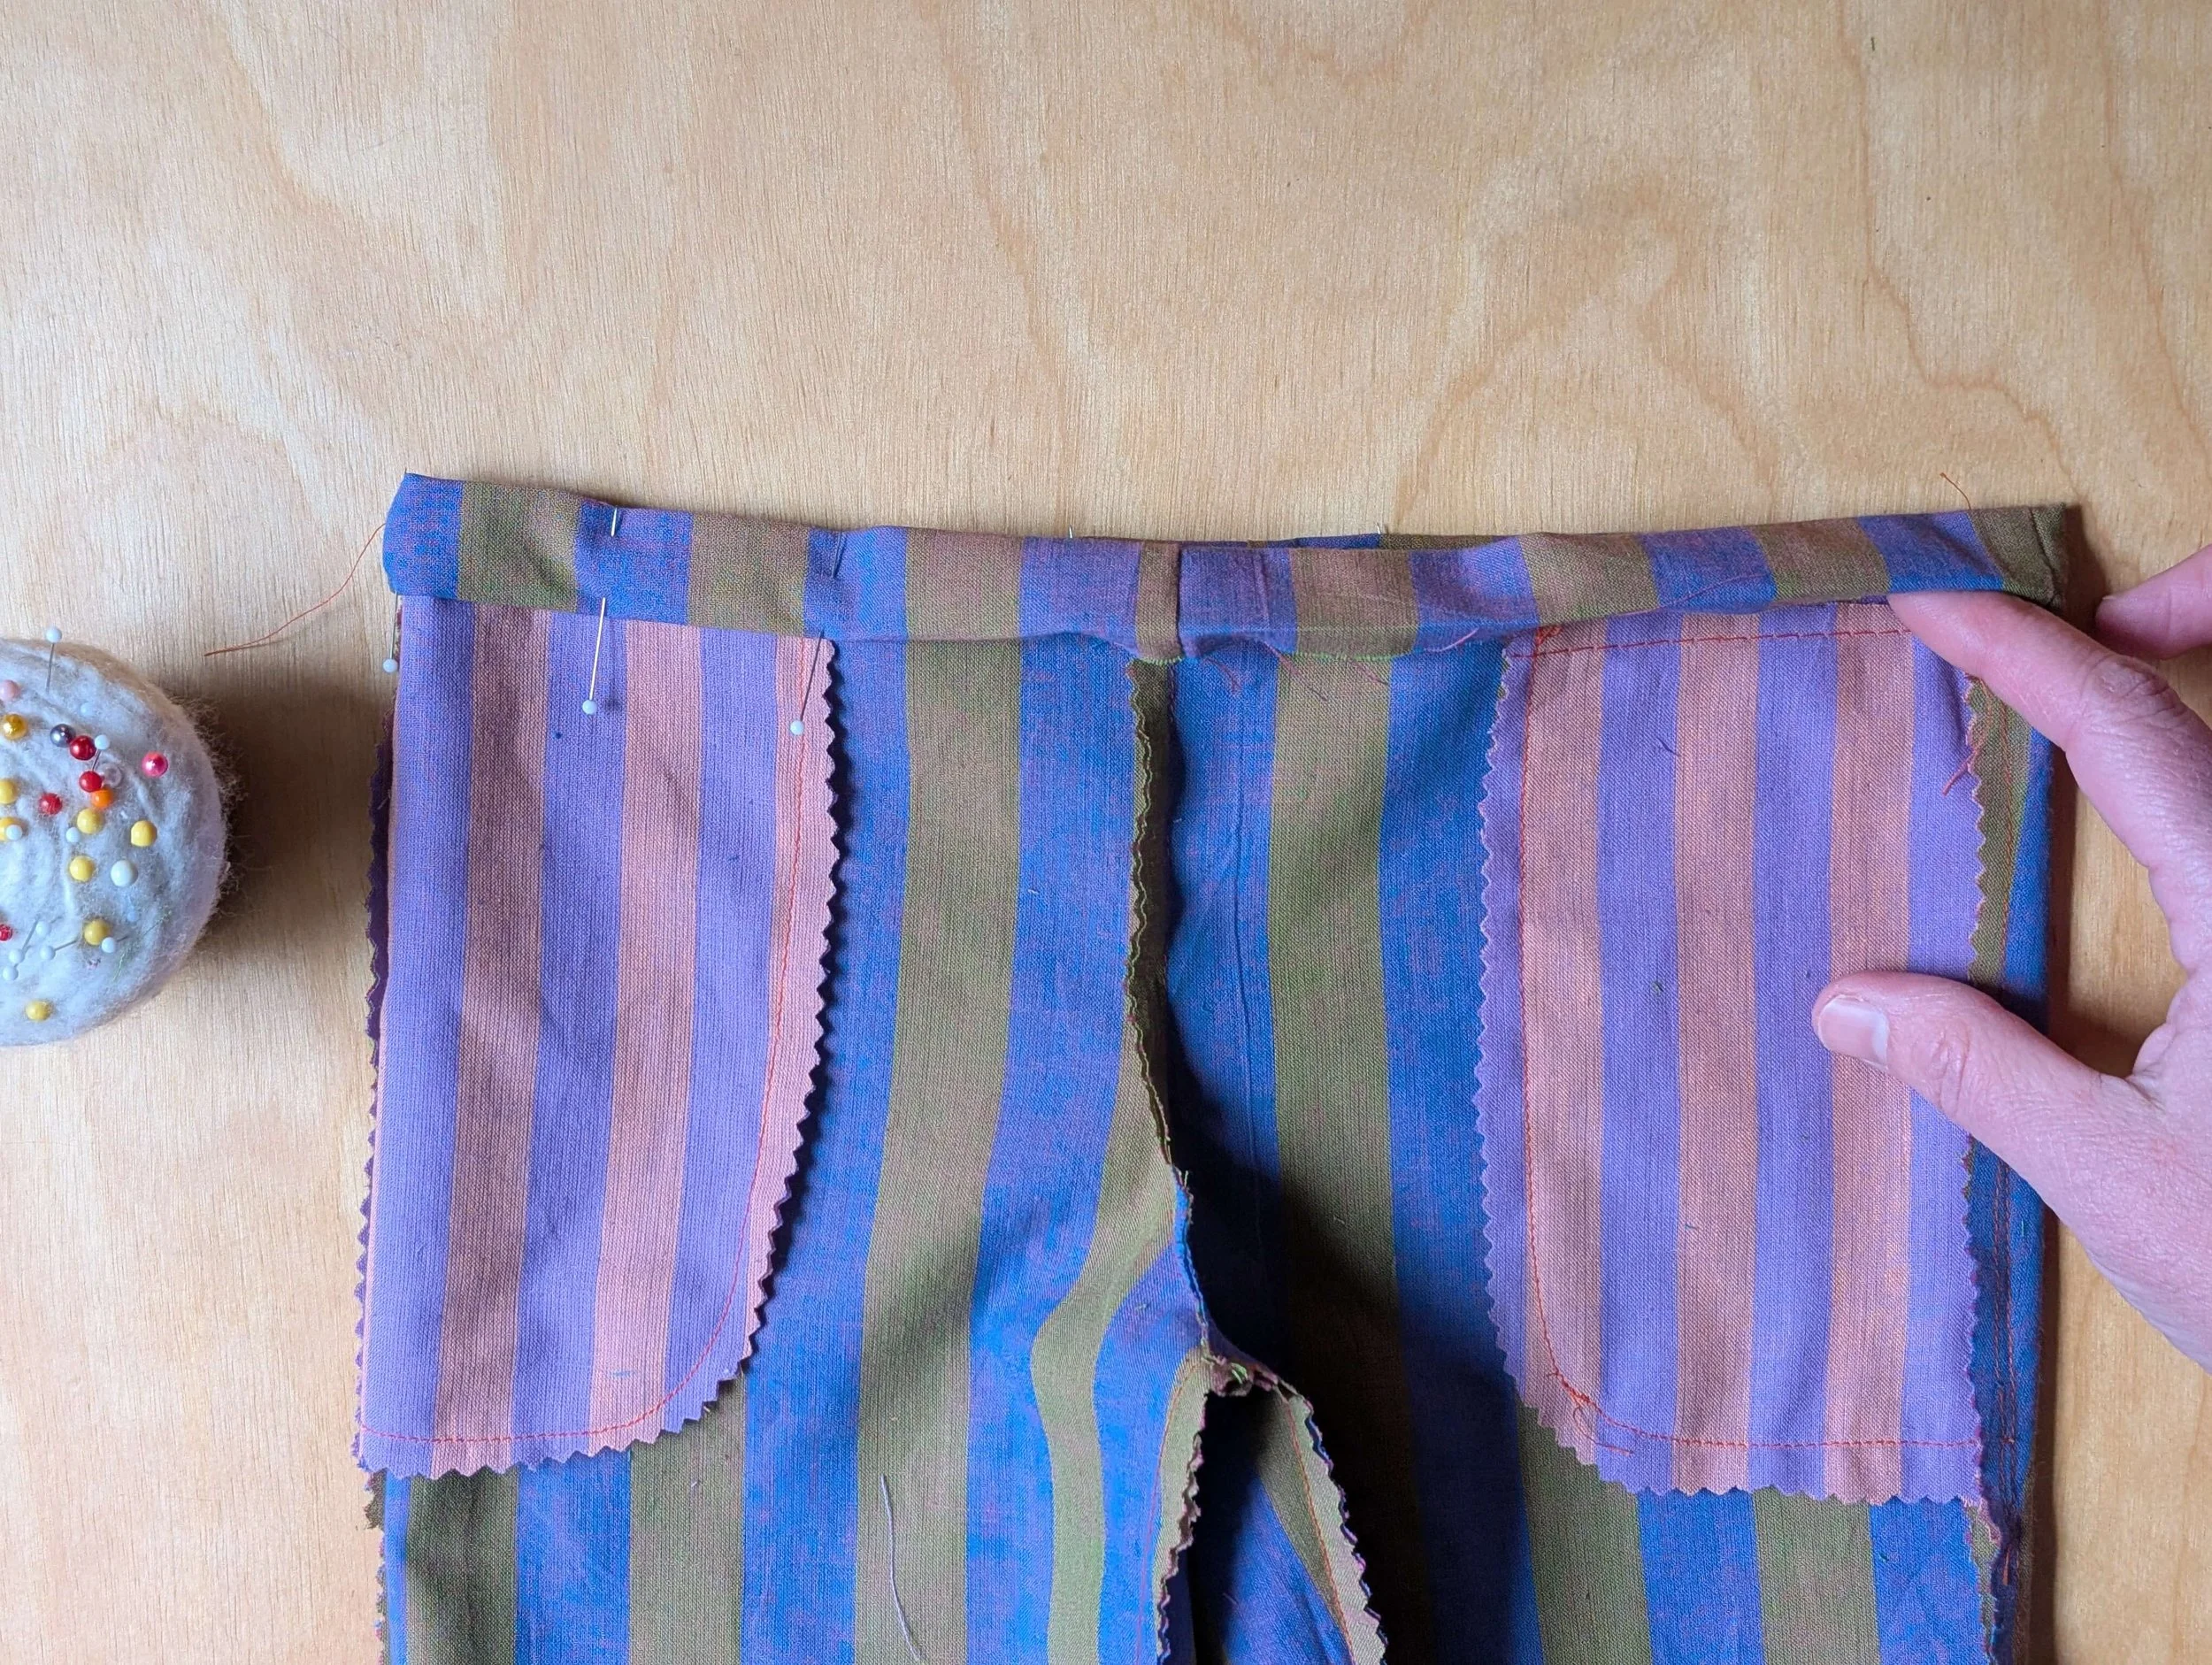
In this photo, the side seams have been sewn. Next the pocket curves must be sewn together.
Beginning at the side seams, sew the pockets together along the curved edges only.
hint: before sewing inseams, open each leg and compare the width of the cuff pieces to the width of the pant/shorts leg to make sure they are the same length. Adjust width of cuff piece if necessary.
STEP 4. Sew inseams
Sew the front and back together along the inseams, matching the center seams. Press seams toward back of garment.
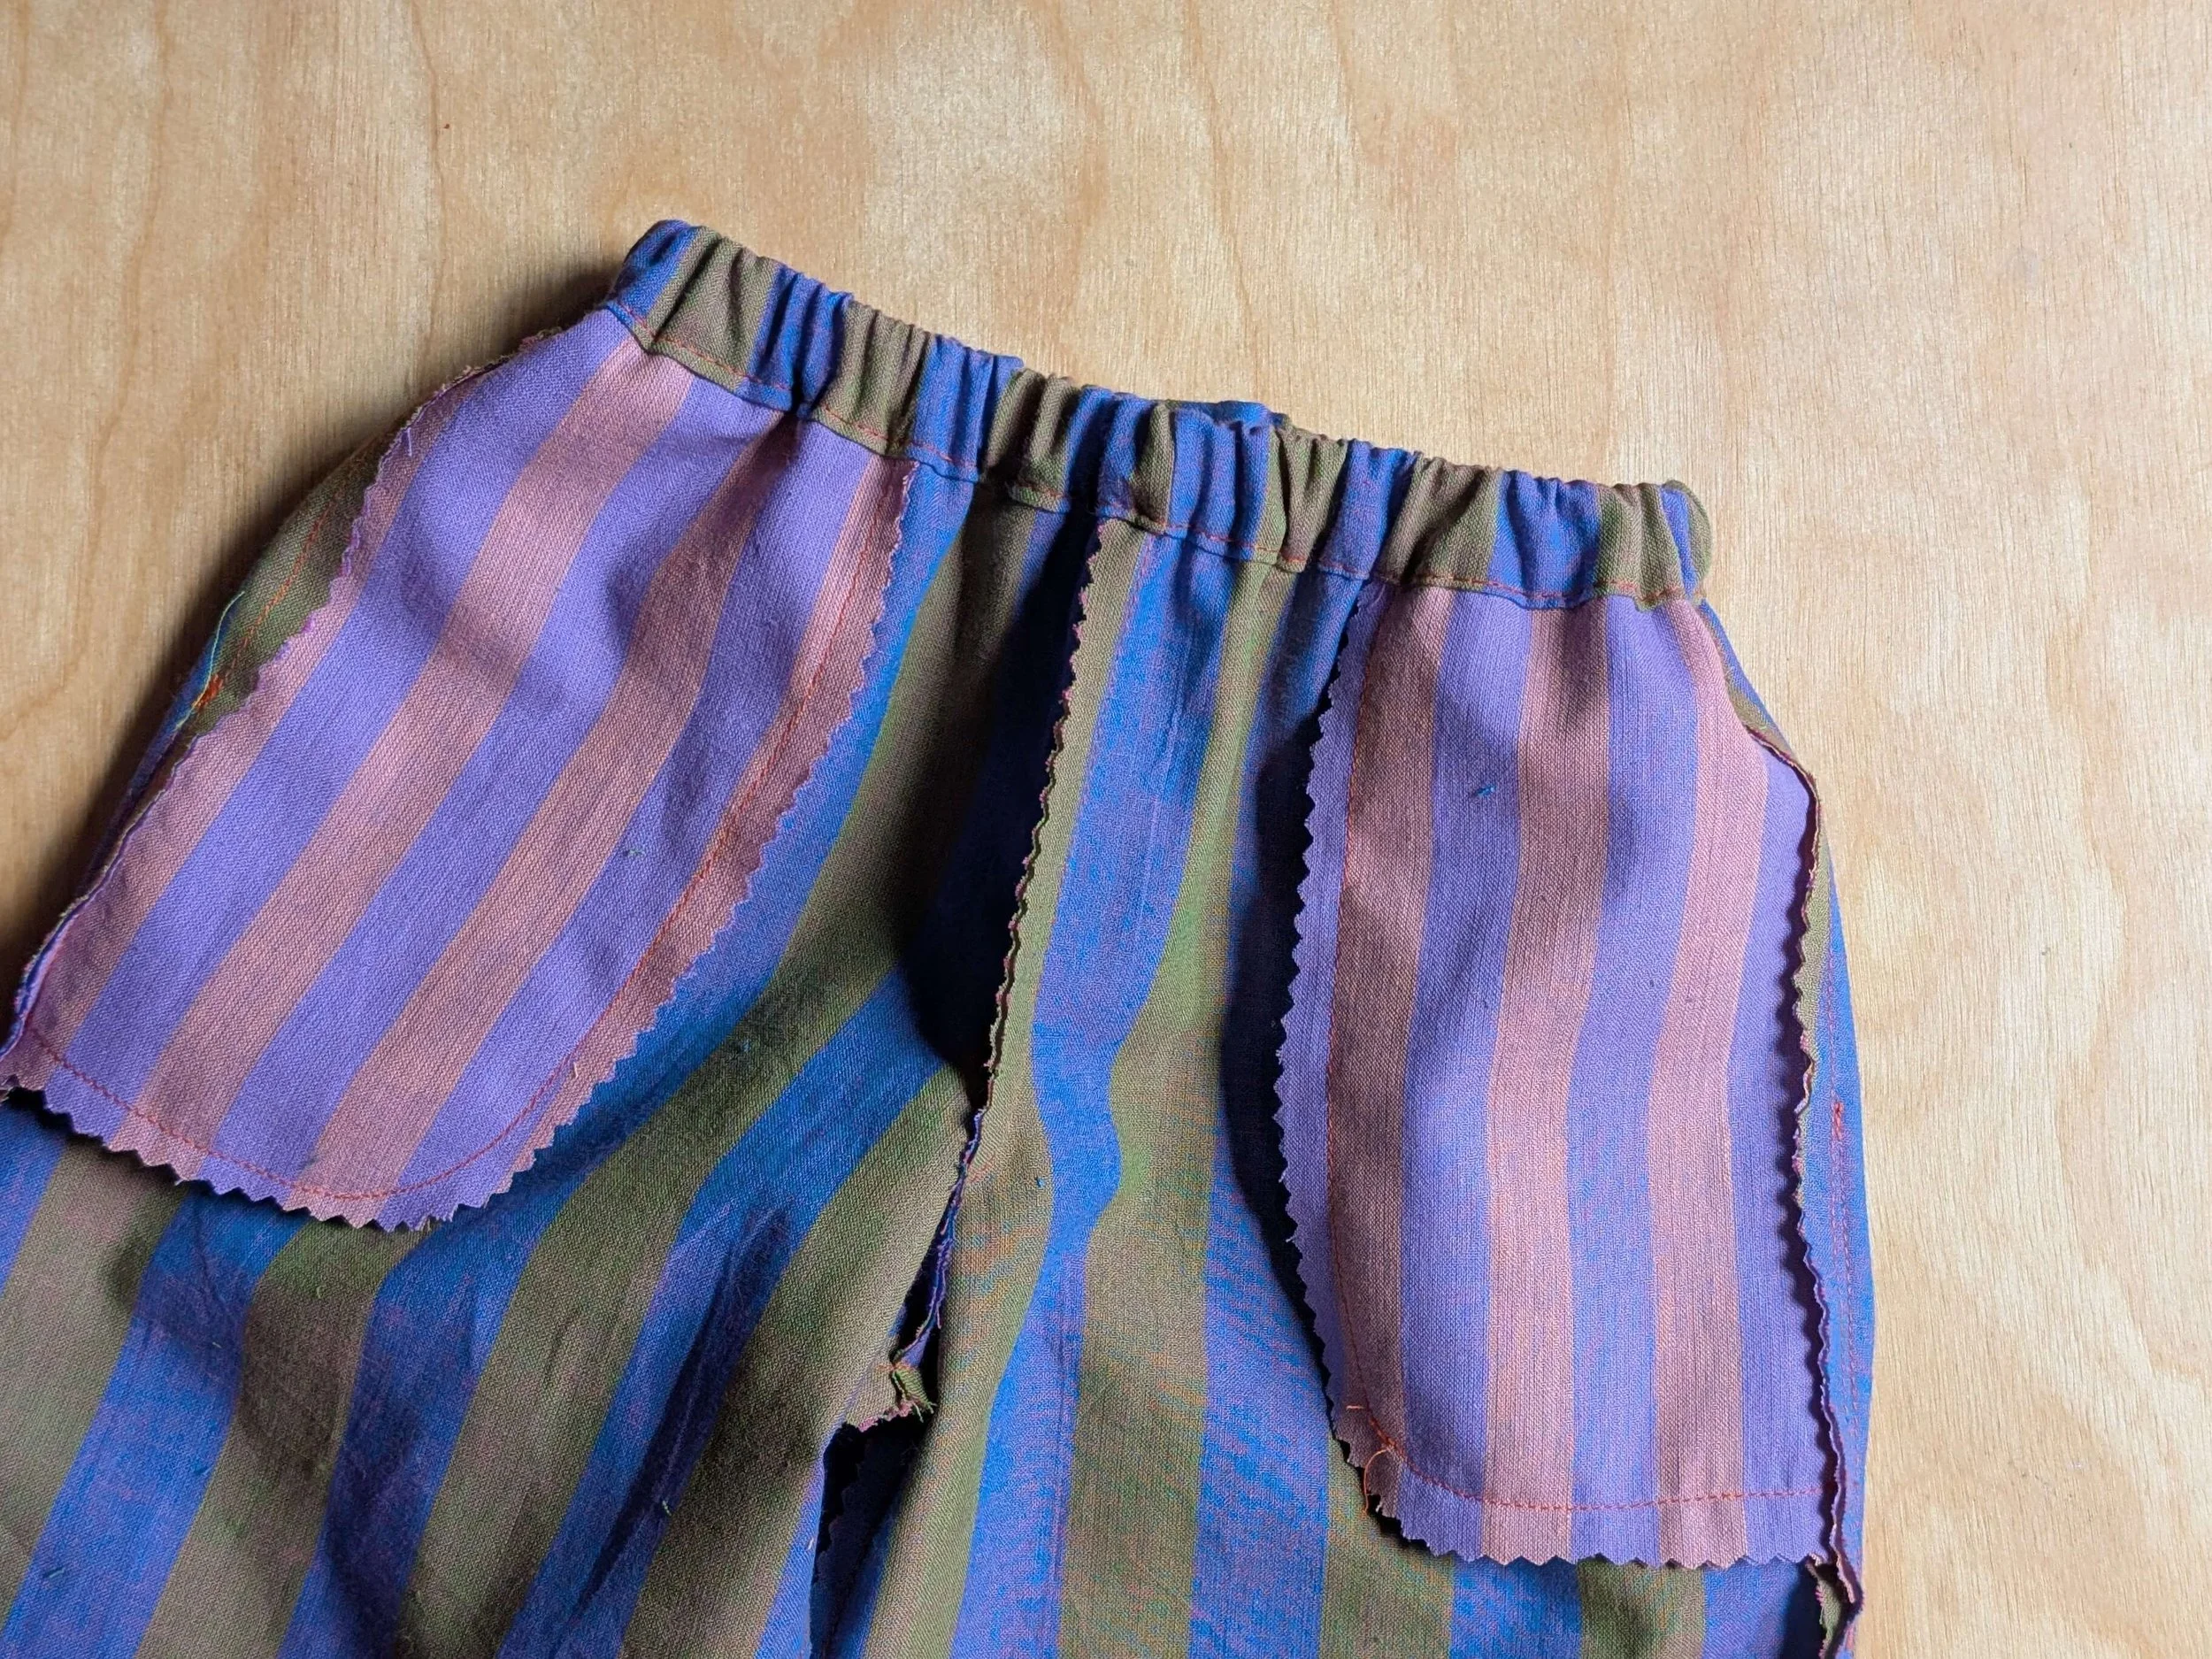
Press the pockets and side seam allowances toward the front. Baste or pin pockets in place, keeping the top edge of the pocket parallel to the top of the garment.
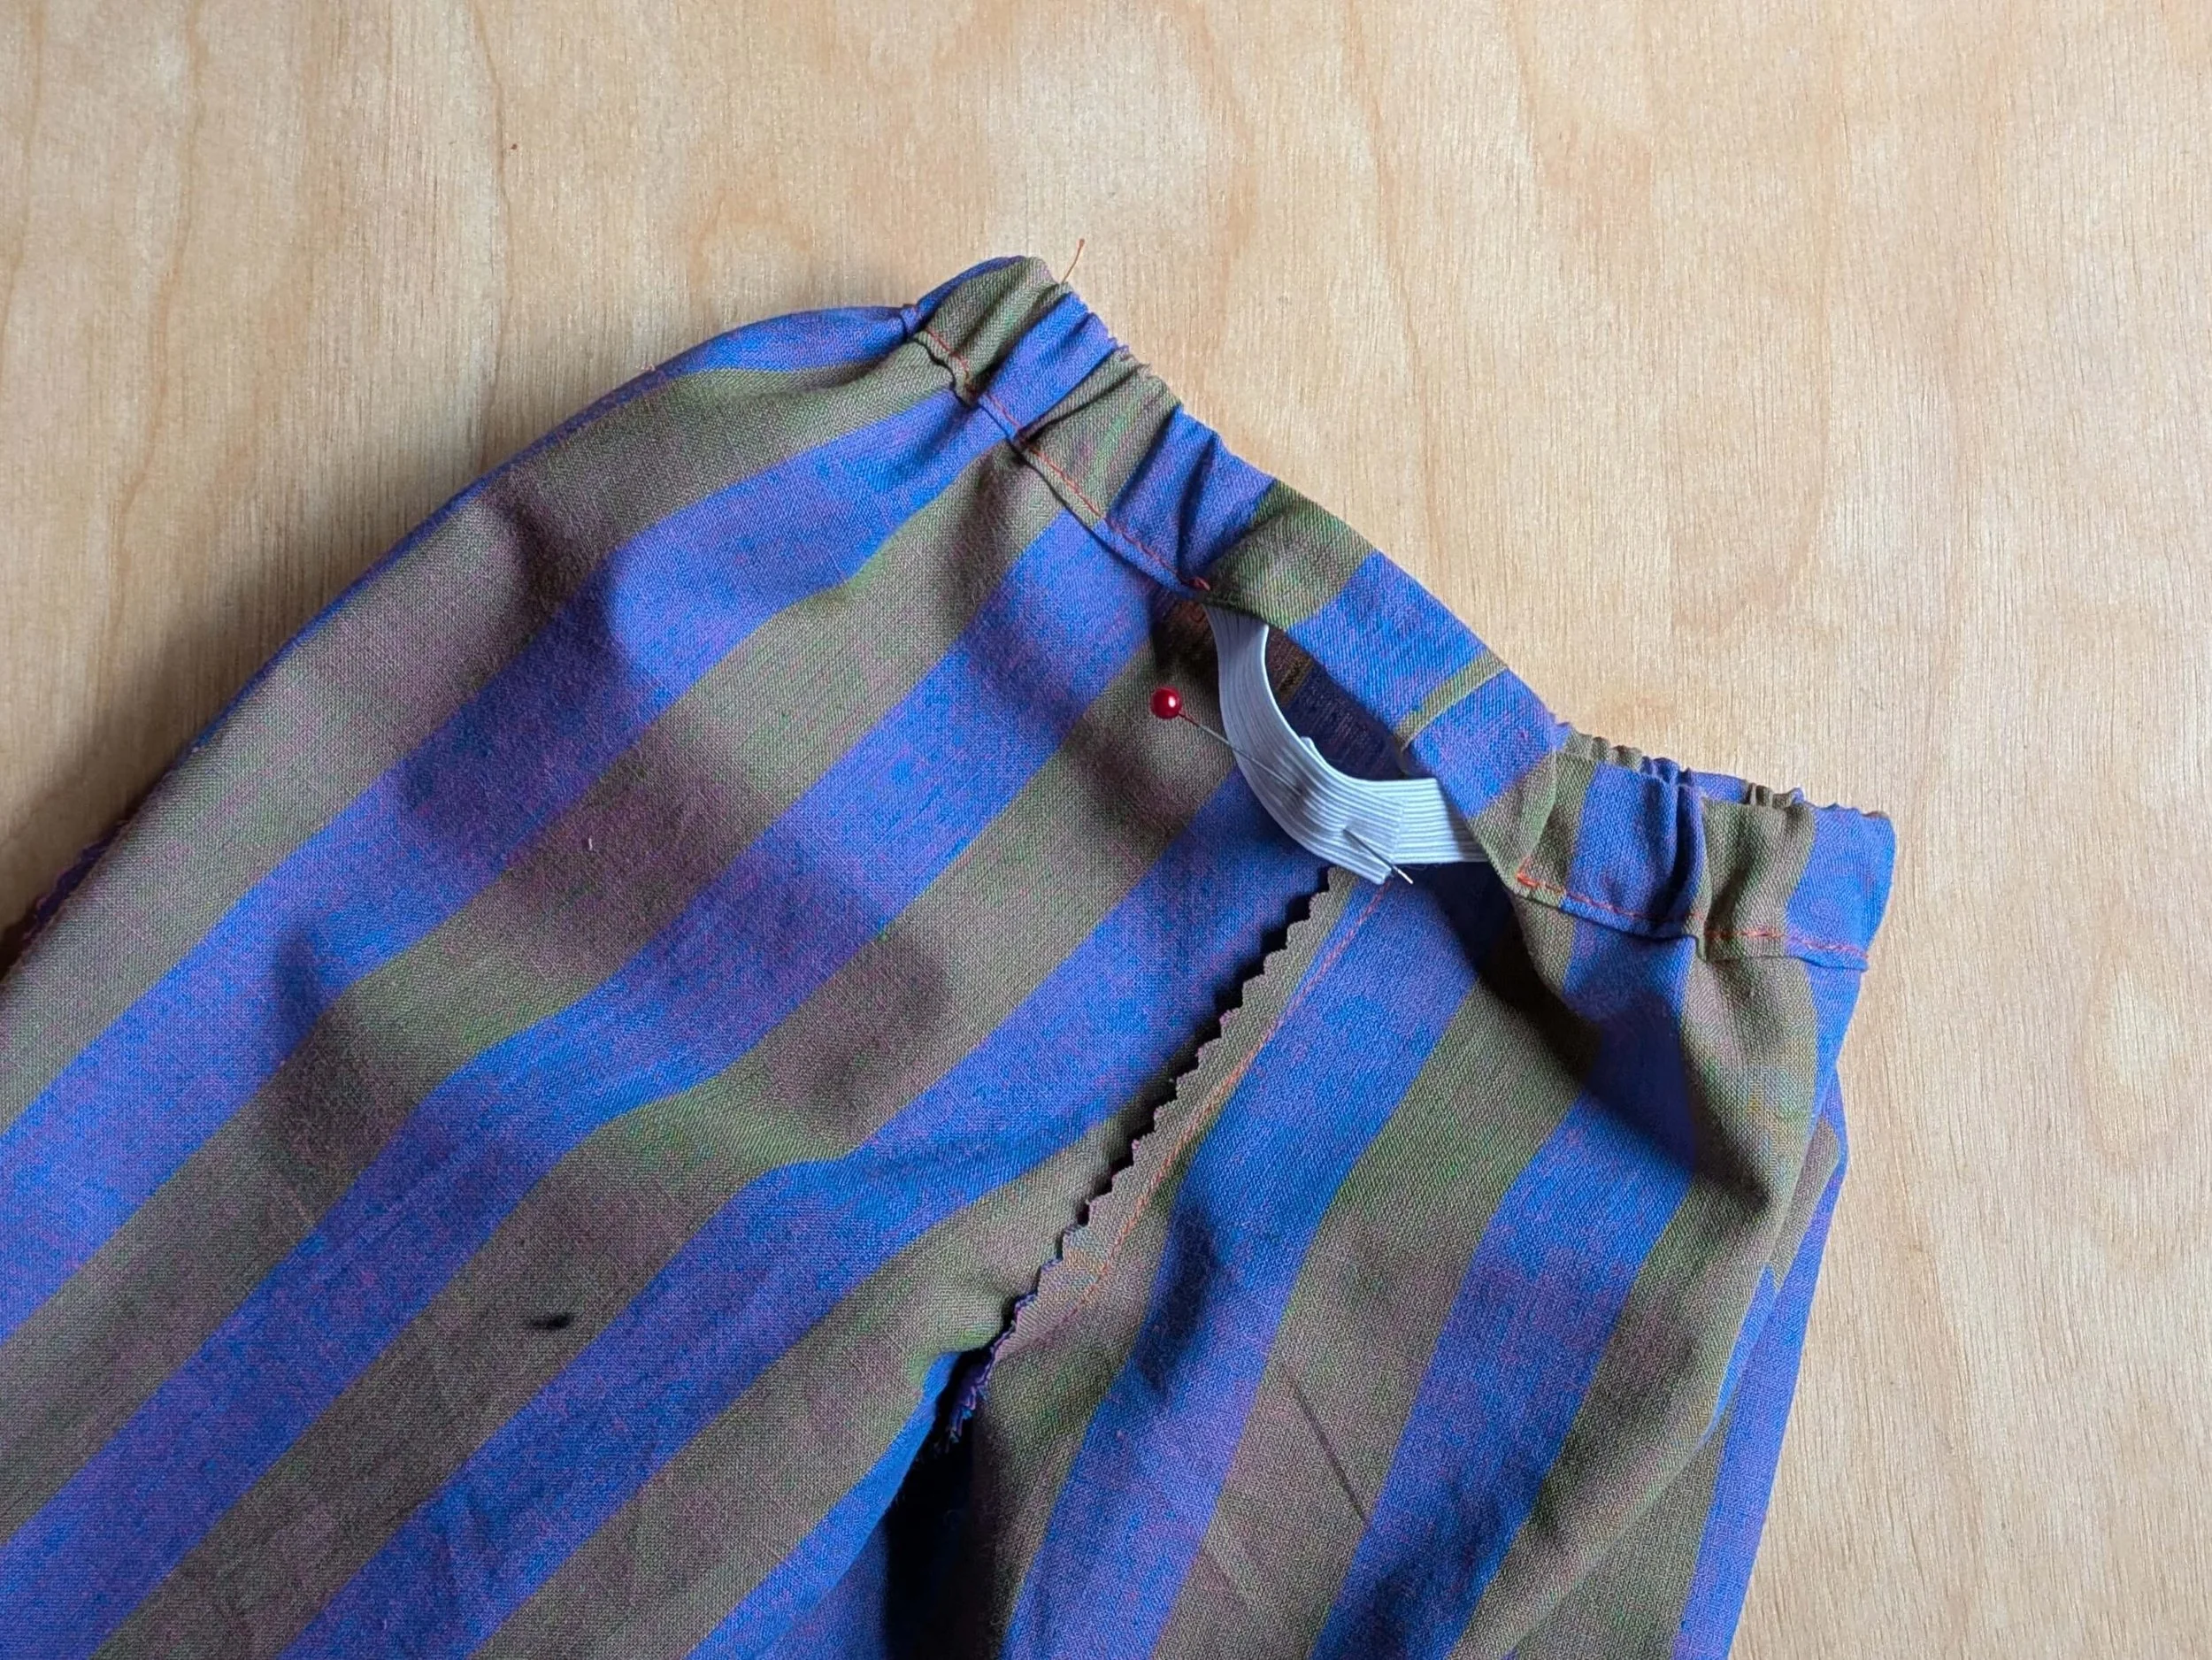
STEP 5. Sew waistband
Along the top edge of the pant, fold and press ¼ inch [6 mm] toward the wrong side, then fold and press another 1.5 inch [37 mm].
Note: if your pants have inseam pockets, the top edge of the pockets will be enclosed in the waistband casing.
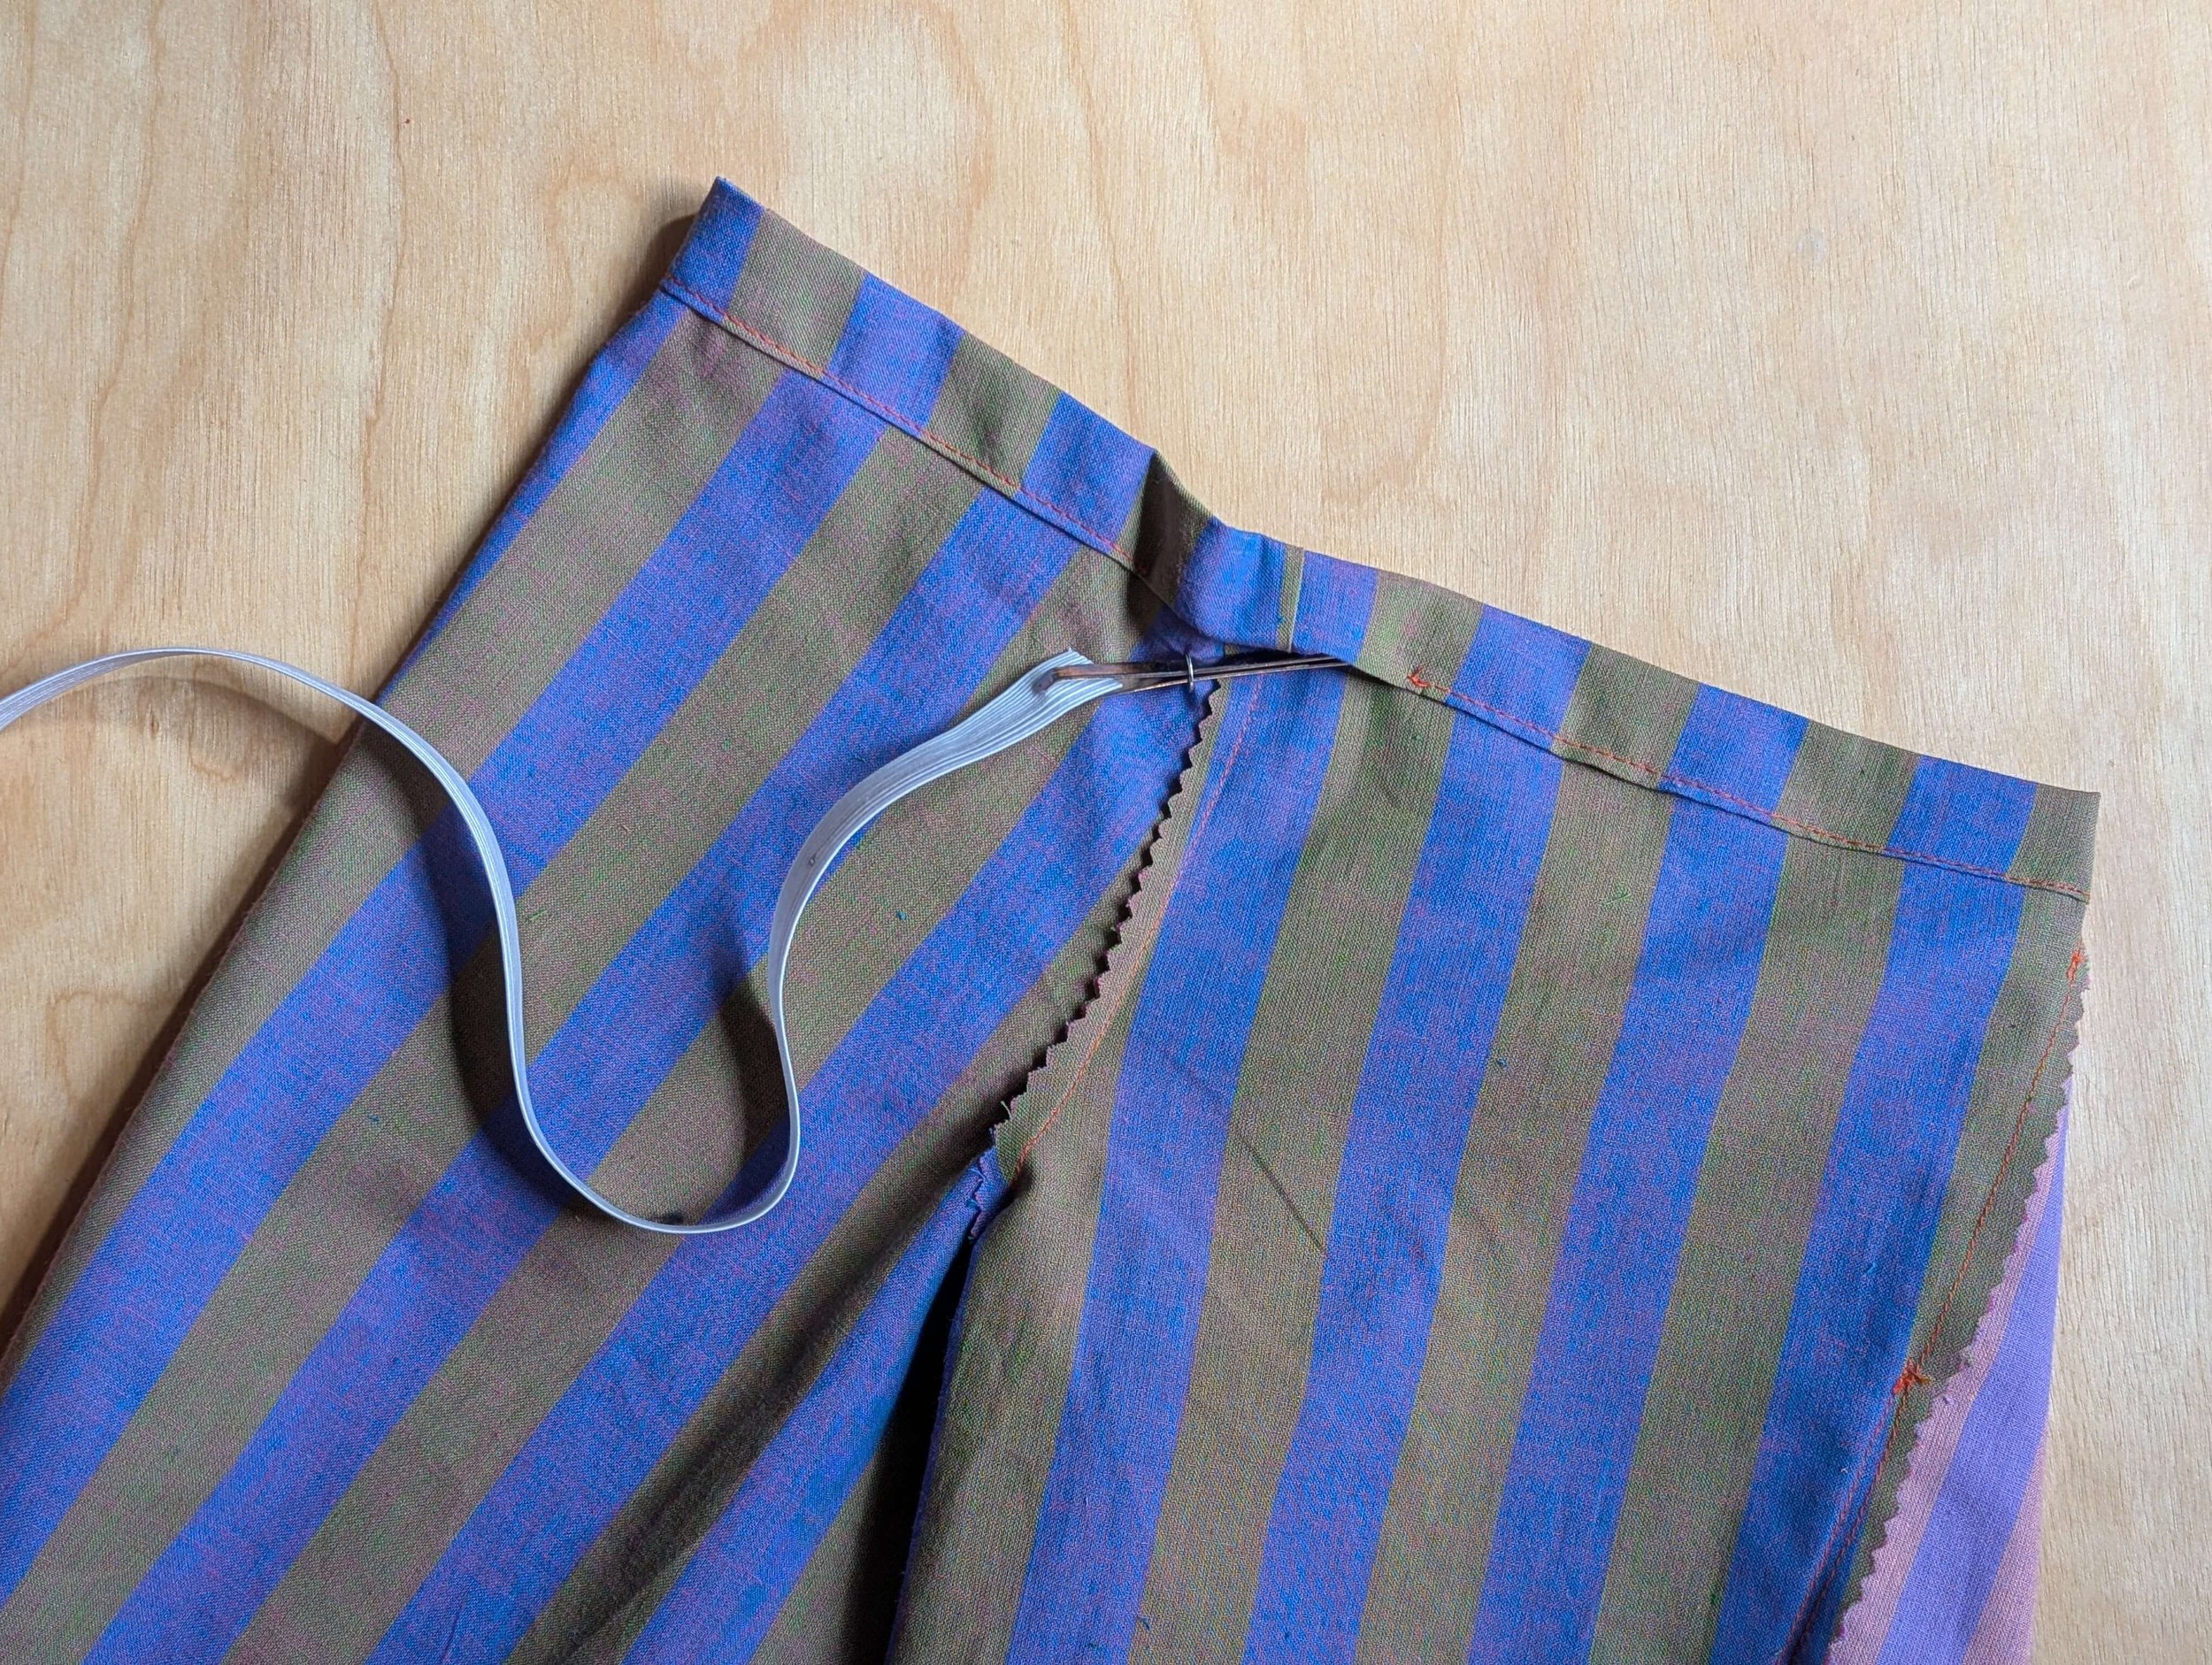
Stitch along the first fold to form a casing, leaving a 1 inch [25 mm] opening for the elastic at center back.
Cut elastic to desired length (I suggest your waist + 1”) , and using a safety pin or bodkin, thread the elastic through the waistband casing. Overlap ends by ½ inch [1.3 cm] and pin together.
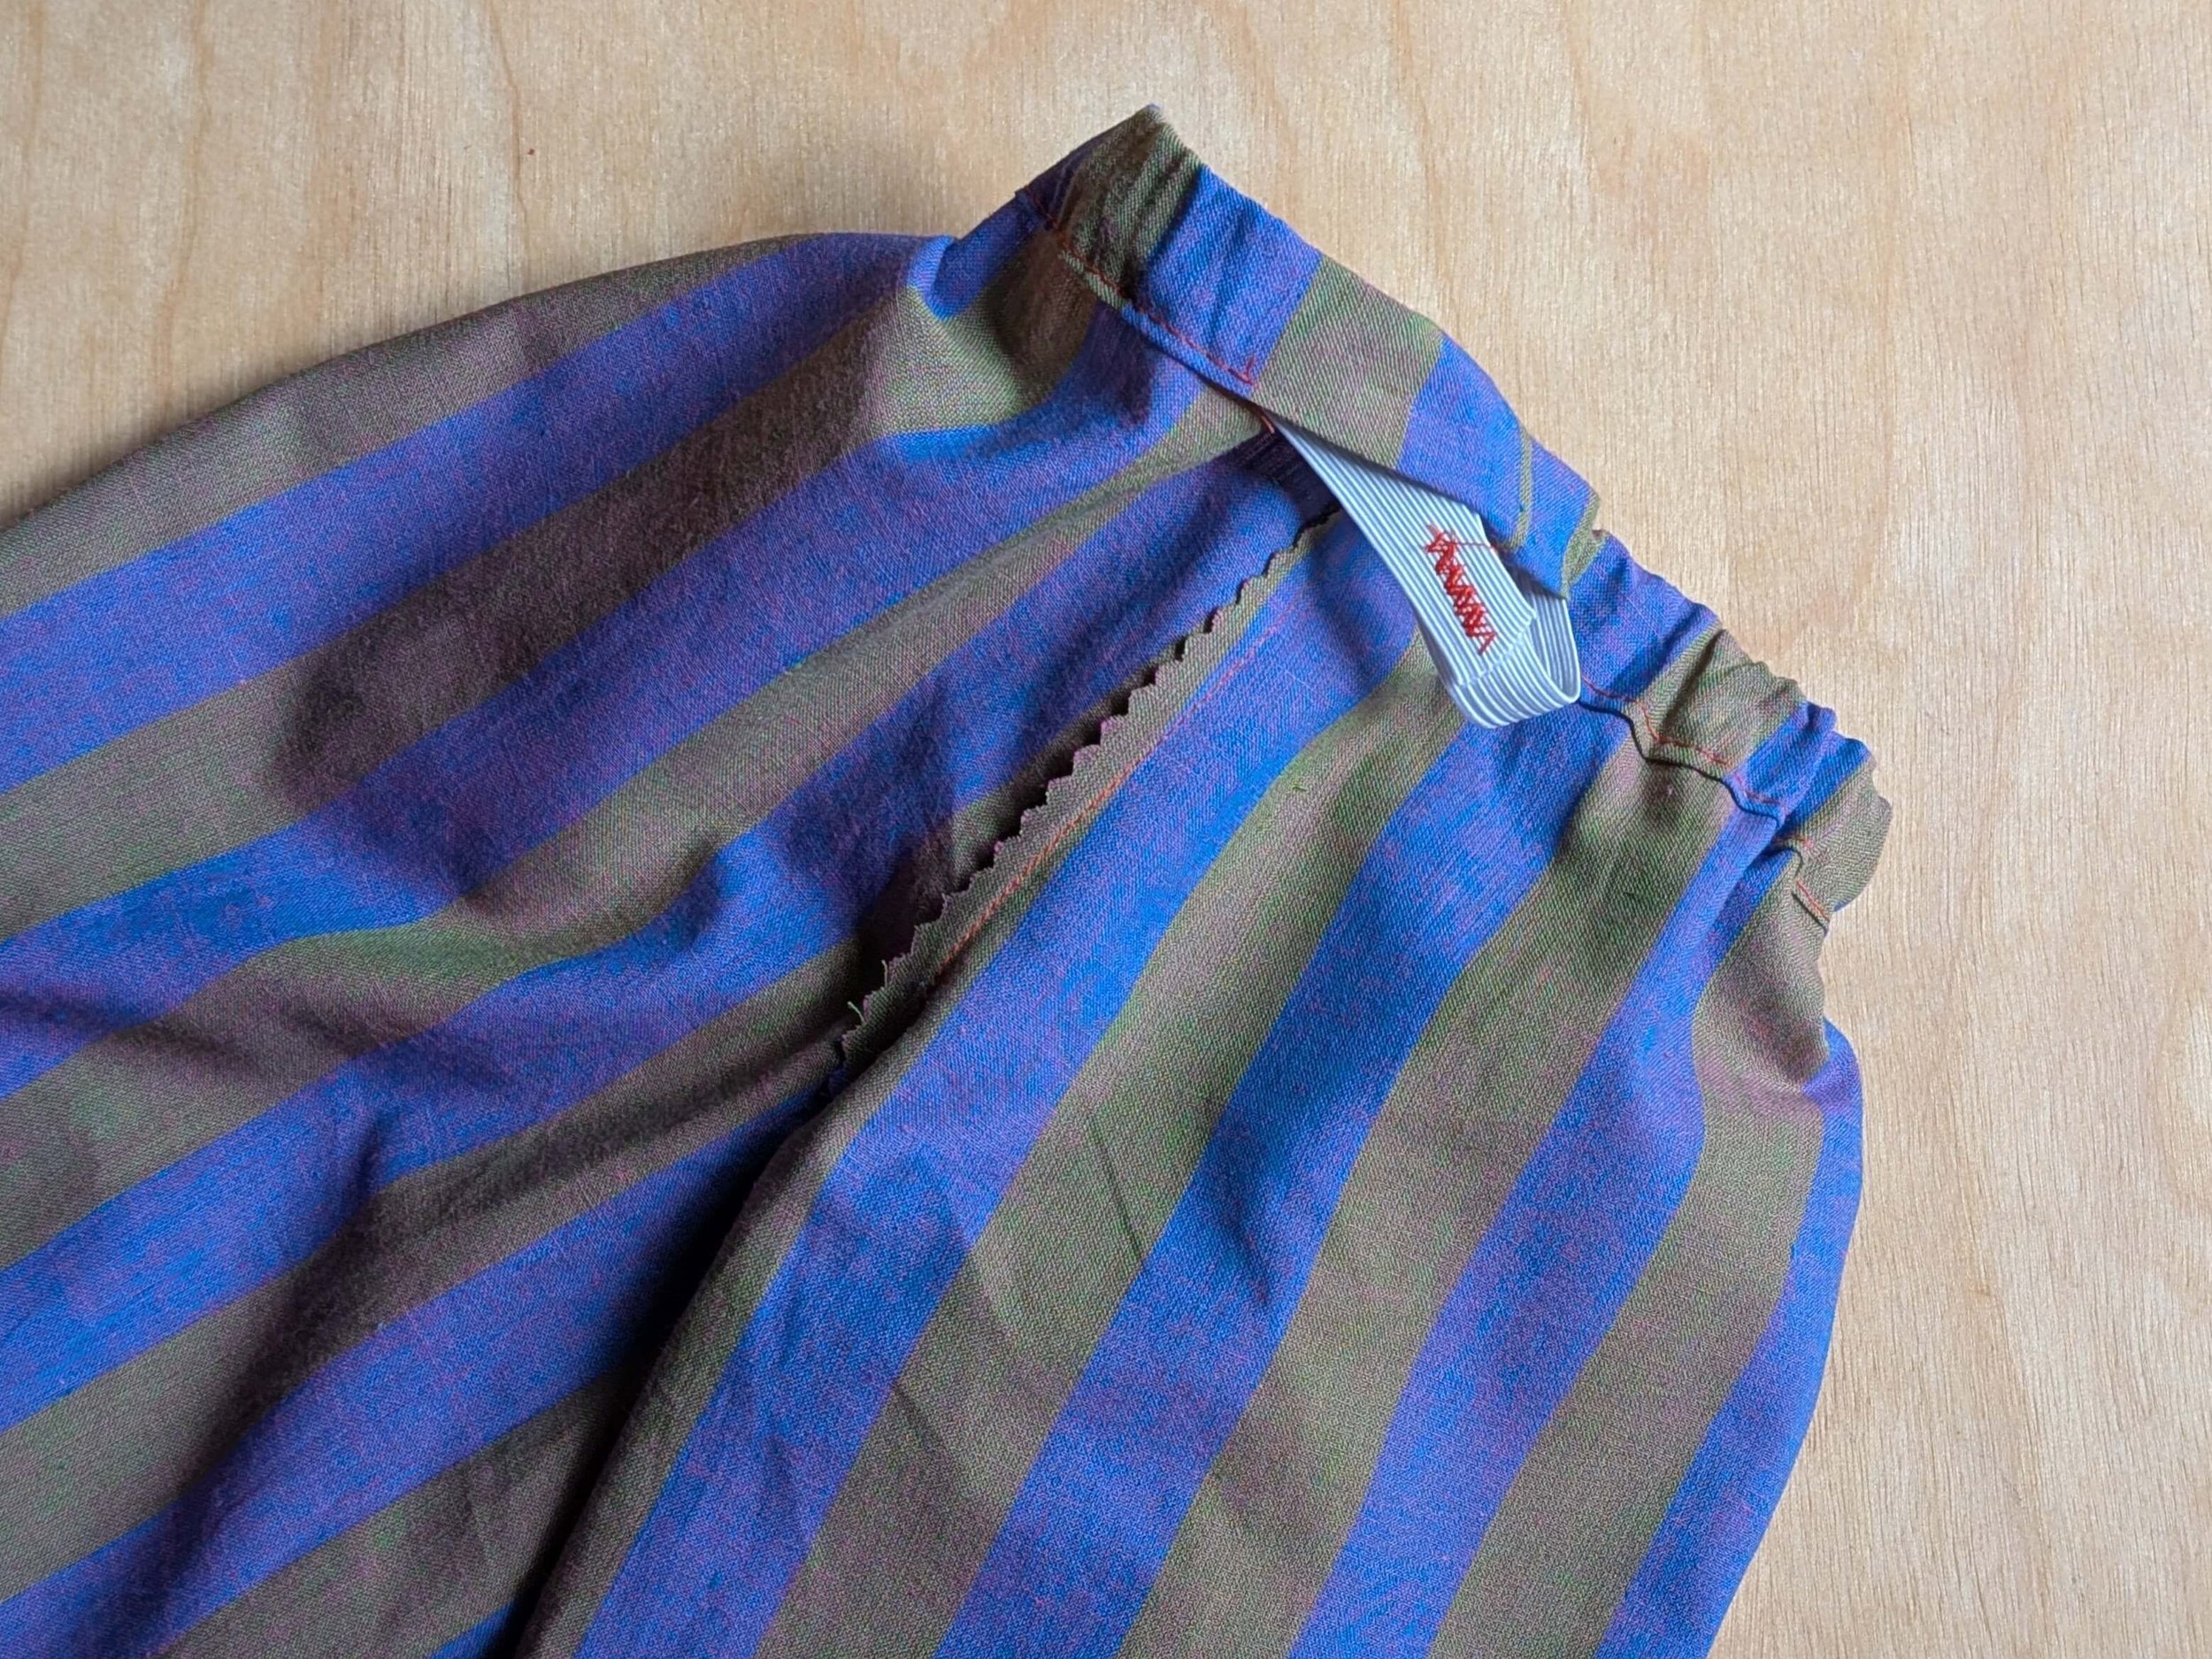
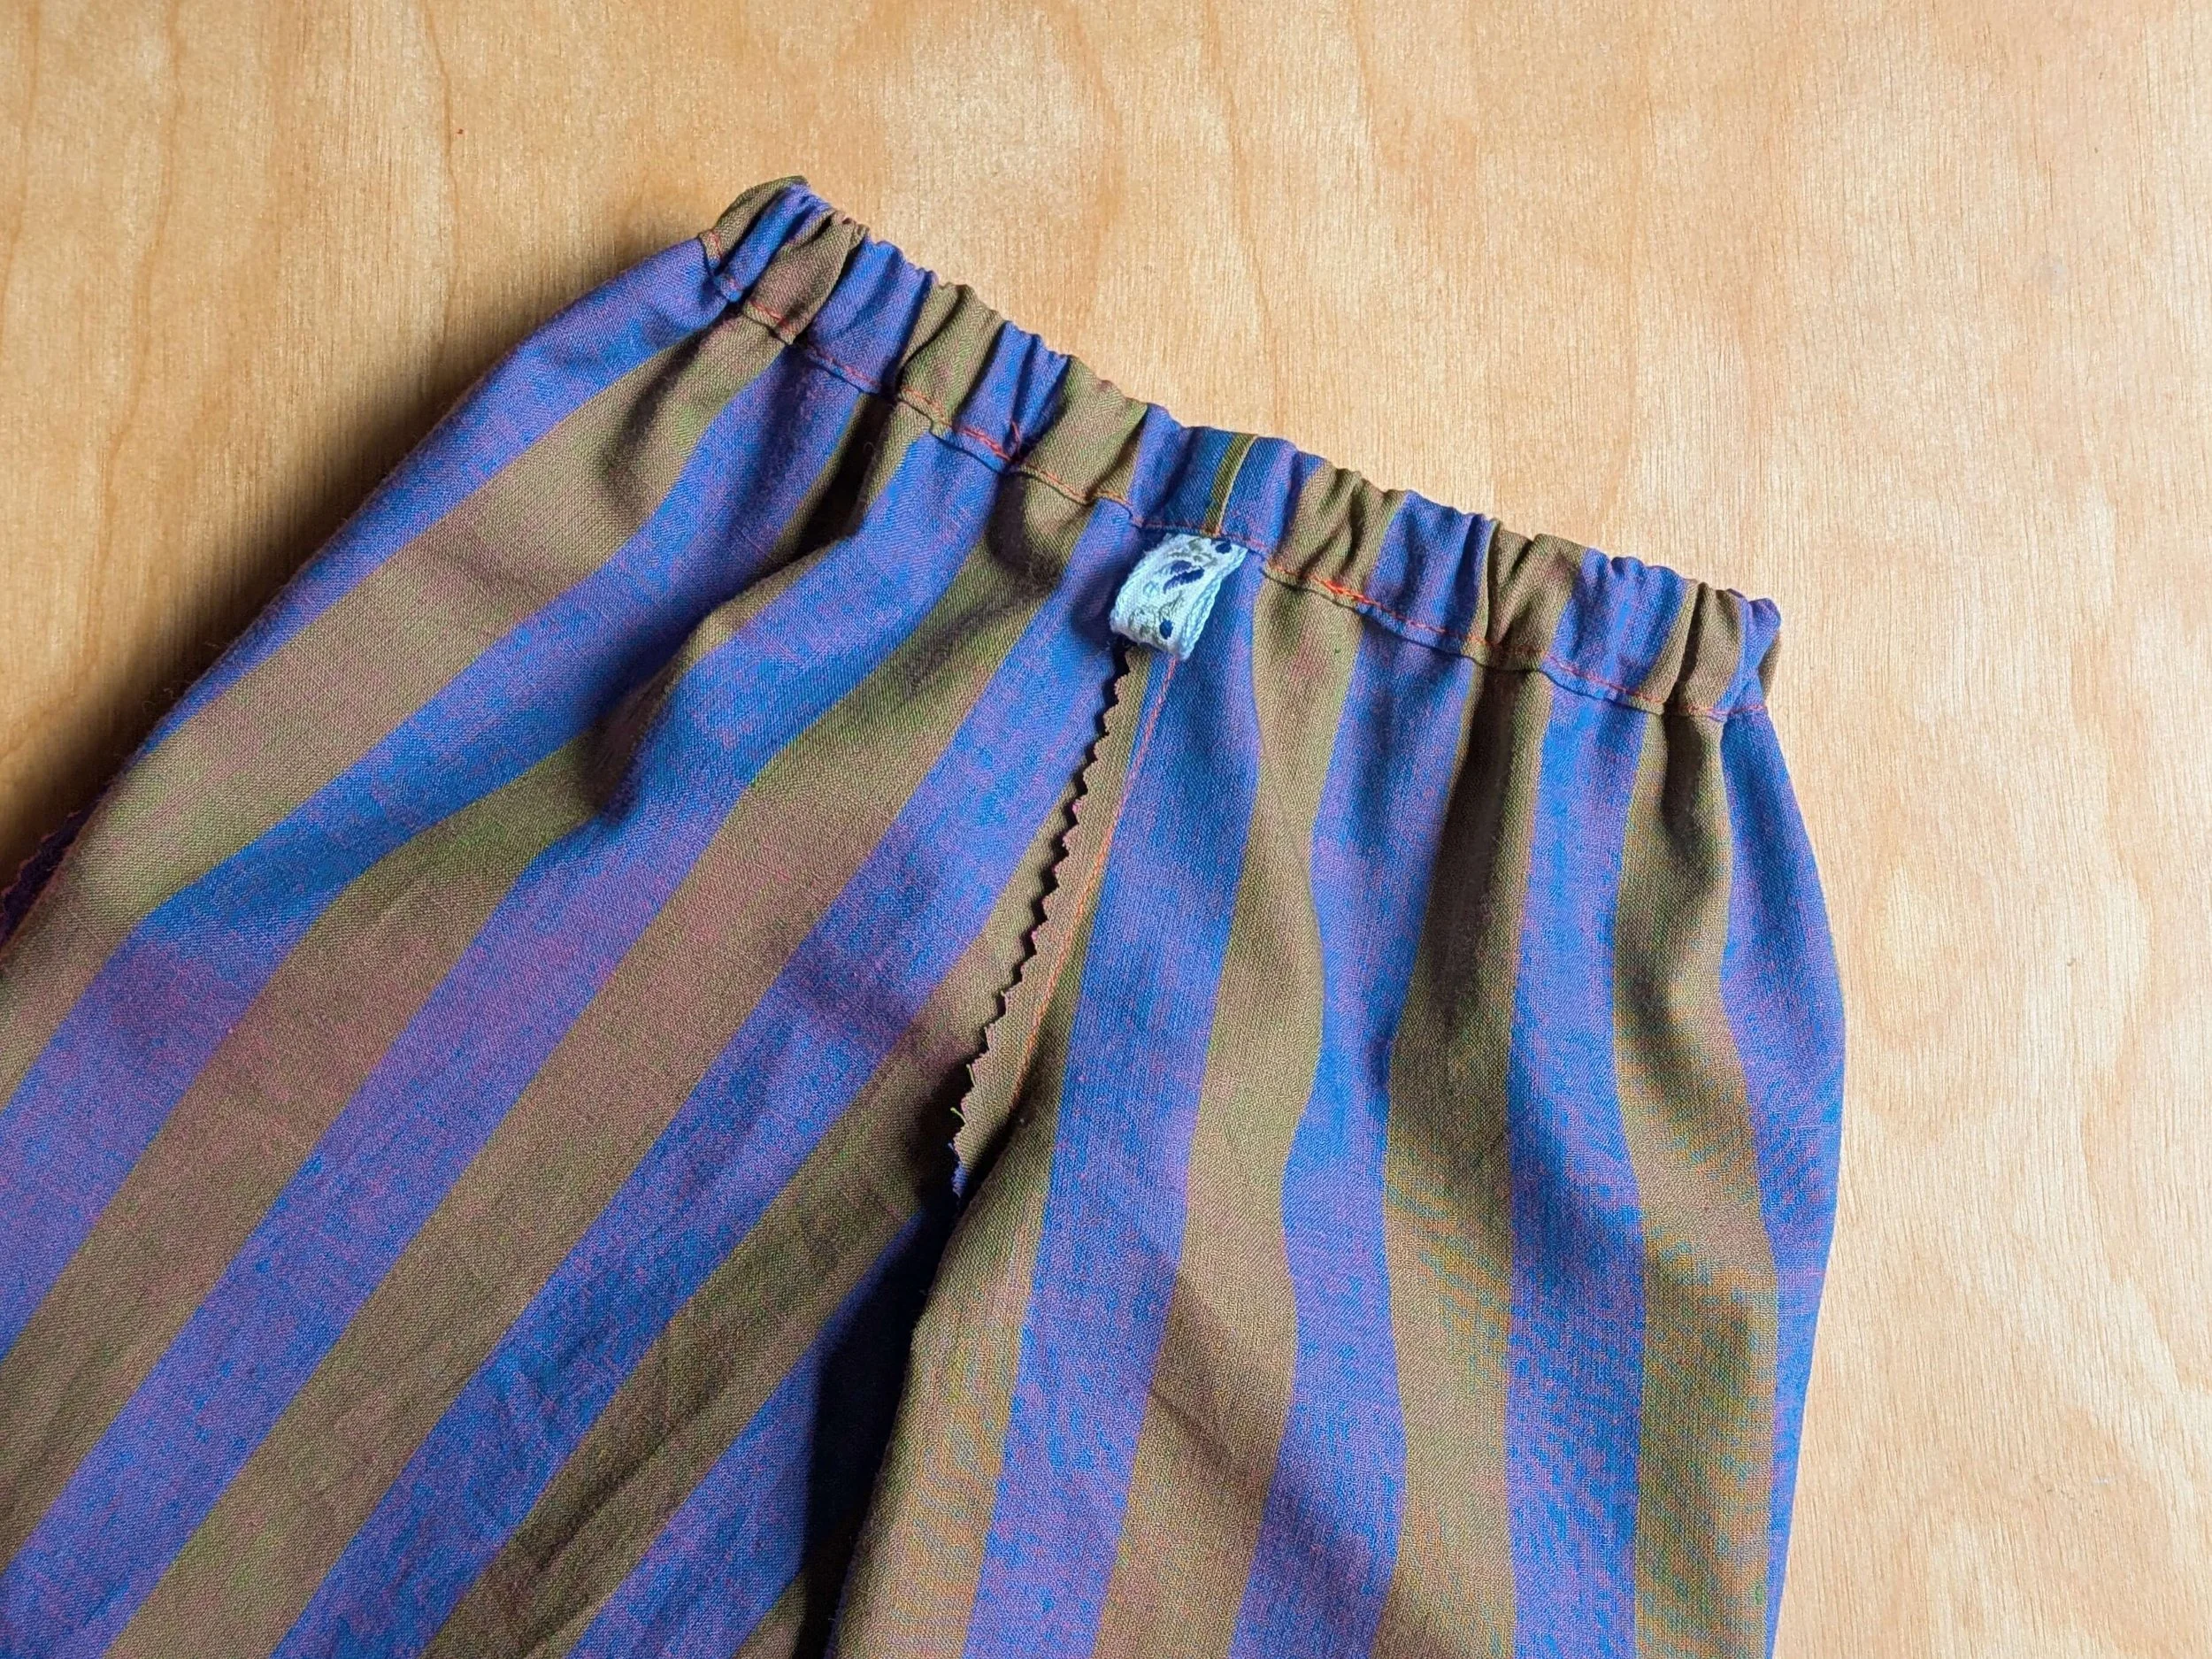
Try on the pants to check fit, adjust the elastic as needed, then stitch the ends of the elastic together. Stitch the opening shut.
Hint: add a small piece of folded ribbon or twill tape before stitching the opening shut to create a tag to mark the back.
STEP 6. Add Cuffs
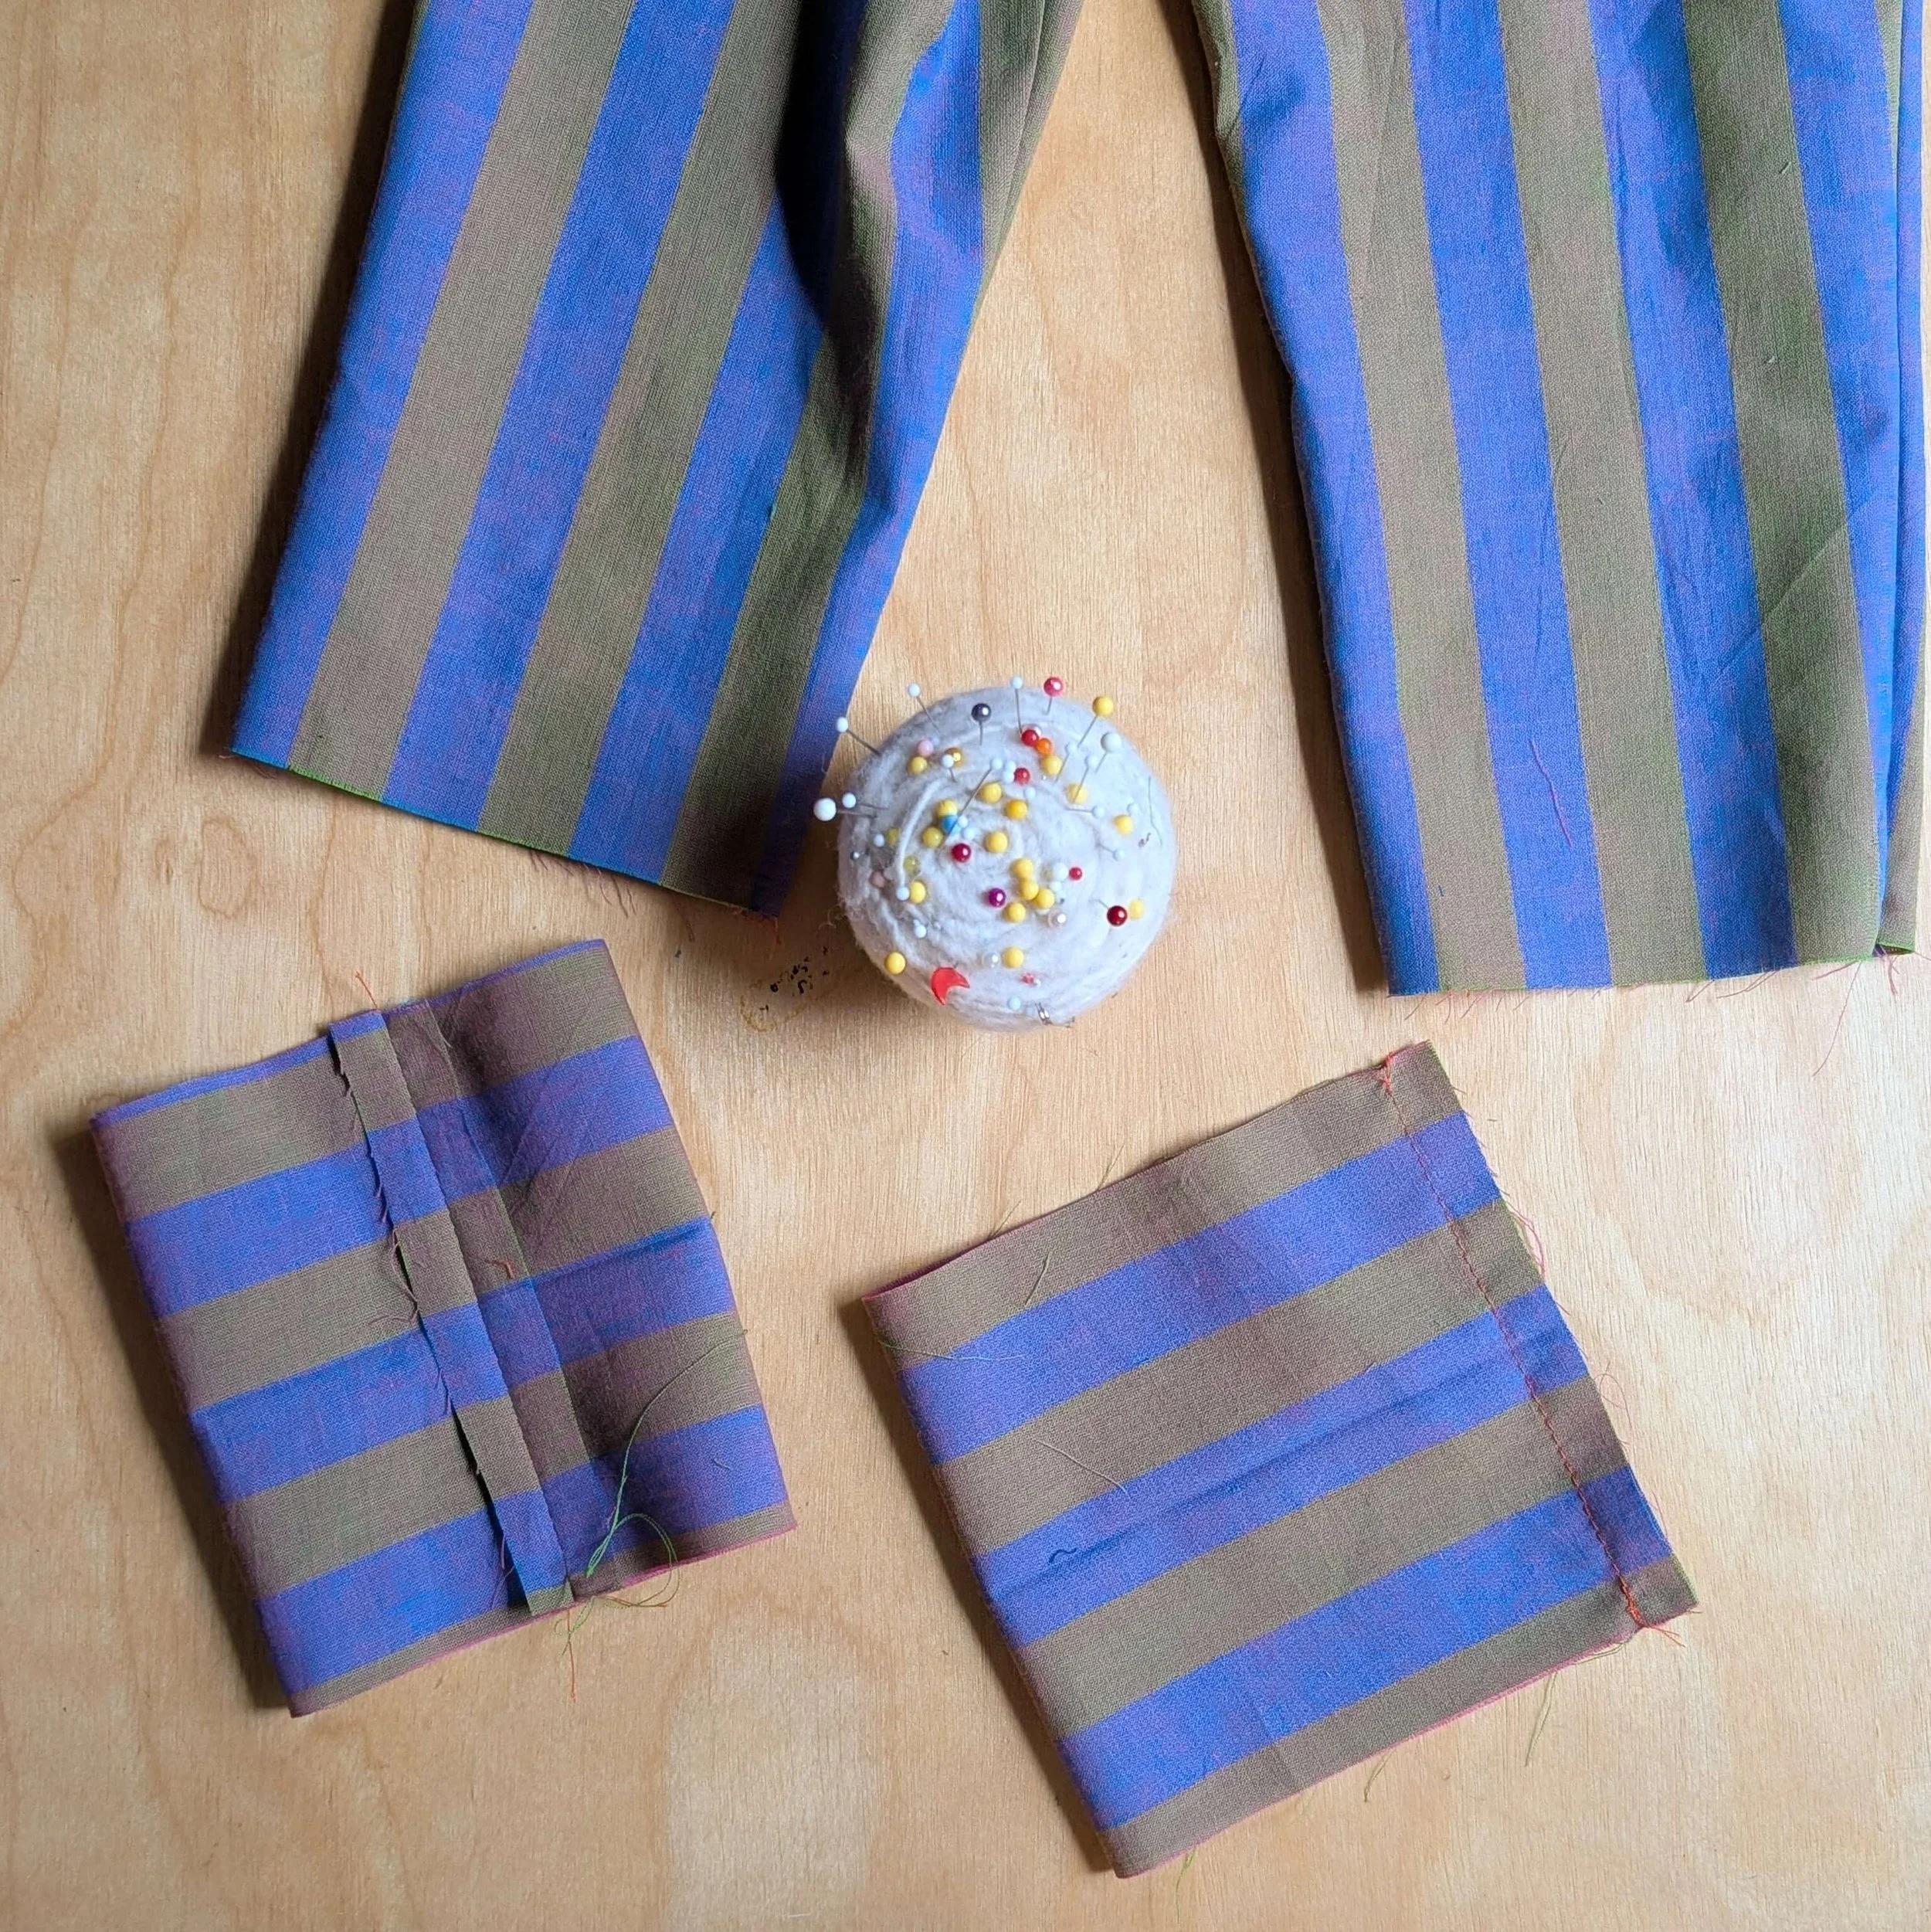
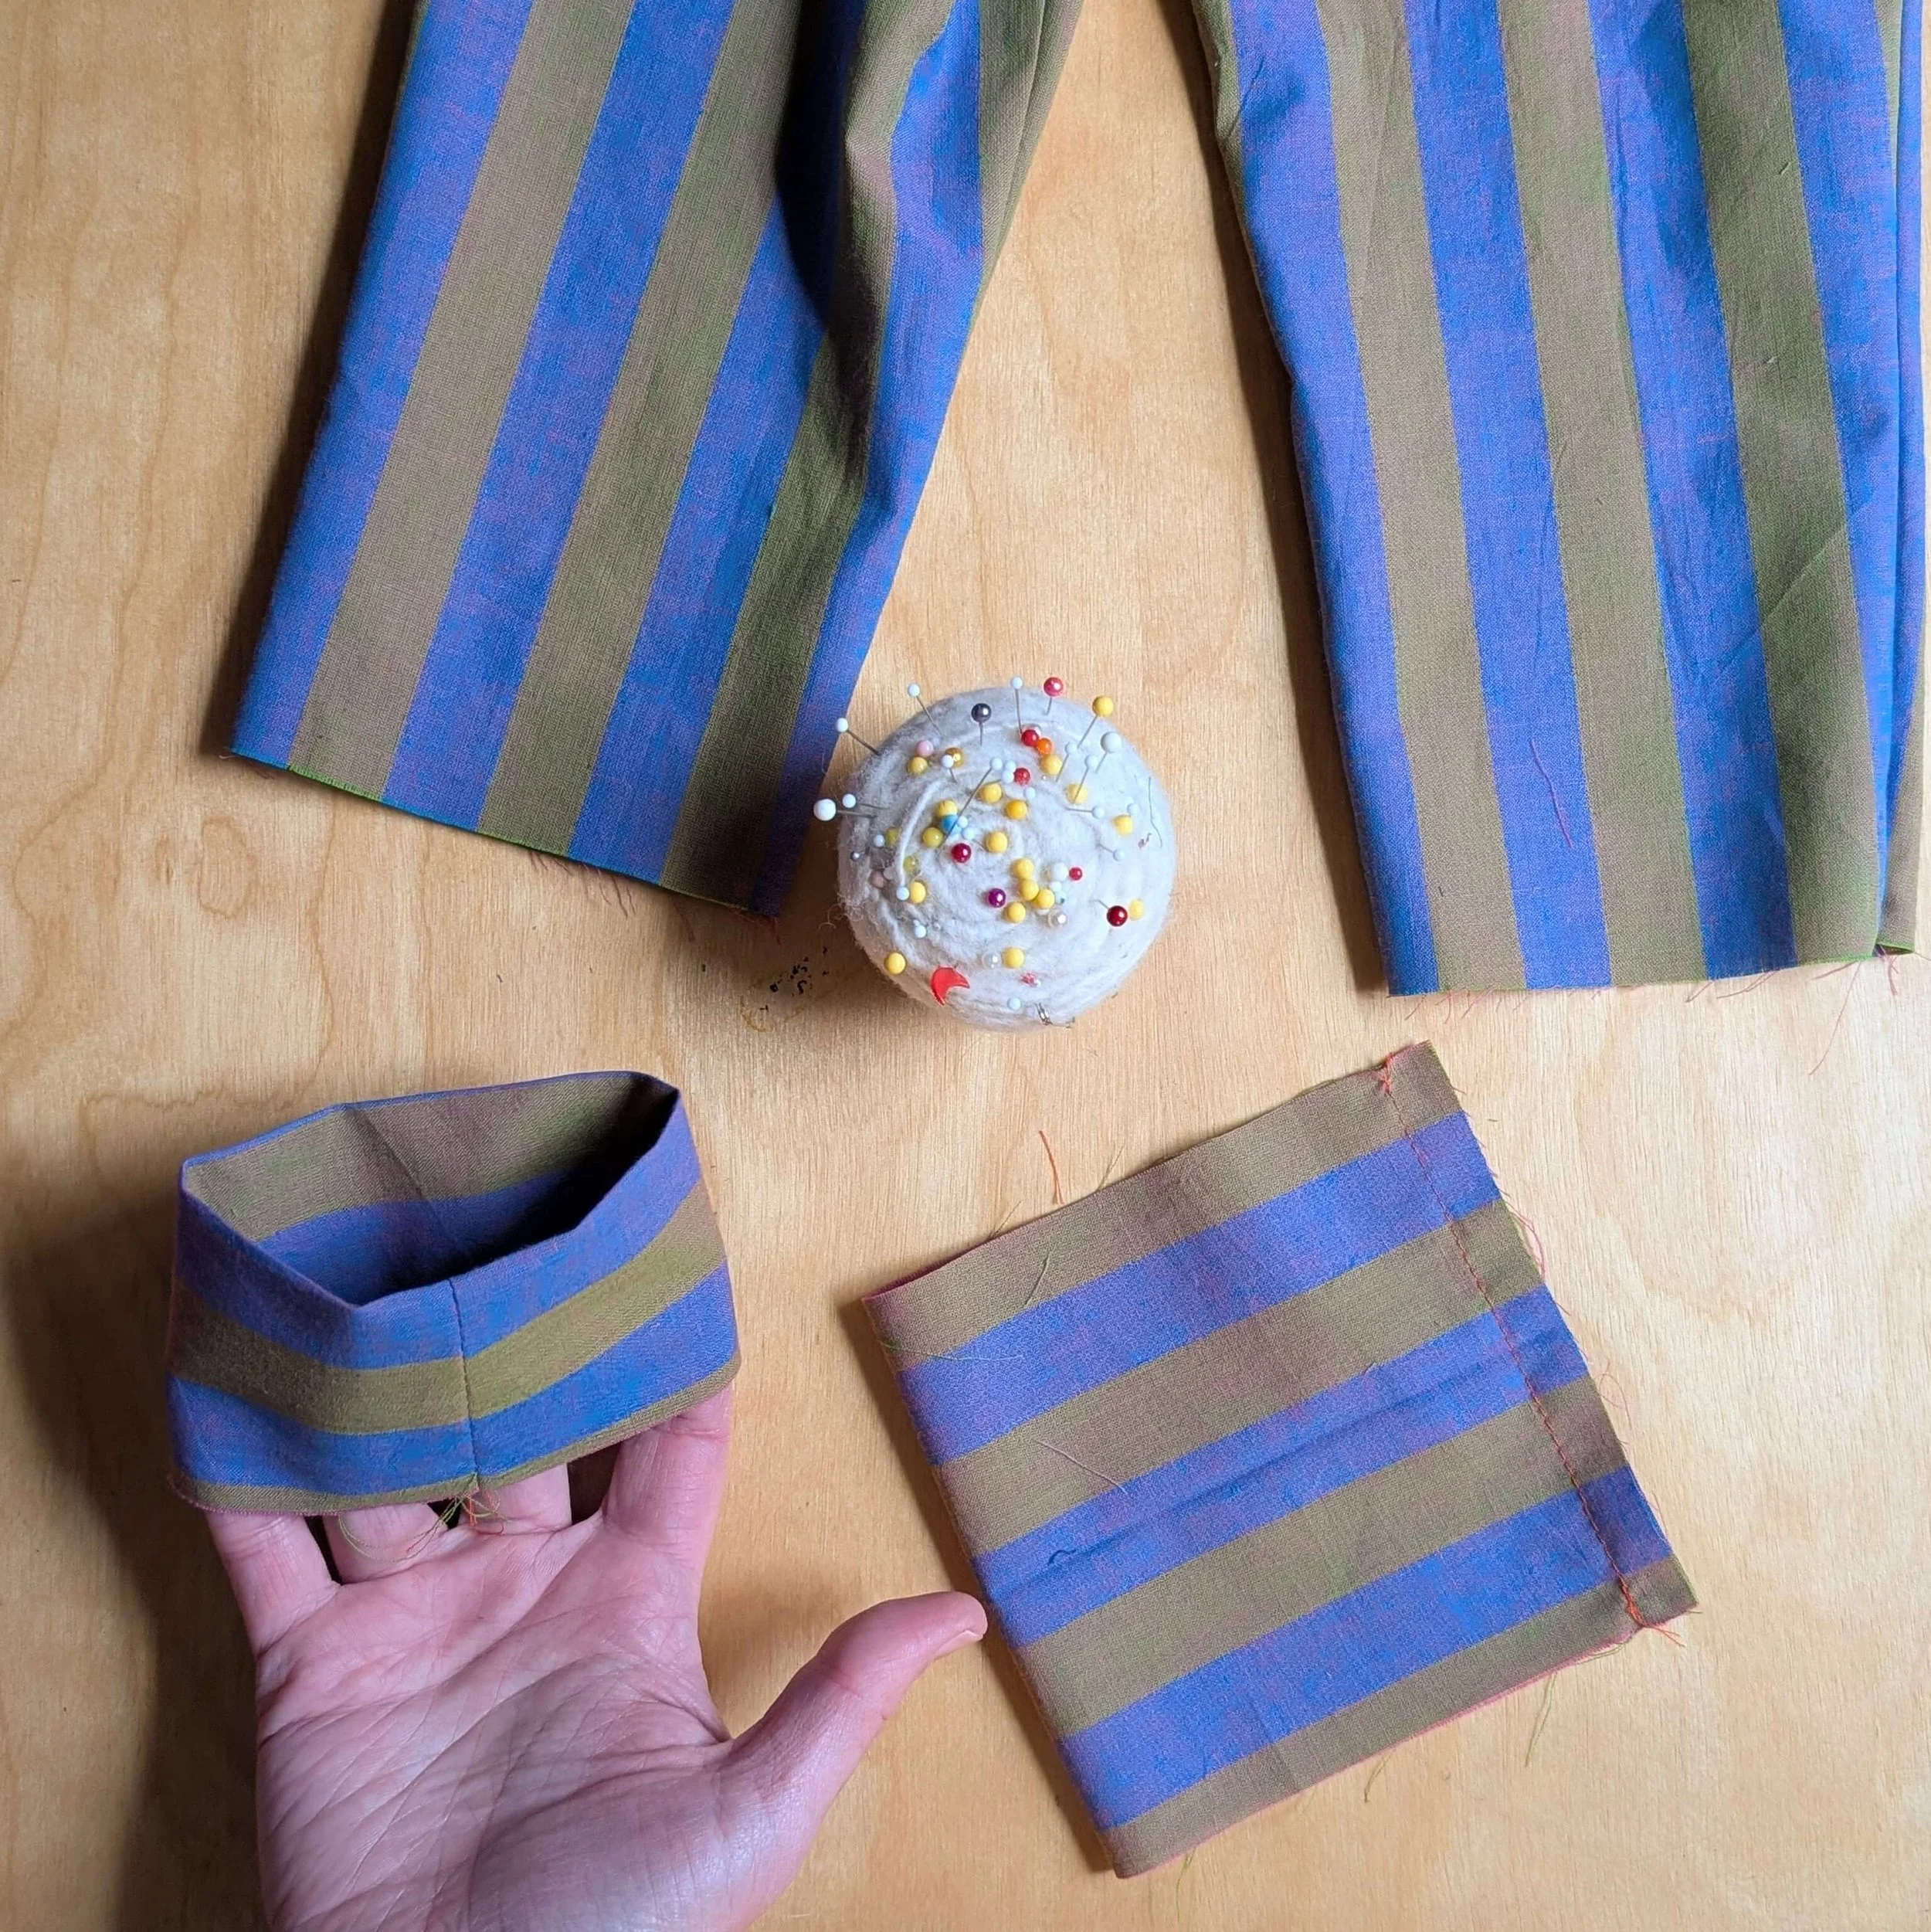
Fold each CUFF in half and sew it together along the short ends (a). Press the seam allowances open. (There is no need to finish these seams.)
With wrong sides together, fold and press each cuff lengthwise along its center line (b). The folded edge will become the bottom of the pajama hems.
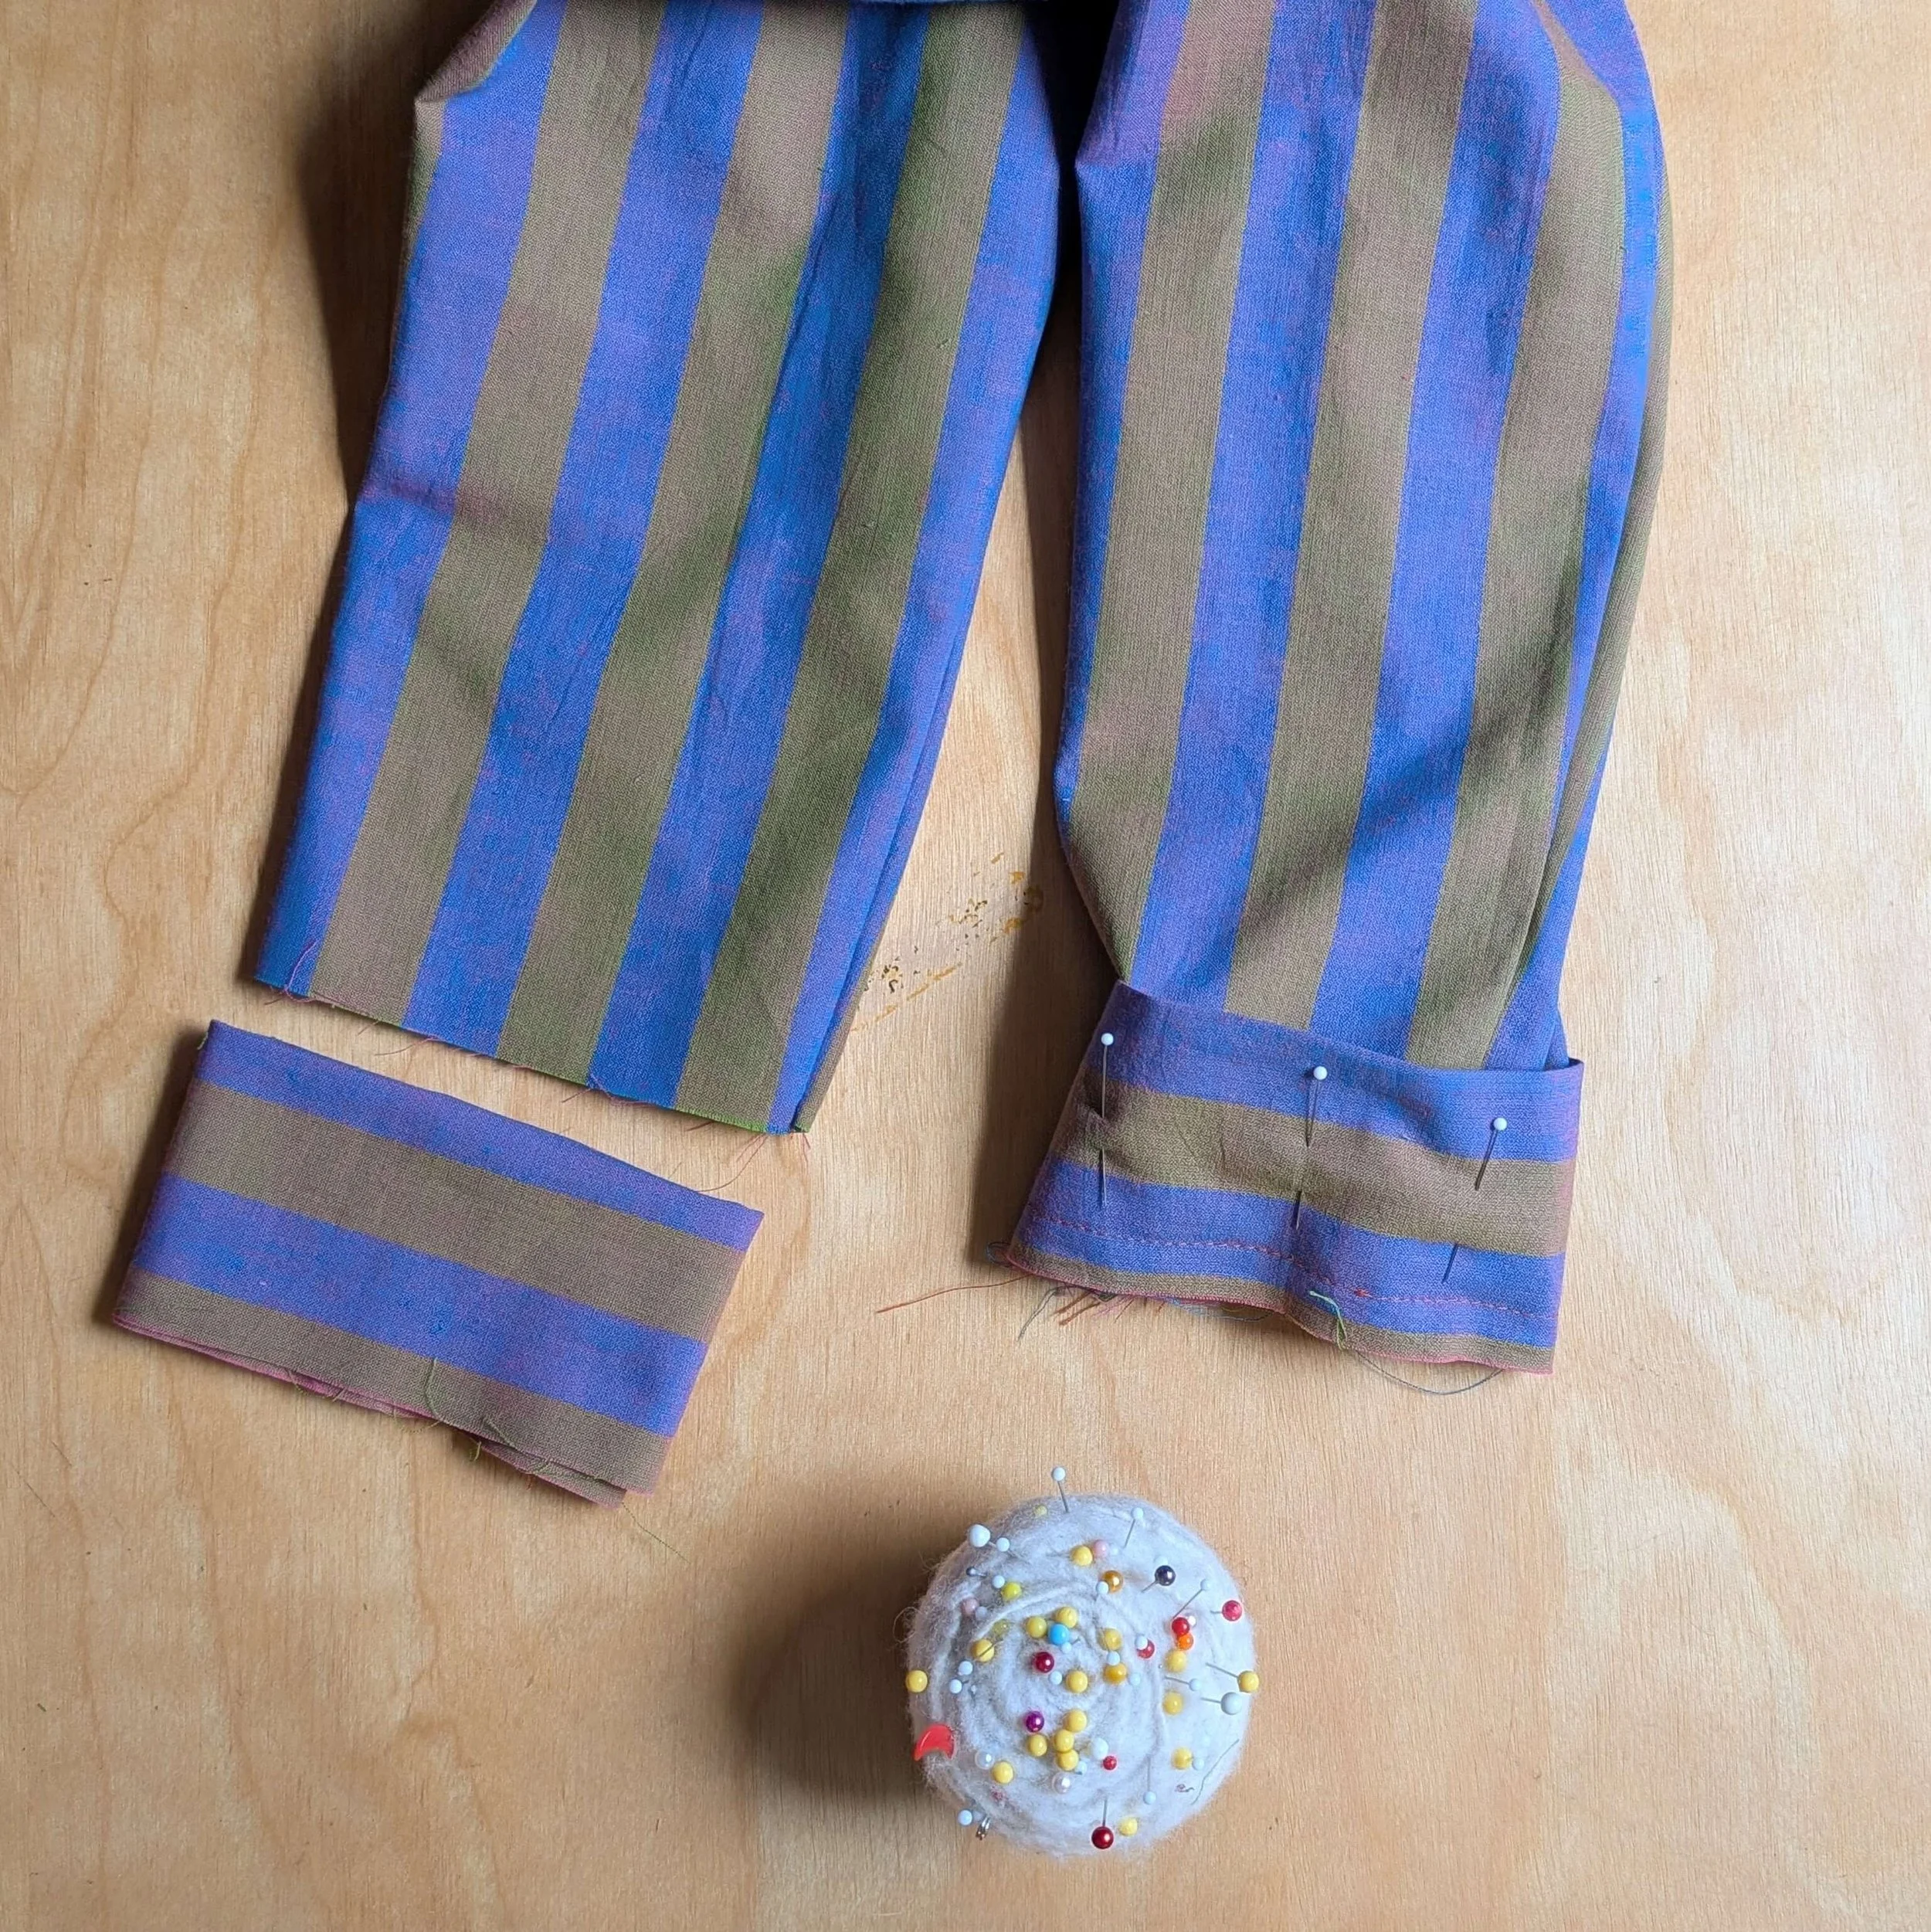
With the garment right side out, place each folded cuff around the end of one of the legs, aligning the two raw edges of each cuff with the bottom edge of the pant or shorts leg, and matching up the cuff seam with the leg inseam. The folded edge of the cuff will be . Sew together through all three layers of fabric, repeat for other cuff. Trim and finish seam as desired.
Flip the folded cuffs down and press; topstitch just above seam to secure the seam allowances if desired.