
Free Chevron Wristlet Pattern!
This tutorial was originally featured on Grograin in 2011 as part of a free pattern month; I’m bringing it back to the blog as of 2023 so you can access all of the instructions right here - scroll down for both the free pattern and tutorial!
I'll admit it, I'm a sucker for the chevron trend. So here’s a free pattern with a tutorial for a little wristlet that can provide you with your Chevron-fix on a daily basis. Since I like to carry different bags on different days, this wristlet functions as my "wallet," I just throw it in whatever bag or purse I happen to be carrying that day. It's plenty big enough to hold all of the essentials: credit cards, cash, cell phone, pen and checkbook, chapstick, whatever.
All you need is a few basic supplies, the free pattern (download it below), and the tutorial here, and you’re good to go!
HOW TO SEW A CHEVRON WRISTLET
This pattern calls for striped fabric to make your own chevron fabric, but you could use any fabric you like for the outside of the wristlet for a patchwork effect. Using solid colors for each section would look really great.
You can even skip the piecing altogether and do a single piece of fabric on each side — just skip Steps 2 and 3!
Materials :
1/2 yard or less striped fabric for outside
10"x14" piece of fabric for lining + more if you want to add a pocket
9" zipper
Optional: rotary cutter, mat and ruler and a marking pen.
STEP 1. Print out pattern pieces for wristlet.
CLICK HERE TO DOWNLOAD THE FREE CHEVRON WRISTLET PATTERN
right click on file once it opens to save/print
{Note: this pattern is provided to you for FREE with the intention that it be used for personal use. Thanks!}
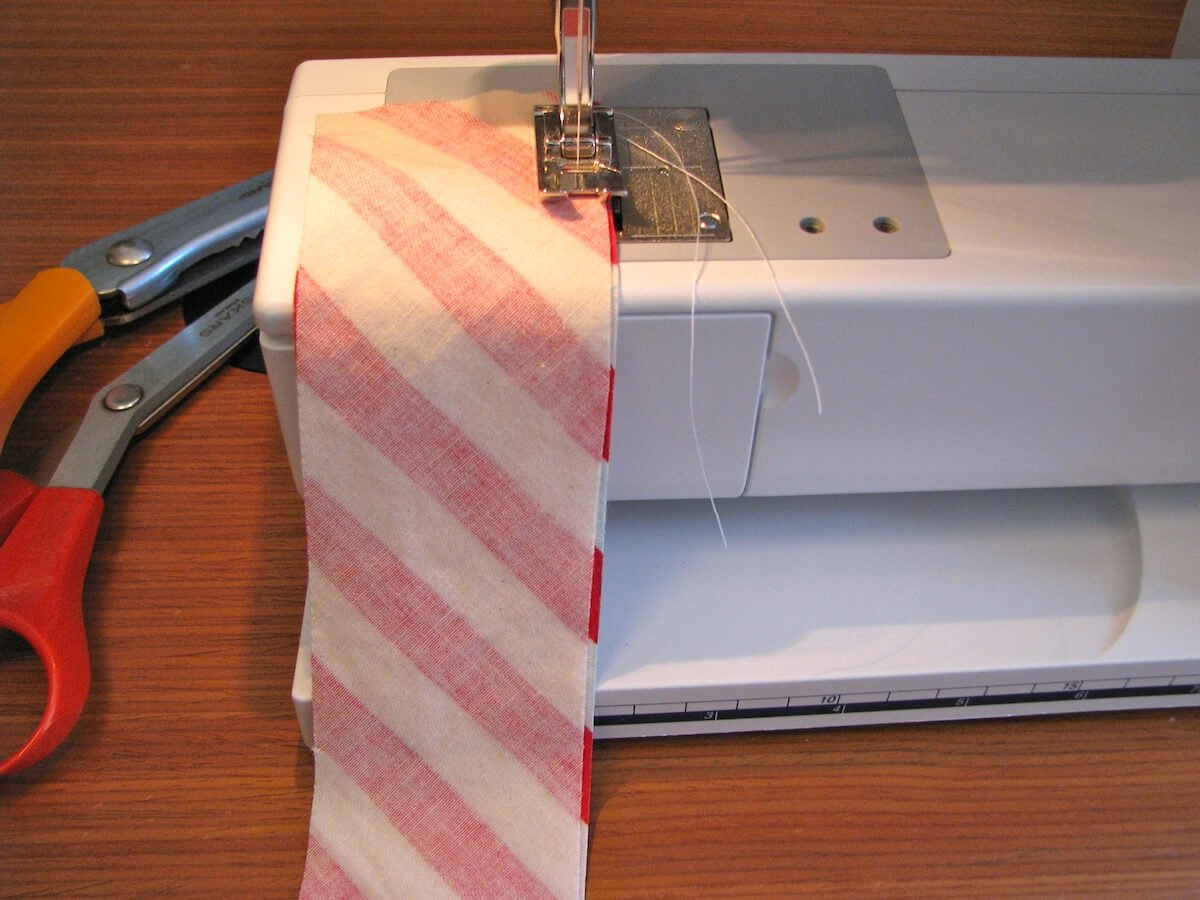
STEP 2. Cut out strips for outside of pouch
Cut out 12 rectangles from the striped fabric: six rectangles with the stripes going up to the left and six with the stripes going up to the right. If you are using stripes (of any width), make sure they are parallel to the template stripes before cutting them out.
Use the stripes on the rectangular pattern pieces to help you line up your stripes when cutting out those pieces as shown below.

Hint:
To make sure the stripes will line up from piece to piece, after you cut your first rectangle, place it on the fabric facedown and line up all the stripes carefully as shown below. Then use the first piece as a guide to cut out the next piece. Then take that next piece and place it face down and cut out the next one, and so on. If you always use the most recent piece to cut out the next piece, all of your pieces will have stripes that line up nicely.

{ If you don't want to print out the pattern, each rectangle is 2x7" }

STEP 3. Sew strips together
Arrange six of the strips alternating striped direction. Make sure the stripes line up along the edges. Then sew the strips together with a 1/4" seam allowance and right sides together:
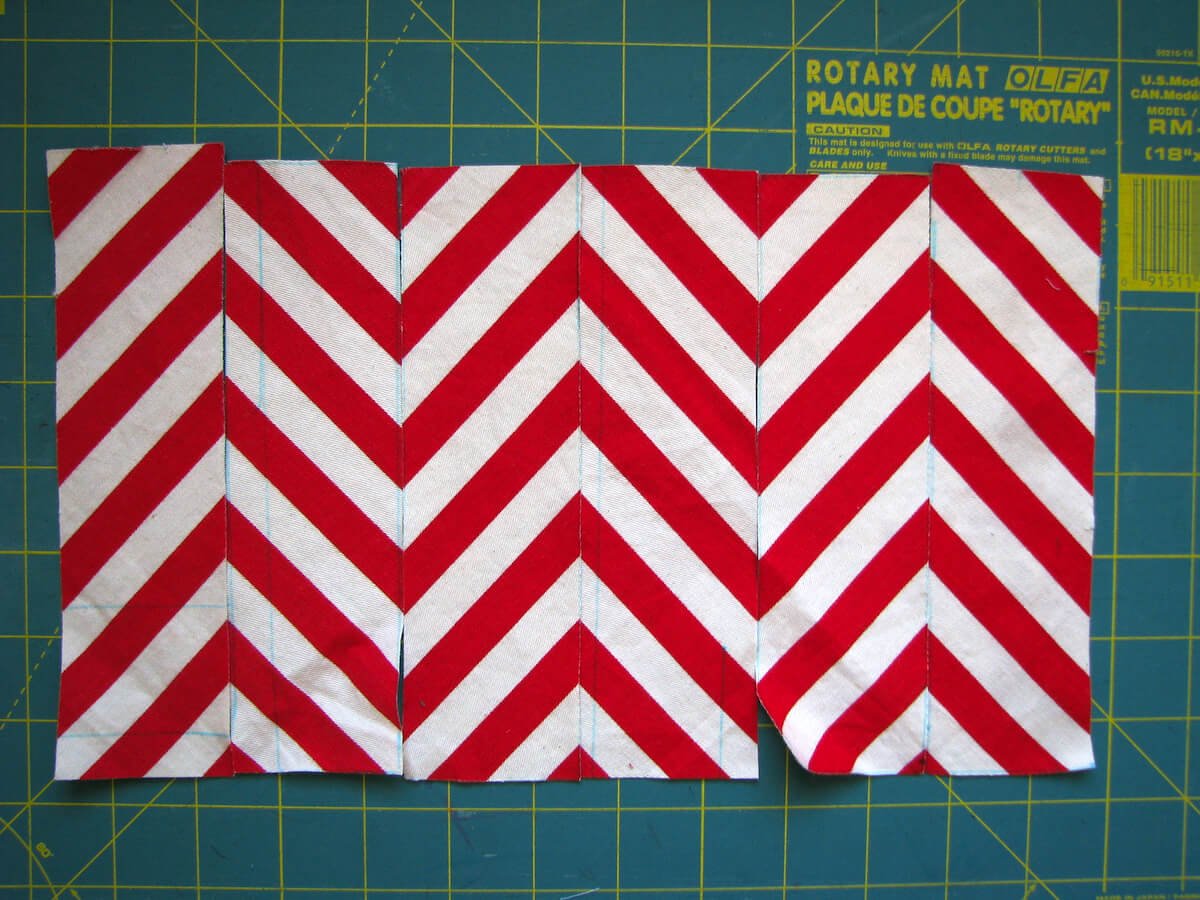


Press the seam allowances apart, and trim the edges if necessary.

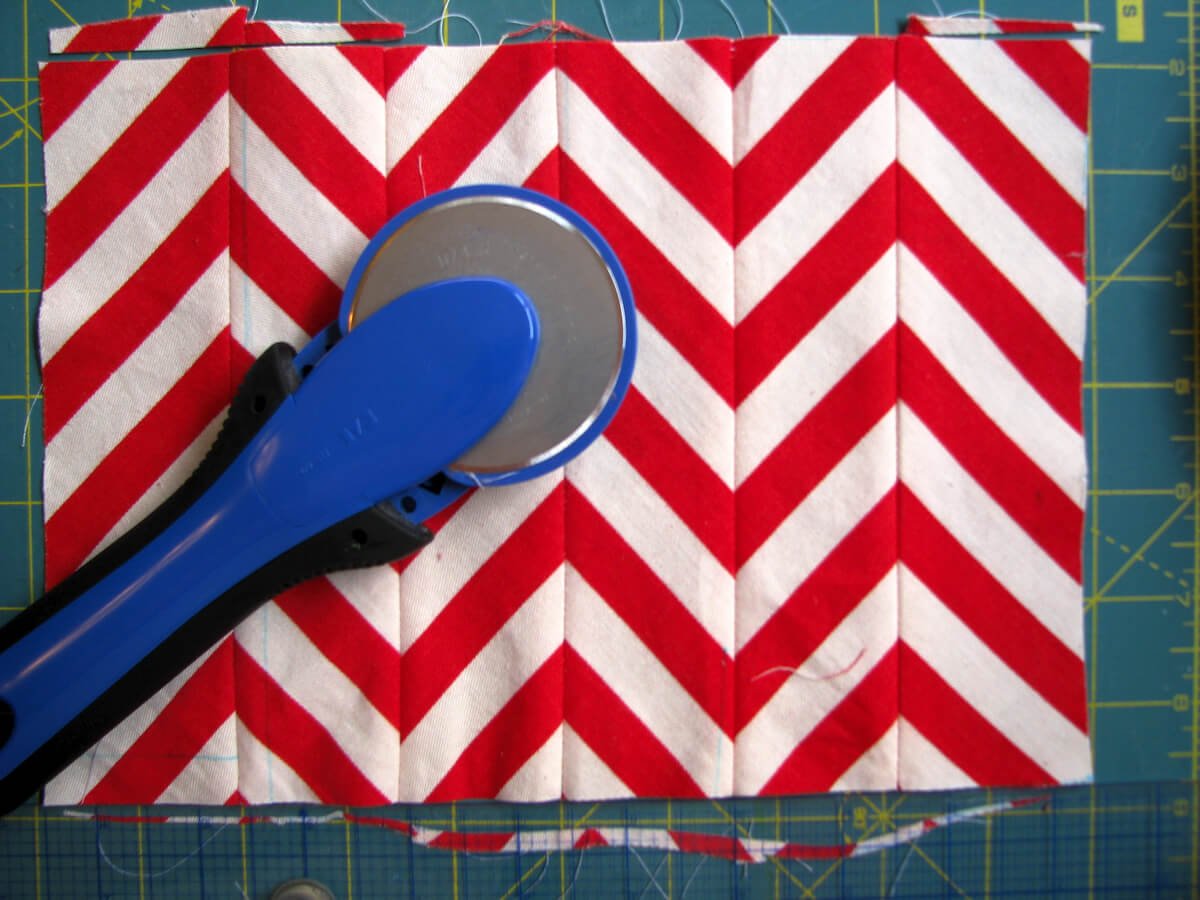
STEP 4. Cut out pieces for outer and lining
Use the wristlet pattern template to cut out two lining pieces and two outer pieces. If your outer pieces aren't quite wide enough, don't worry about it...as they were cut on the bias they will have a tendency to stretch a little when sewn. Just center the pattern over the striped pieces and trim as closely as possible.

{ If you're not using the pattern printout, you can just use a drinking glass or other round object to curve the corners of the striped rectangles and then use that shape to cut out the lining pieces.}
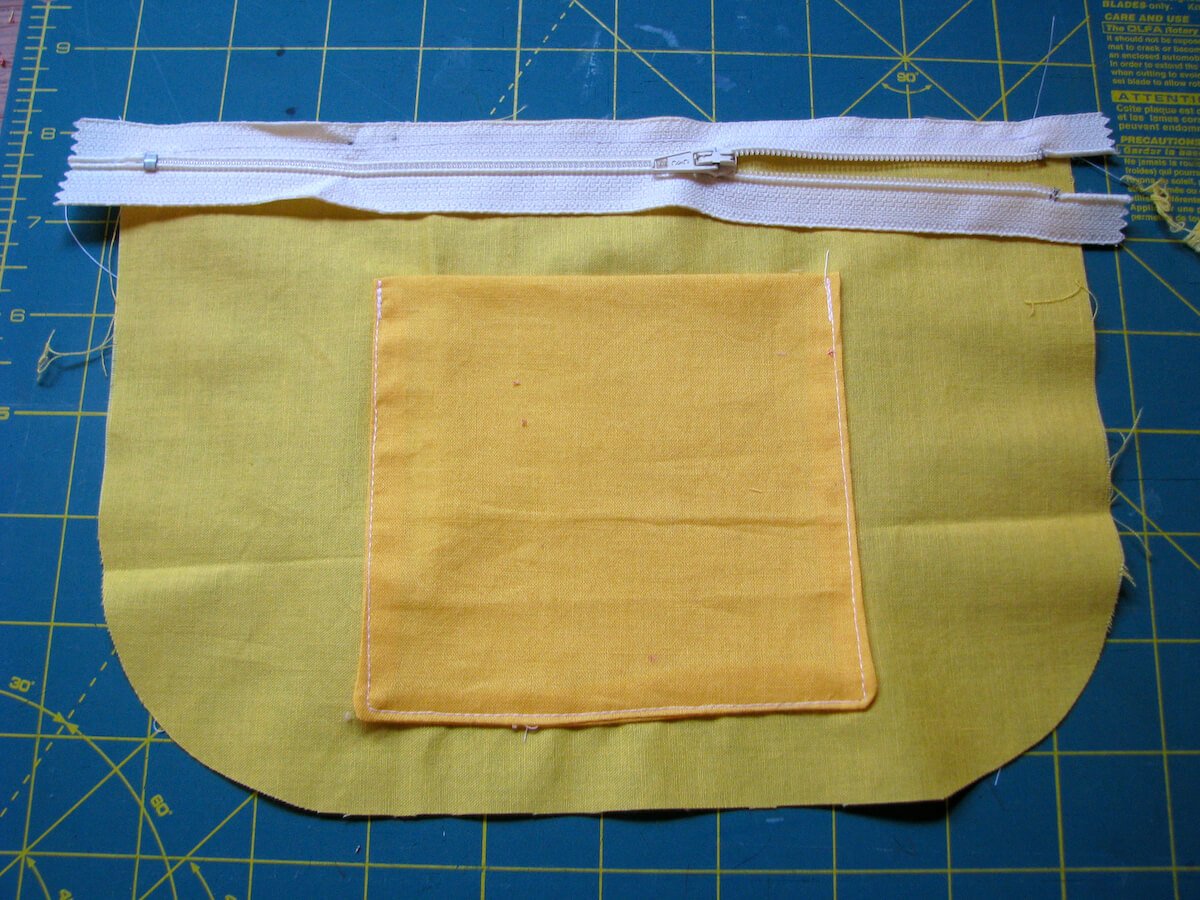
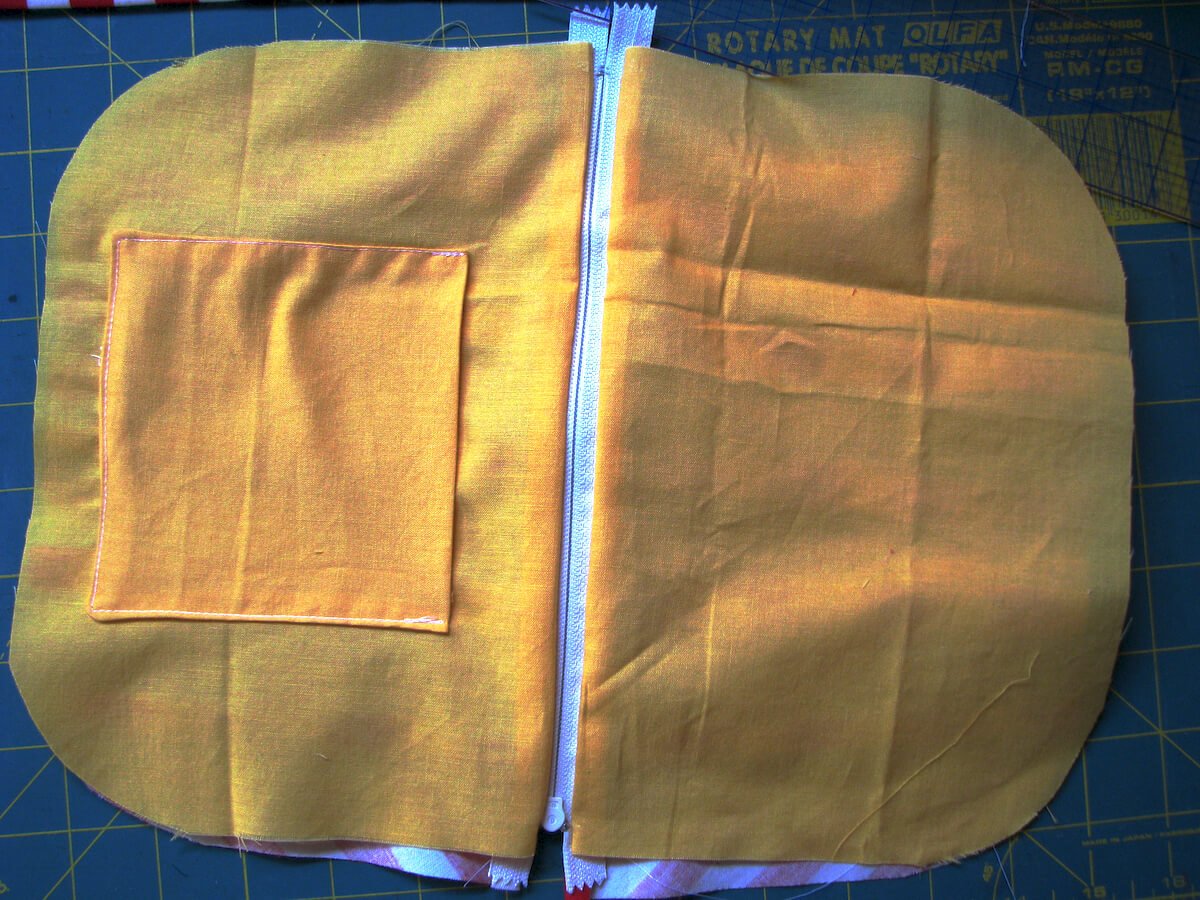
STEP 5: (optional) Add a pocket
Add a pocket to the lining if you would like. I used a rectangle 5"x9" and this tutorial from my blog.
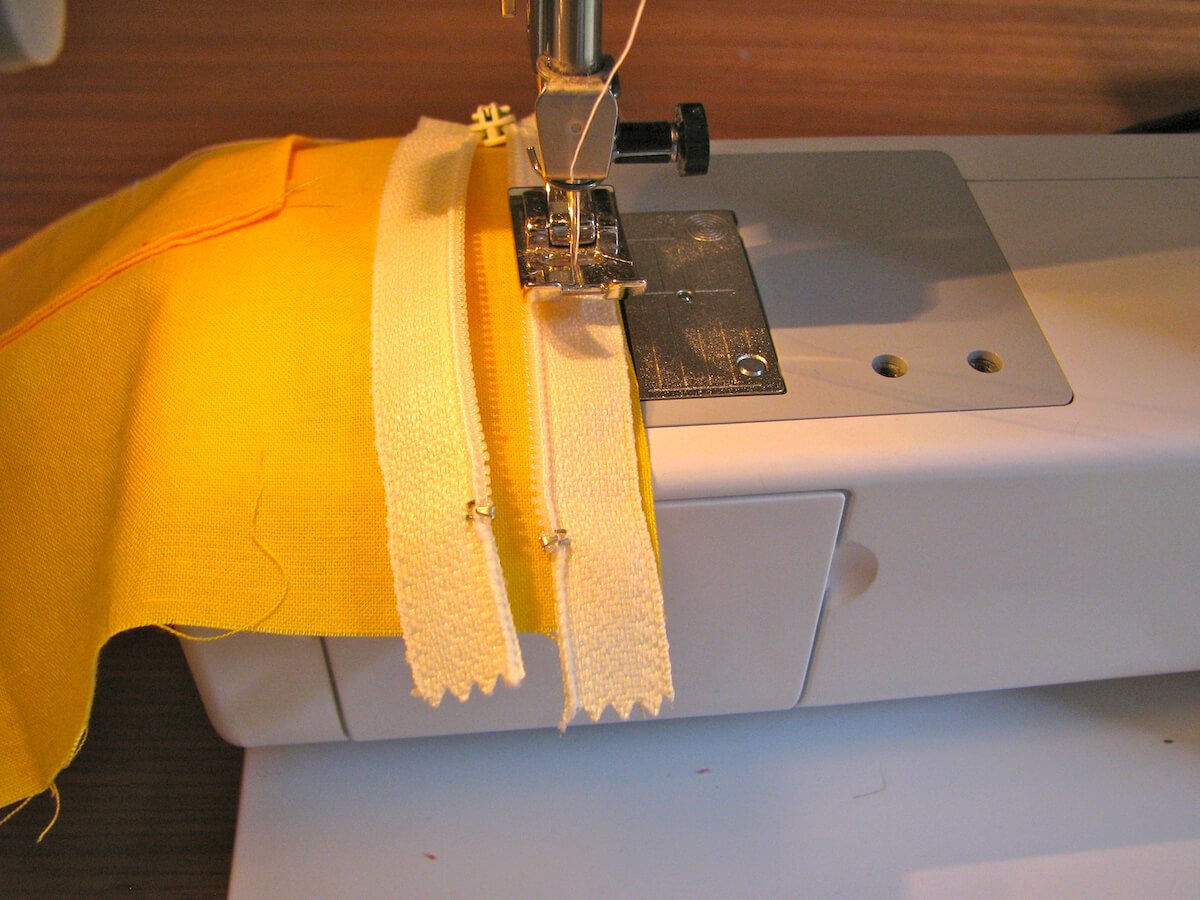
STEP 6. Attach zipper to lining
Center the zipper face up over the right side of one lining piece with the edge of the zipper aligned with the top edge of the lining. (So make sure you got that: the WRONG side of the zipper is facing the RIGHT side of the lining)
Sew together with a 1/4" seam, starting and ending where the teeth of the zipper begin and end (in other words, don't go all the way to the end of the zipper; stop sewing when you get to those "tails" on the zipper that open apart.
Hints:
- You will have to move the head of the zipper at some point to avoid sewing over it, so when you get close to it, put your needle down, slide the head of the zipper out of the way, and continue on.
- I use a regular presser foot for sewing zippers, but you can use a zipper foot if you like. I find if I line the edge of the presser foot up with the edge of the zipper, I get a nice 1/4" seam.

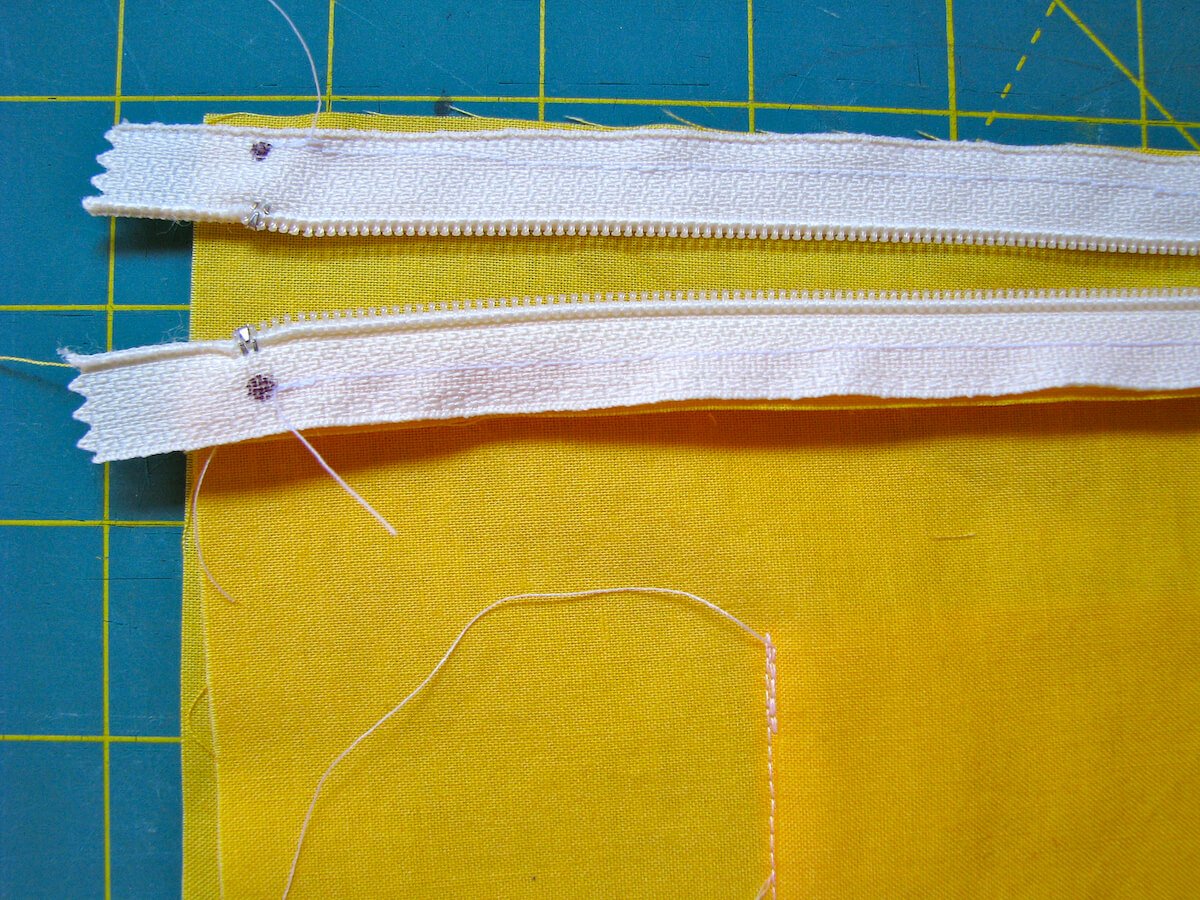
Repeat for the other piece of lining and other side of zipper. The dots in the photo on the right shows where I ended the stitching.

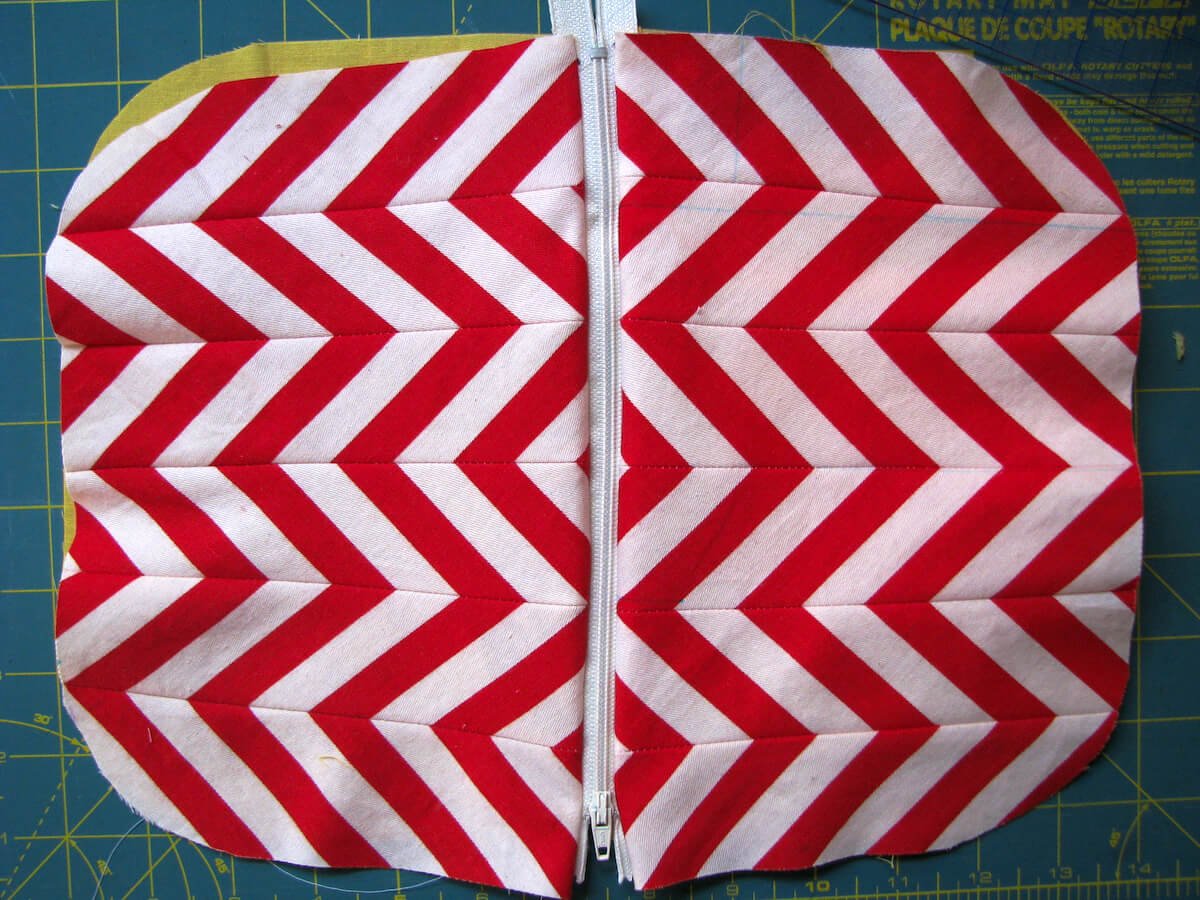
STEP 7: Attach outer pieces to zipper
Center one outer piece face down on the right side of the zipper, top edge aligned with the zipper edge (So make sure you got that correctly: The RIGHT side of the outer piece is facing the RIGHT side of the zipper).

Sew together with a 1/4" seam, just inside of the lining/zipper stitches (it helps to have the wrong side of the zipper facing up while you sew so you can see those previous stitches). This is what it will look like when you flip the striped piece away from the zipper after sewing:

Repeat for the other outer piece and other side of zipper.

When you press everything away from your zipper, the top of your zipper should look like this:
And the bottom should look like this:
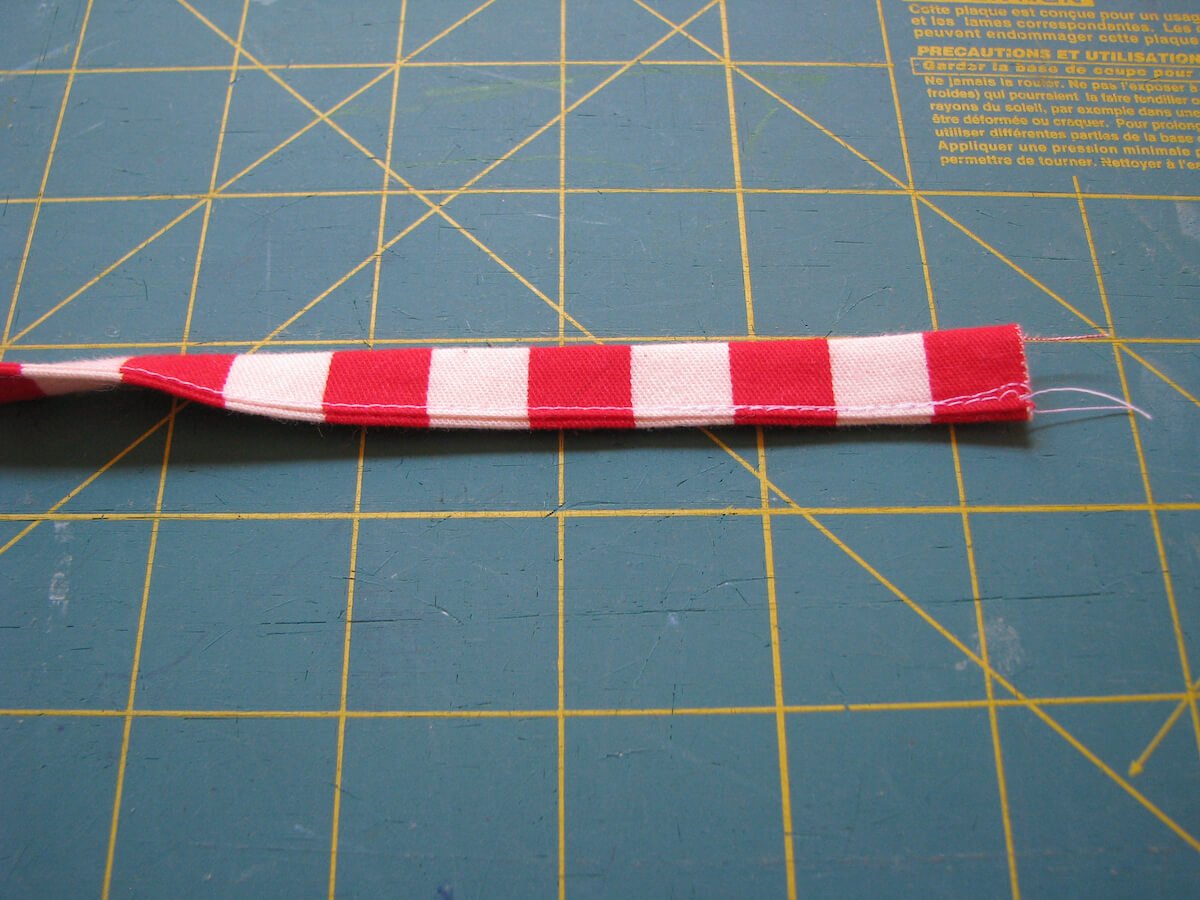
STEP 8. Attach strap
Cut out a 2.5" by 13" rectangle for the strap. Fold in half like a hotdog and press to create a crease down the center of the rectangle. Then fold the raw edges in to meet at the center crease and fold again to hide those edges. Sew along the open side of the folded strip to finish the strap.

Fold strap in half, pin raw edges of strap along the raw edge of one of the striped pieces about 1/2" below the top. Baste a little less than 1/4" away from the edge to secure in place.

STEP 9. Sew pouch together
With striped pieces right sides together and lining pieces right sides together AND THE ZIPPER HALFWAY OPEN (v. important!!!), sew around the entire wristlet with a 1/4" seam, skipping the 3" at the bottom of the lining (it helps to mark this before you sew).

Hints:
- When you get to the zipper, go very very slowly and make sure that you will not be sewing through any metal. It's going to be close, so be careful!
- The zipper tails should be sewn towards the lining, not towards the stripes.

STEP 10. Turn right side out and finish
Use the turning hole to turn the wristlet right side out, then stitch the turning hole shut, either by hand or machine.

Press fabric away from the zipper, and you're finished!
