
Rainbow Dress Tutorial
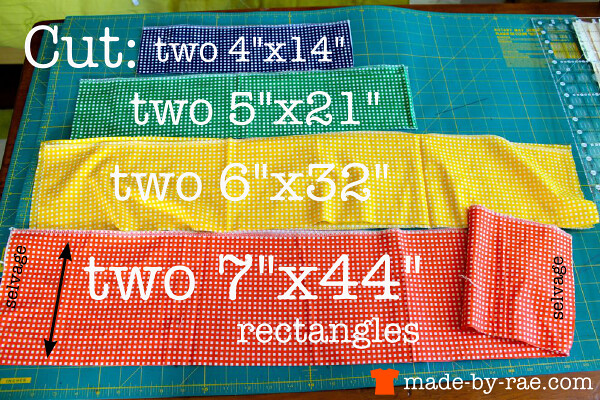
Well it's here: The Rainbow Dress Tutorial! I realize my timing is (as usual) a little odd, as it's now the very end of summer proper and the temperatures here in Michigan are downright cool. But my sister Elli just moved to Texas and assures me that it's still 100 degrees there, so I'm guessing some of you will still be able to use and enjoy it. Anyway, it's never too early to start sewing for next summer, right?Finished SizeThis tutorial is for a size 2T dressIf you skip the straps, a size 3-5T skirt that is 18" long and has a 26" waist (fully stretched). The finished dress is 18" tall without straps and 21" tall with straps.What about other sizes?If you'd like to make the dress in a larger size, add 1/4" to the width and length of each rectangular piece for every size you want to go up (for example, you would add 3/4" to each piece for a size 5). Note that the bottom piece is already 44" wide, so my suggestion would be to leave that one the same width. If you want to make this in smaller sizes, subtract 1/4" from both the width and the length of each piece for each size you want to go down.Materials List1/2 yard of four coordinating fabrics (it doesn't have to be a rainbow; think solids! stripes! colorblock!)elastic thread for shirring (see Step 6 for more information on elastic thread)1/2" wide elastic for strapsDo you need a serger?Nope. The instructions here presume that you have a serger to finish the edges as shown in the pictures, but if you don't have a serger, you can easily zigzag stitch the raw edges for a similar effect. I've also included suggestions throughout this tutorial for sewing this dress without serging OR zig-zagging (is that even a word?)Read this first please: The pictures and instructions are offered here for free. Please don't repost any of my content without permission. Thanks!You can download the 2-page printable PDF of this tutorial here:CLICK TO DOWNLOAD THE FREE PRINTABLE Step 1
Step 2
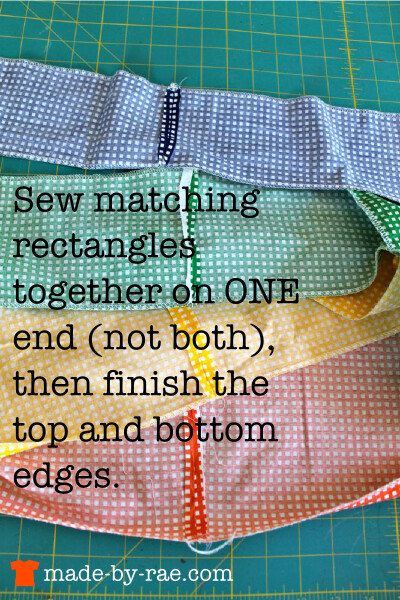
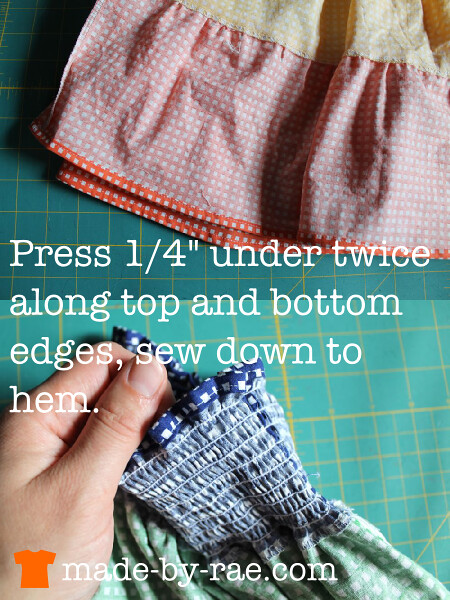
Use a 1/4" seam to sew the ends together on one side. Then serge the top and bottom edges of each tier. A zig-zag stitch works just fine if you don't have a serger. If you prefer a more "finished" look, add 1" to the width of each of the panels when cutting in Step 1, then fold/press under 1/4" twice along the long edges and sew down instead.Step 3
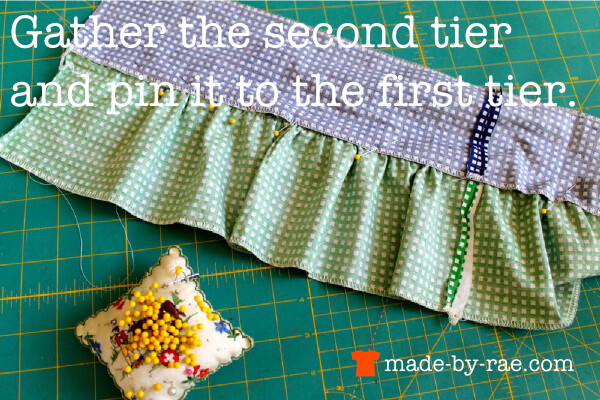
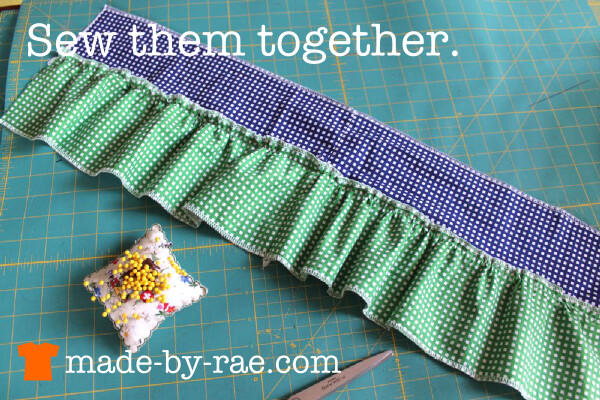
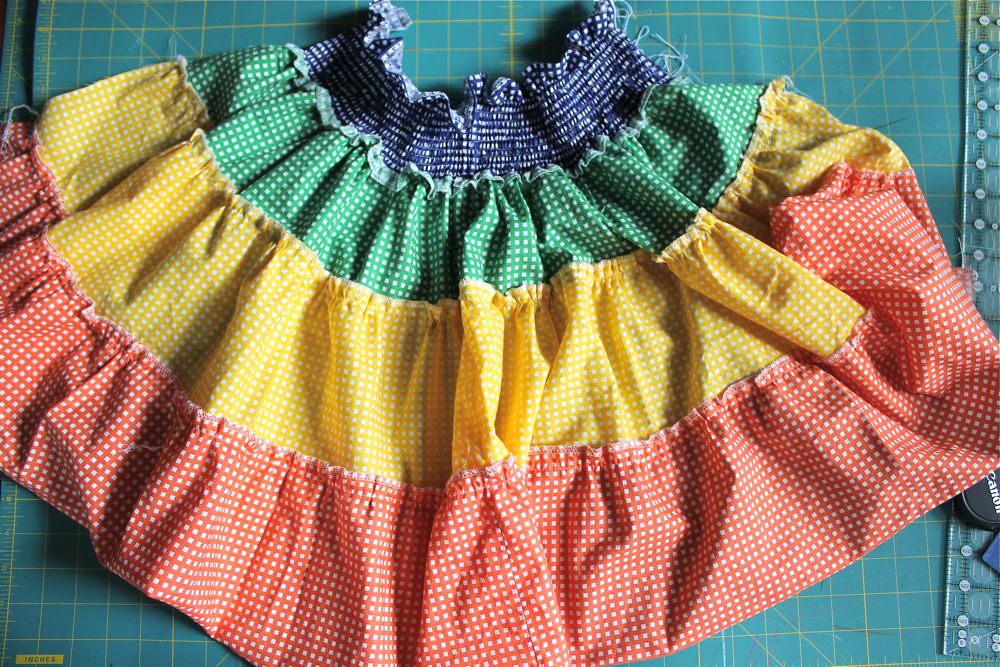
I find it easiest to gather by setting my machine tension to the highest setting and using the longest stitch length possible. Then I just sew one row of stitches 1/2" from the edge on the right side of the fabric to gather it up. Leave plenty of thread at each end. When you pull on either of the top threads you can adjust the gathers easily.Line up the tiers with their ends and seams together. The top edge of the second tier should overlap the top tier by 5/8" (an easy way to do this: flip it over to the back side and move the second tier so that the gathering stitches are JUST hidden by the bottom edge of the top tier). Adjust the gathers evenly by pulling on the ends of the gathering threads, then pin them together.Step 4
Sew directly over the gathering stitches, 1/2" from the top of the second tier.Step 5
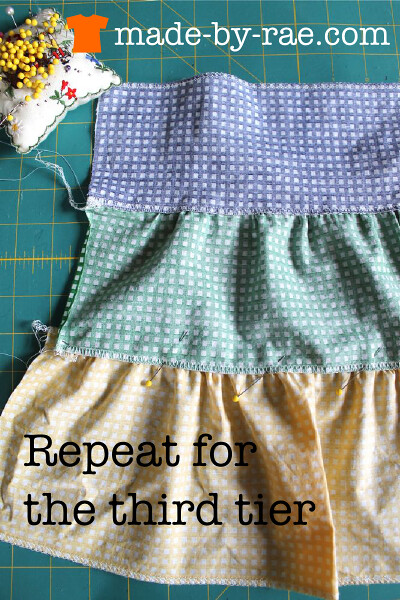
Now it should look like this:

Step 6
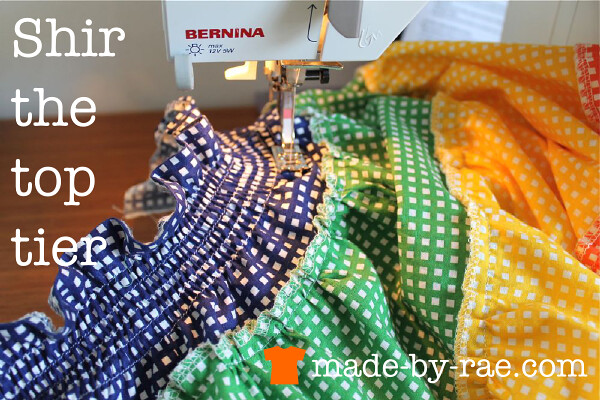
Handwind a bobbin loosely with elastic thread* and put it in your machine. This goes faster than you might think because elastic thread is really thick.*You want my advice? Don't use Dritz or JoAnn storebrand, the quality seem to be really unpredictable and has resulted in nothing but in poor shirring and tears for me. Try Guterman (available at JoAnn) or order yourself a huge cone of this stuff instead.OK, so begin shirring across the top tier, beginning 1" below the top edge. Leave a little bit of extra elastic thread at the end of each row before turning the fabric around and sewing back across the tier. The rows should be 1/4" - 1/2" apart. Keep in mind that you should ALWAYS test this on a scrap of fabric before attempting on your dress, and that the closer together your rows, the more tightly your fabric will gather. I have mentioned before that I have a love/hate relationship with shirring; in my experience it definitely takes some trial and error to get the tightness you want, so take the time to experiment with this a little bit so you don't get frustrated!Steam the rows of shirring with your iron after you are finished; the elastic should shrink up even more:
Step 7:
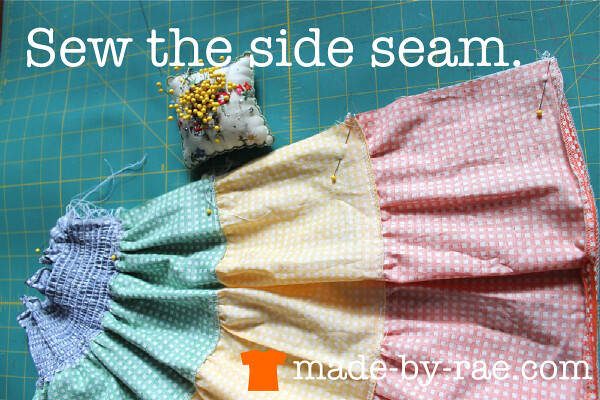
Pin the remaining side edges together, matching up each tier carefully. Then sew together with a 1/4" seam.
I also serged this seam to prevent fraying, but you could also zigzag stitch or do a french seam here if you don't have a serger.
Step 8:
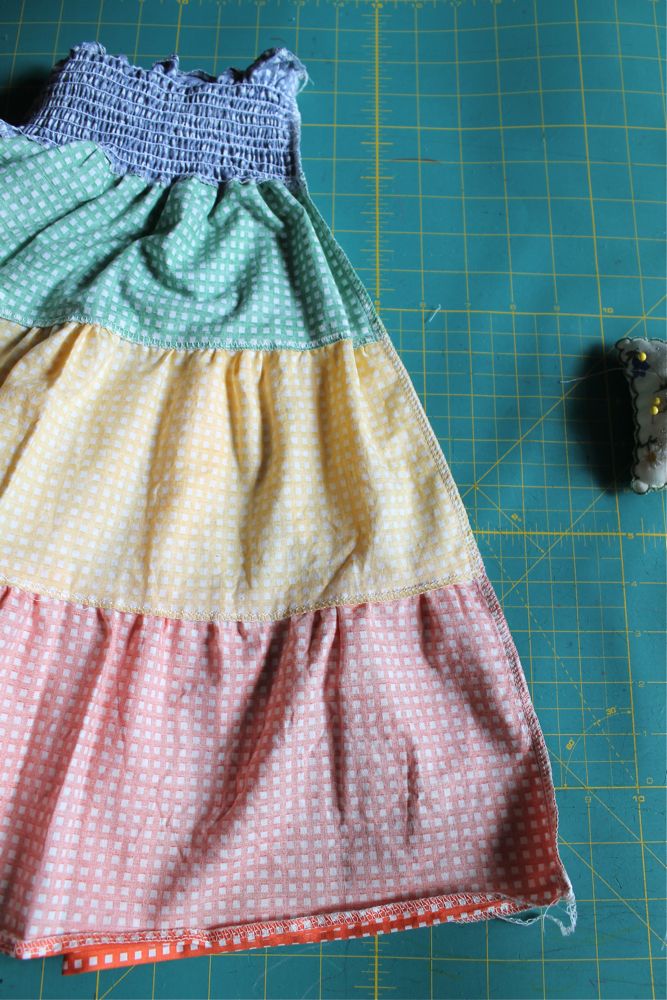
Now it should look something like this:
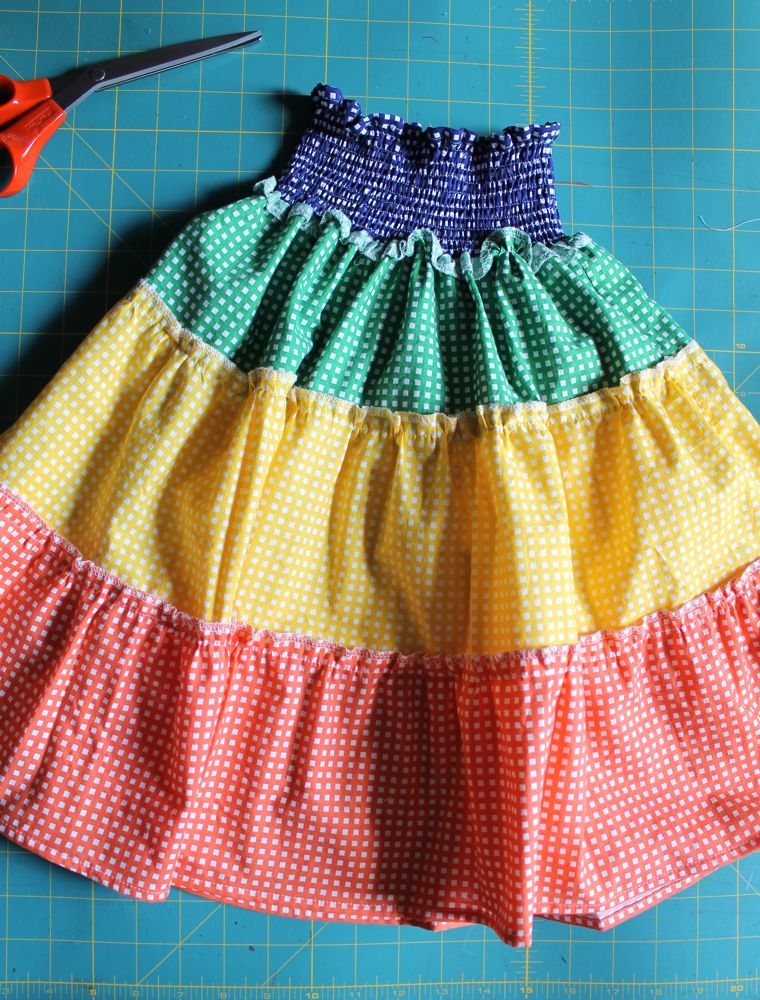
If you are making a skirt, congratulations, you're finished! Or continue on to add straps...Step 9:
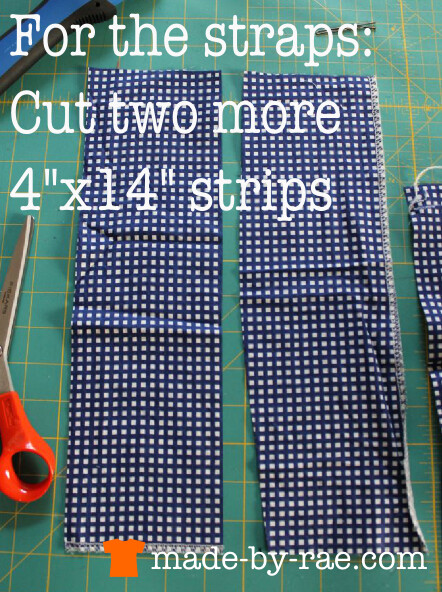
Step 10:
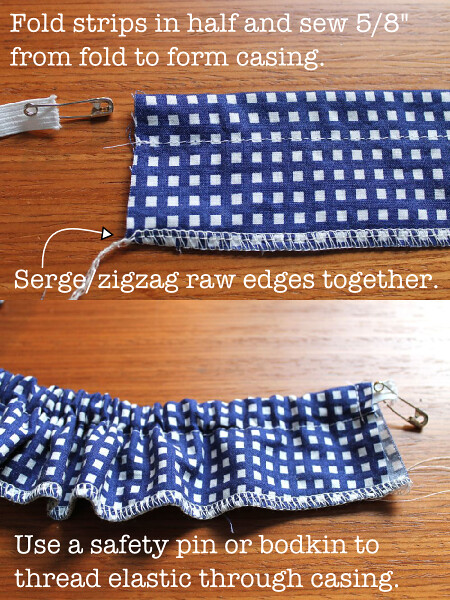
You'll need about 8" of 1/2" wide elastic to thread through the casing here.Note: If you don't like the serged/zigzagged look, cut your strap rectangles 1" wider, then fold the raw edges opposite the fold under (together) 1/4" twice and sew down for a more finished look. You could also fold the raw edges under towards each other and sew down. Either way works.Step 11:
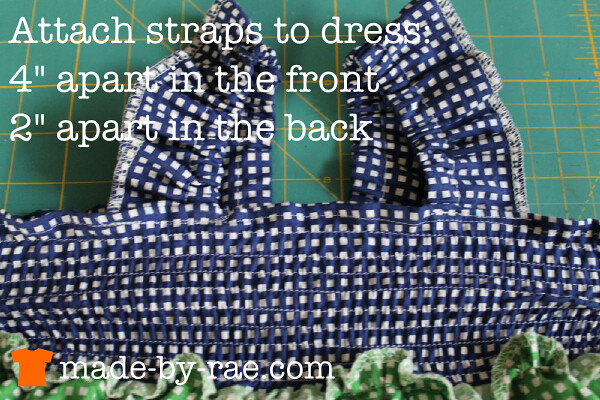
You'll want to pin the straps in place with safety pins and try it on a child before sewing these down; I found that 8" was a little too long so I pulled a little more elastic through and then sewed the straps down. Fold under the raw edges on the ends before sewing them to the dress.
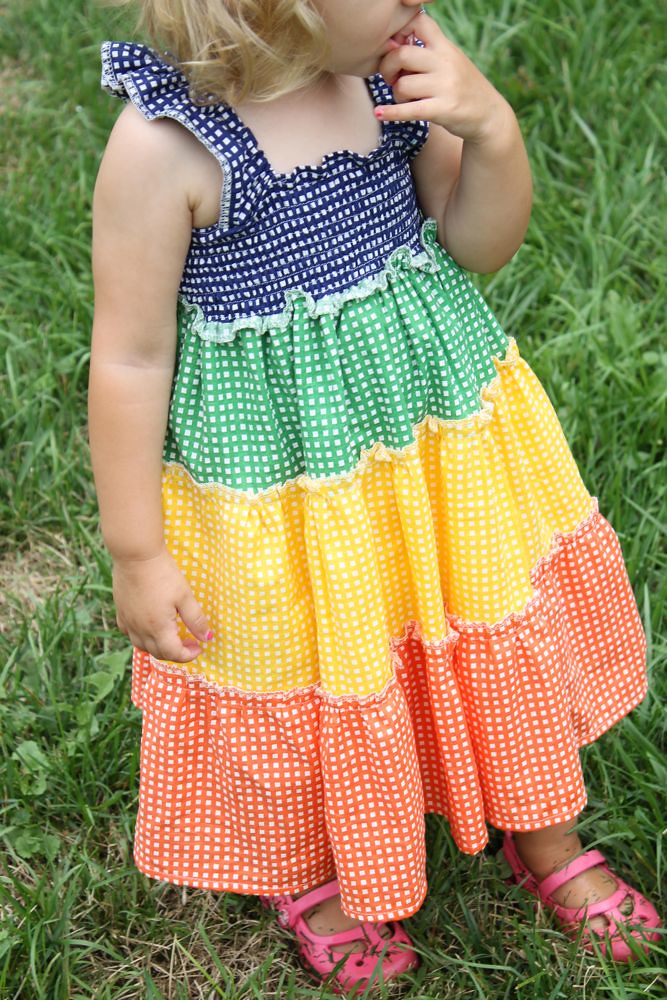
Voila! Finished dress!!! Add your photos to the Rae Made Me Do It! Photo pool so we can all enjoy them.