
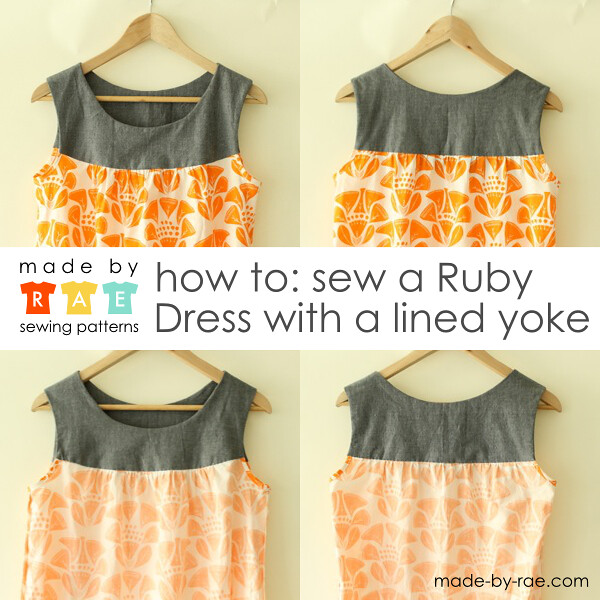
Ruby Dress Yoke Lining Video Tutorials
I promised I'd show you how to line the yoke on the Ruby Dress and Top, so I made you guys another handy dandy series of video tutorials to guide you in the process (the Washi Dress also has a video series on lining the bodice that you can view right here).
I'd probably recommend if you're new to sewing that you try the pattern the way it is first, before attempting this method. But honestly even if you're an ambitious beginner you shouldn't have much trouble with it. The only issue I really see here is that the dress is MUCH easier to alter, fit-wise, if you sew it together the way the instructions show. So it's smarter to have made at least a test version or muslin first before going this route.
Array
READ THIS before you watch:
One thing that is not mentioned in the video but is pretty important: I really recommend that you add an extra 1/4" to the neck and armhole edges of the yoke pieces (all of them) when you cut them out to allow for the seam allowance needed with this technique. It's not shown in the video (and actually, it was one of those things I realized *as* I was making the video, ahem, which resulted in a finished dress that's an eensy bit too tight), but it's a good idea so go ahead and do that, OK?
What about a full lining?I show how to bind the lower part of the armhole with bias tape here, but you could just as easily line the lower part of the dress as well and make it fully lined. To do this, cut an extra front/back dress (I'd cut them 1" shorter for the linings so they won't show at all at the bottom), add 1/4" extra seam allowance at all of the the armhole curves, sew the side seams separately for dress and lining, then sew dress and lining together along the armhole curves with right sides facing. Then clip and turn right side out; you'll get a very nice armhole finish and then you can gather it and attach it to the (lined) yoke. Fully lined Ruby? Hot-cha-cha!! You are on FI. YAH.
OK! Ready to watch? Here you go!
Ruby Yoke Lining - Part I (7.5 min)
Intro, sewing neck and first armhole
Ruby Yoke Lining - Part II (9.5 min)
Sewing second armhole, finishing lower armholes with bias tape
Ruby Yoke Lining - Part III (7.5 min)
Attaching the yoke to the lower part of the dress
Ruby Yoke Lining - Part IV (40 sec)
Final look after hand-sewing. Yeah, yeah...I accidentally shot that clip with the camera sideways...heh.
I hope you'll find these useful as you sew up your very own Ruby Dresses!