
How-To: Square Floor Cushion

Array
Ever wonder what to do with all the scraps you accumulate when you sew all the time? Why not make a floor cushion? Using scraps makes them heavier and more substantial than if you fill them with stuffing or poly-fill. I always feel guilty throwing fabric away, but I'm not the sort of person who saves every little scrap for a future project. As much as I would love to use all those wonderful little scraps, I have to be realistic. Is it really going to happen? And if so, WHEN? Most of the scraps I produce (especially from garment fabrics, like knits and rayon) don't really have any potential for reuse.

Array
So I recently took a yard of velveteen (this one is from Anna Maria Horner's Field Study velveteens), some piping, and a whole bunch of scraps, and made this little floor cushion for the kids. They love it!

Array

Array

Array
I should mention that the original concept for this cushion came from an adorable round floor cushion made by my friend Emily; which she made using a tutorial from Living With Punks (warning: copious amounts of pop-up ads at that link). That version also uses just a yard of fabric, and adds some cute handles on the side to boot!Here's a quick how-to for my (square) version:
Materials
1 yard of fabric, either 44" or 54" wide
4 yards of home decor piping (or make your own with a bag of 6/32" piping, some 1.25" wide bias strips, and my piping tutorial)
UPDATED: 1.5" wide is better
Bag o' scraps
Step 1: Take a yard of fabric and cut it into two 18" squares for the top/bottom of the cushion, and two 12" wide by 36" tall strips for the sides. Note that the print of your fabric will run sideways if you use a one-directional print, so you might want to find a non-directional one.

Array
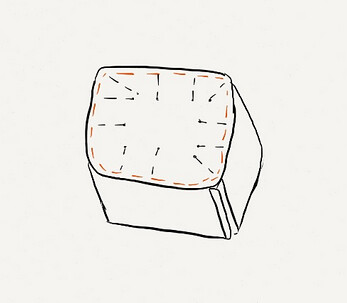
This diagram above shows how you would cut a yard of fabric to get the pieces you need; the part with the red X is not used.

Array
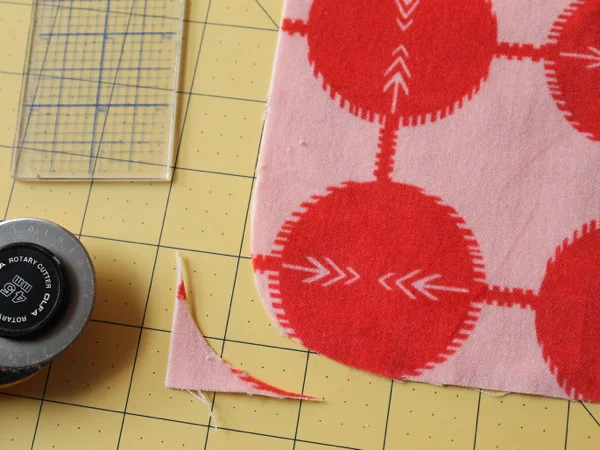
Step 2: Trim the corners of your squares (but NOT the side strips) so that they are curved. You might want to use a small juice glass to help you draw the curve first.
Array
Step 3: Sew your piping around the edges of the top and bottom squares, keeping the edges of the piping even with the edge of the squares, sewing as close to the piping cord as you possibly can (a zipper foot and adjusting needle position to the left may help), and overlapping the ends of the piping when you get back to where you started. To overlap the ends, unpick the stitches in the piping and trim away the cord for the last inch or so on one end, so that you have a little piece of fabric to fold over the other end.

Array
Step 4: DO NOT SKIP THIS STEP. Clip into the seam allowance of your piping around the corners of the squares.

Array

Array
Step 5: Sew the short ends of your two side strips together with a 3/8" seam, leaving a 4-5" hole in one side so you can stuff your cushion later. We'll call this piece the "side loop" from here on out.

Array

Array

Array
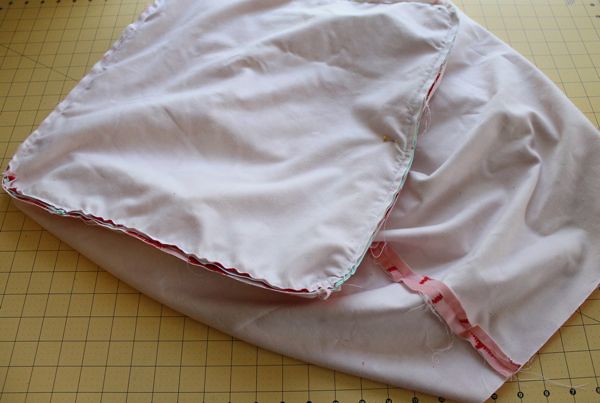
Step 6: Pin the top square to the side loop with right sides and raw edges together. It helps to pin the end seams at the corners first, then find the middle of the sides and pin those at the other two corners, then ease in the rest of the edges as you pin them together. Now sew the top and side loop together, with the top square facing up, so you can use the piping stitches as your guide (just sew right over them). Then repeat this for the bottom square and the other end of the side loop.
Array
Array
Step 7: Turn your cushion right side out (through the hole) and START STUFFIN BABY.

Array
Here's my bag o' scraps. I keep one trash can in my sewing room for "fabric trash." I almost have enough already for another cushion!!!

Array
Step 8: Once your cushion is full, hand-stitch the opening shut with buttonhole or topstitching thread. Basically, a stronger thread will be more likely to hold up over time. You can also try doubling up machine thread, but make your stitches smaller so that your seam is extra strong.

Array
Voila! Beautiful cushion!!!