
Cleo Skirtalong Day 5: Elastic and Hems
Welcome to the last day of the Cleo sewalong! If you’re just joining us, see all of the skirtalong posts here.

Cleo skirtalong Day 5
Today we’ll add elastic to the waistband and hem the skirt (or add hem bands if you’re making View A).
Step 8. Add elastic and close the waistband
Using a safety pin or bodkin, thread the elastic through the back waistband casing.

Cleo skirtalong / elastic and hems
Secure both ends with safety pins at the sides seams.
TRY IT ON!
Try on the skirt to check the fit, adjust the elastic as needed. It’s now that I need to tell you something important: Cleo really needs to be worn at the natural (high) waist, not the low waist or above the hips. I know this can be tough, but it really does look best when it’s worn at the natural waist. I usually need to trim the elastic down from the recommended length by a few inches, because I like to be able to put my hands in my pockets or keep my phone in there without feeling like the skirt is falling down.
Cleo skirtalong / elastic and hems
Here’s a closer look at the waistband, with elastic added and pinned at both sides:

Cleo skirtalong / elastic and hems
Once you are happy with how it fits, take the skirt off and stitch through all layers of the waistband at each side seam to secure the elastic.

Cleo skirtalong / elastic and hems
Now pin and topstitch the folded edge of the front waistband to the inside of the skirt as you did for the back.

Cleo skirtalong / elastic and hems
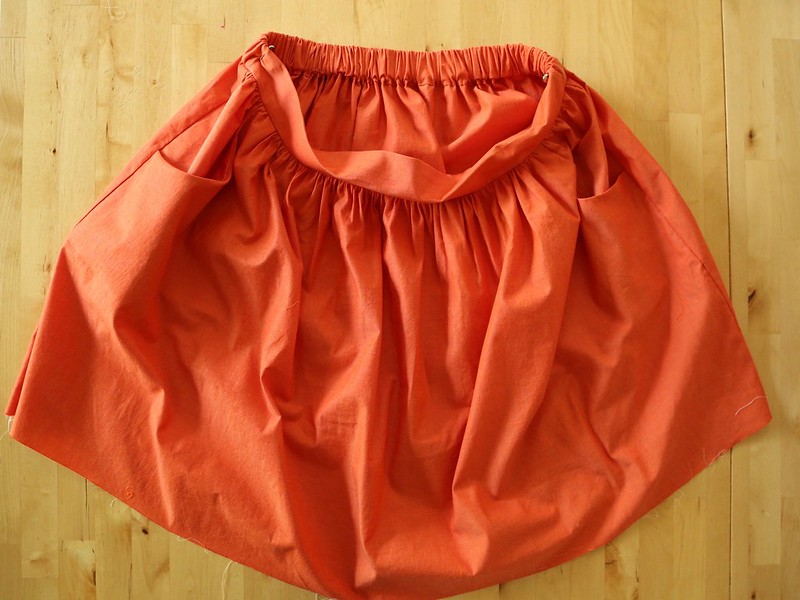
When you’re finished it will look like this from the outside:

Cleo skirtalong / elastic and hems
And here’s how it looks from the inside:

Front waistband - inside view
TRY IT ON!
At this point, I recommend trying on the skirt again to check the length. You have yet to hem it up (View B), or add the hem bands (View A), but this should still give you a rough estimate of how long it will be on you. If you want to add wider hem bands, narrower hem bands, adjust the amount you’ll fold up at the bottom, or shorten the skirt before adding the hem bands, do that now. This is your skirt, so customize it so you get the length that you want!
Step 9. Attach the hem bands (View A only; scroll down for View B)Sew the front and back hem bands together along the short ends. Press the seam allowances open. There is no need to finish these seams.

Cleo skirtalong / elastic and hems
Note that I interfaced the fabric I used for the hem bands (shot cotton) because it was lighter than the orange shirting I used for the rest of this skirt; in retrospect I don’t think that was necessary, but you can see it in this photo.
Press the hem band in half lengthwise with wrong sides together. The center fold/crease will become the bottom of the skirt.

Cleo skirtalong / elastic and hems
With the skirt right side out, pin the hem band to the bottom of the skirt, matching the side seams and lining up all three raw edges together.
If the side seams don’t match up, make sure you have the front hem band matched to the front skirt, and the back hem band matched to the back skirt.

Cleo skirtalong / elastic and hems
Another issue I sometimes have is that the hem band comes out slightly too big or too small to fit around the bottom of the skirt. If this happens, adjust one of the hem band side seams until the skirt and hem band are exactly the same size (you may have to rip out the hem band seam to do this).
Now sew the hem band to the skirt through all three layers with a 1/2″ seam.

Cleo skirtalong / elastic and hems
Finish this seam as desired (again, a serger or a zig zag stitch through all layers over the edge are both great options), and then flip the hem band down and press it.

Cleo skirtalong / elastic and hems
Here’s how mine looked after finishing the hem band seam and pressing it:

Cleo skirtalong / elastic and hems
One thing to add: if you’d like, topstitch just above the hem band seam to hold that seam allowance in place. It can add a nice professional touch once you’re finished, but it will create a visible line of stitching, which I don’t always want (so I didn’t do it here).

Cleo skirtalong / elastic and hems
Step 9. Finish hem (View B only)
Fold over and press 1/4″ toward the wrong side along the bottom edge of the skirt.

Cleo sewalong day 5 / hemming View B
Fold over another 1 1/2″ (Note: use whatever amount you want here — sometimes I like to do a really wide hem, so I fold 4,” and sometimes I’m short on fabric and use a very narrow hem) and press.

Cleo sewalong day 5 / hemming View B
Pin the hem in place. Don’t skip this — it helps prevent the fabric from twisting as you sew the hem!

Cleo sewalong day 5 / hemming View B
Finally, stitch along the first fold to secure the hem in place. For this skirt I used a straight stitch and a 3/8″-wide hem (see more pics of this skirt at my Green Striped Cleo post):

Cleo sewalong - hems
Here’s another skirt I made with a wider hem. For this one I used the blind hem foot and stitch on my sewing machine, which produces an invisible stitch line from the outside of the skirt (you can see more pics of this skirt in the Gingham Cleo post).

Cleo sewalong - hems
That’s it for our Cleo Sewalong! I hope you enjoyed this step-by-step deep dive into the Cleo skirt pattern.

Cleo skirtalong / elastic and hems
Please post any questions and comments if you have them, and share your photos with us using the #cleoskirt tag so I can give you a virtual high five!