
Trace and Make: Shorts Pattern
I’ve taught a number of trace and make classes over the years, including my Trace and Make Tee and Leggings class for kids over on Creativebug, so I think it’s a pretty useful thing to know how to do. Tracing existing garments to create a pattern really helps you understand the architecture of garments, how clothes are built. It’s also handy when you want a pattern for something but can’t find the right one, or have a well-fitting garment you want to replicate.
In this post, I’ll show you how to make a simple shorts pattern — just one pattern piece — from an existing pair of shorts. You can also use this method for other types of garments, and since it’s based on something that already fits, there’s no guessing on the size you need.
DIY trace and make shorts / made by rae
There are a few caveats to tracing clothes to make patterns that I’d like to mention before we start. First, be aware of the ethical pitfalls: don’t use a traced pattern to create a pattern or product you intend to sell. That is using someone else’s work for profit, and unless you have permission to do this, it’s not OK. Do the work, my dudes. I’ve traced and recreated plenty of garments over the years for myself or my kids, but when I create new patterns to sell, I don’t use tracings; I draft new patterns from scratch or base them on my own existing blocks. Also, be aware that the “it’s OK to trace as long as it is for personal use” philosophy may still be viewed by some as too lax; there are some who believe that tracing is under NO circumstances acceptable.
Another thing: tracing is fairly time-consuming and detailed work, requiring a fair amount of fiddling/adjustment, so if there’s already a sewing pattern for the thing you’re tracing, consider supporting the artist who already put time into creating that pattern for you. Tracing is great, but it’s not perfect; sometimes a sewing pattern that’s been tested is even better.
Since I first posted this tutorial (as part of the upcycle men’s shirts into kid shorts tutorial, Apple Doesn’t Fall Far From the Tree Shorts), I created the Parsley Pants sewing pattern for kids, along with an easy tutorial for making Parsley shorts, so you might want to give that one a try if you’re in market for a simple pants/shorts pattern!
OK, let’s get started!
Tools you’ll need:
clear quilter’s ruler
white butcher paper or large-sheet packing paper
marker
Step 1: Find a pair of shorts
Find a pair of shorts that fit your child. The shorts should have elastic either halfway or all the way around the waist. Flat-front shorts with elastic in the back are fine.
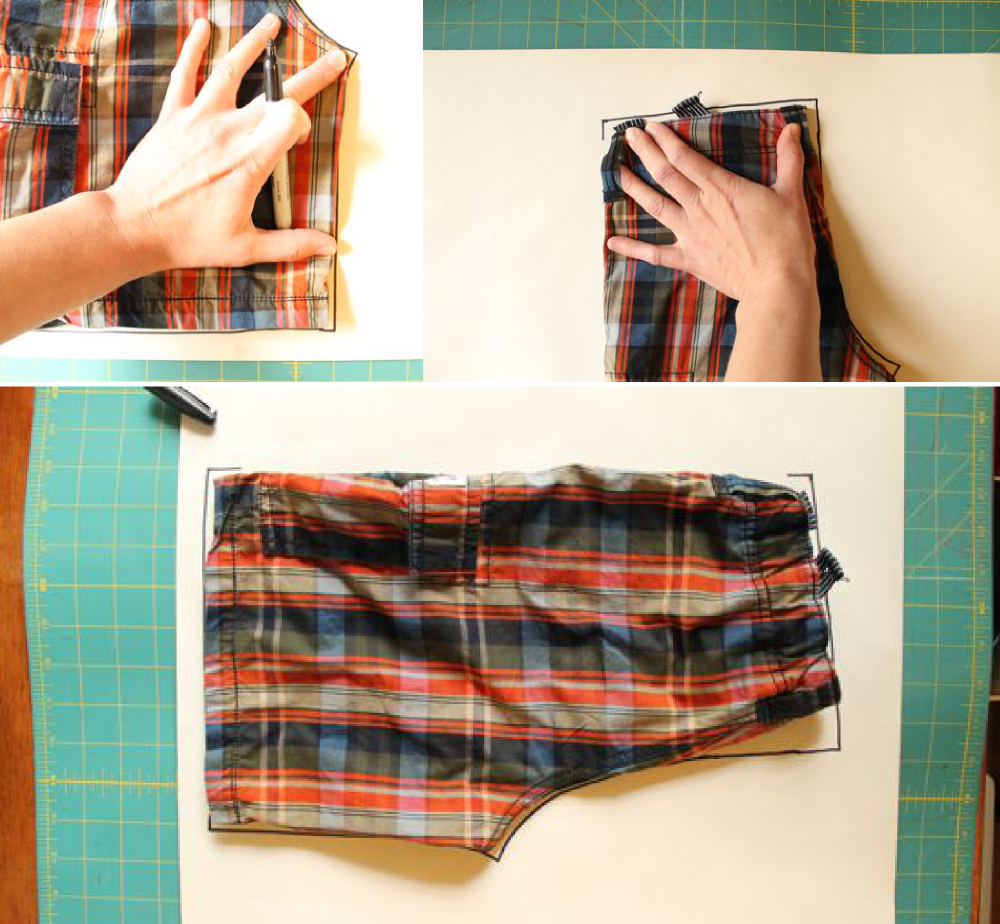
Step 2: Trace the back of the shorts
Fold the shorts in half down the center so that the back side of the shorts is facing out. Place the shorts on a large piece of butcher or packing paper, and overlap the halves of the shorts as evenly as possible, lining up edges carefully and flattening the shorts as best you can. Take a marker and trace as closely around the bottom, inseam, crotch curves, and top edge of the shorts as possible.

DIY trace and make shorts / made by rae

DIY trace and make shorts / made by rae
Stretch out the elastic as much as you can to get the true shape of the shorts along the top, and make marks at the side so you’ll know where to place the shorts on the paper when you trace the other side.

DIY trace and make shorts / made by rae
Step 3: Trace the front of the shorts
Now fold the shorts down the center so that the front side is facing out. Line the sides of the shorts up with the marks you just made. Repeat the tracing steps for the back.

DIY trace and make shorts / made by rae

DIY trace and make shorts / made by rae
Step 4: Check that the pattern is wide enough at the waist
Before we move on, we’re going to do a little size-check. Measure across the top of the shorts, double that number, and make sure that it’s at least 2” bigger than the hip measurement of your child (measure with a flexible measuring tape around the widest part of their bum). If the waist width is too close to their hip measurement, it’s going to be a squeeze to pull it on, so if it’s too small, draw the pattern wider at the center front or center back until it’s large enough.

DIY trace and make shorts / made by rae
Example (above): I measured the waist edge on the pattern to be about 13” wide, so the finished shorts will measure twice that, or 26” around the waist before the elastic goes in. Since my son’s hip measurement is 24,” there will be 2” of extra room.
Step 5: Make sure the inseam is the same length on both front and back
The shorts have to match up along the inside of the leg (inseam), so measure that distance on both sides and make sure it’s the same. If it’s not, lengthen one of the sides to match the length of the other.

DIY trace and make shorts / made by rae
When you’re finished you should have something similar to the outline below. The taller side is the back of the shorts.

DIY trace and make shorts / made by rae
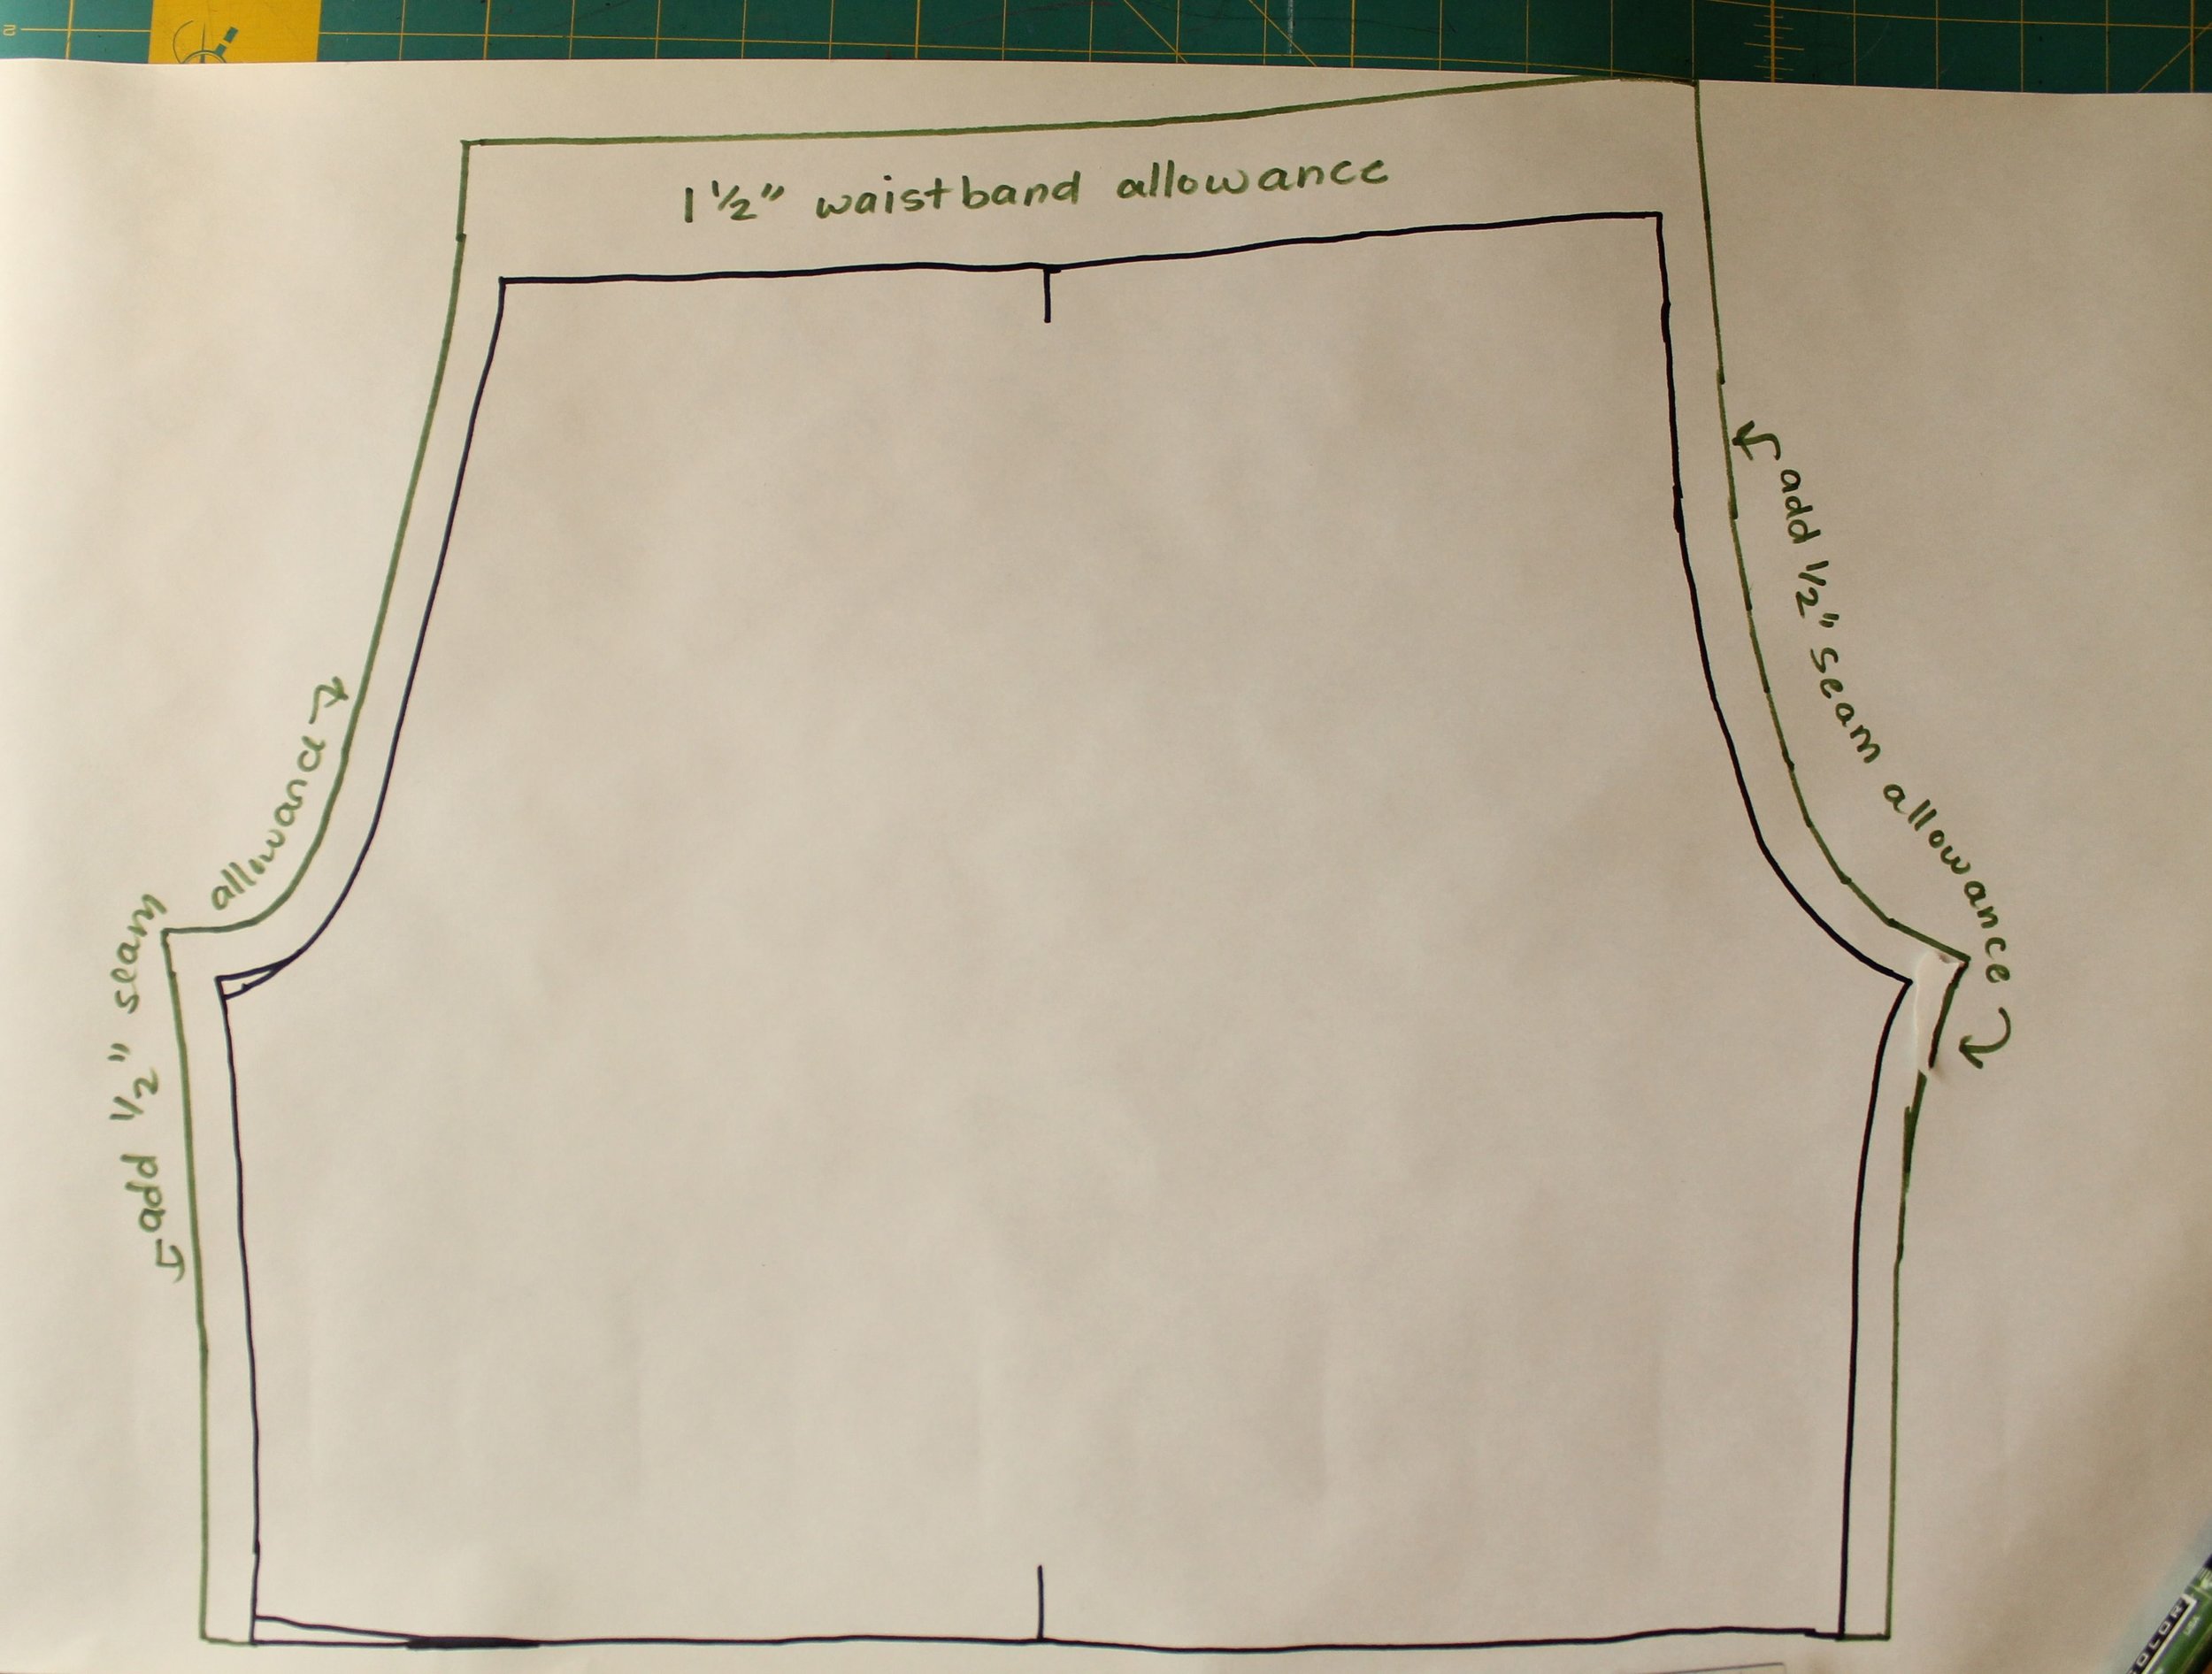
Step 6. Add seam allowances to the pattern
Take your ruler and add ½” around the outside of the center and inseam edges of the pattern. Add 1 1/2” to the top for the waistband casing, then add 1" or more for the hem allowance along the bottom edge.
DIY trace and make shorts / made by rae
Note: In this photo you don’t see the hem allowance along the bottom edge of the pattern. I originally created this pattern as part of my Apple Doesn’t Fall Far from the Tree shorts tutorial, which upcycles men’s shirts, so it uses the finished edges from the shirts for the hem. If you want to use this pattern to make additional pairs of shorts or you are using new fabric for this tutorial, definitely add at least 1” for hem allowance to the bottom of the pattern.
Now you’re finished making your pattern! You’re ready to cut out your fabric and sew some awesome shorts woot woot!!!
Want to see how to sew them together? Check out this post for a how-to: