
How to sew a Jade + Isla dress

DIY jade+isla dress / made by rae
The dresses that I’ve made combining Jade and Isla have gotten a great response on IG (I just posted the Grid Dress here on the blog if you want to see that one), and I know it’s one of the things that drew many of you to the Jade pattern. So as promised, here’s a quick how-to if you want to make a dress using both my Jade and Isla sewing patterns, specifically how to add the Isla skirt to the Jade bodice.
Note: for a limited time, you can buy both patterns together in the discounted Jade + Isla bundle in my shop!

how to combine jade and isla
Increased yardage
Combining the two patterns will use more yardage, so you’ll need to add at least 1/2 – 3/4 yards to the original Isla yardage requirement to create this dress, depending on how long you want the sleeves. If you want a maxi version of the dress (like mine) you’ll need to add another 1/2 yard. Disclaimer: I haven’t calculated the exact yardage for this in every size, and depending on how wide your knit fabric is, you may be able to get a little creative with pattern pieces, so please use this as a general guideline rather than exact yardage. And of course, let me know how it works out if you try this mod!!
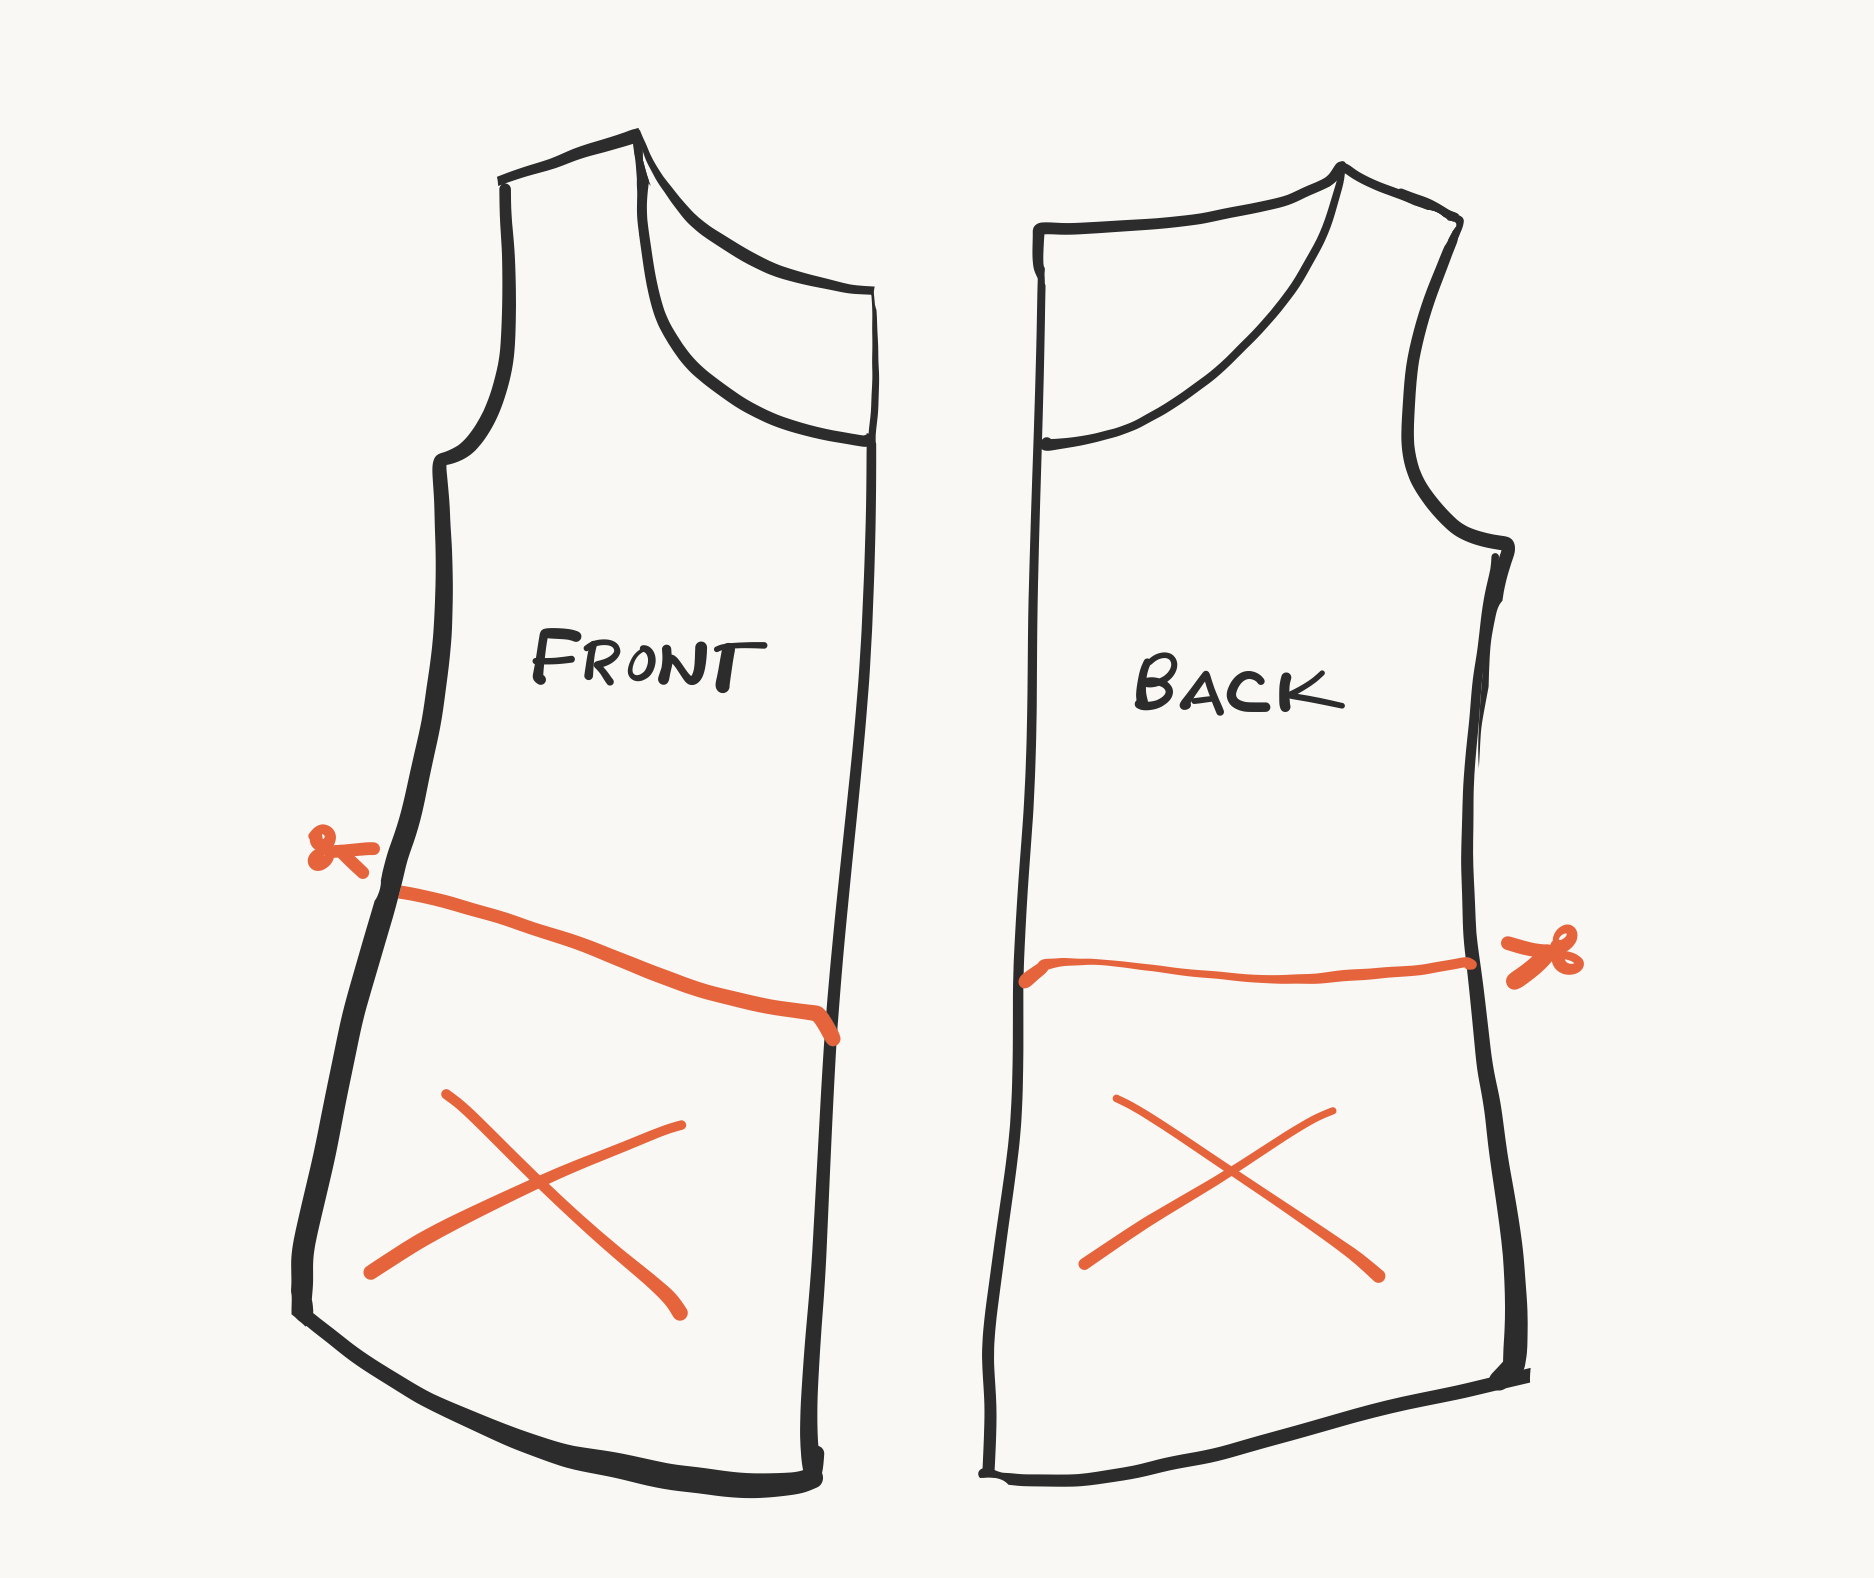
STEP 1. Cut out your pieces
To create a Jade + Isla Dress, you'll need to cut out the following pieces from your fabric:
From Jade:
Cut 2 Jade bodices, using the Isla cutting lines (see note below)
Cut 2 Jade sleeves along desired length lines
Cut 2 Jade facings (optional -- depends on View A or B, see pattern)
From Isla:
Cut 2 Isla Skirts
Cutting notes:
A cutting line is provided on both Jade bodices to shorten the bodice to Isla-length (that is, slightly above natural waist). These lines are 1/2″ lower on Jade than Isla, simply because I noticed that for fabrics that didn’t have 4-way stretch, the Isla waistline was landing pretty high on everyone, including me, and it’s always easier to shorten rather than lengthen a bodice. If you like the original Isla length, shorten this by 1/2.”
jade + isla tutorial / made by rae
Remember to include the center notches on both the skirts and the bodices. This makes it sooo much easier to attach the skirts!
Note for maxi version:
If you want a maxi version of this dress, extend the skirt pieces to roughly 40″-44″ tall (they’re rectangles, so this is easy to do). I am tall (5’9″) and I usually cut my maxi skirt pieces 44,” though I did end up shortening by a couple inches when I made the rose maxi version due to the vertical stretch in the poly jersey. Be aware that this may take some experimentation.
Note for stripes:
If you’re using a horizontally striped fabric, cut the bottom of the bodices along one of the stripes rather than using the Isla cutting lines (which are slightly curved to allow for more room in the front for the bust). I find it easiest to start from the cutting line at the side seams, then use a ruler to draw a line straight across to the fold. See this post for a pic!
STEP 2. Sew Jade bodices together
Using the sewing instructions from the Jade pattern, assemble your Jade bodices: sew the shoulders, add the sleeves, finish necklines and hem the sleeves, and sew the side seams.
STEP 3. Try it on and take in side seams
IMPORTANT: This step is key if you want your Jade + Isla dresses to fit like Isla does. Jade has more room added to the waist than Isla, so you’ll probably have to take the side seams in a bit. This step is part of the Isla instructions too, so if you’re finding that Isla bodices seem too big, you might be skipping this step for Isla.

Try on the bodices, then pinch out any excess at the waist along the side seams (I find this easiest to do if I try it on inside out). Pin, draw a smooth line from armpit to waist using chalk, and then re-sew the side seams if needed. Then try it on again and check fit. You want the bodice to be close-fitting at the sides, not loose (unless that’s the look you’re going for!).
STEP 4. Attach Isla Skirts to bodices
Using the sewing instructions from the Isla pattern, gather and attach the skirts to the bodice. If you use the elastic thread gathering and attaching technique that is used in the Isla pattern, you’ll get a nice smooth waist seam! Then hem your skirt, and your dress is finished!

DIY Grid Dress / Jade + Isla Sewing patterns
Voila new dress! Now go forth and wear your fabulous new frock all over the place.
The Jade and Isla patterns are both available in my shop!