
Trillium with an Elastic Casing
For this tutorial, you’ll need to have the Trillium (formerly Washi) Sewing Pattern. You can find the pattern in my shop!
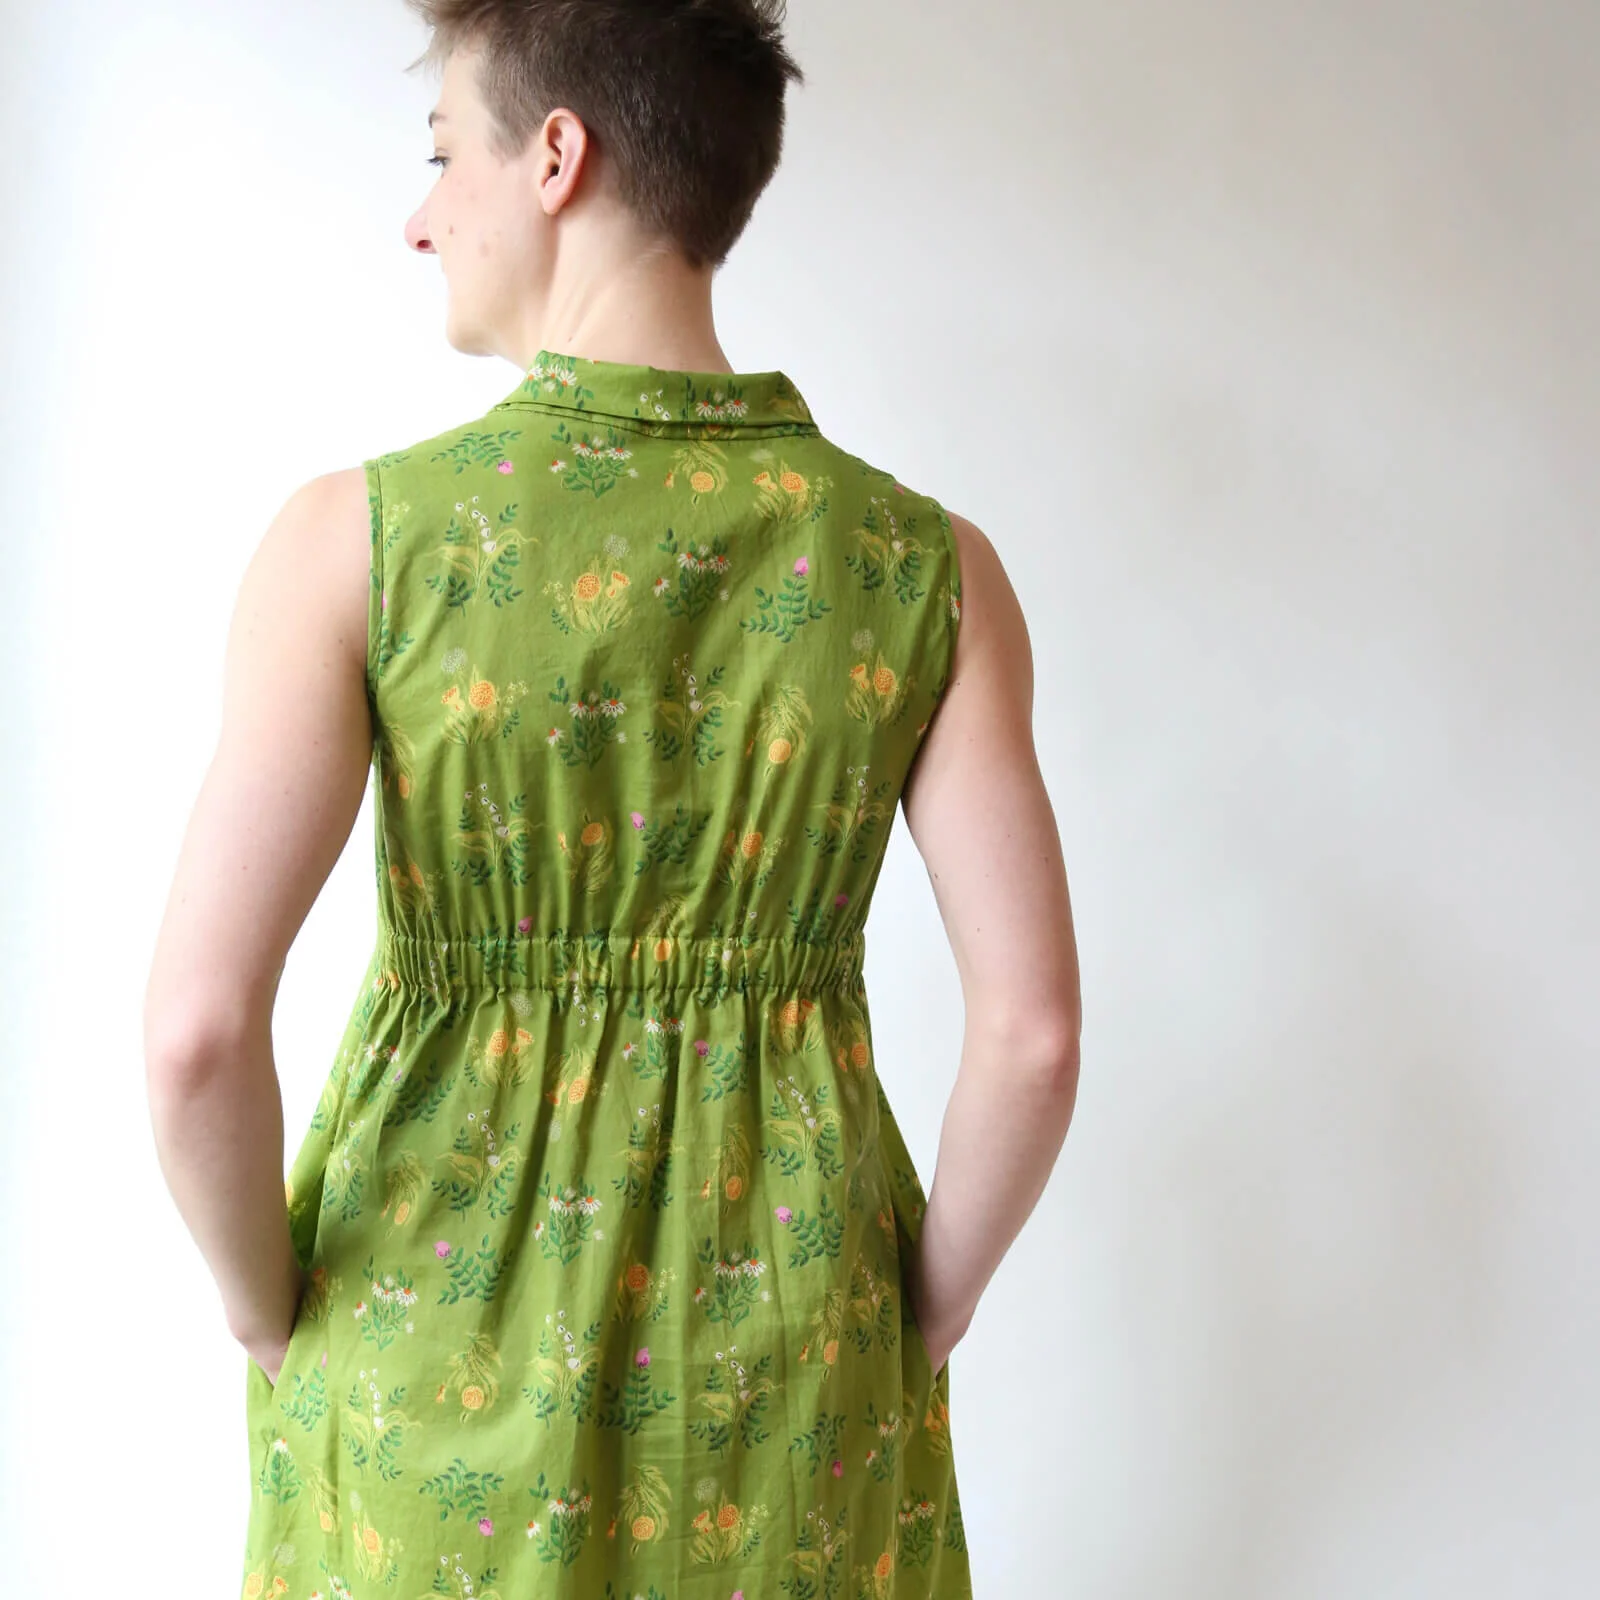
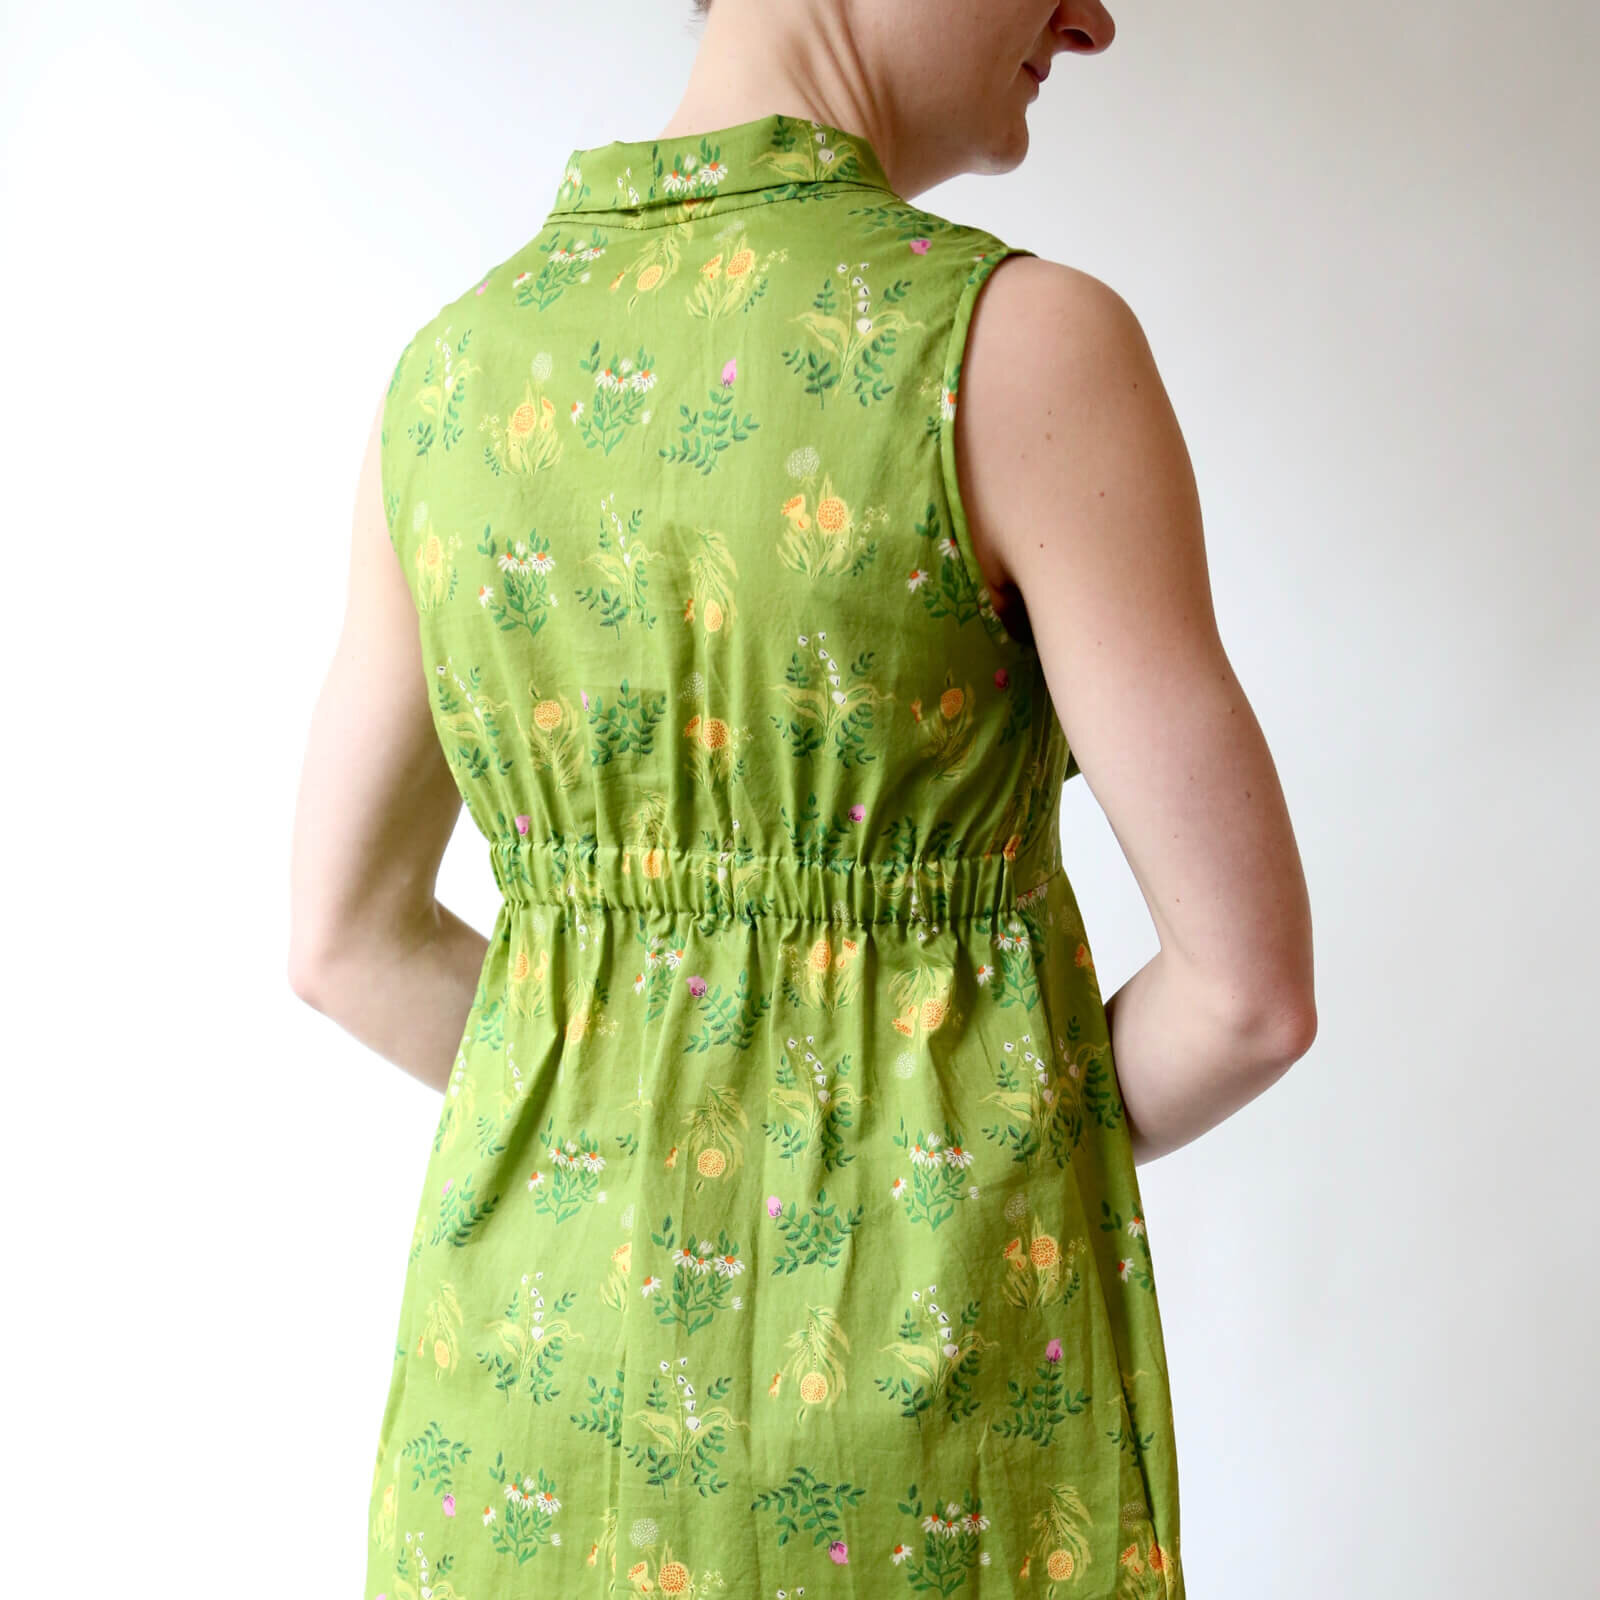
The Trillium dress doesn’t include any zippers or closures, something that’s made it really fun and easy to make. The elastic shirring in back is comfortable, and it pulls the bodice in nicely for a great tailored fit around the bust.
However, shirring can be difficult or impossible on some sewing machines, which can make it super frustrating (see my Shirring Tutorial for some troubleshooting tips though!). Furthermore, elastic thread can sometimes be tough to find, especially elastic thread that’s good quality and actually works (hot tip: avoid Dritz brand or craft-store-brand elastic thread; this is the stuff I use, btw).
The good news is that it’s easy to sew a Trillium without elastic thread. You can leave it out entirely and make ties instead! Or, create an elastic casing in the back of the pattern like the one shown here. This is one of my favorite ways to sew my own Trillium dresses!!
Here’s a quick how-to. Note that I’ve included instructions for an elastic casing with a separate piece of fabric, but you can also do this if you are lining the dress; scroll down to see instructions for doing it this way, too!
You will need:
a piece of elastic - knitted or woven or non-roll, any width, though I personally like 1” wide (25 mm)
a strip of fabric or bias tape for the casing (see below for how to create this!)
tools: sewing machine, pins, ruler, scissors or rotary cutter, safety pin or bodkin
Step 1. PREP your casing piece
Use a quilter’s ruler to cut a strip of fabric as long or slightly longer than the width of the back dress pattern piece at the lowest shirring line (measure across your pattern piece to figure this out - remember to double for the fold), and as wide as your elastic plus 3/4” [2 cm]. For example: If your elastic is 1/2” [13 mm] wide, you’d want to cut your strip 1.25” [32 mm] wide. If your elastic is 1” [25 mm] wide, you’ll want to cut it 1.75” [44 cm] wide.

An alternative is to find a piece of single-fold bias binding that is slightly wider than your elastic.
Once you have cut out your casing piece, press under 1/4” [6 mm] towards the wrong side along both long edges of the casing piece.
(see diagram at left)
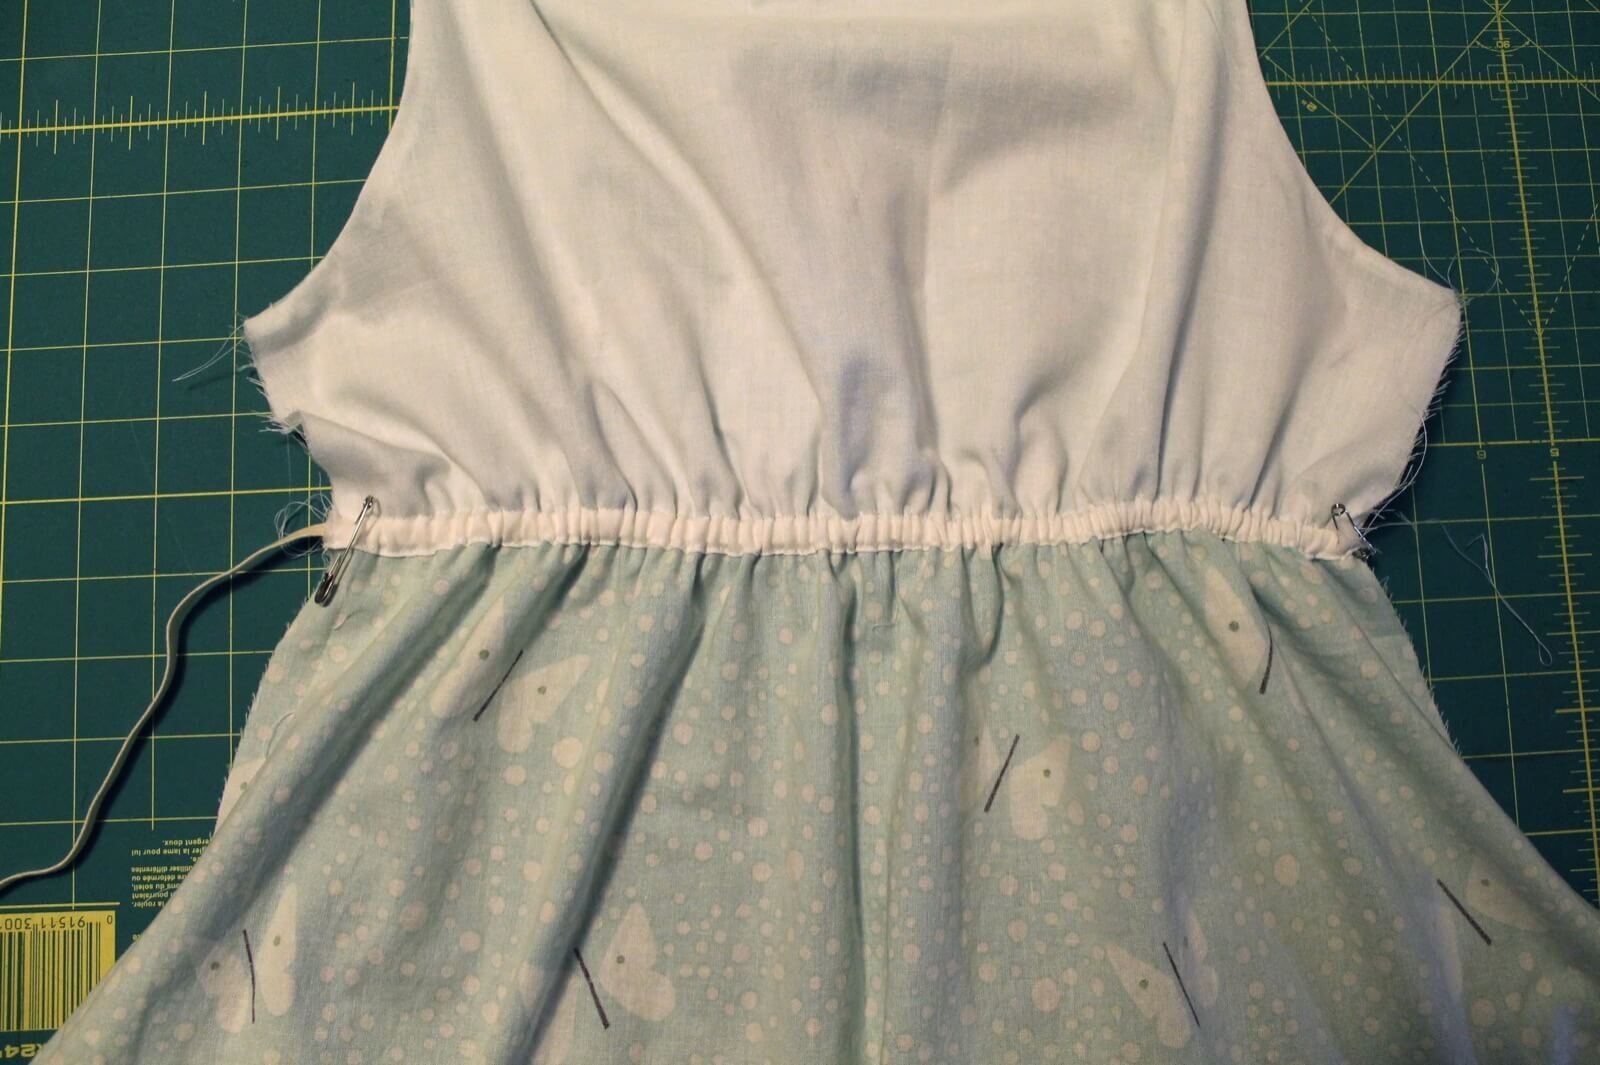
Step 2. Attach casing to back of garment
Now place the casing along the lowest shirring line that you’ve marked on WRONG SIDE of the back dress. The bottom edge of the casing should be lined up with the lowest shirring line.
Pin in place and edgestitch along both long edges of the casing piece to hold it in place. Trim elastic casing even with the sides of the back.

Step 3. Thread elastic through casing
Cut a piece of elastic so that its length equals half your underbust measurement, plus 1” [25 mm](with a tape measure, measure around your body, underneath the bust).
Using a safety pin or bodkin, thread the elastic through the elastic casing. Secure both ends of the elastic at the seam line (1/2” [25 mm] from each side edge) with safety pins or basting stitches to hold the elastic in place until you can sew the side seams together in a later step.

Step 4. Continue constructing your garment
After you’ve secured your elastic, continue sewing the garment together until you reach the step where you sew the side seams together. At this point, I recommend basting the side seams together first, trying on the dress, and adjusting the elastic by pulling the elastic in tighter (or looser) if you need to (you’ll have to unpick the basting stitches to do this). You can also adjust the side seams of the dress at this point. You want a close, comfortable fit, but not too tight. Once you are happy with the fit, stitch over the ends of the elastic a few times so they won’t pull out, then use a regular stitch to sew over your basting stitches.
Continue the steps of your pattern to finish your dress or top!
WHAT IF YOU’RE LINING YOUR TRILLium?
If you’re lining your Trillium, you can create a casing using the lining piece. I’ve shown this here with a bodice lining, but you could also do this if you’re creating a full lining. Note: for the lining videos, please see this post; these may assist you with the arm/neck construction, which has to happen before you can sew the casing.
For a bodice lining, cut the back lining piece slightly longer than the bottom shirring line (I usually add 1/2 inch [13 mm], then fold that extra under and stitch down the bottom edge. Then mark another line above that one and stitch along it to create the casing for your elastic. The width between these stitch lines will vary depending on the width of your elastic, but add at least 1/4” [6 mm] to your elastic width to leave extra room for your elastic.
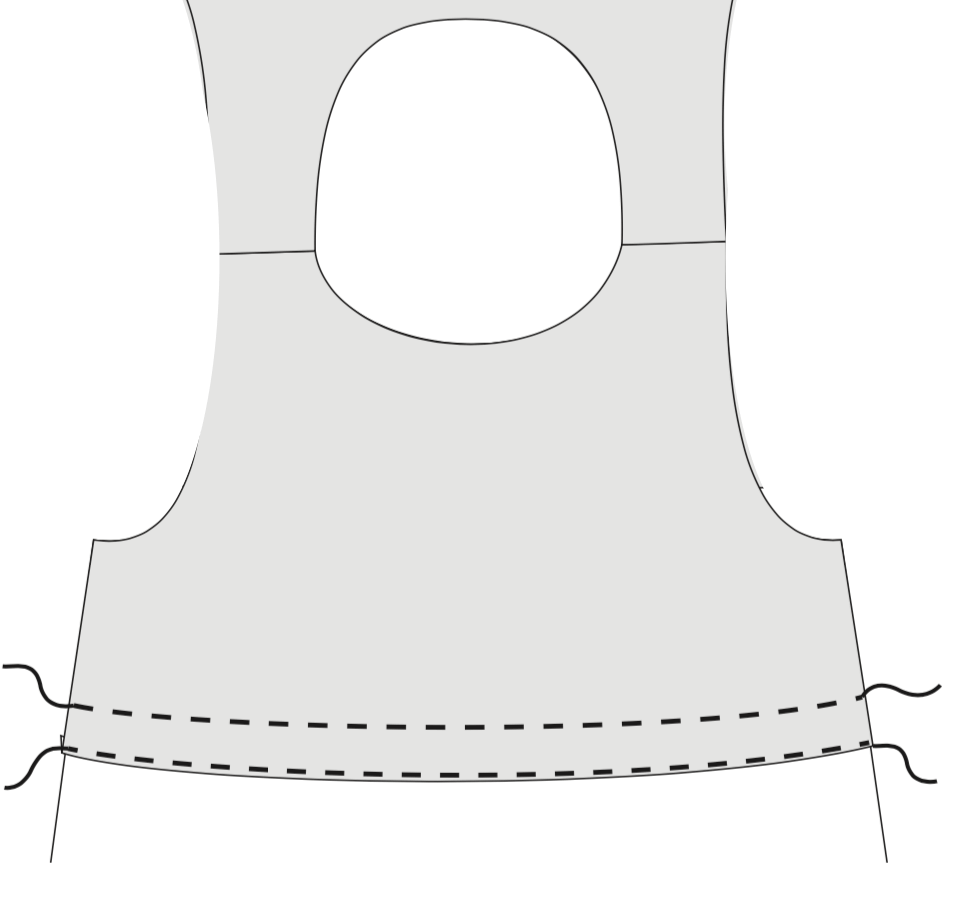
Note: the grey in the diagram above indicates the right side of the lining.
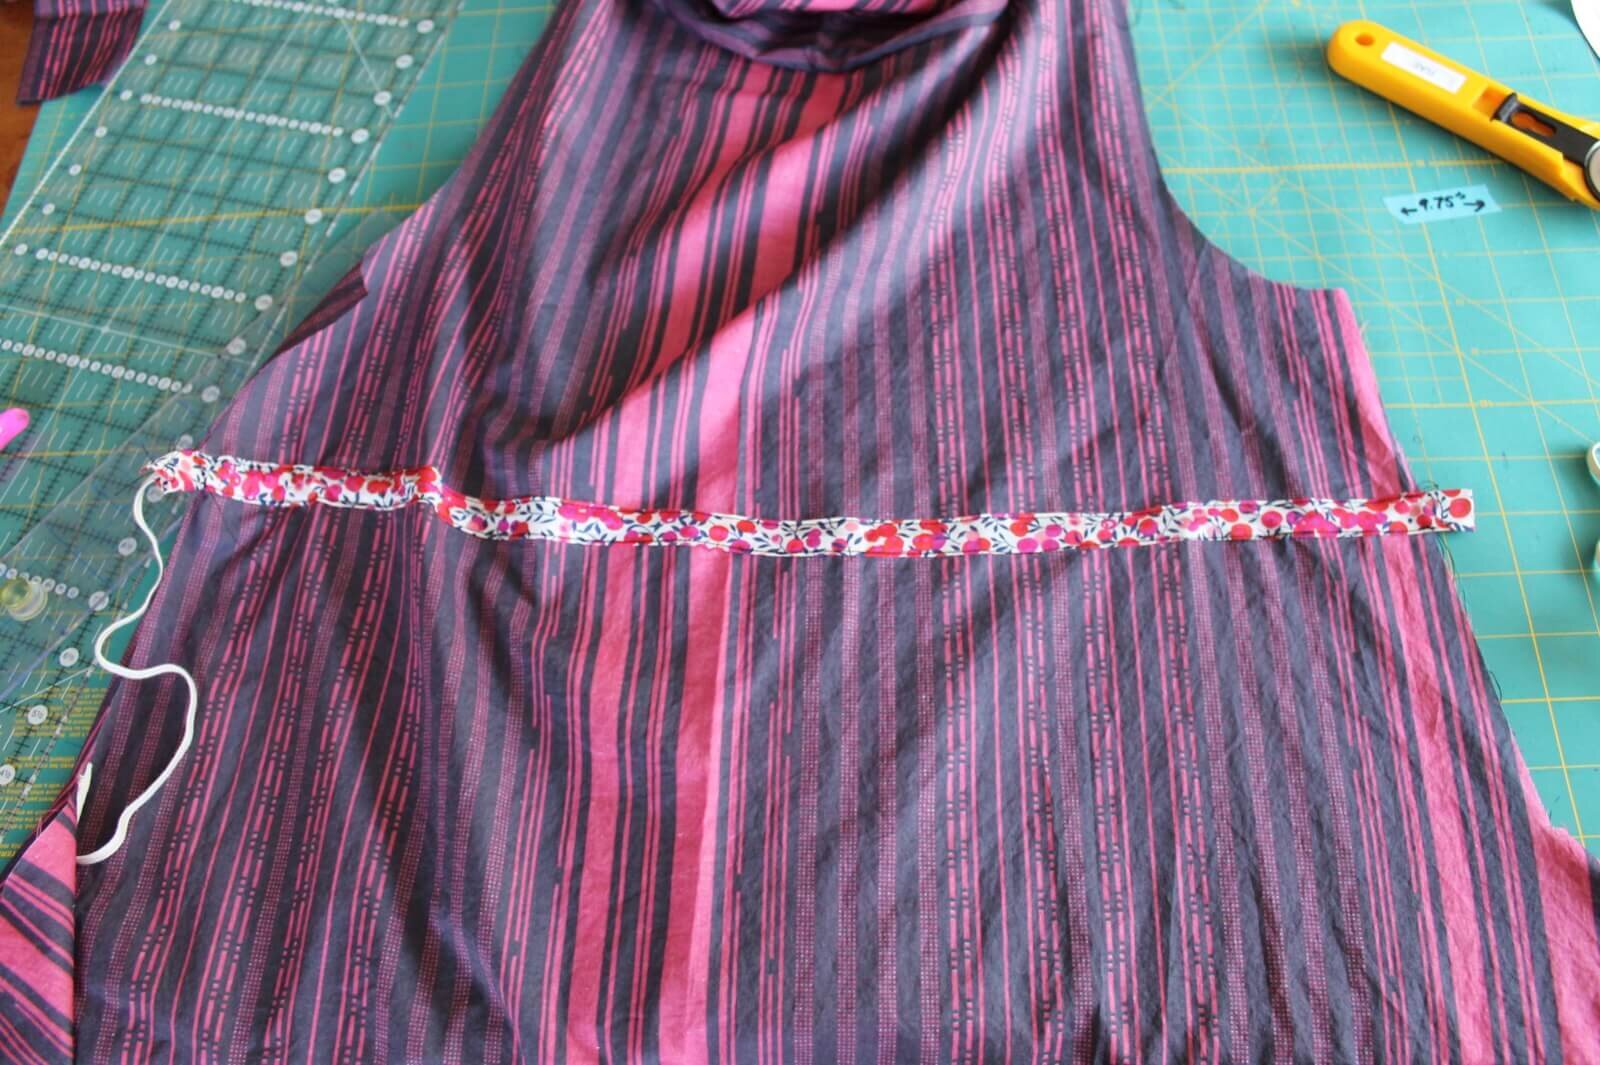
Here’s a lined version of Trillium that I made. First I pinned along the lower, pressed up edge of the lining:

And then I stitched along that edge and 3/4 inch [2 cm] above that (my elastic in this version is 1/2 inch [13 mm] wide) and threaded the elastic through:
Hopefully this post gives you a good place to start if you’re looking for an alternative to the elastic shirring.
Share your Trillium makes online and see what everyone else is making using the #MBRTrillium tag! I love to see what you’re making with this pattern.
You can find the Trillium pattern in my shop, and check out the Trillium page for more tutorials and resources for this pattern.