
How to add a sleeve to Ruby

As promised, here are the details on how to create a Ruby top with sleeves like the striped one in my last post. Ruby is a sleeveless dress or top, but it's quite straightforward to add a sleeve, especially if you have a gathered sleeve cap. Adding a gathered sleeve doesn't require as much precision in the shape and length of the cap curve as adding a fitted sleeve would.
I created a free pattern piece for Trillium earlier this year, and I used that pattern piece to create this top, but if you have the Josephine sleeve pattern piece or the (now discontinued) Washi Expansion Pack sleeve pattern, or really any gathered sleeve from another pattern -- there's not much exact science, just your preference for the sleeve width and length.
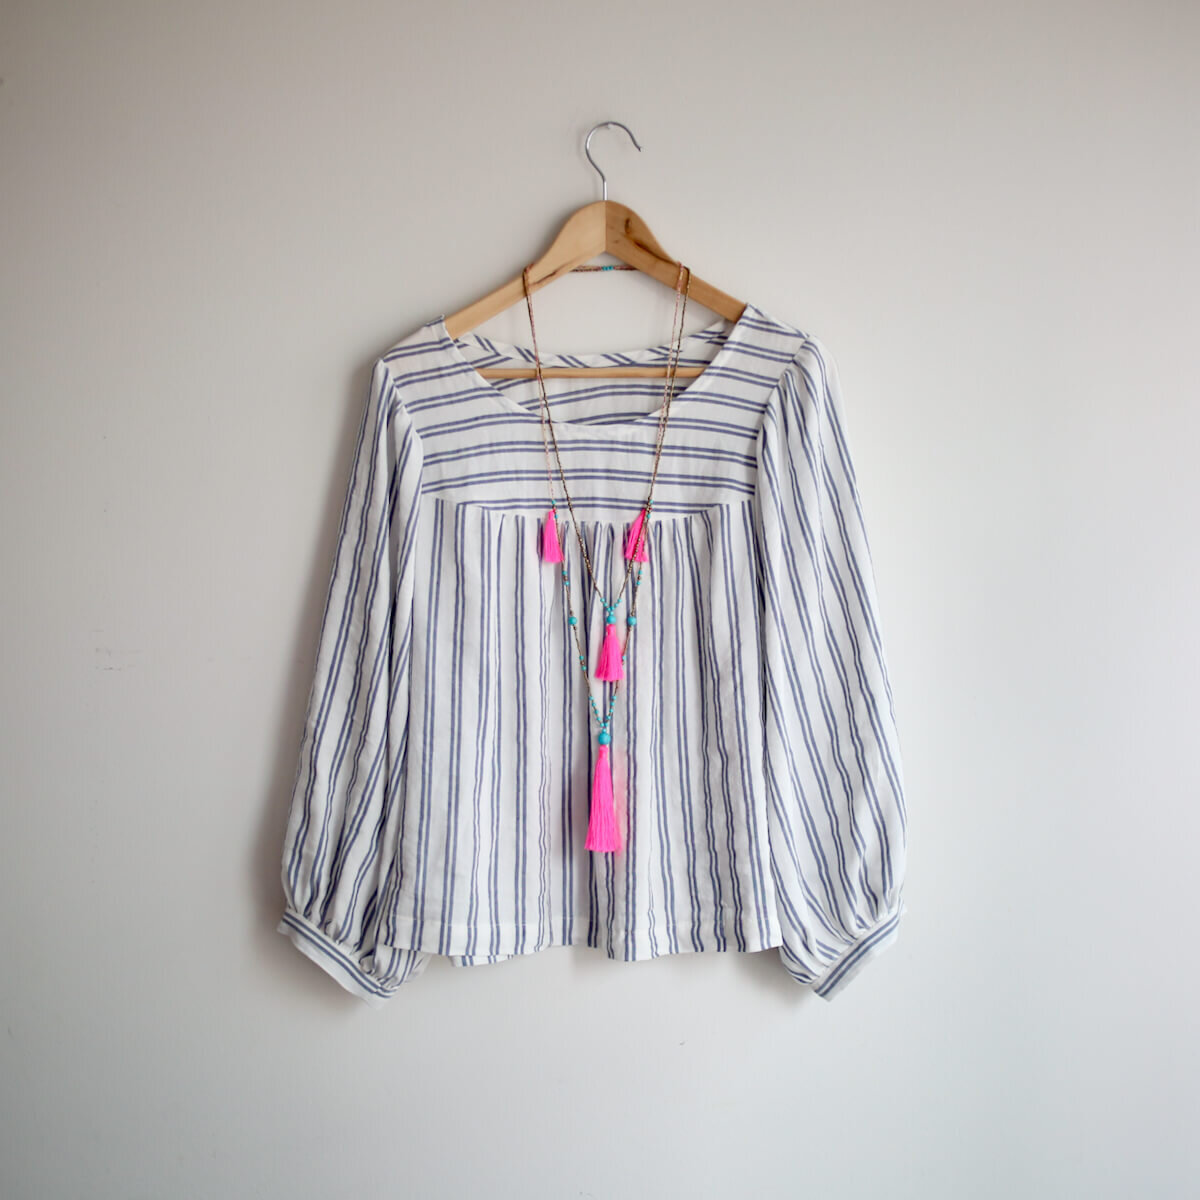
I made a number of changes both to the Ruby pattern (added width, shortened) and the Trillium sleeve (added width), so I'm going to outline those changes in this post so that if you would like to recreate this top, you can.
Most of the work is done in the cutting step, and as you might expect, it does require more fabric (about 3/4 yard [0.7m] more) to add the sleeve.
HOW TO ADD A SLEEVE TO RUBY
Here are the mods I made when cutting out the Ruby pattern to create this top:
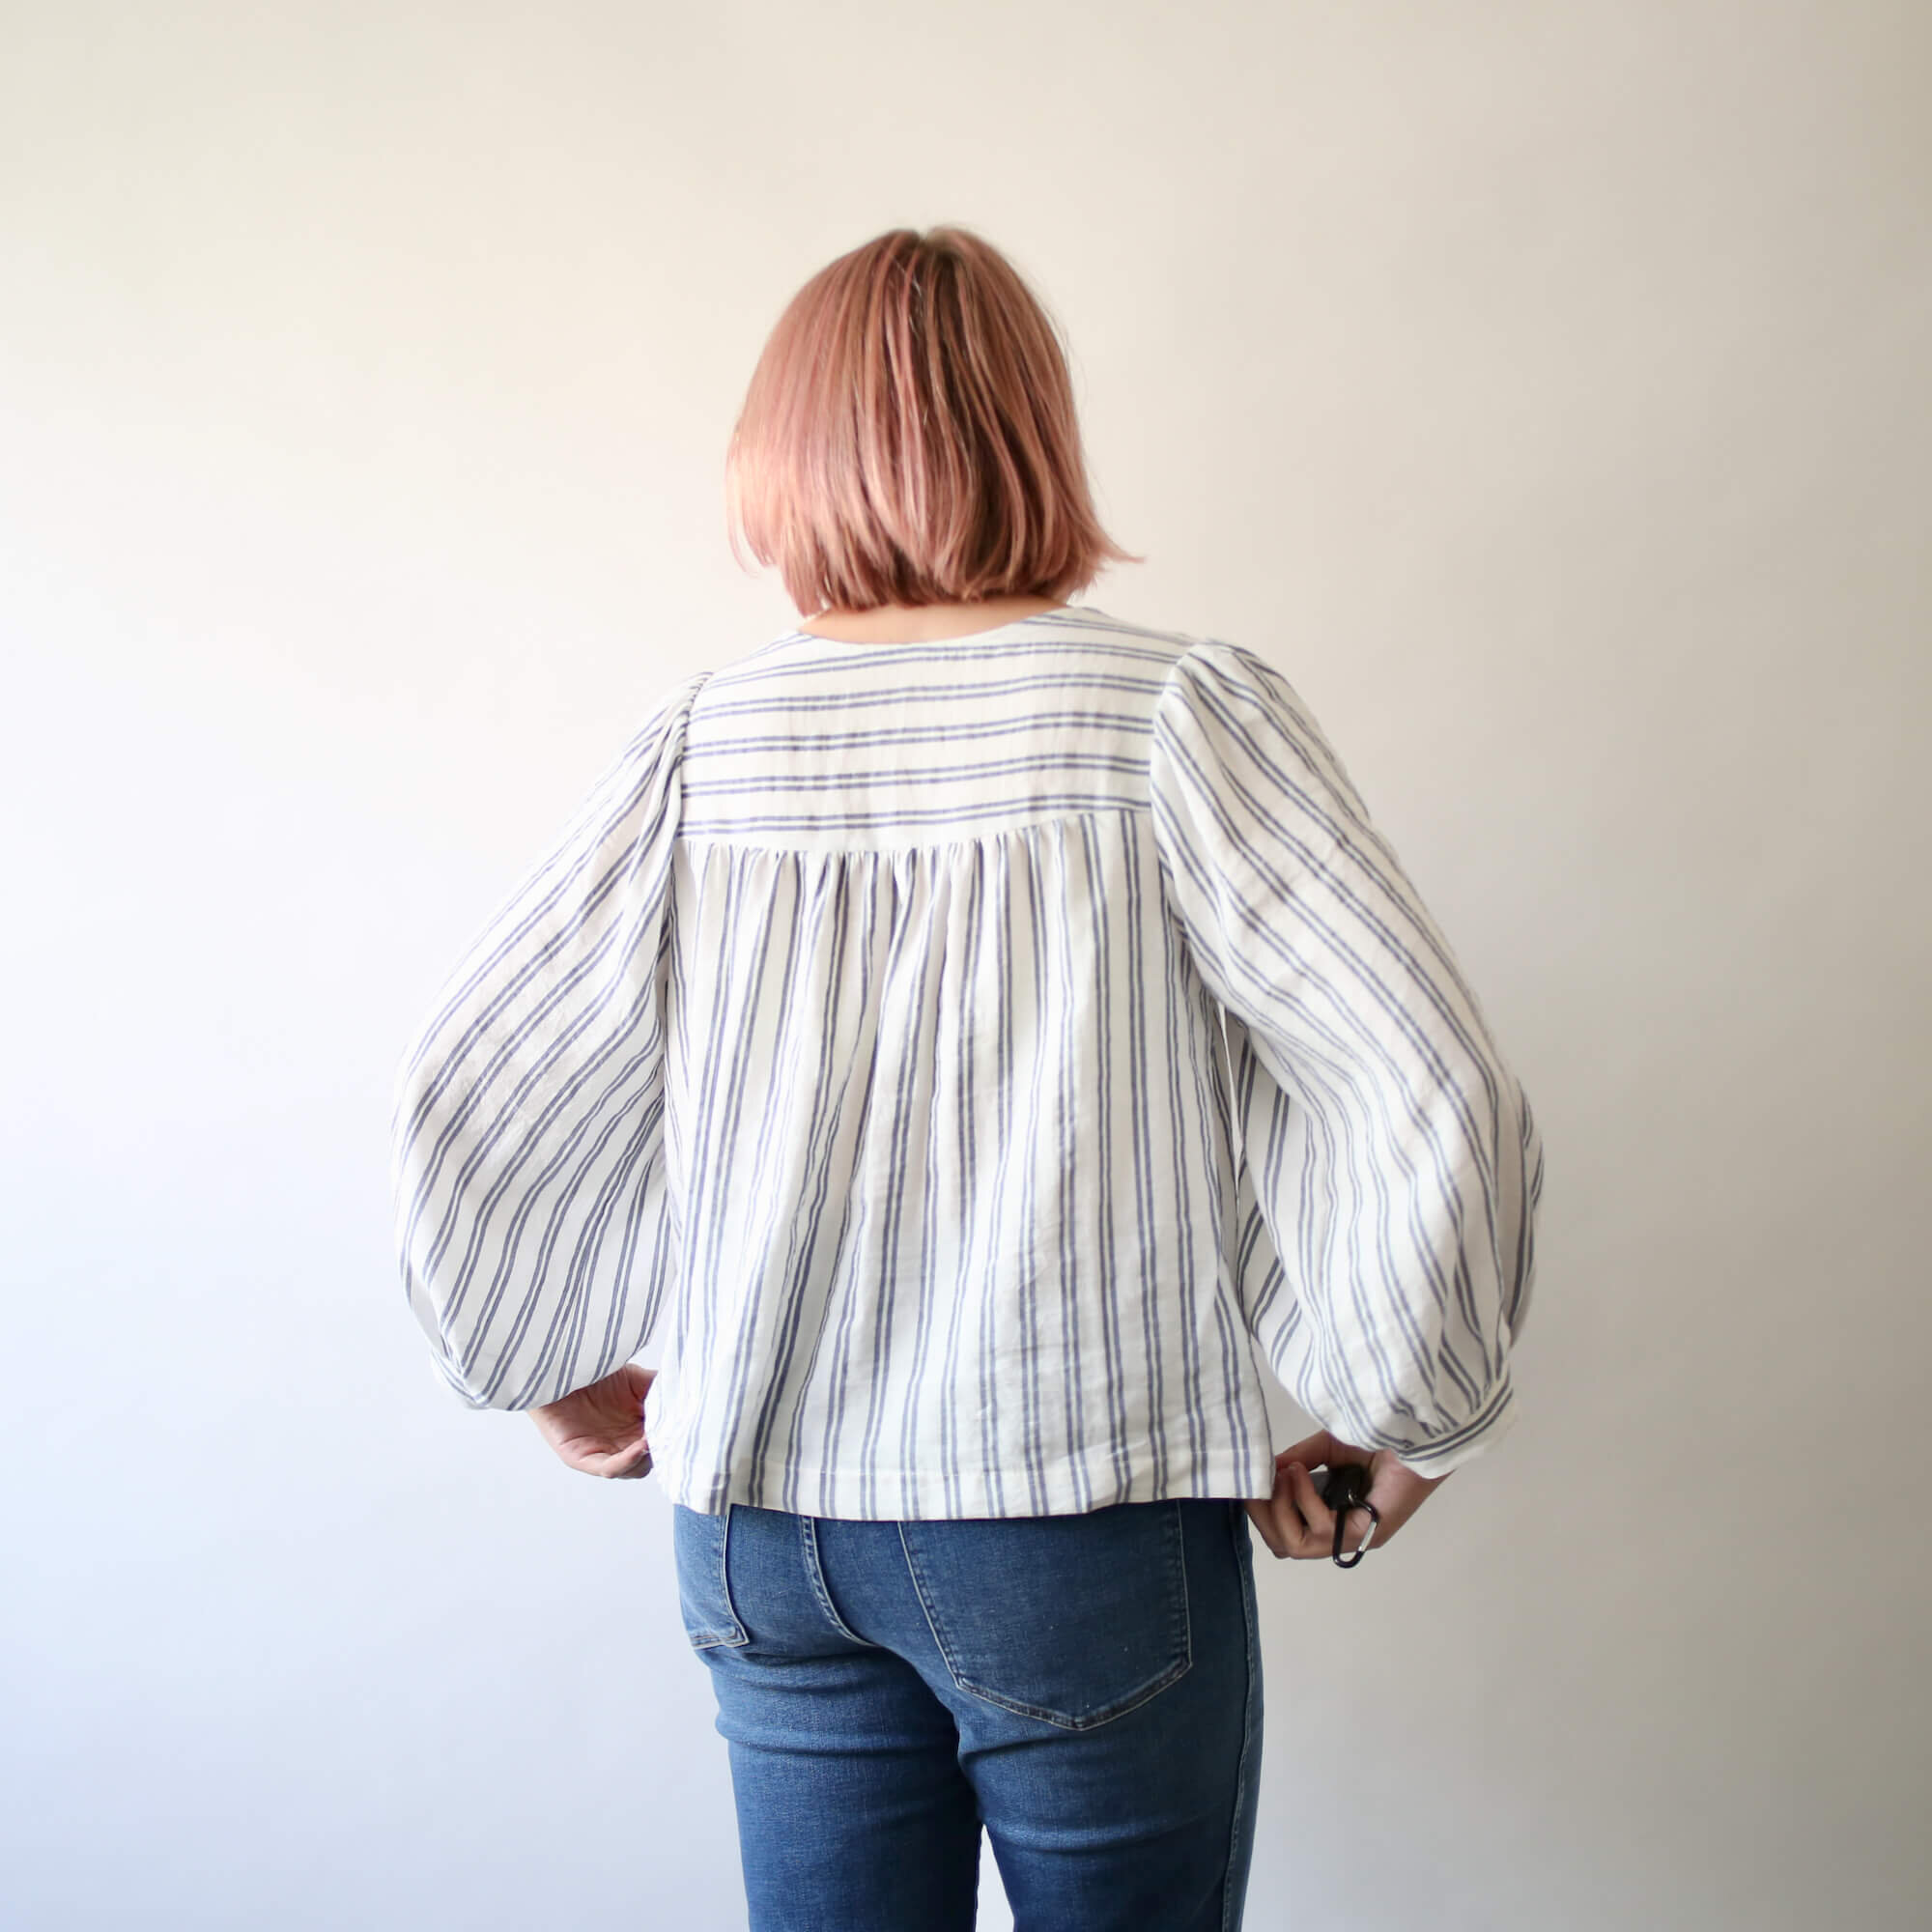
Shortened the main top: I cut the length at the “finished hem - top” line, and then hemmed it up a bit higher than instructed, which cropped it by a couple inches.
Widened the main top: added about 4” to both the front and back by sliding the pattern away from the fold by 2” (see diagram, below)
Lowered the armholes by 1." Lowering an armhole is just about the easiest mod you can make to a pattern; you literally just mark the side seam where you want the armhole to land, and redraw the armhole curve to carve out a larger hole in the pattern.

Added sleeves: I used the free Trillium sleeve pattern (see: How to add a sleeve to Trillium)
Added width to the sleeves: added about 6” to the sleeves by sliding the pattern piece 3" away from the fold
Added cuffs: cut two 13" x 3" rectangles for the cuffs

HOW TO SEW IT UP
As far as the sewing, it’s exactly the same process as shown in the How to add a sleeve to Trillium tutorial: First you sew the shoulder seams, then you gather the sleeve caps and attach them to the armholes, then you sew the side seams. Finally, you finish the hems and the ends of the sleeves.
For the cuffs, sew the short ends of each cuff together, fold in half (so it’s 1.5” tall), and then attach them to the gathered ends of the sleeves. If you’re not familiar with how to gather the end of a sleeve and add a folded cuff, I’d recommend taking a look at the Josephine pattern, or just use the elastic casing method to finish the end of the sleeve, as shown in the Trillium sleeve tutorial.
For the neckline, I used a bias strip folded to the inside and stitched down (see also: Bias Binding: French Method), rather than the traditional method shown in the pattern.
And that’s really it! I hope that this post gave you enough info to get started on a Ruby top with sleeves of your own — if there’s anything I can clarify, please pop your q’s into the comments.
A NOTE ABOUT SIZING
Currently, the Ruby pattern is graded to fit up to a 53” hip. I would love to add even more sizes to Ruby. Currently I’m working on adding more sizes to two of my other patterns, but Ruby is not one of them, so it’s going to be some time before we can offer more sizes for Ruby.
However, Ruby is a very simple design, so if you find you fall outside of the maximum hip dimensions and are set on making this top but don’t want to wait for a size update, I hope you can see from the diagram above that simply by adding width to the main panels, you can change the finished dimensions of the top/dress significantly (my changes add 8” total, which would bring the max hip up to 61”). The key is to find the yoke pieces that fit your shoulders best, then add enough width to the bottom pieces that you have at least 6-7” of extra room in the hip. This is also true for bust.
While I understand this is no replacement for having a pattern graded into your size, and I would encourage you to only support brands that make patterns that come in your size, I also have to be realistic about what I can do, project-wise, and if showing folks how easy it is to adjust this one makes this pattern more accessible to more folks, then it’s at least an imperfect solution.
If you need any assistance modifying the panels or just want someone to walk you through how to figure out the width you need to add, please don’t hesitate to email me! (contact form, above)

I’m so excited to wear this top this fall, and I already have plans to shop my stash for a Liberty print I’ve been hanging onto for years and turn it into a slightly longer (I’m thinking tunic-length) version.
Still need the Ruby pattern? You can find it in my shop right here. You can find even more awesome Ruby tutorials (including a video for a lined yoke circa 2013 yeehaw!) over on the Ruby Page.
happy sewing, friends!
- R
PS. If you make one and share it online, please tag me (@madebyrae) and/or use the tag #rubydressandtop or #MBRruby. I love to see what you’re making with my patterns!!