
How to sew Ruby with a lined yoke

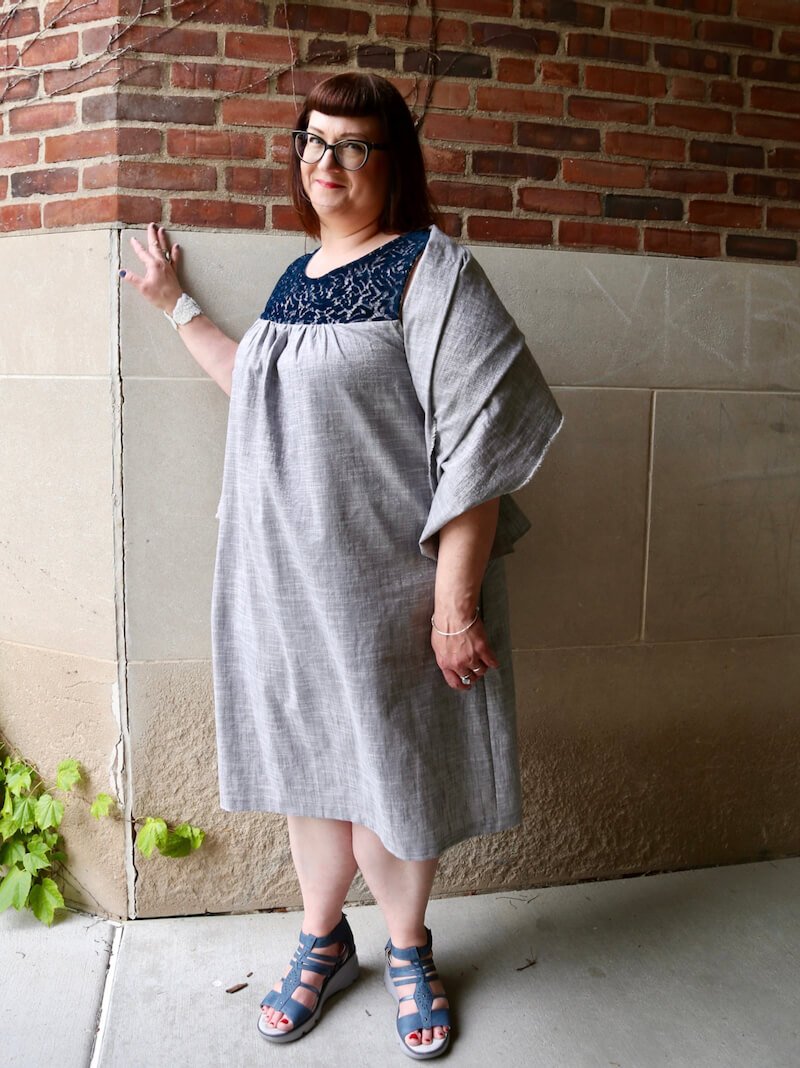
Rae here - I’m so excited to present a guest post today for the Ruby pattern from my dear friend and awesome Ruby model, Amy, who wrote this great tutorial showing how to line the Ruby yoke. She used this method for the dress she is wearing in these photos.
Years ago I shot a video series demonstrating this technique, but I never managed to put together a photo tutorial. So this spring, when Amy was sewing up this gorgeous Ruby for our shoot, I asked her if she would be willing to photograph her steps so that you could see the steps here on the blog. I was so happy she said yes!
Ok, here’s Amy:


Hi, I am Amy Cameron from @modernpearlco and I am a massive Ruby Dress and Top enthusiast! I have more than 30 Ruby variations, but this was the first using velvet lace. Here are the steps for a self-lined yoke using the “burrito method” to finish the neckline and arm holes which was perfect for this fabric.
{Rae adds: Note that you can substitute the word “top” for “dress if you are making the top version of this pattern}
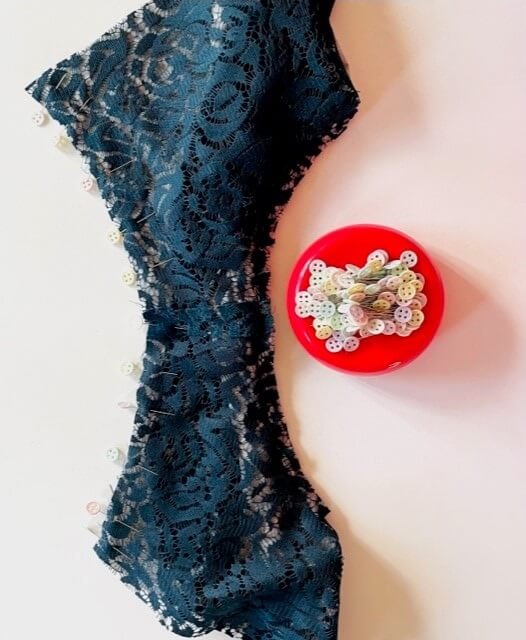
If you are feeling adventurous and want to try this project with lace (or velvet lace!) see my tips at the end.

Step 1. Cut out your pieces
Using your Ruby pattern, cut 2 front yokes and 2 back yokes with an extra ¼ inch seam allowance at the neck and armholes. I chose 1 set in velvet (outer) and 1 set in a metallic cotton woven (lining/inner).
Cut out 1 front and 1 back dress and set aside. I used the metallic cotton woven for the main part of the dress as well as for the inner yoke.
Staystitch the neckline if you have a fabric you think might stretch out in the sewing process.
Step 2. Sew shoulders
Pin the front and back of each yoke set, right sides together and sew shoulder seams with a half inch seam. Press shoulder seams open.
Step 3. Sew Neckline
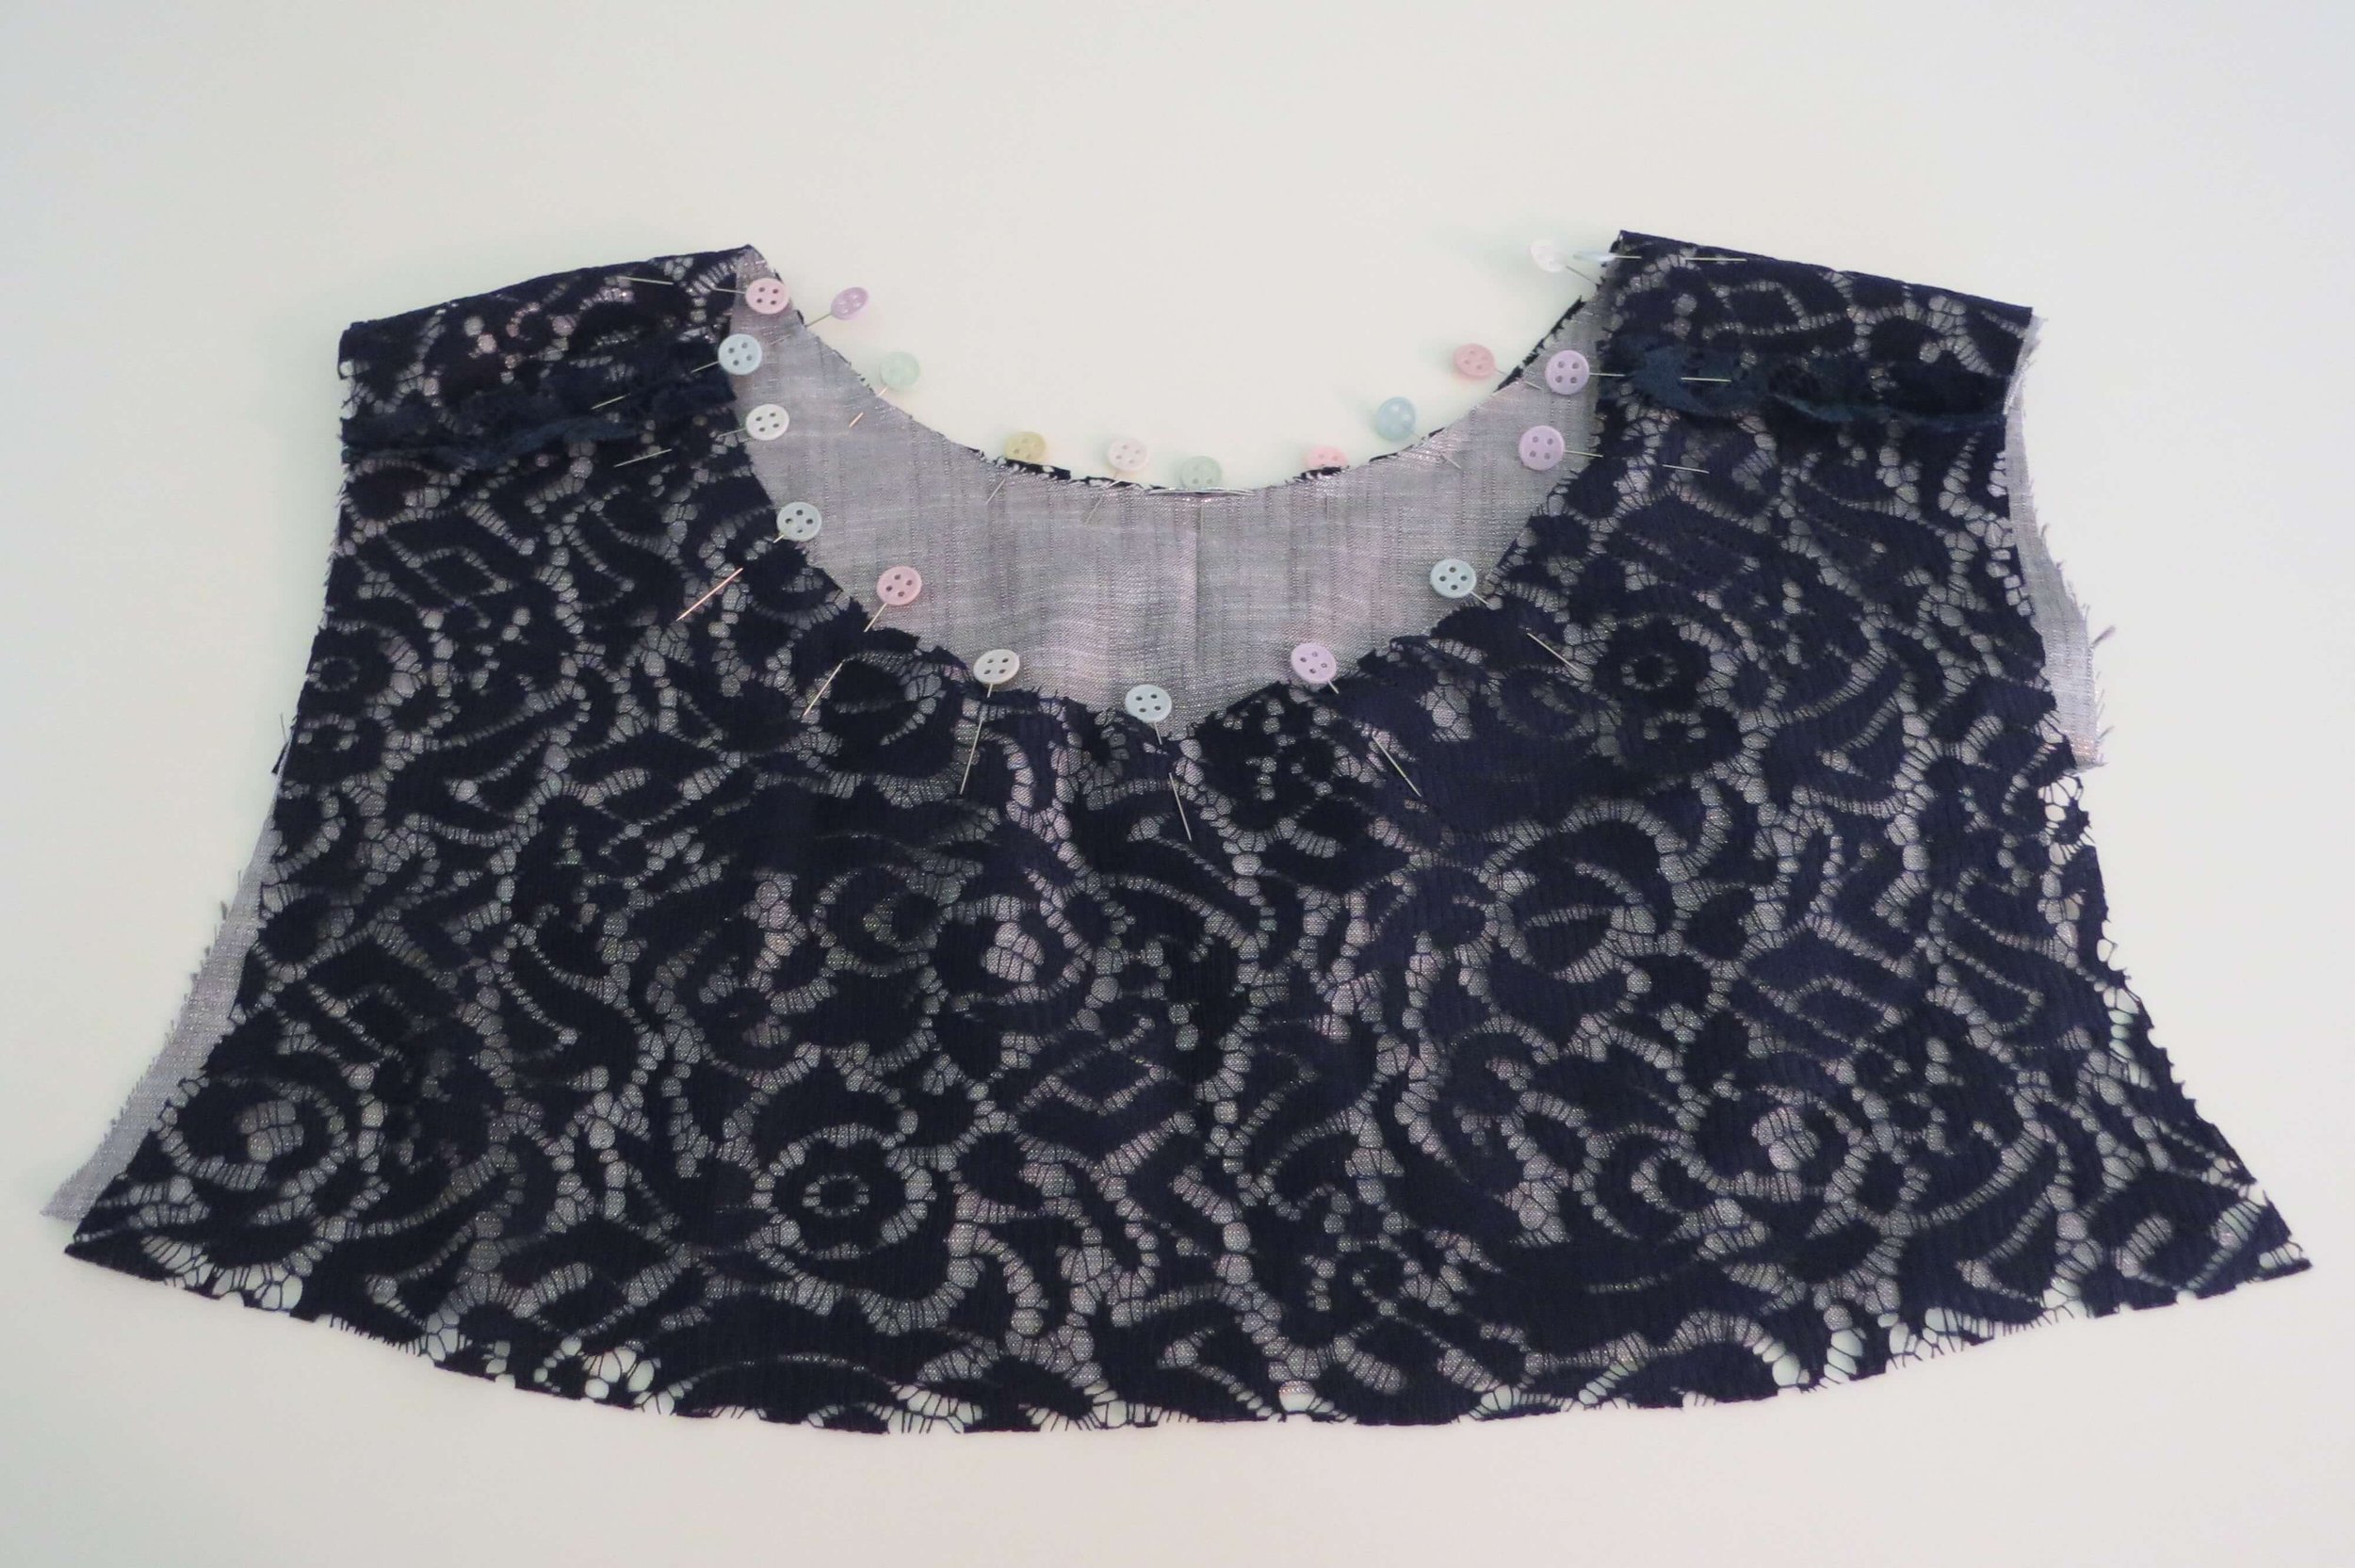
Pin yoke necklines together, right sides together starting at the shoulder seams.

Sew neckline seam with a ¼ inch seam. Clip into seam allowance all the way around. Make sure not to cut into your stitch line! Flip over and press seam to finish the neckline.
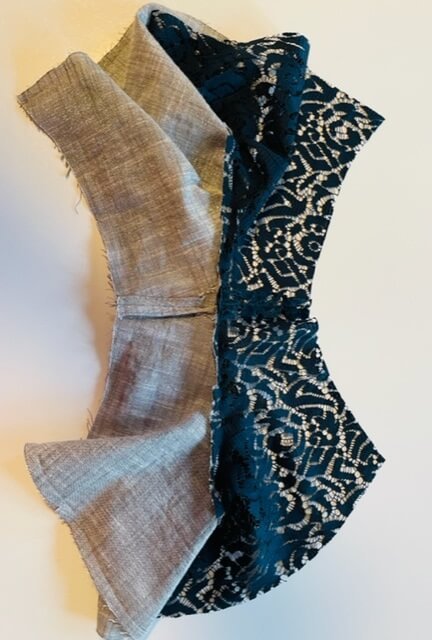
Step 4. Sew Armholes (aka Burrito Time)
Now the crazy part- burrito time! Lay the yoke flat on the table. Separate the right armhole of the yoke and slide the front of the armhole (wrong side facing up) to the left across the piece sandwiching the rest of the yoke in the middle. The first time you do this, it is much easier if the facing and lining fabric are different! As you can see in the photo, it does indeed look like a burrito.
Line up the right sides of the right armhole again and pin. Sew ¼ inch seam being careful to not catch any of the rolled up “burrito filling” from the neckline and other shoulder. You can clip into this seam as you did on the neckline to release the curve so it lies nice and flat here as well.
Carefully pull the yoke right side out after sewing and admire the finished armhole you just created. Finger press armhole seam to coax a flat edge and then press with an iron.
Repeat steps 6-8 with the right armhole.

Step 5. Gather main part of dress
Gather the front and back of dress pieces per Ruby instruction booklet.
Step 6. Sew side seams
Sew down the side seams of the dress pieces with a ½ inch seam. Finish the seams. I sewed a straight stitch and finished with my serger.
Step 7. Finish lower armholes
To finish the bottom of your armhole on the dress, use a 6-10 inch piece of ½ inch single fold bias tape under each arm. Sew the tape to the right side of the dress with a small amount of overhang at each end. Press up and press over to cover seam allowance so bias tape is now folded on the wrong side of the garment and all raw armhole edges are covered. Sew the bias tape down at the edge of the tape. See the inside close-up of my dress and seam finishing:

Step 8. Attach yoke to main dress
Attach the front yoke to the front dress with right sides together and sew a ½ inch seam across easing the gathers on the dress to the yoke. For the velvet lace, I sewed both the lace and the metallic cotton lining to the dress together and finished with my serger as shown above. Do the same for the back yoke and dress.
Press the yoke seams down and tack down the corners of the serged edge. This made a stronger seam for the delicate fabric. Rae has a version in her tutorial video that separates the two layers. The lining is pressed under and hand sewn to the facing fabric seam allowance that you would press up under the yoke. Watch her video for that technique. Much prettier finish if your fabric is stable!

Step 9. Finish hem
Finish the bottom hem to your desired length. I used a blind hem for this luxe fabric.
Enjoy your new dress!!!!
Thank you, Amy!!!
You can find the Ruby pattern in my shop, plus see all of the Ruby tutorials and videos over on the Ruby page.
If you make this pattern, please share your pics online with the #rubydressandtop tag! I love to see what you are making with my patterns.
-Rae