How to line up stripes along a seam
(or any motif or pattern such as plaid, geometric, or floral, for that matter…)

I picked up some striped Warp and Weft fabric at Seams when I was there for an Emerald trunk show earlier this month and I had so many ideas for what to make with it. It’s the perfect lightweight cotton, similar to the Loominous woven cottons which I have made so many things out of in the past. I eventually decided to make a pair of Lunas (cut cross-grain - still in progress as of this writing) and this fun Emerald top. I’ve made mostly solid Emerald dresses, but I’ve seen a number of striped Emerald tops and dresses online, and I love how the stripes look when you cut them on the bias and wanted to try it myself.

After I posted some in-progress photos on Insta, someone commented asking if I would do a tutorial on how to match up the stripes along the seam lines. It’s super easy! Here’s how:
note: You can do this for ANY pattern or motif that you want to match along a seam, be it plaid, stripes, or florals.
Step 1. Trace your pattern and draw in the seam line
First, I trace my pattern and draw the seam line in along the edges I want to match along. This is easy on Emerald as the center front and center back seam lines are already on the front and back pattern pieces.

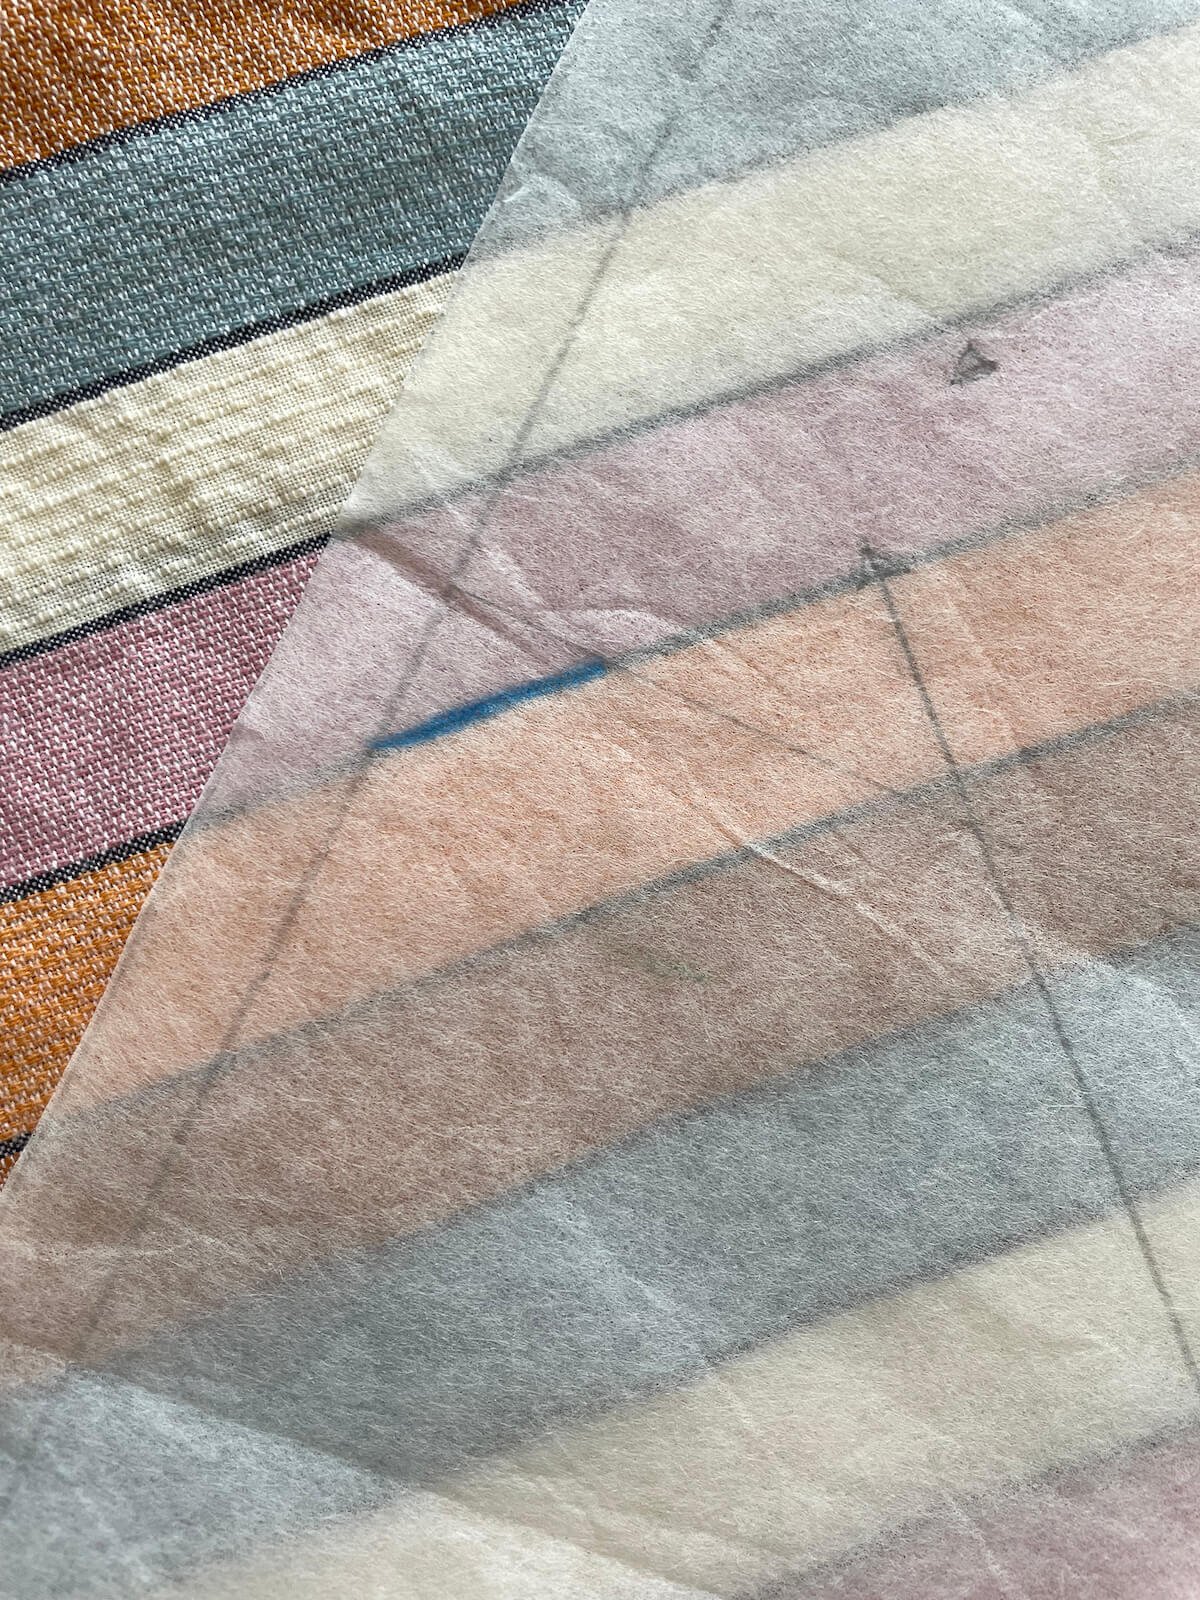
Step 2. Lay your pattern piece over your fabric and mark stripe intersections
Next, lay your pattern piece on the fabric where you intend to cut it out.
It’s very important to make sure that your fabric is laid out perfectly flat, straight, and without any diagonal warping.
Use a colored pencil to mark where the stripe or plaid intersects the seam line - in this case, I traced between the orange and pink stripes in a few different places on the pattern piece.
Don’t trace the line to the edge of the pattern piece, just to the seam line, as shown.
Step 3. Cut out your pieces one at a time
It’s important when cutting out your fabric to cut just one piece at a time (rather than through folded fabric or two layers). For Emerald you have to do this anyway because the pattern is on the bias.
Then flip your pattern piece over and use the colored markings to align your fabric correctly before cutting your second piece out. Then sew your pieces together!
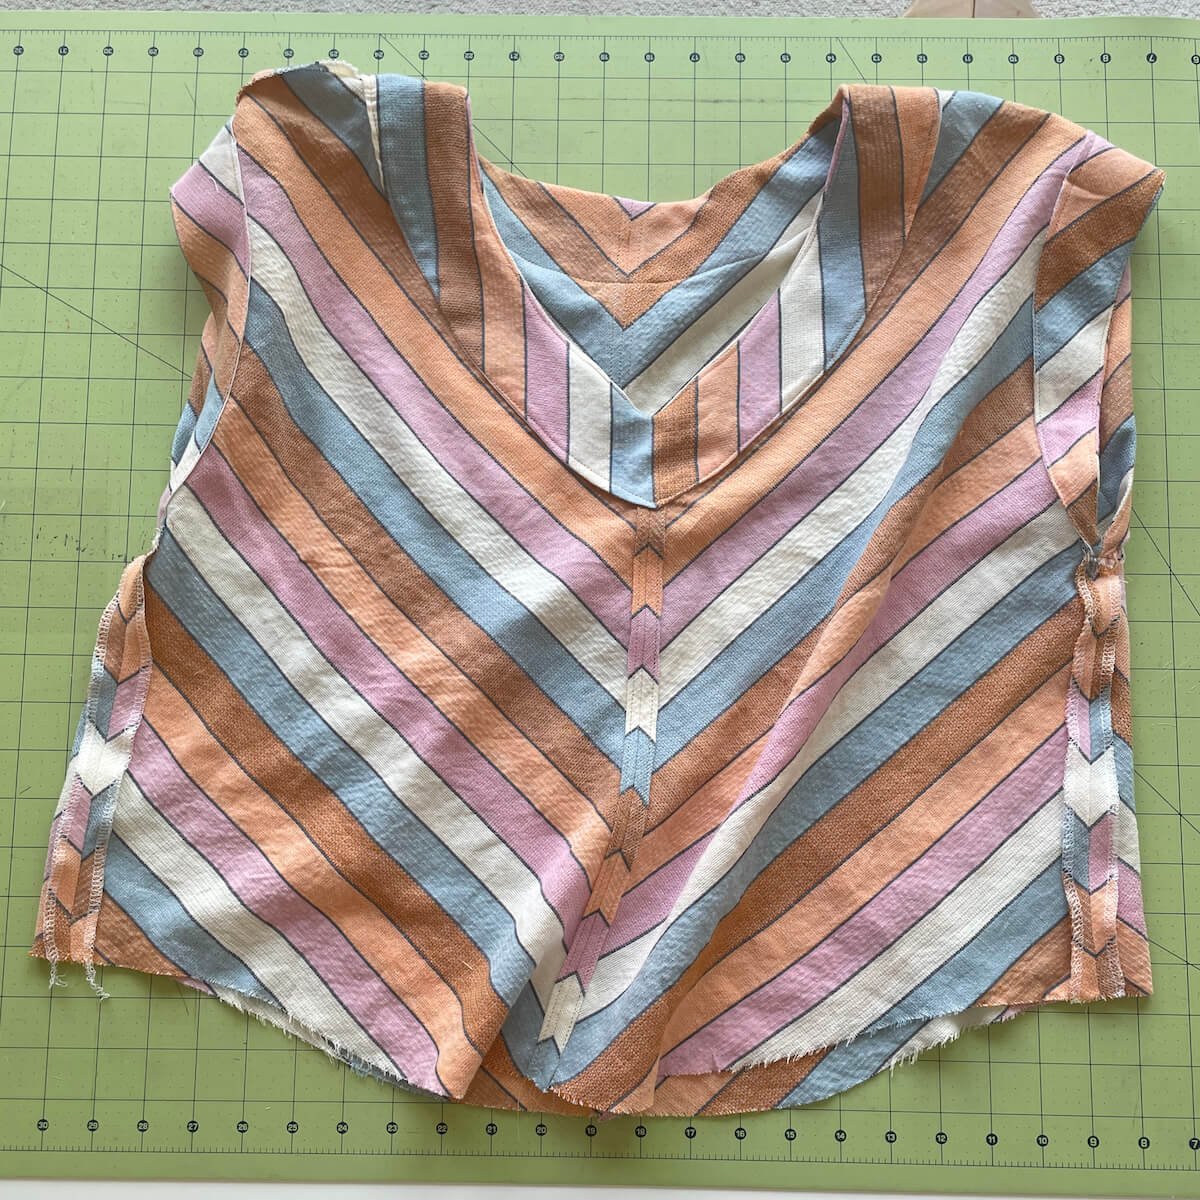
Here’s a zoomed out view of what the pattern pieces look like, over top of the finished top:

And here’s a fun look at what the inside looks like after you sew the seam, and fold and stitch down the seam allowance to either side!

One other note: It’s not always possible to match patterns on all of the garment seams, due to the size of the motif differing from the sizes of the pattern piece (it makes sense if you think about it), though with stripes you can match at the center and sides fairly easily.
I didn’t try to match the stripes along the side seams for this top — just the front and back center seams — though you definitely can with stripes if you lay the front and back pattern piece tracings over each other and transfer the markings along the side seam side from one to the other.