
How to sew a patchwork shower curtain


A patchwork shower curtain is a great way to show off multiple fabrics that you love, plus it’s super easy to sew! If you can make it out of leftover pieces from other projects, even better.
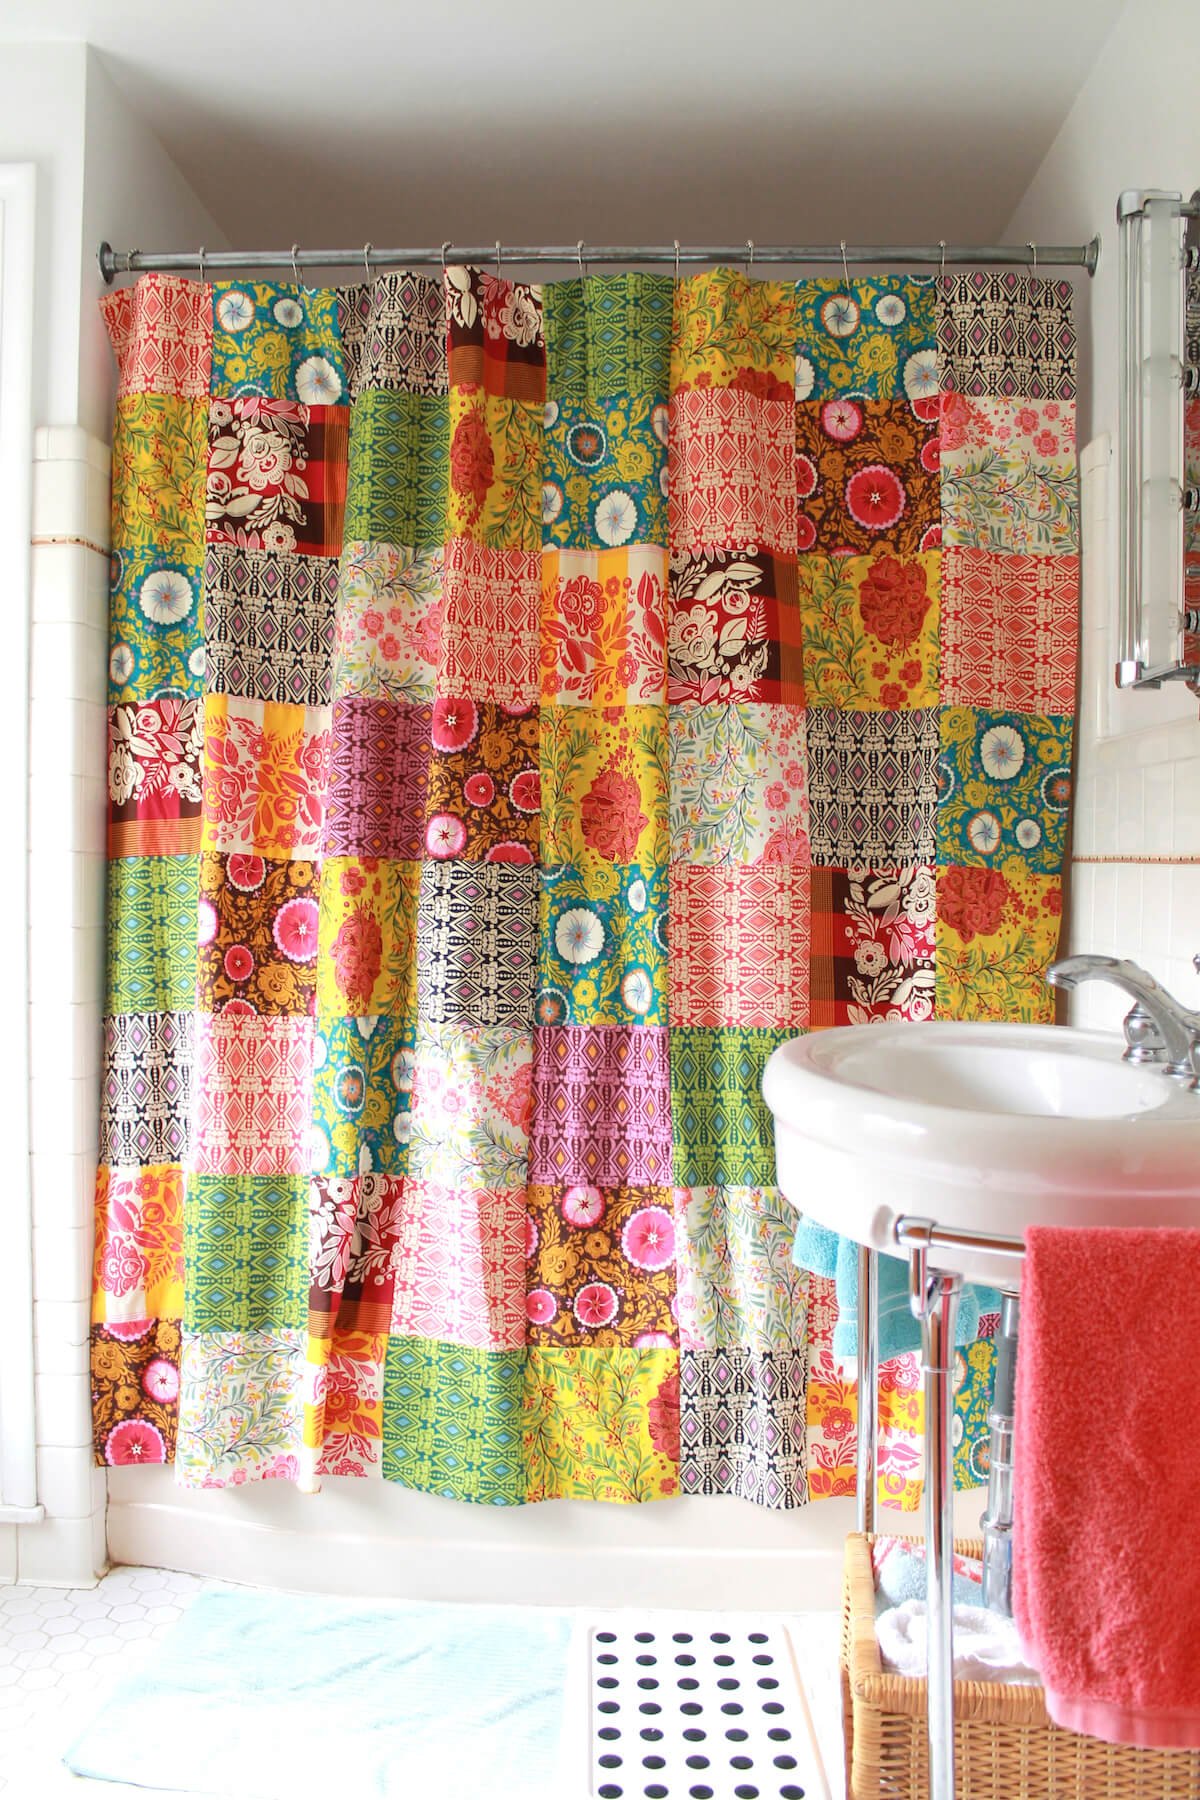
This shower curtain has been hanging in our bathroom since 2013. I love how cheerful the colors and prints are, and it makes me happy to see it every day because it was made out of one of my favorite fabric collections, “Good Folks” by Anna Maria Horner. It’s been in two bathrooms, actually; it moved with us from our rental (shown in these pics) to the house that we currently live in.

I first posted these pics back in 2013, but didn’t include any instructions. Recently, when I was sorting through my old photos, I realized I still had the notes on how to make it, plus a few in-progress pics. So, here’s a quick tutorial on how I made mine!
HOW TO SEW A PATCHWORK SHOWER CURTAIN
Finished dimensions:
72” wide x 70” tall
Recommended fabrics:
I recommend choosing stable, mid-weight fabric, like the quilting cotton in this one. Linen would also be really beautiful, but might be a little harder to work with. Lawn is another nice choice, but is a bit more delicate, so interfacing the top edge would be essential.
You will need:
3/4 yard each of eight fabrics (or: 1/2 yard each of sixteen fabrics, or some combination in between — see cutting notes below)
coordinating thread
sewing machine
serger (optional)
rotary cutter, quilter’s ruler, and mat
seam ripper (for buttonholes) OR set of 12 grommets
1/2 yard fusible interfacing (optional)
Step 1. Cut out your fabric
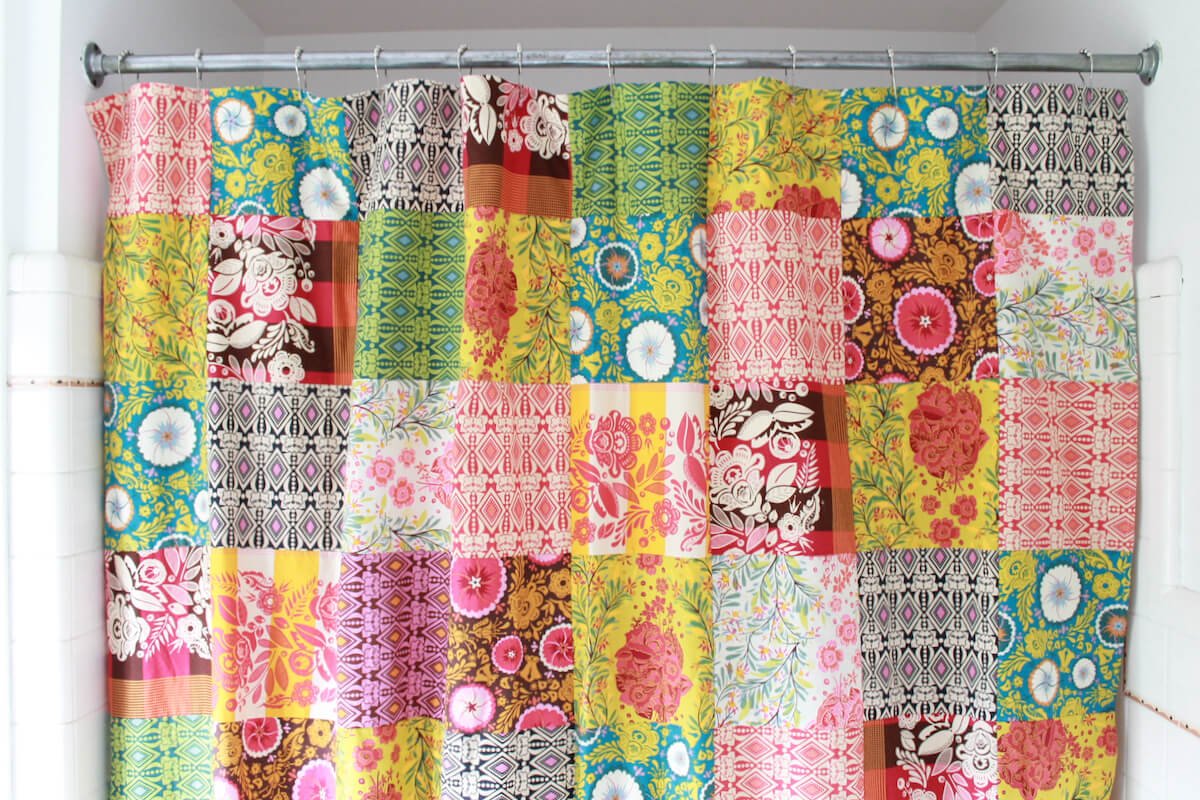
Cut 64 squares from your fabric, each 10” across. Use a rotary cutter and quilter’s ruler to make sure each square is equal.
note: If you are using a serger, and prefer NOT to trim off the excess seam allowance, you can cut your blocks 9.5” wide, and use a 1/4” seam rather than a 1/2” seam to sew your blocks together.
If you want, you can cut eight squares from eight different fabrics. I had TEN fabrics that I wanted to use, so I cut the following numbers from the prints I had:
8 squares from four fabrics (the turquoise, yellow, navy diamond, and red diamond prints)
6 squares from four fabrics (the green diamond, ivory floral, orange and white stripe, and brown and red stripe)
5 squares from the brown floral print
3 squares from the purple diamond print
But really: you just want a nice variety of prints, with 64 squares total.
Step 2. Arrange your squares
I placed my cut squares on a bed to arrange them the way that I wanted. It took me a while to make them look “random” enough, but eventually I had a configuration that I liked.
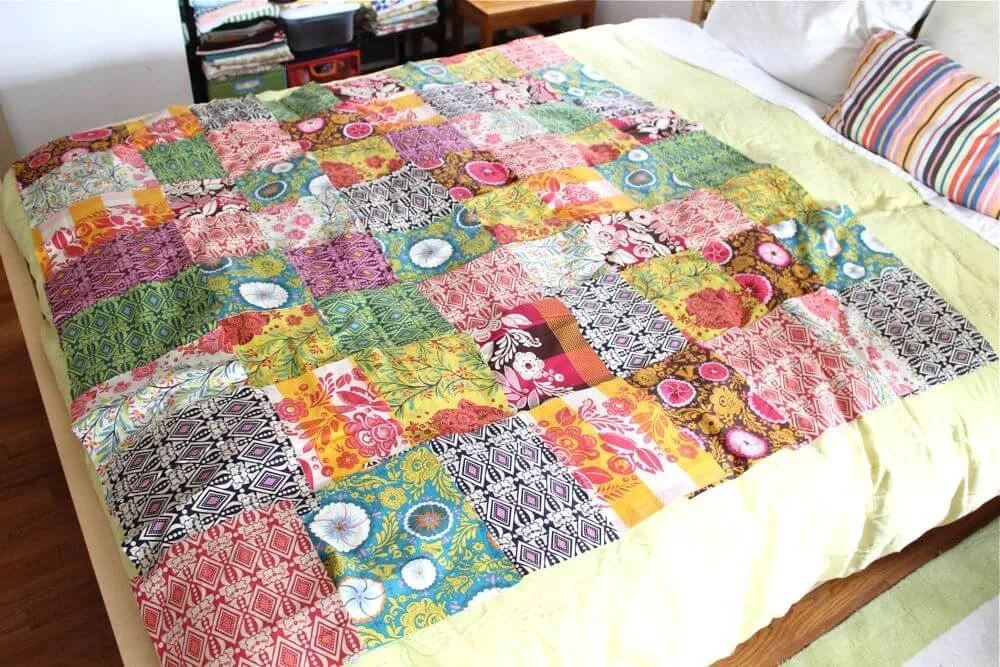
Step 3. Sew the squares together
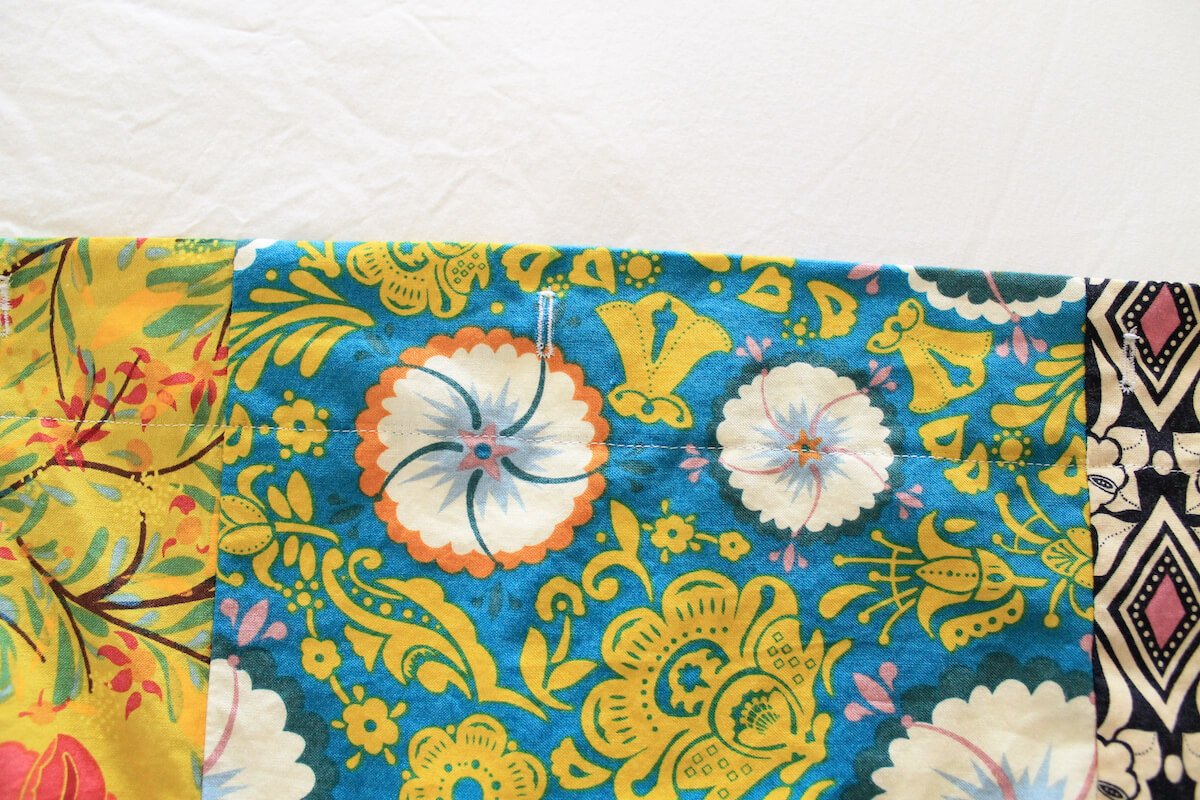
Using a 1/2” seam allowance, sew the squares together, four at a time, into bigger squares (this will make 16 blocks made of 4 squares each). Press seams to one side or apart.
note: I used a serger, so I didn’t have to finish my seams at all, but if you don't have a serger, you may want to consider pinking the seam allowances after each seam so that the edges won’t fray when the shower curtain is laundered. This takes a bit of extra time, but you’ll be glad you did it later; you want to create something that will last, not fall apart over time.
Next, attach the larger blocks together - again four at a time — to make four large blocks made of 16 squares each. Finally, sew these four blocks together to create a giant square.


Step 4. Hem the sides and bottom
Fold and press under 1/4” along the the side and bottom edges of the curtain twice, then stitch down along the first fold to hem the edges.

Step 5. Finish the top edge
For this edge, you may want to add a strip of interfacing along the top edge first to help reinforce your button holes. I didn’t do this, but with quilting cotton the material is pretty stable on its own so keep that in mind if you use something other than quilting cotton for your shower curtain.
Fold and press 1/4” towards the wrong side along the top edge of the entire patchwork piece. Then fold and press another 1.75” towards the wrong side, and stitch down along top sides and the first folded edge.

Step 6. Add buttonholes or grommets
Mark twelve locations, equally spaced, along the top edge of the shower curtain. At each mark, sew 1/2-inch tall buttonholes or add grommets, placing the center of the buttonhole or grommet 3/4 inch below the top edge.
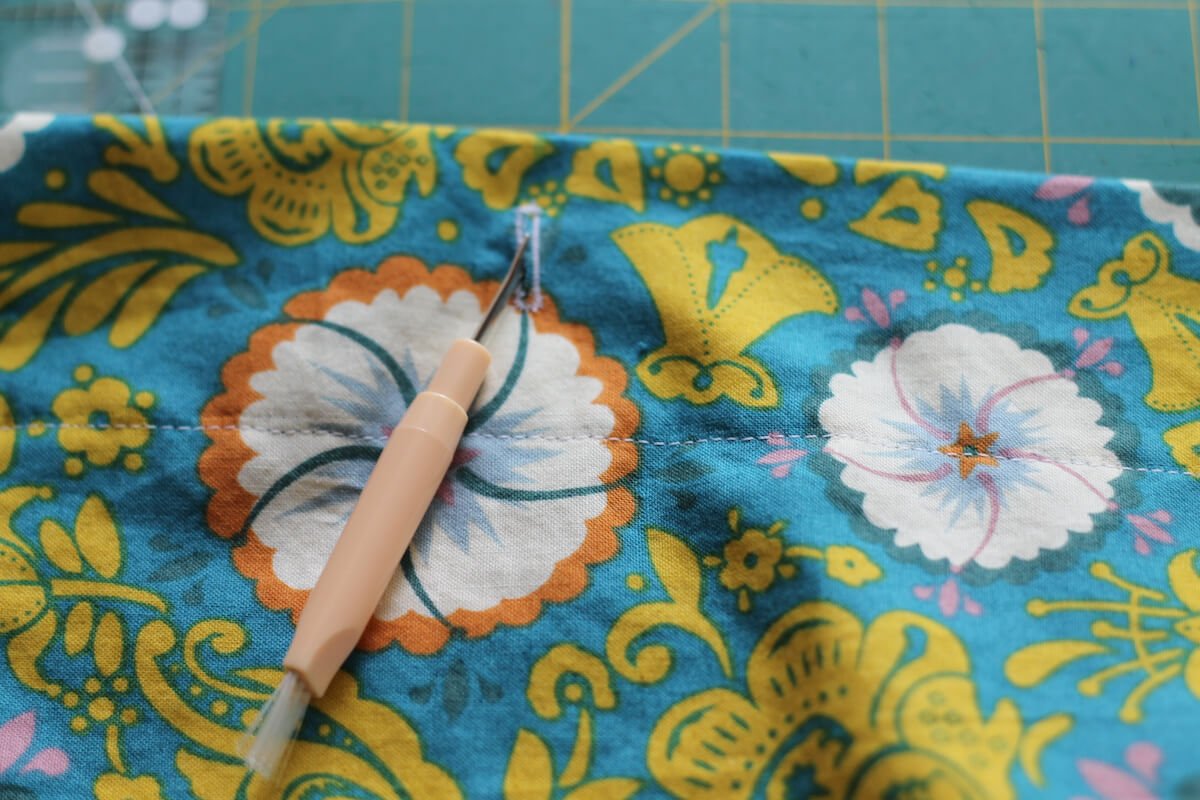
Once the buttonholes are sewn, open them up with a seam ripper, buttonhole tool, or small sharp scissors.
That’s it! When you’ve finished your curtain, give it one last press, and then hang it up and enjoy!