
Notes on my quilted coat

If you’ve been following along with my Friday Faves series, you’ve maybe noticed a few peeks at my quilted coat that I’ve been working on. I started it in the spring of 2021, about a year and a half ago, and it’s still not finished, but I thought I’d leave some notes in a post so you can see my progress so far.
Quilted coats have been having a moment for the past couple of years. Like many things that have come back into style that I would have sworn that I would never wear (fanny packs, overalls with only one strap buttoned, shoulder pads), my younger self would be shocked to see me embrace this trend.
Points of Inspiration
I think perhaps the first quilted coat to capture my interest was this one pieced from colorful scraps by @Hannahktb on Instagram. Later, Carolyn Friedlander would post a photo of a coat made by Brittany Frey and I fell harder for quilted coats, not gonna lie, that one is pretty stunning. Then I discovered that Brittany Frey wrote a guest tutorial on How to Make a Quilted Coat for Suzy Quilts, so I bookmarked it and made some notes. Monelle of @bashfulleo also posted a peek at her process of creating a coat from scraps on the Sewcialists site that I found very inspiring.
Getting started
I couldn’t land on a pattern that matched what I had in my mind, so I drafted my own pattern pieces for a front, a back, and a sleeve for a coat. I could write a long list of possible coat patterns you could use for this sort of project, but I really don’t want to spend time on that.
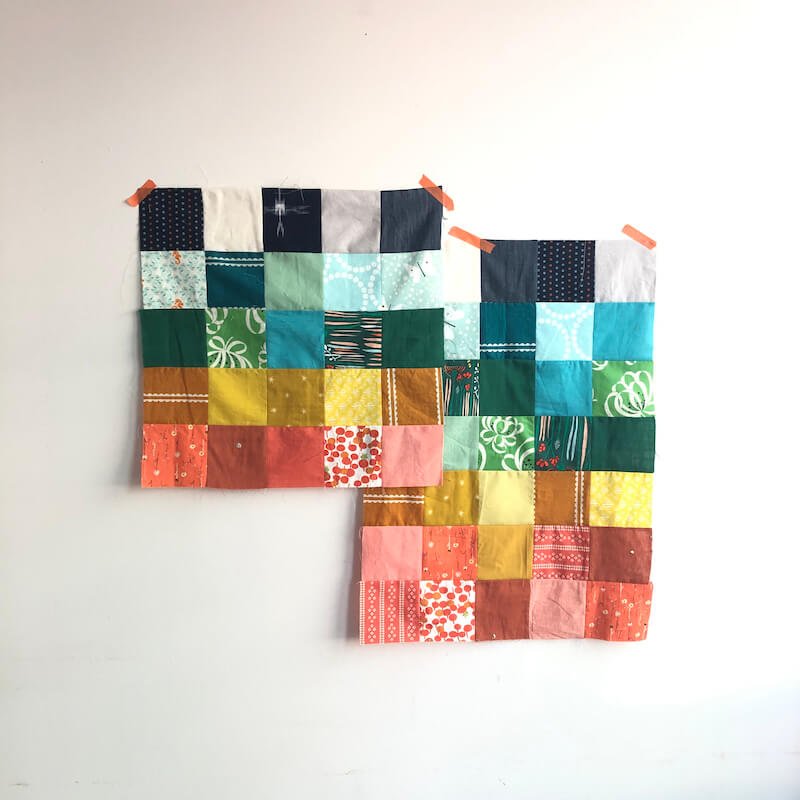
Using the how-to post from Brittany Frey as a rough guide for choosing and arranging fabrics, I picked five color groups, and began selecting four or five fabrics from my scrap bin in each color group, and then cut 4” squares for each one. I did some rough math to figure out about how many squares I would need, total, and decided to cut about 10 squares of each, which ended up being more than I needed. I was using scraps of fabrics from past projects, so I didn’t always have enough to get 10 squares out of each — and sometimes I had more — but I did my best to make the stacks fairly equal. You can see the result of that in the first photo.
Piecing it together
I spent a fair amount of time laying out the squares in a way that I liked. I did this mostly on my basement floor, and then strip-pieced each section (fronts, back, sleeves) together. When I was finished, I put them on my bed and realized that oh yes Rae does tend to select the same colors over and over doesn’t she?


Quilting
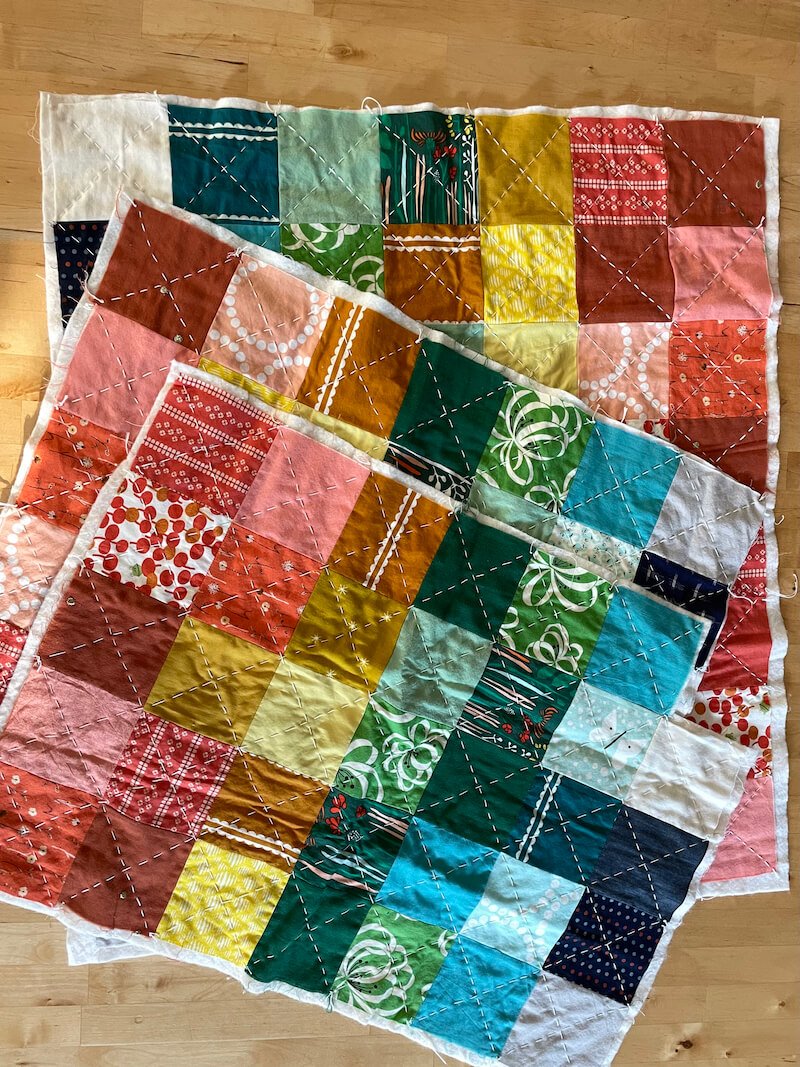
The next step was to cut out rectangles of batting slightly larger than each pieced section, and quilt the two layers together. I did this with some white sashiko thread I bought at Seams, as well as some craft string I had laying around. In retrospect the craft string was perhaps not the best choice of thread to use, but I wanted it to be thick enough to really see the stitches, and I was too impatient to order more sashiko thread online.


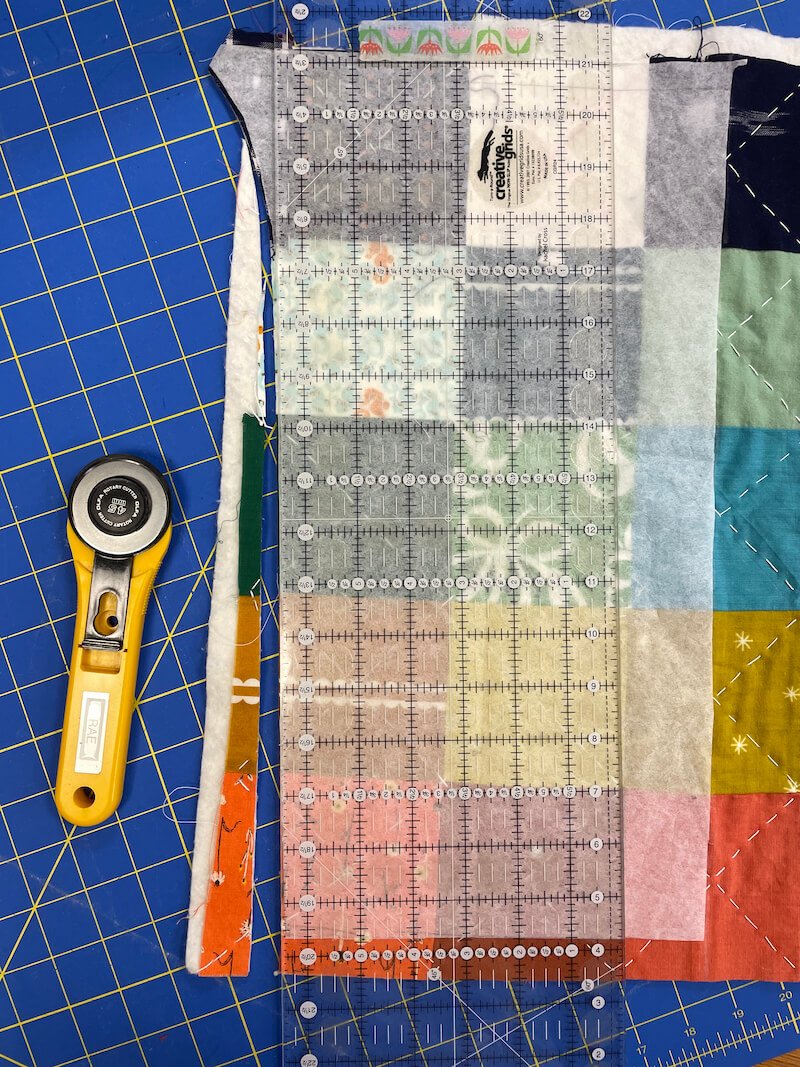
Cutting the coat pieces
I then used my pattern pieces to cut out all of the coat pieces. After I did that, I took my sewing machine and stitched all the way around the edges of each piece so that none of the quilted stitches or piecing stitches would come undone before I could sew the outer coat together.
I also cut identical pieces out of my lining, which is a grey dotted chambray fabric.


Sewing the coat together
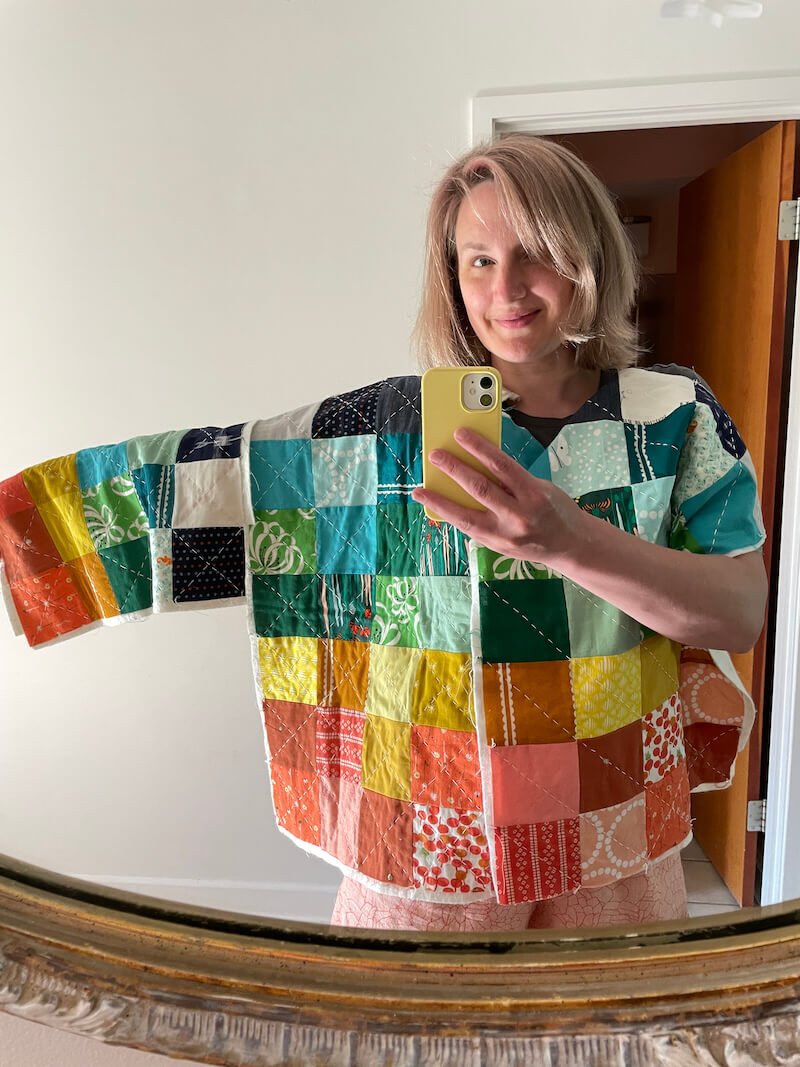
This brings me to my current step - I’ve sewn the outer coat together and tried it on, so I know it fits. I haven’t started sewing the lining together yet, since first I need to add interfacing for the magnetic snaps I plan to use to fasten it. Interfacing is always a mental hurdle for me. My plan is to add the snaps, sew the lining together, and then leave a hole in the side seam of the lining and bag the entire thing. I also might add some vintage buttons to the outside of the coat for decoration, though I don’t plan to make them functional.
I hope it’s been fun for you to see the progress of my quilted coat so far. As you can see, this is a slow process. I love the memories that this coat already holds through the scraps I’m using to put it together, and I’m excited to see how it turns out.
If you’ve made, or are working on, or have plans for a quilted coat — tell me about it! I’d love to hear about yours.