
Pink Jumpsuit

Most of my new pattern designs are based in some way off of another pattern that I modify, often to the point of non recognition. This jumpsuit definitely qualifies; it’s technically a Rose+Gemma hack, but as you can maybe see, is also quite the departure. I started working on this two summers ago but set it aside and only recently became motivated to finish it because Clementine and I had tickets to the Eras Tour in June (see this post for a few pics) and I decided I wanted to wear it to the concert.
I can’t commit to turning this into a New Pattern right now (the design still has some issues to work out, noted below), but when I posted it on Instagram a few weeks ago I said I would share my notes so you could create something similar on my blog. Hence this post. I’m not saying it will never become a pattern? But you know that by the time I might actually get around to working on it, some other pattern co. will have already put out an adequate stand-in, if they haven’t already.
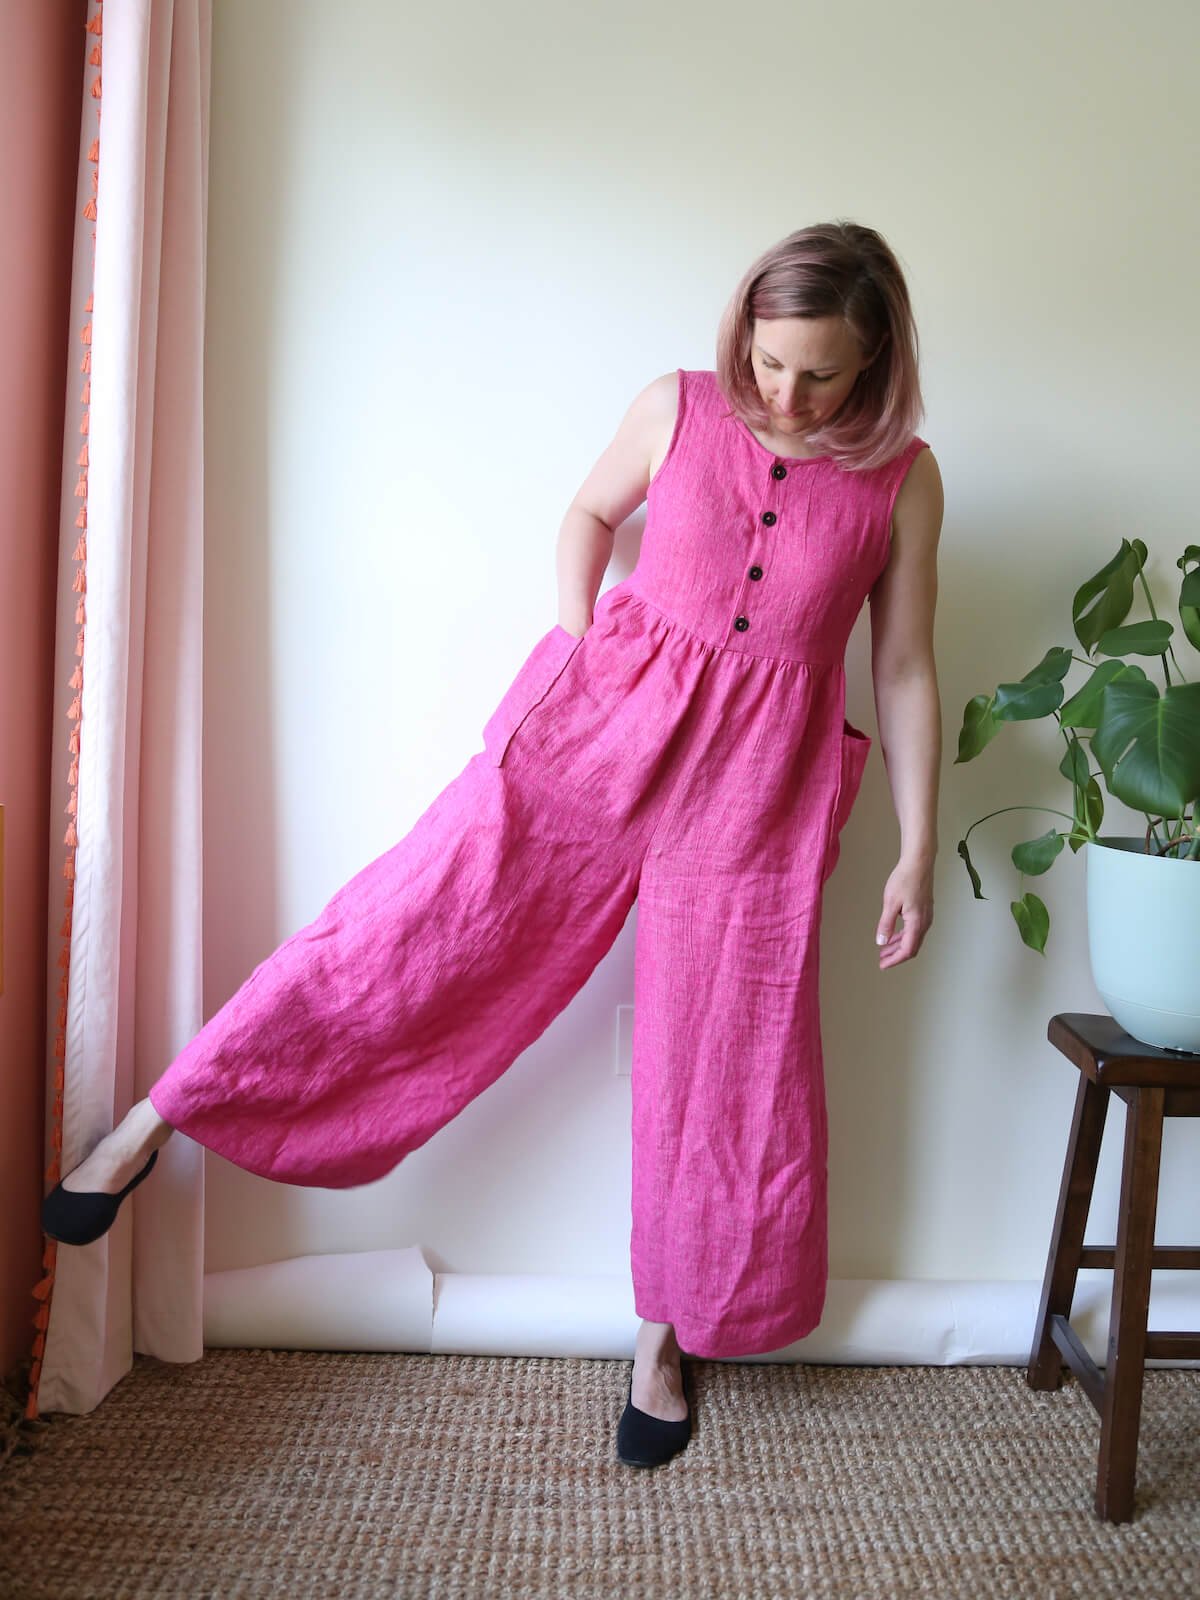
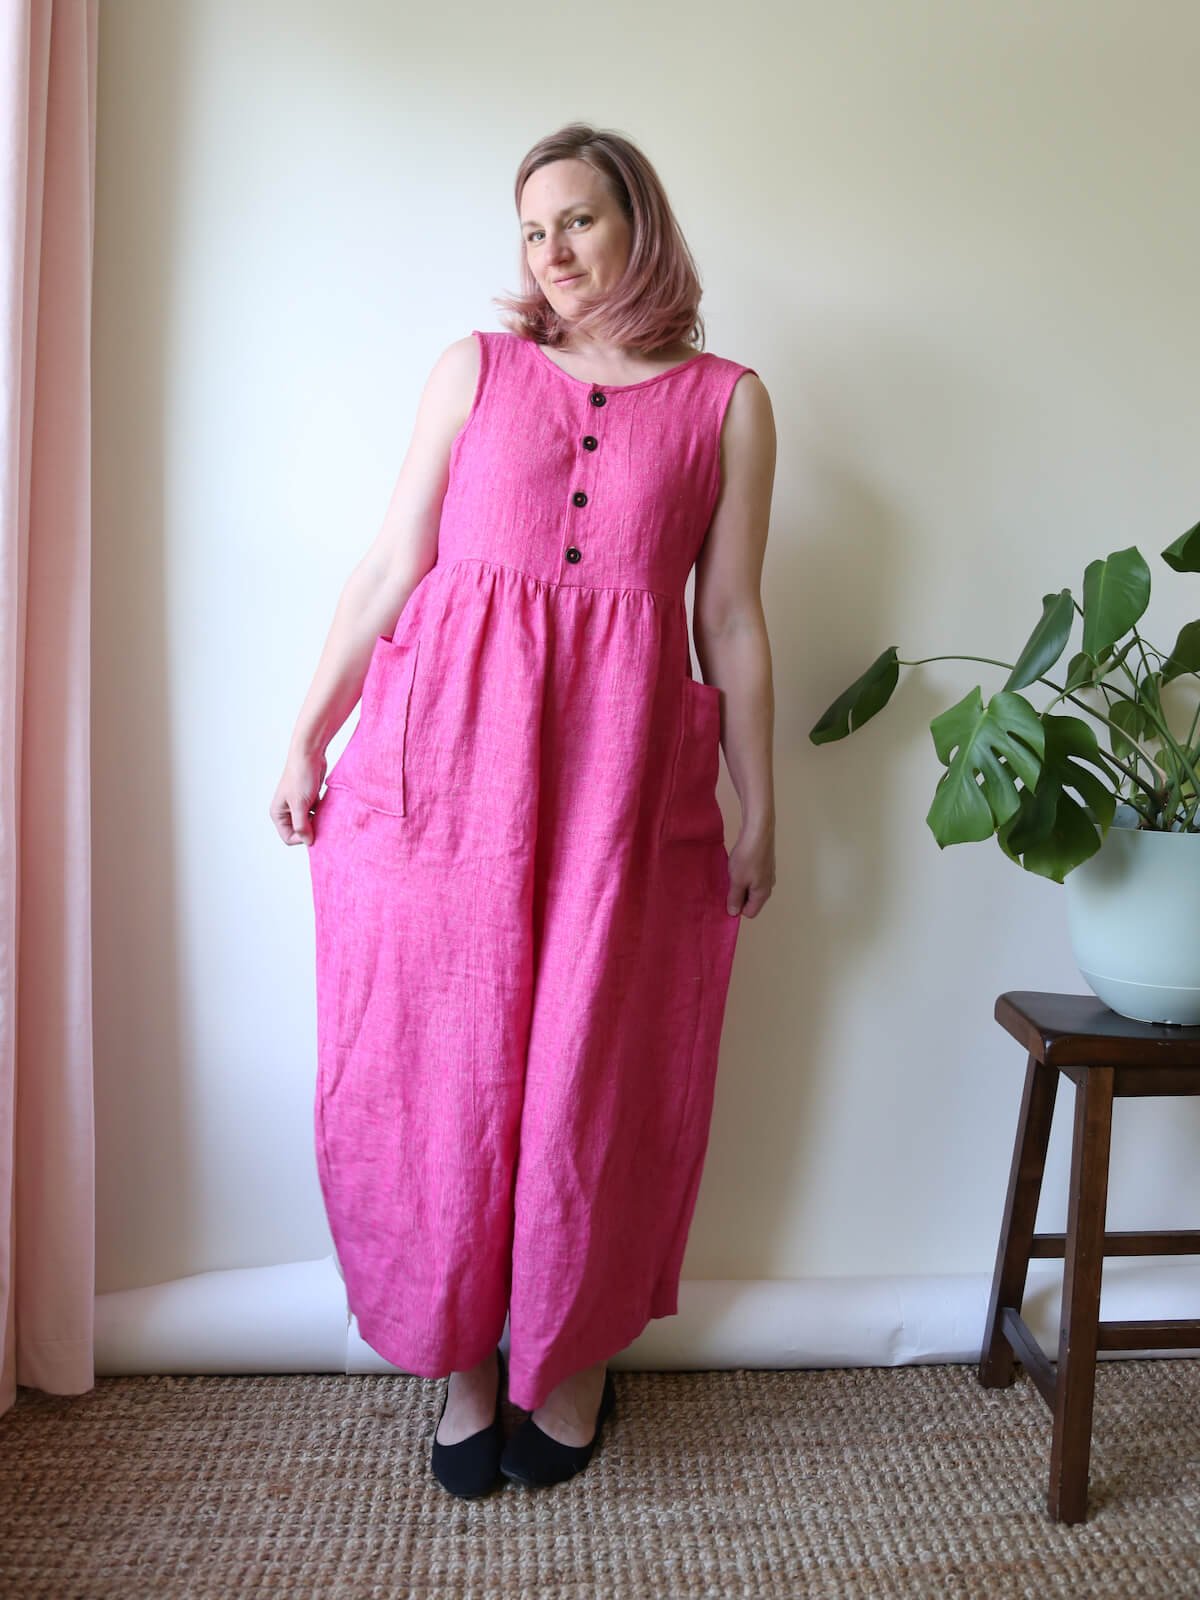
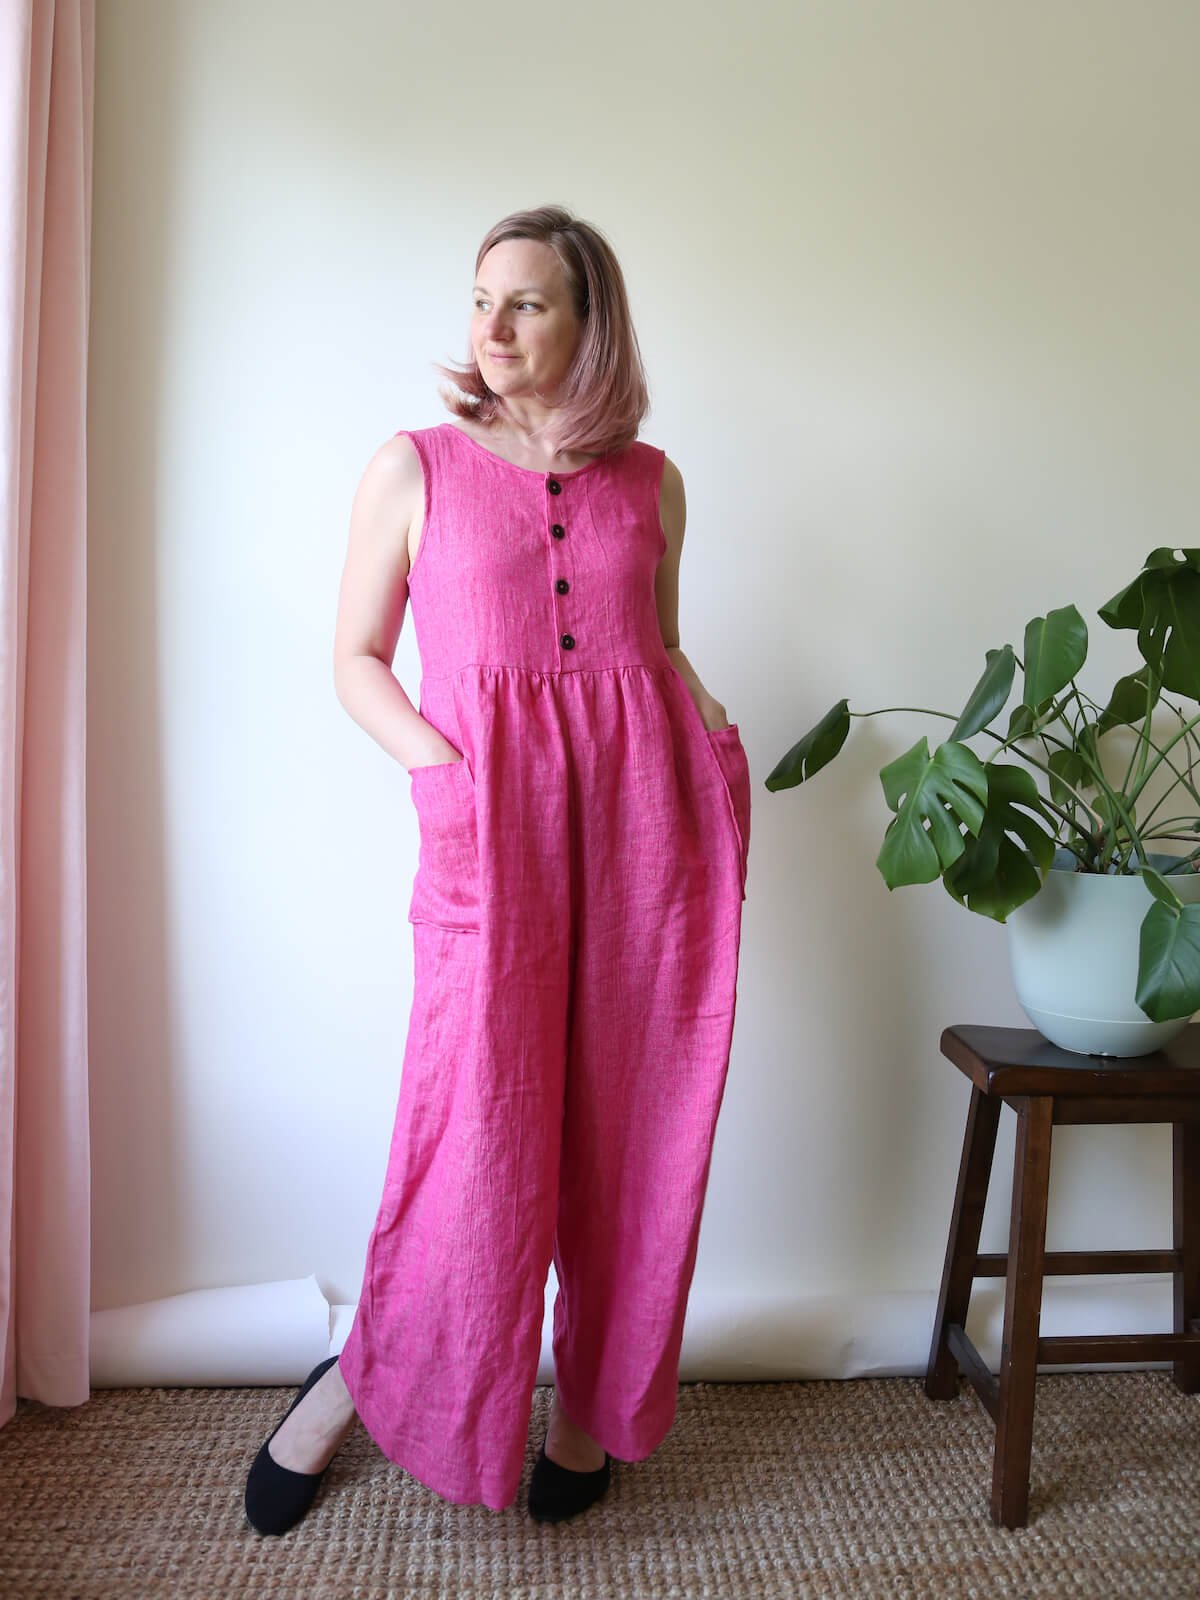
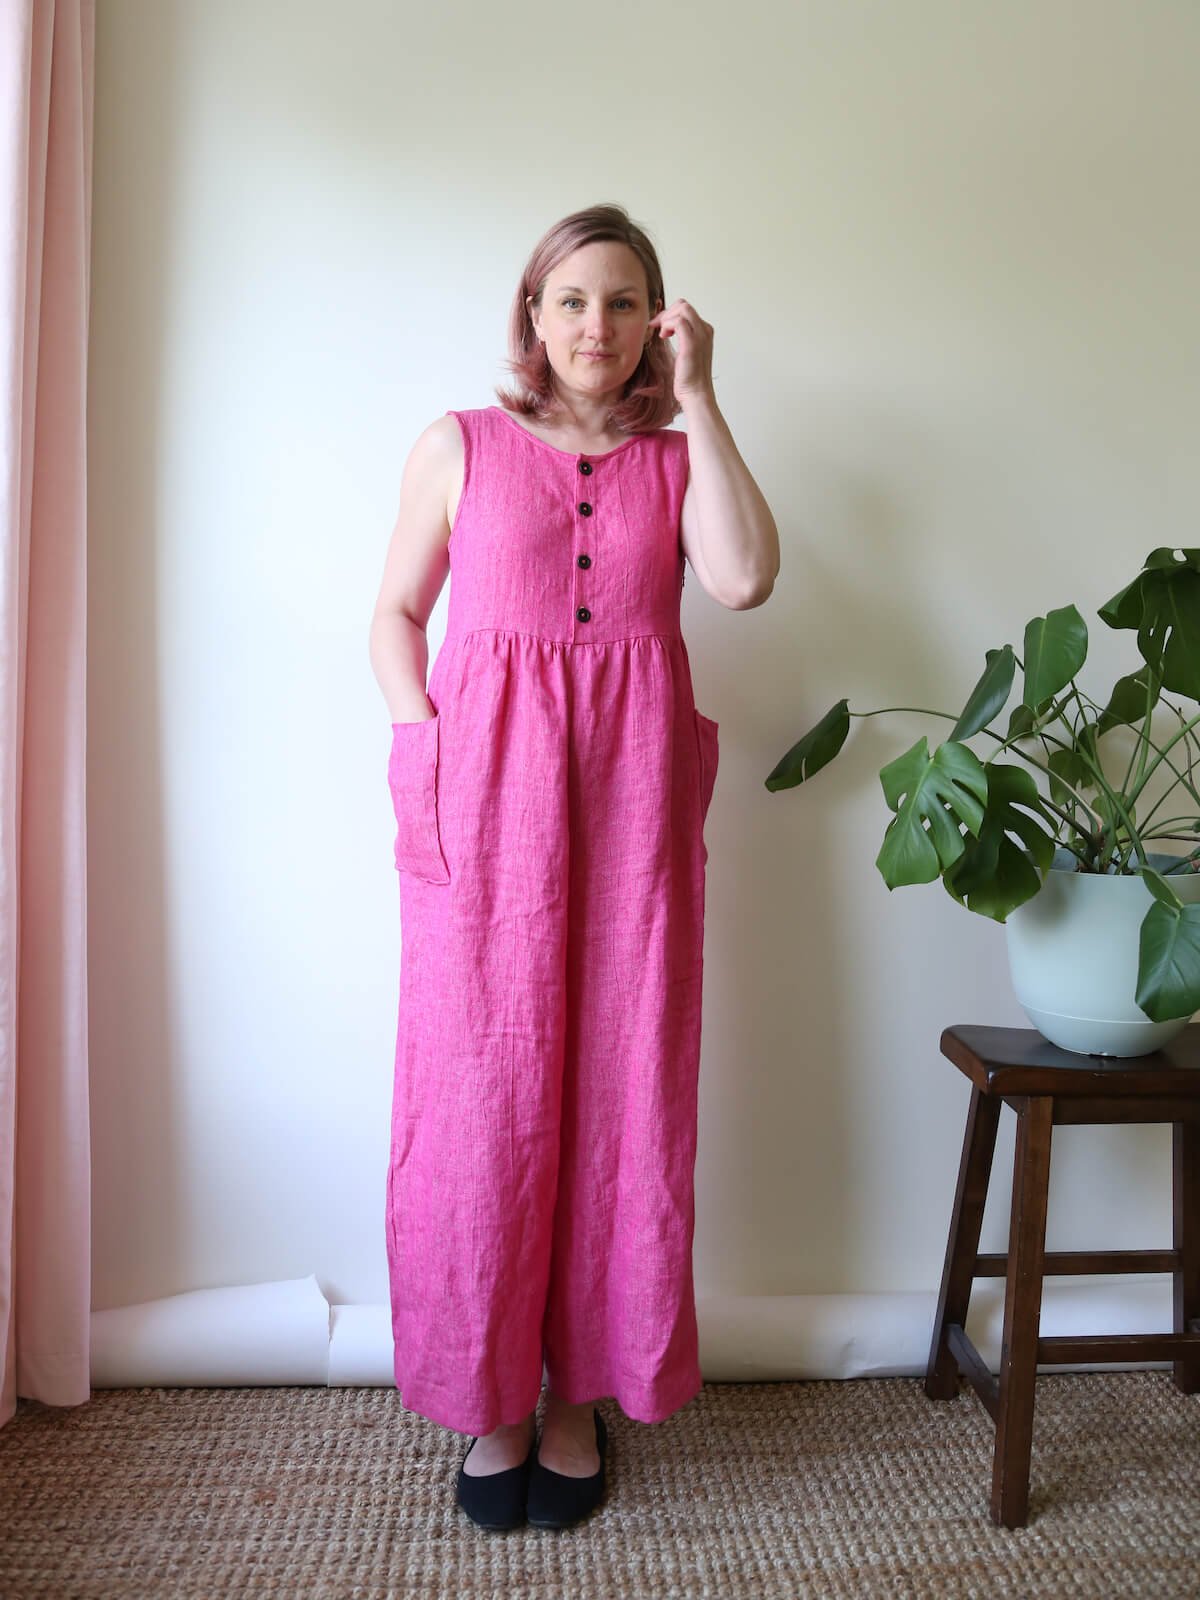
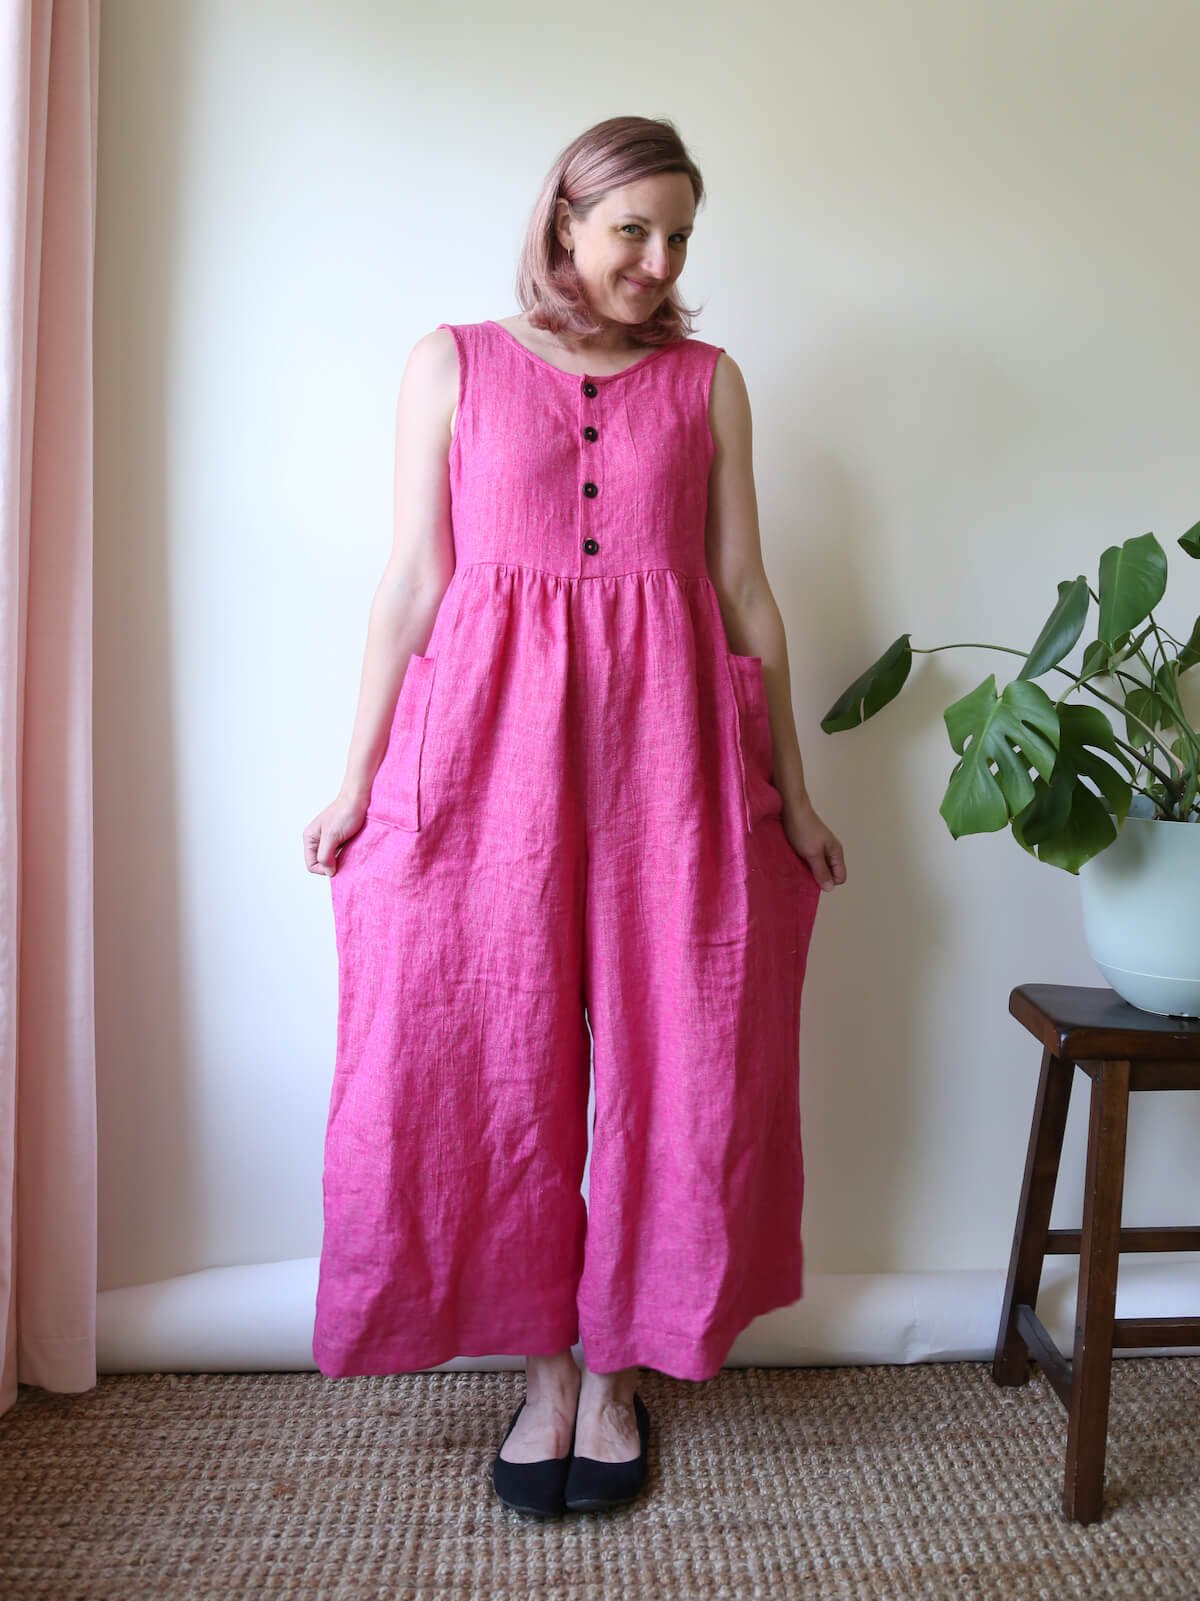
I’m rather delighted by how it came out. I used Merchant and Mills linen via Oak Fabrics and Merchant and Mills buttons via Gather Here. The investment was definitely worth it, as it is incredibly comfortable and I love the fact that even though I don’t (and probably won’t ever) iron it, the rumpled texture of the linen doesn’t hold large wrinkles like some other linens do.
When Clementine saw the finished jumpsuit, she declared that we were both “going as Lover” to the Taylor Swift concert. OK? IYKYK. And may I just say, wow, that concert. It was really something. Still reeling from the sheer number of humans, volume of screaming, and number of pink and/or sequined dresses in one locale. Really though, it was quite the unforgettable experience, and super fun to go with Clementine, who was over the moon and basically had a manic episode for the length of the 3+ hour concert.
The biggest change I made to the Gemma pattern was adding a button placket to the center front, but I also cropped it, widened the shoulder, added a couple of darts to the back for shaping, put an invisible zip in at the side, and scooped out the back. For Rose, I removed the waistband and pockets, added a LOT of height and width to the main pattern pieces and gathered them before attaching to the cropped Gemma upper.
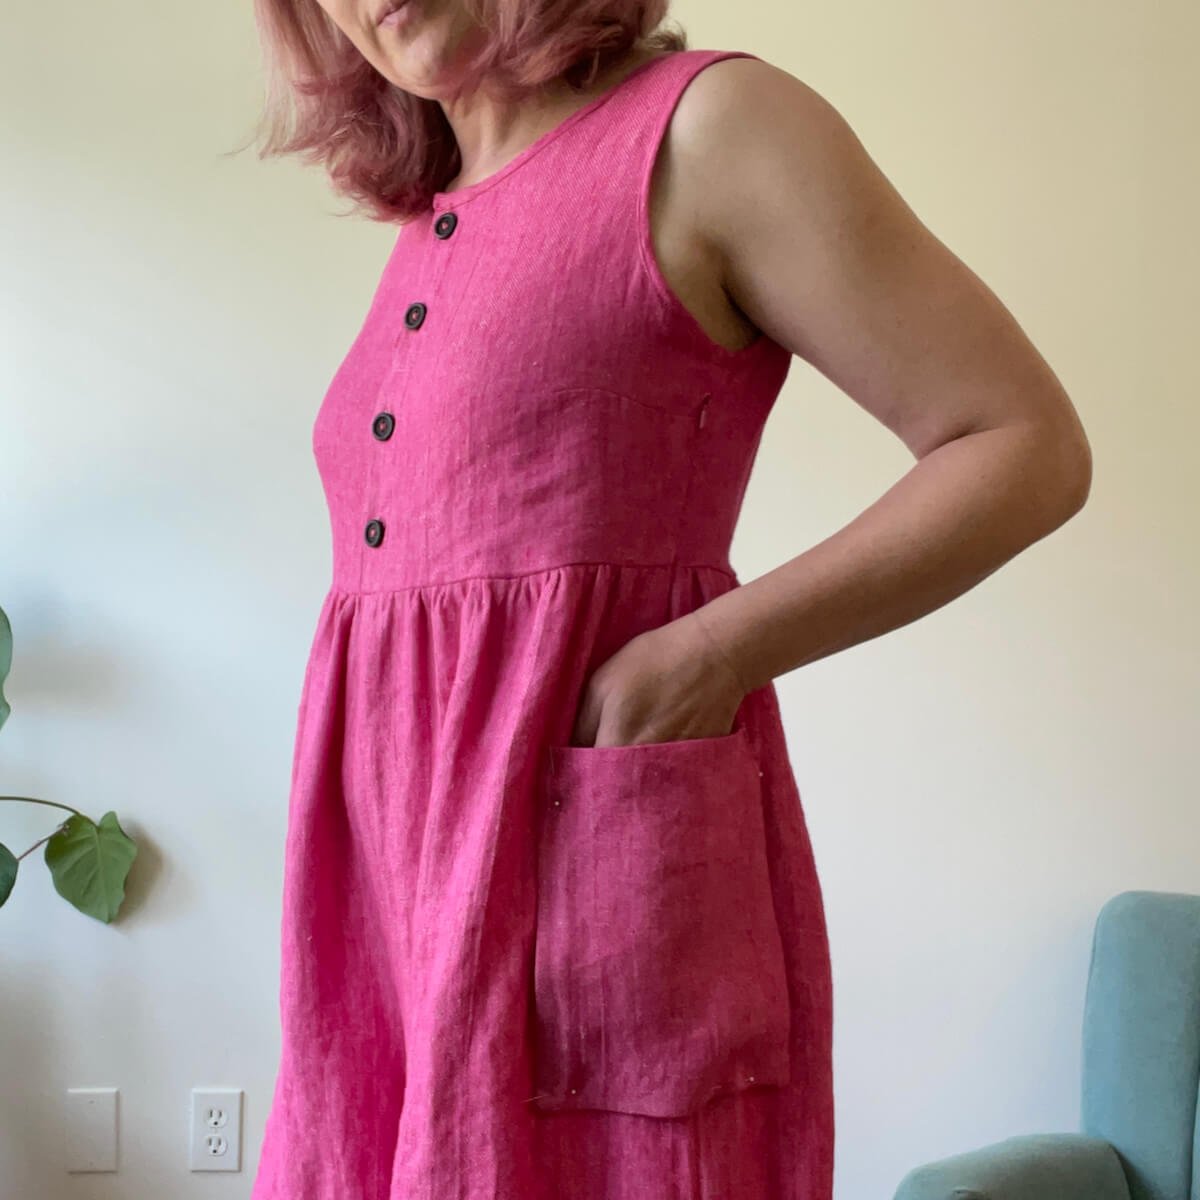
You can see the invisible zipper in the photo above, and how it comes out of the pocket (which I had only pinned on at this point). Below you can see the back darts and the scooped back.

Here are a few more details for you ambitious sewists who may want to attempt something similar, but with a BIG disclaimer: you really will need to have the confidence to problem-solve this along the way as I did - and honestly I may have forgotten something, so proceed with intelligence.
If I could go back and do it again, I probably would make the button placket go down further - below the waist seam - so that I could just skip the invisible zipper. And the hardest part was getting the rise correct; I had to baste and rebaste the lower and upper portions together a few times before I got it right in both the front and back.
HOW TO CREATE A GEMMA + ROSE JUMPSUIT*
(*roughly)
You will need:
fusible interfacing
4-5 buttons
invisible zipper
PATTERN NOTES:
When tracing your Gemma pattern pieces (FRONT & BACK):
add 2” at the center front to Gemma FRONT for the button placket
crop both front and back following the instructions in this tutorial (How to Crop Gemma) so that the side seam length is 6.75” tall.
add 3/4” to the shoulder width to make them a bit wider
use the scoop neckline shape for the front to scoop out the BACK neckline
When tracing/cutting your Rose pieces (FRONT & BACK):
use the full pant length for both - I cropped mine, but just above the ankle and with a wide hem
add the missing pocket corner to the FRONT ala the muslin instructions.
add 5.5” in height* at the top of the pattern pieces (waist) to make up for the missing waistband and extra height needed to reach Gemma’s bottom hem.
add 2” in extra width to both FRONT & BACK pant pieces at the side seams - this should be relatively straightforward as those edges are already fairly straight.
*note this is probably a bit more than you need, but I started here and trimmed a bit of height off after basting the pants to the top and checking the length
CUTTING NOTES:
Cut 2 Gemma fronts, 1 Gemma back on the fold
Cut 2 Rose fronts, 2 Rose backs
Cut 1-1.5 yard of bias binding for Gemma neckline and armholes
Optional: Cut two pocket pieces, 8.5 x 18” each
SEWING NOTES:
First, sew Gemma
Staystitch neck and armholes (V. IMPORTANT!).
Finish the bottom edges (hems) with a overlock stitch or serger
Attach a strip of interfacing to the front center edges of Gemma and then fold over 1/4” and then 1.5” toward the wrong side, and edge stitch down to create the button plackets.
Next sew the front darts, shoulders, and one side seam entirely, and the top 1.5” of the other side seam (leave the rest open for the zipper).
Add the bias binding to finish the neck and armholes as per the instructions.
Sew two vertical back darts on the back, each 1” wide, beginning at the waist and tapering to mid-back height below the shoulder blades. This will remove 4” total of width from the back and create shaping in the back.
Baste the front placket together at the bottom.
Try it on to make sure you can take it on and off over your hips.
Then, sew Rose
Finish the side seam edges of the fronts and backs separately (overlock or serger)
Sew the center (crotch) seams and one side seam entirely, and the other side seam from about hip height down (recommend just basting; you’re not exactly sure yet where the zipper will end). Make sure this is the same side you left open for Gemma.
Sew the inseams.
Gather the top edges of the front and back (two lines of basting stitches; leave long tails for gathering)
Next, baste Gemma and Rose together
Basting is pretty important since you don’t know if you’ll be able to pull it on and off until you do this step - and you’ll probably be adjusting the rise at least once.
Pin the gathered Rose bottoms to the Gemma hem, match side seams and centers, and adjust the gathering stitches until they are the same widths. Baste together with a 1/2” seam.
Now you should be able to try it on and assess the length. It was at this point that I’m pretty sure I removed some height from both the front and back of Rose, but I think it was less length from the back than from the front. I pinned the Gemma front plackets shut and pinned the side where the zipper will go to get a sense for the overall fit at this point as well.
You want the crotch seam to fall at a position that you can comfortably sit down and stand up without too much droopiness, or tightness. I also wanted the waist seam to be somewhat fitted, to balance out the bagginess of the pants and serve as a counterpoint to the gathered bottoms. You can increase the back darts a little (or even add front waist darts)
Once you are happy with it, sew and finish the waist seam, and finish the inseam.
Finish everything
Add the invisible zipper (just below the underarm section you sewed). Tack across bottom of zipper at roughly hip height, then trim and discard the lower portion of the zipper (that you don’t need) and sew/finish the rest of that side seam.
Hem the pants to desired height, and add the buttons and buttonholes.
If you want patch pockets, add those at the side seams, centered slightly towards the front, and so that they just cover the bottom of the invisible zipper on that side.
(Tutorial: How to Make Patch Pockets)
Voila! Jumpsuit!!!
