
How to Sew Beautiful Knit Hems
Smooth hems on knits can be tricky to achieve; with Jade we felt like we finally landed on a technique that REALLY worked (no curling; looks smooth, not stretched out or puckery, stitches that won't pop with wear, and works with both CURVED and STRAIGHT hem edges).
Since most of us don't have coverstitch machines to sew the hems we're used to seeing on our ready-to-wear tees, this method uses a regular home sewing machine. The key elements to success: a wider (1") hem, and stabilizing the edges using knit interfacing. Adding the interfacing adds a bit of extra time, but it's totally worth it!
How to: Below, we'll demonstrate the technique that is incorporated into our Jade Tee pattern. You can use these steps for hems on any knit tee you make!
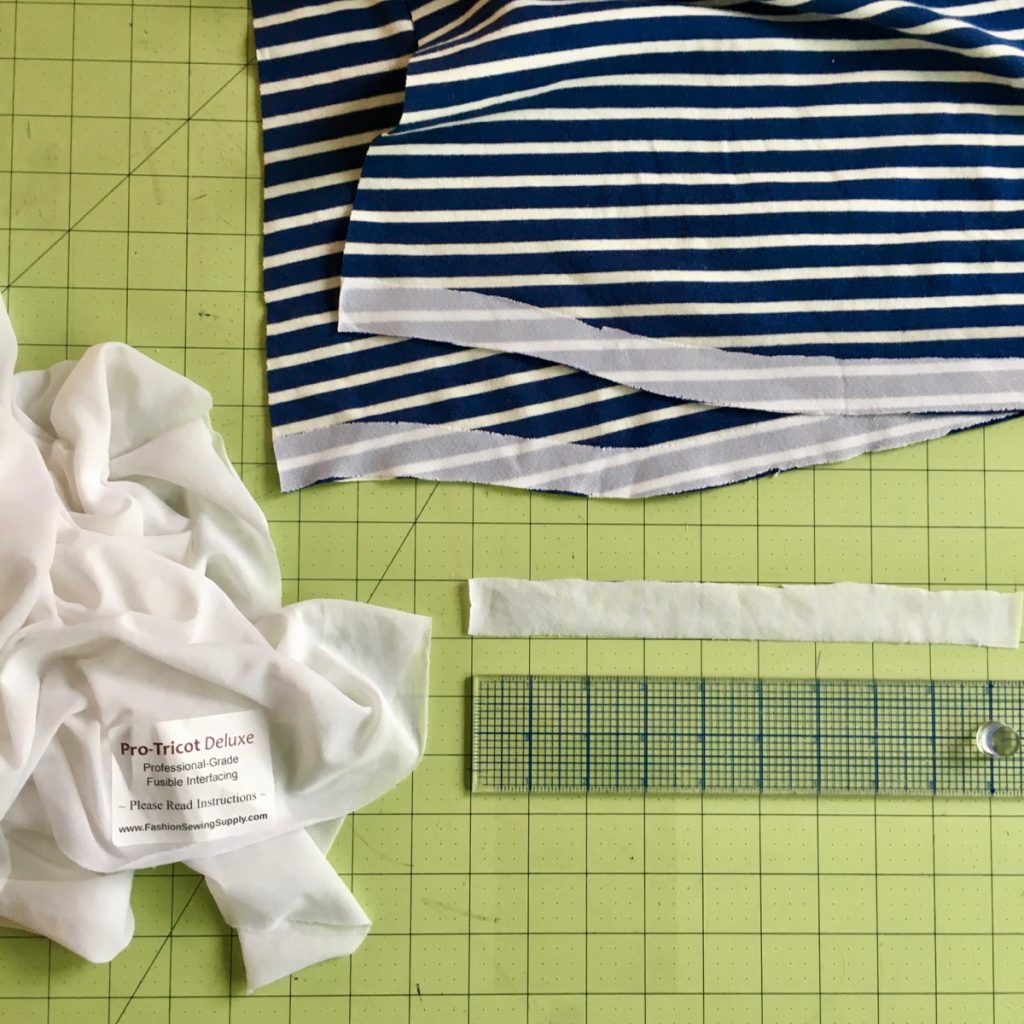
Step 1. Cut interfacing
Using a rotary cutter, cutting mat, and ruler, cut 1" strips of knit interfacing, estimating how much you'll need for your sleeves, front, and back hems.
(PS. Check out my favorite source for interfacing here).

Step 2. Attach interfacing to hems
Use an iron to fuse the interfacing to the wrong side of the hems of your pattern pieces. Jade's hems are a little curved, and the interfacing is flexible enough to follow those curves easily, but this works just as well with a straight hem (like the one on the Flashback Tee).
Step 3. Press hem allowances
I like to press my hems before I sew the shirt together -- it's not technically necessary to do now, but I find it's a little easier to press flat pieces than 3D pieces, and I always thank myself later. Just fold the hem up along the edge of the interfacing, and press.

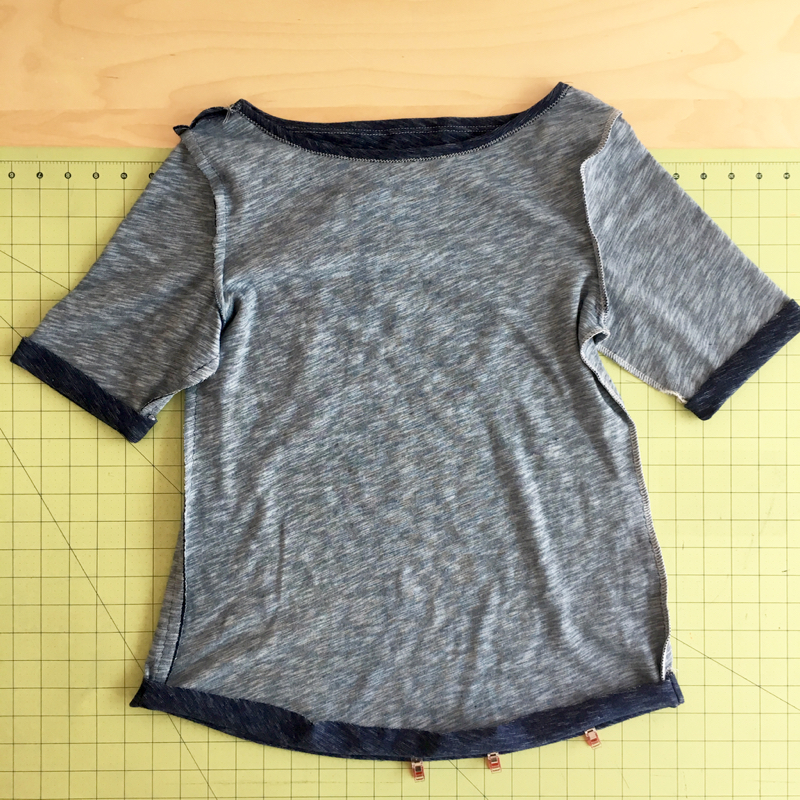
Step 4. Construct your tee
Sew your shoulder seams, attach sleeves, and sew side seams from the end of each sleeve to the hem. (Make sure the hems are unfolded if you pressed them in the last step). In the sample below, I used a serger for one side and a narrow zigzag stitch for the other side -- was just experimenting!

Step 5. Pin or clip hems
With the shirt still inside out, fold the hems up and press (skip this if you already pressed in Step 3). Use clips or pins to hold your hems in place before sewing. It's important not to skip this step; failure to secure the hem before you sew it can cause it to twist while you're stitching it in place.
If you use pins and plan to use a twin needle, turn shirt right side out first, pinning from the outside and making sure you catch the edge of the hem underneath.

Step 6.Sew the hem
Now that you've stabilized and also pressed and secured the hem, you're ready to stitch. Note that what you did *before* you even did any stitching is the key to getting the hem to lay flat. However, the stitches you choose are also important because they will determine how long the garment will last. There are various stitches to choose from for this step:
narrow zig zag: A narrow zigzag is the fastest and simplest. At a very narrow setting of 1.25 mm and stitch length of 3 mm, it barely looks like a zigazag, but it provides a bit of added stretch. It's not the most durable, though, and those stitches sometimes break while taking the tee off and on.
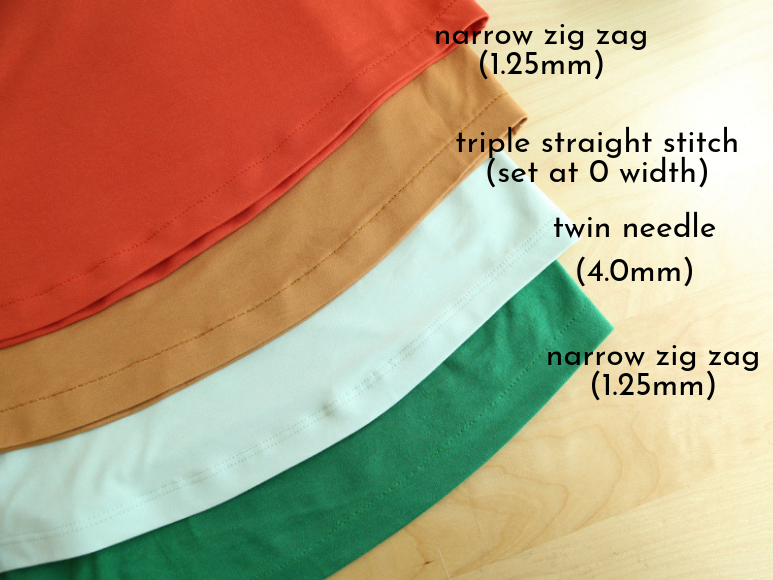
twin needle: Using a twin needle makes for a professional-looking finish, and holds up quite well to wear. You can get twin needles in different widths, and our favorite is 4mm. To use a twin needle, simply replace the regular needle on your machine with the twin needle, and hold two strands of thread together to thread the machine, only separating the strands when you reach the separate needles. (Pro tip: if you don't have two spools of the same color thread, wind an extra bobbin and use that!).
To sew, place your hem right side up (this means you'll have to use the throat plate to make sure you are at the correct hem allowance; in the case of Jade this is 1"), set your machine to a straight stitch, and sew a quick test on a scrap of fabric to check tension and determine the stitch length you'd like to use. When you sew the hem, make sure both needles catch the folded-under hem. If one goes off the edge, the seam will sometimes pucker. On the other wrong side of the fabric, you'll see that the bobbin thread automatically makes a zigzag pattern, which provides the stretch for this hem.

triple straight stitch: For an easy and very durable, utilitarian hem, I use the "triple straight stitch" setting on my machine (which is a Bernina - circled below, in case your machine has a different name for it). With the stitch width set to zero, this creates a straight stitch that goes back and forth repeatedly as you sew, making a straight line that appears a bit wider than a regular stitch. I love this stitch for knits because it's super strong and won't stretch and pop, so it works particularly well on super stretchy knits (like the bamboo knit used in the photo below).

Once you've sewn your hem, give it one last press and voila!! You've got yourself a beautiful knit hem!

PS. All of the Jade tutorials and mods can be found on the Jade page, and you can buy the Jade tee sewing pattern in my shop!