
Rose Pants Sewalong: CUT AND PREP PATTERN PIECES
Welcome to Day 2 of our Rose Sewalong! Today I’m going to cover cutting and prepping your pattern pieces.

Here are the previous Pantsalong posts just in case you need to go back:
Get Ready for a Rose Sewalong
Rose Sewalong: Print, Assemble, Trace your pattern (Day 1)
Need the Rose pattern? Buy it in my shop: Rose Pattern PDF (we also have printed Rose pattern sheets available!!)
Ok, let’s get started!
Lay out your fabric
The first thing you should do is fold the fabric in half on your cutting surface, lining up the selvage edges of the fabric as best you can. If you have any wrinkles, press those out with an iron first.
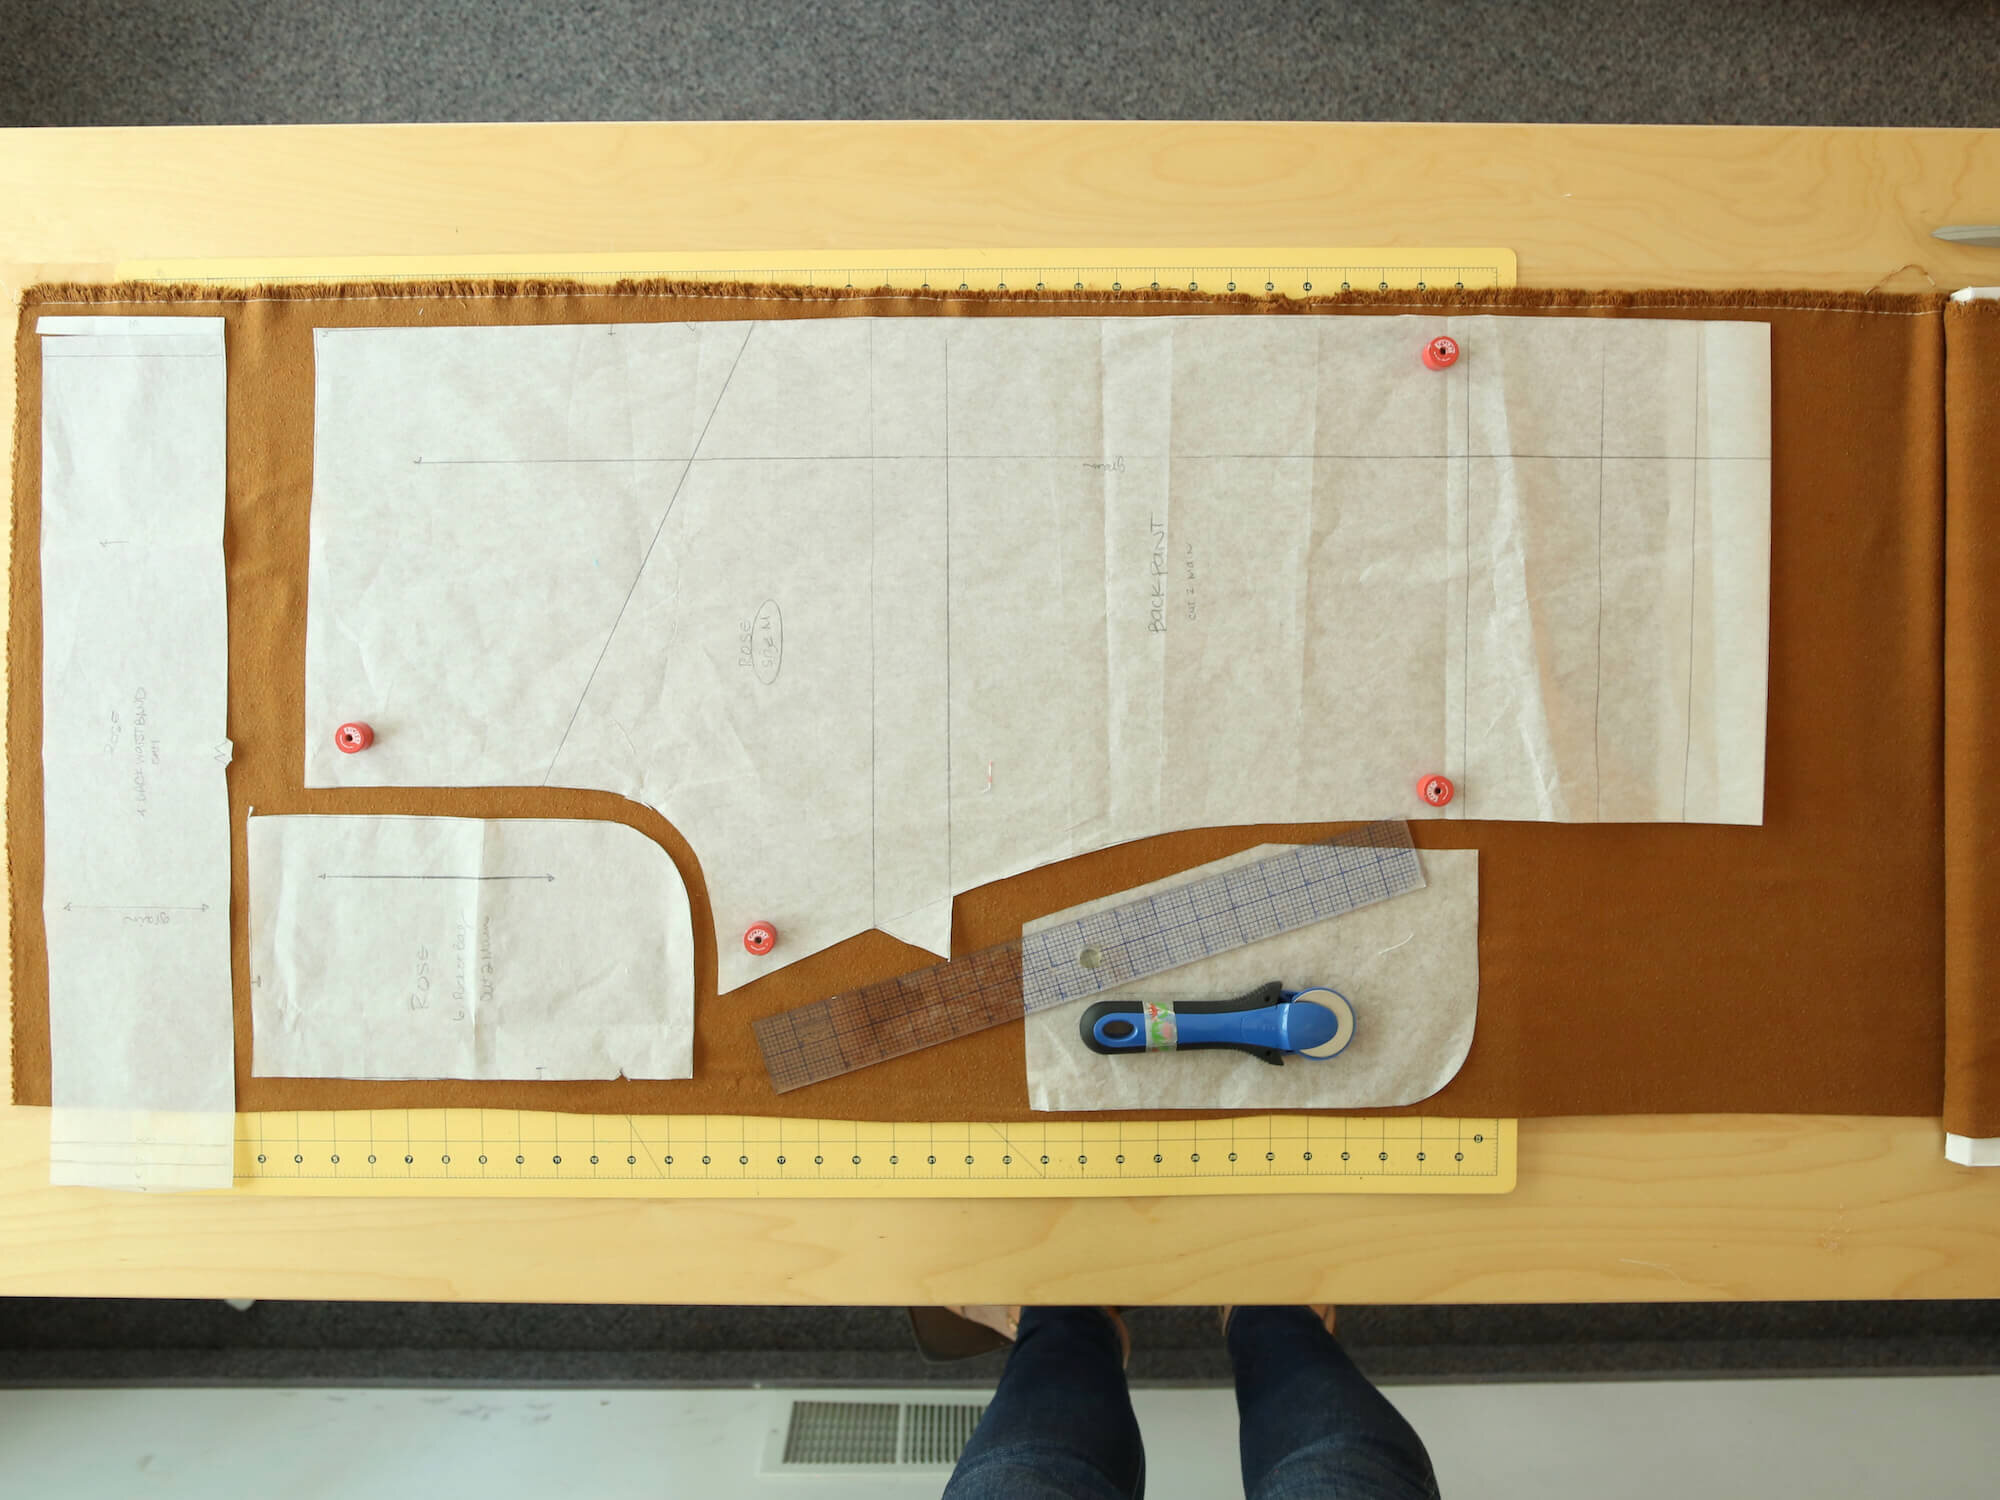
Lay out all pattern pieces before cutting
I recommend that you lay out all of your traced pattern pieces on the fabric to visualize where they will go before you do any cutting. It’s important to line up the grainline arrows on the pattern pieces so they are parallel to the fabric fold/selvages, otherwise the pants may end up draping funny once worn. The cutting instructions (pages 11-12 in the pdf) include layouts for all the different combinations of sizes, pant/short length, and fabric widths.
Some pointers:
Make sure you pay attention to print direction if your fabric has a one-way directional print!
Make sure you cut mirror-image pairs of the pattern pieces (this will happen automatically if you’re cutting through two layers of folded fabric; meanwhile, the cutting diagrams indicate where to flip your pattern piece on single-layer layouts)
For some of the pieces and sizes (example: the waistband pieces), you may have to unfold your fabric before cutting. Take a look at the cutting diagrams for help with this!


Shorts vs. Pants
Let’s talk about that little bump-out on the inseam for the shorts hem allowance. You don’t necessarily need to have separate tracings for the shorts and pants. If you’re sewing the pants version, make sure your tuck away that little triangle for the shorts hem allowance before cutting the front and back leg pieces.
If you’re cutting the shorts, you’ll need that triangle for the hem, and you can cut along the shorts line by folding up the bottom of the pant, or marking your fabric with chalk at either end, then drawing a line with a straight edge to preserve the entire pattern piece.

Cut out your pieces
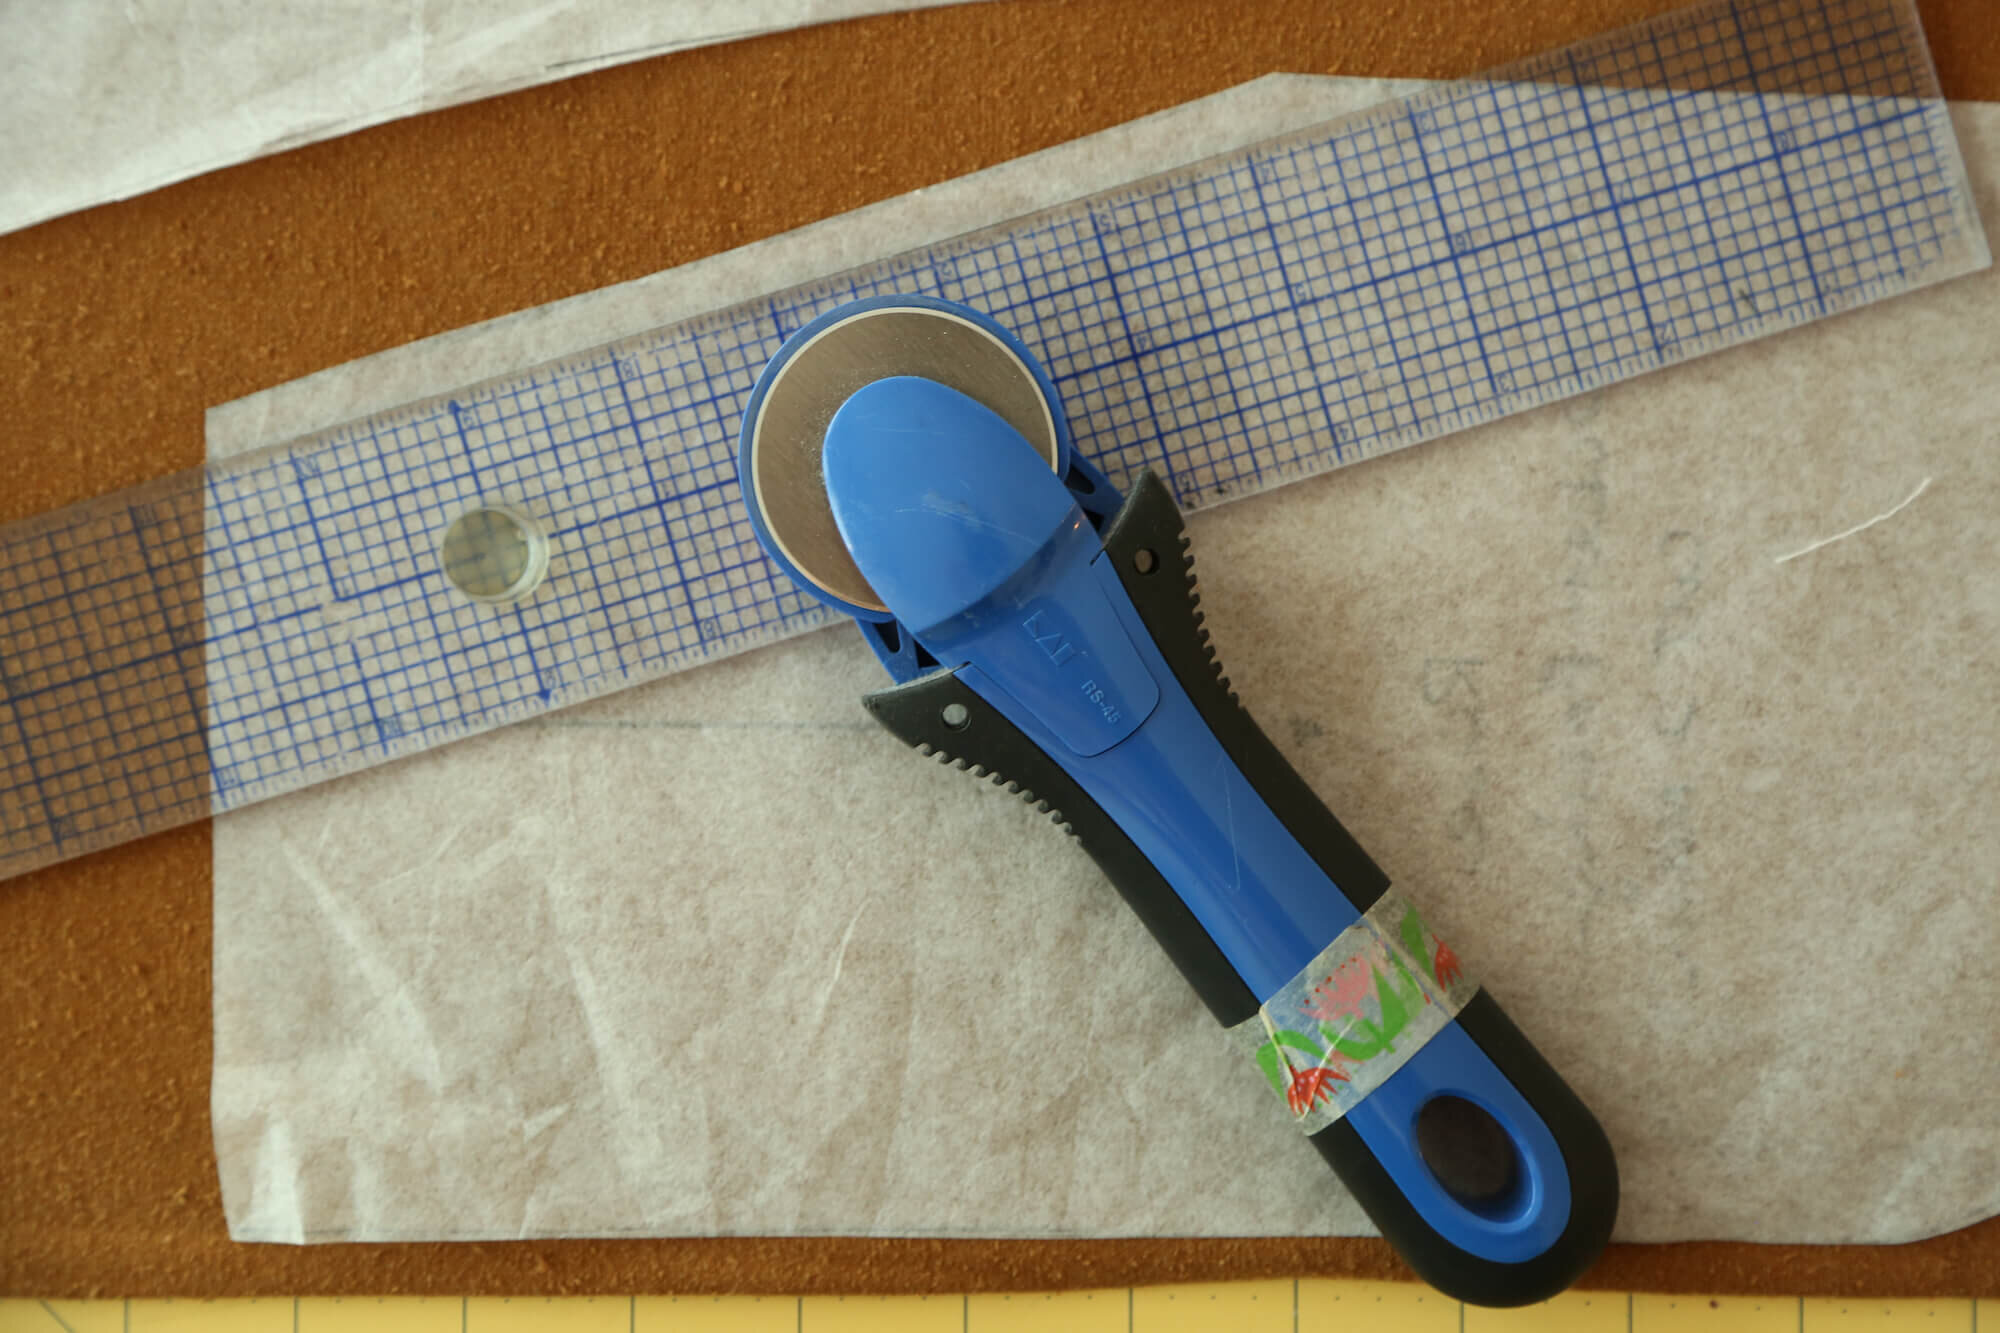
Once you have your pattern pieces arranged the way you want them, pin your pattern pieces to the fabric or use pattern weights to hold them in place. Then carefully cut out your pieces. I like to use a rotary cutter and mat because it goes quickly, but fabric shears are fine too. If you’re using shears, I recommend taking a piece of chalk and marking around the outside of the pattern piece before you cut.
When you’re finished, you should have:
from Fabric
– 2 front pants
– 2 back pants
– 1 front waistband
– 1 back waistband
– 2 pocket facings
- 2 pocket bags
from interfacing
- 1 front waistband

You’ll also need two lengths of 3/4″ [19mm] wide elastic for the waistband, or one length of 1.5” [38mm] wide elastic, so if you want to cut that out now, go ahead and do that, following the chart on page 3 of the pdf.
Step 1 - Prepare pattern pieces
TRANSFER NOTCHES AND PLEAT MARKS
Now that you’ve cut out your pieces, use chalk or disappearing fabric marker to transfer all the pleat markings and notches to the right side of your pattern pieces.
(ERRATA NOTE: The pattern instructions say to transfer markings to the front pant and pocket bag, but actually ALL of your pattern pieces have notches or marks, so do make sure they ALL get transferred)
Here’s my tip for marking the pleats: after cutting out the front pieces, flip them over and slide the fabric pieces down a 1/2” or so the pleat marks are just visible at the top of the pattern piece below. Then take the chalk and mark the pleat marks on the RIGHT SIDE of the fabric.
If I’ve cut my fabric out with right sides folded together, I can just flip the top piece down and mark them like this:

You’ll also want to mark the notches at the tops and sides of the pocket pieces. Don’t forget these! It will help you match everything up later.

It’s also an option to cut the notches with scissors — some people choose to cut triangles that point out (this is actually portrayed in the digital diagrams provided in the pattern). Here, I’ve cut a tiny notch into the seam allowance, and lower down, a small triangle-shaped notch. If you do this, please make sure those notches are only about 1/4” [1cm] long so they don’t interfere with your sewing!

Note that there are notches on ALL of your pieces (front, back, waistbands, and pocket pieces), so make sure that you have all of them transferred before moving on to the next step!
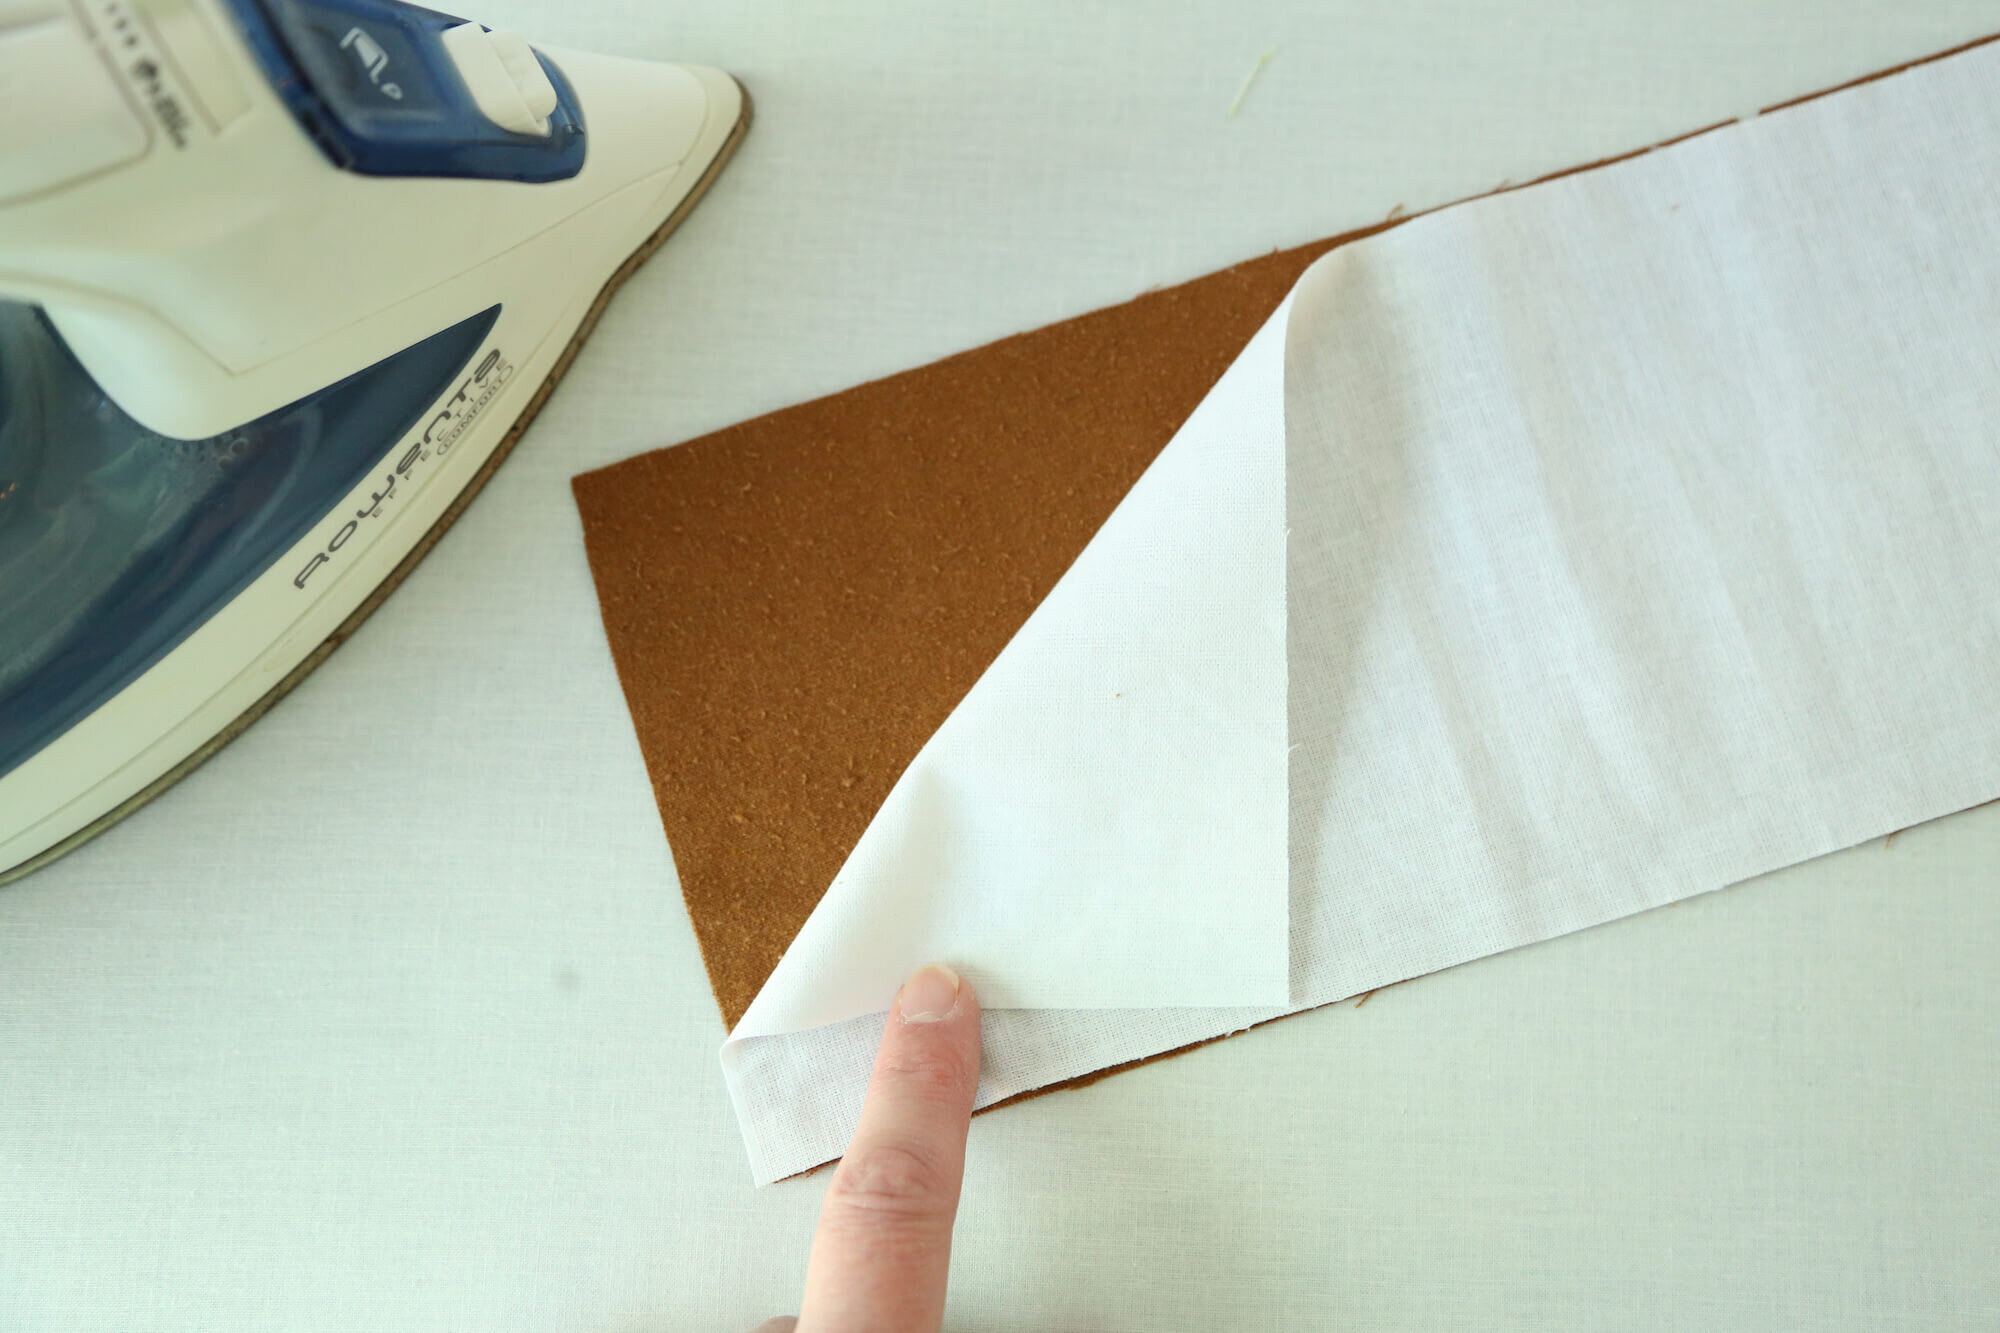
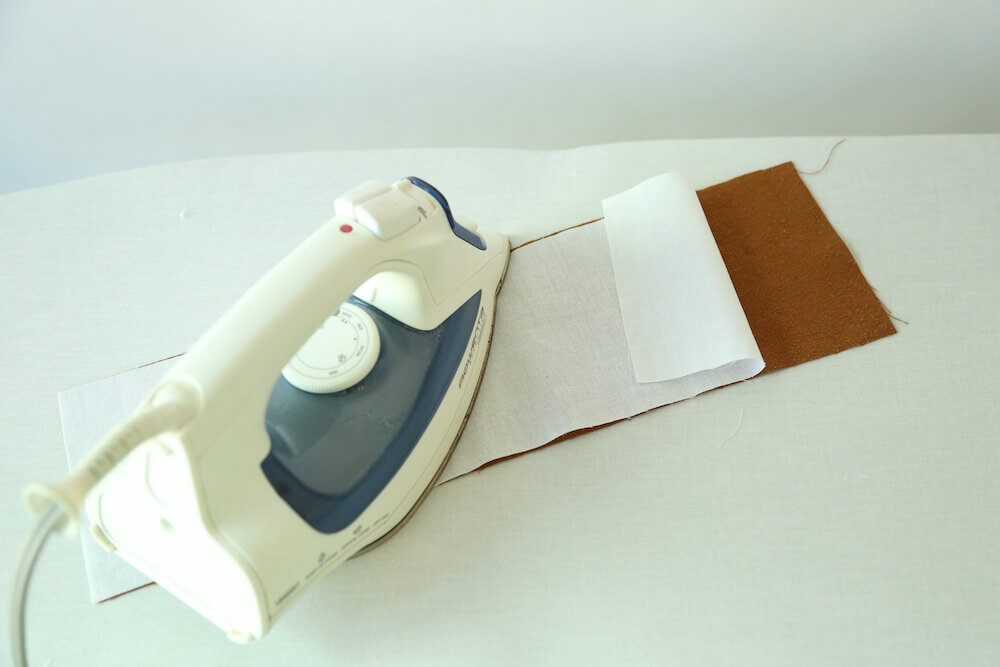
PREPARE WAISTBAND PIECES
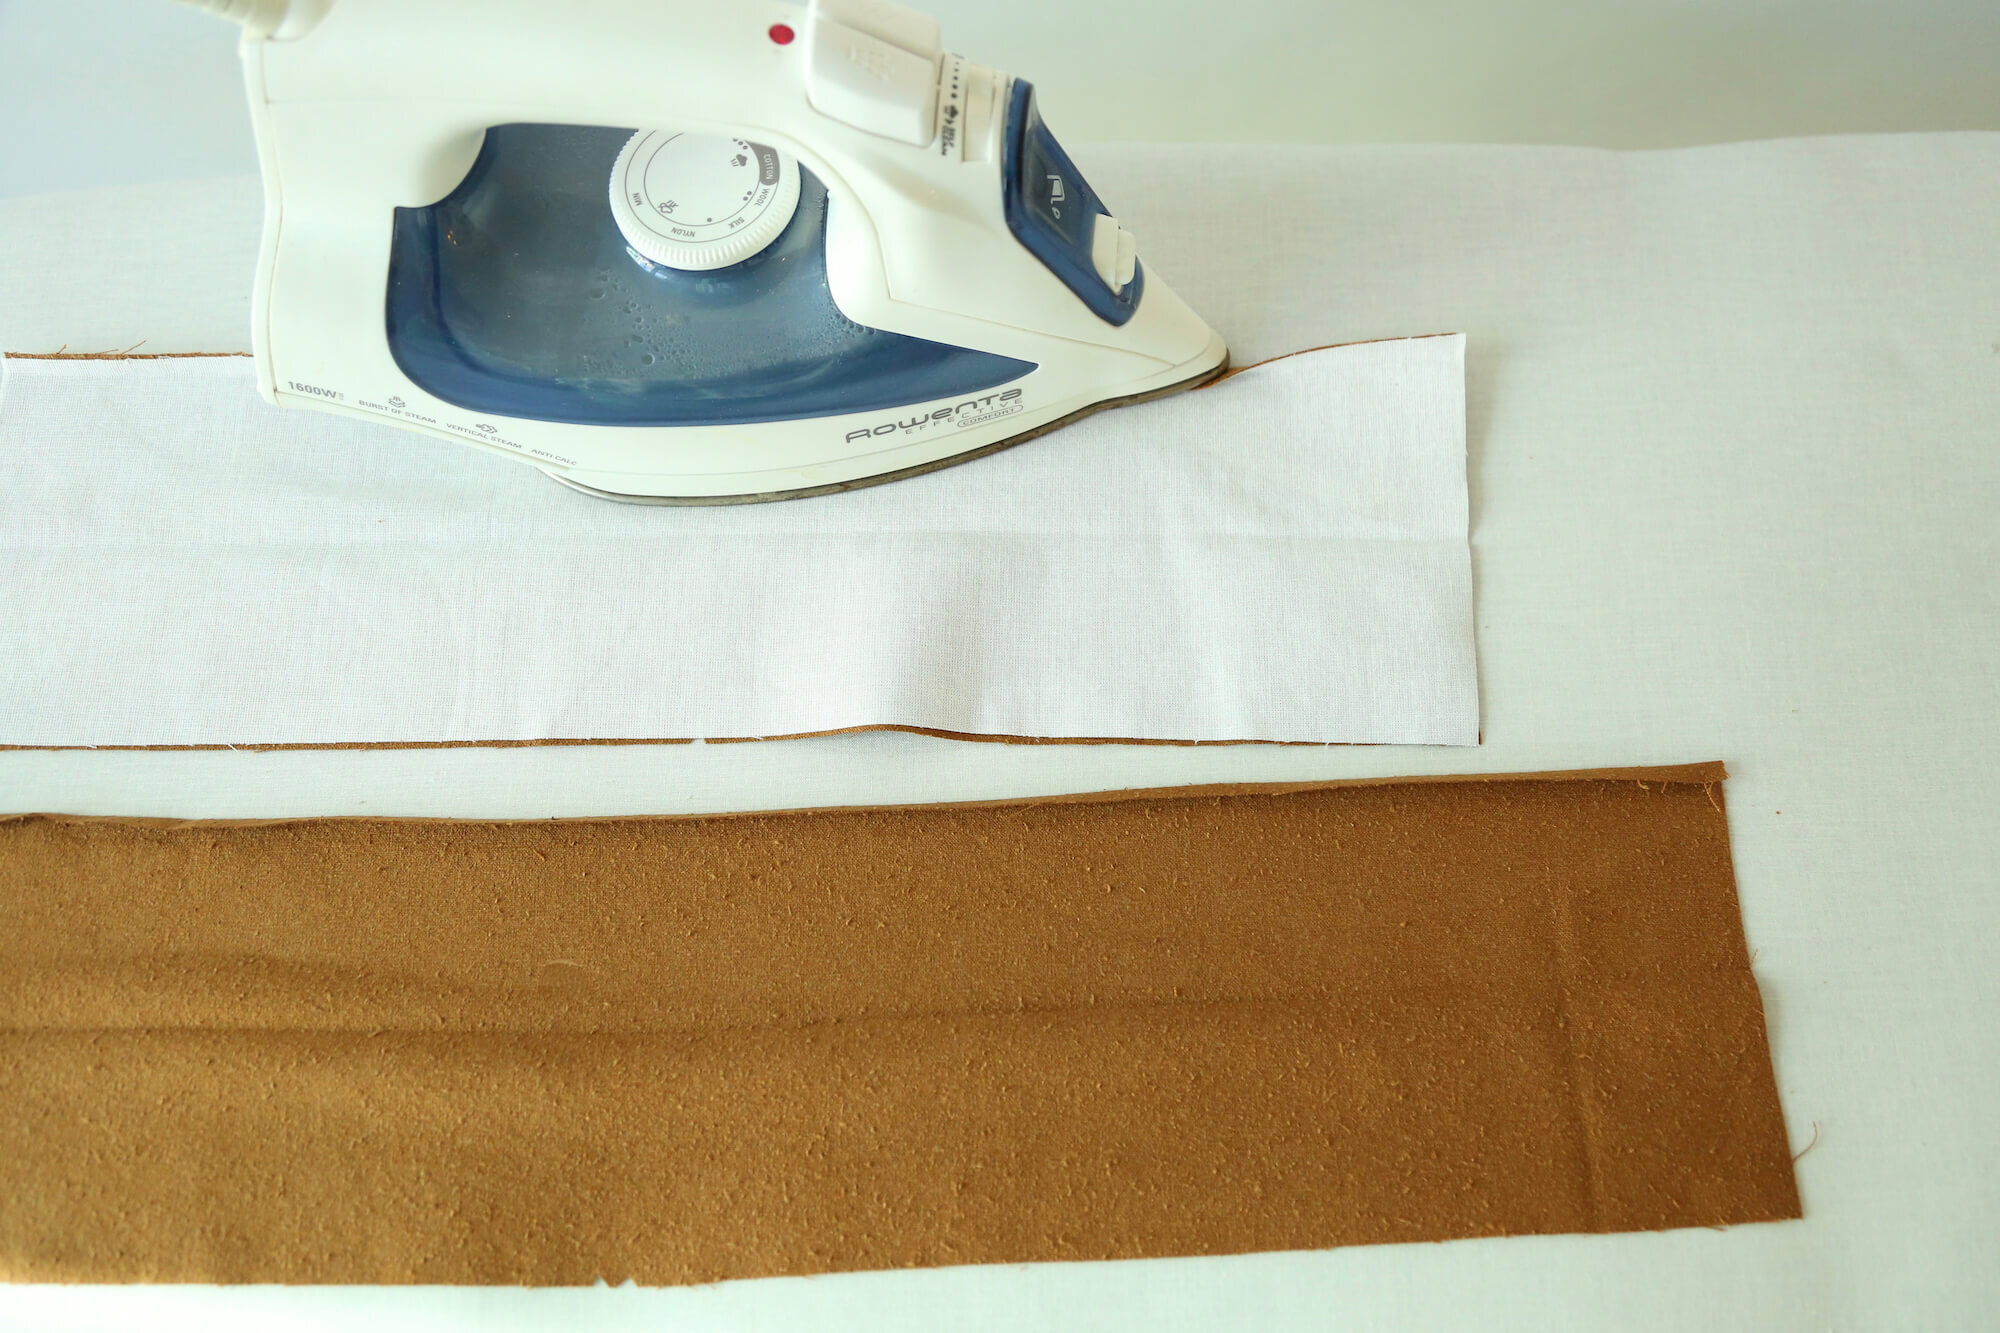
Use an iron to attach interfacing to the wrong side of your front waistband:
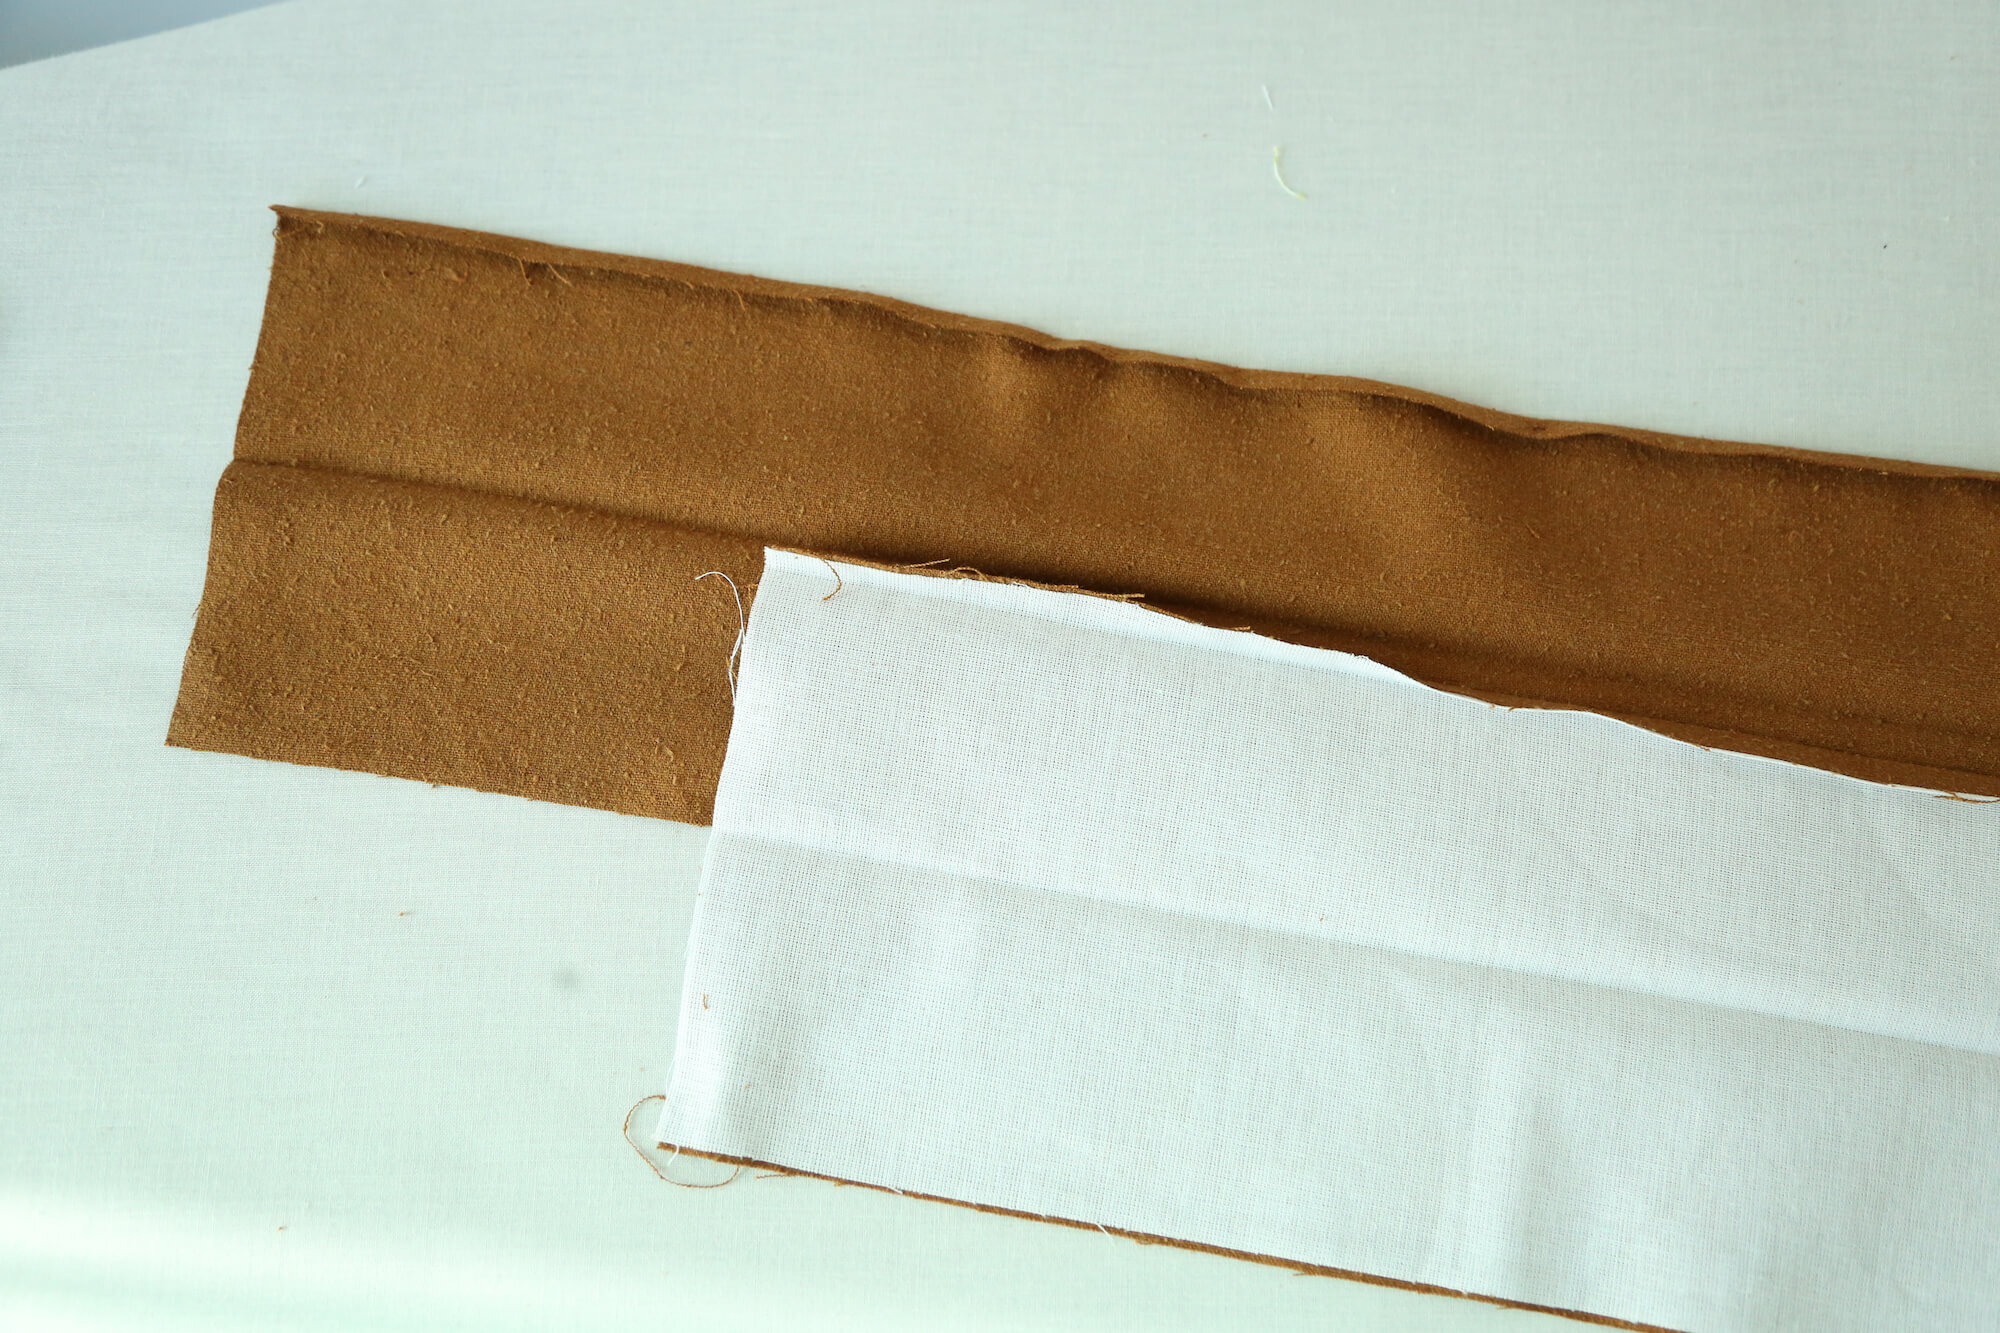
Then press both waistbands (front and back) in half lengthwise:

And then carefully press the upper (un-notched) edge under 3/8” [10 mm]:
Now we’re ready to start sewing! In the next post we’ll sew Steps 2-4 of the pattern.
Sewing along with these posts? I’d love to see your progress! Tag me (@madebyrae) and use the #rosepantsalong tag if you’re sewing along with us!
Get pattern details, view size and yardage charts, and materials on the Rose Page.