
Rose Pants Sewalong: PRINT, ASSEMBLE, TRACE YOUR PATTERN

Welcome to the first day of our Rose Sewalong! Today I’m going to cover printing, assembling, and tracing your pattern. Let’s jump right in!
Need the Rose pattern? Buy it in my shop: Rose Pattern PDF (we also have printed Rose pattern sheets available!!)

Print AND ASSEMBLE your pattern
When you download the Rose pattern, you’ll find it’s a “zipped” file. When you double click on that file, you’ll find a folder that contains a “Read Me” file, along with instructions and pattern pieces in two different formats: print at home and copy shop.
Next, you’ll want to print out the pattern. If you’re using a copy shop to have the pattern printed, check out this post: How to use a copy shop file
If you’re printing your pattern pieces out at home, go ahead and print out the pattern at 100% — full size, no scaling. Then check the scale square on the first page carefully before you do anything else!
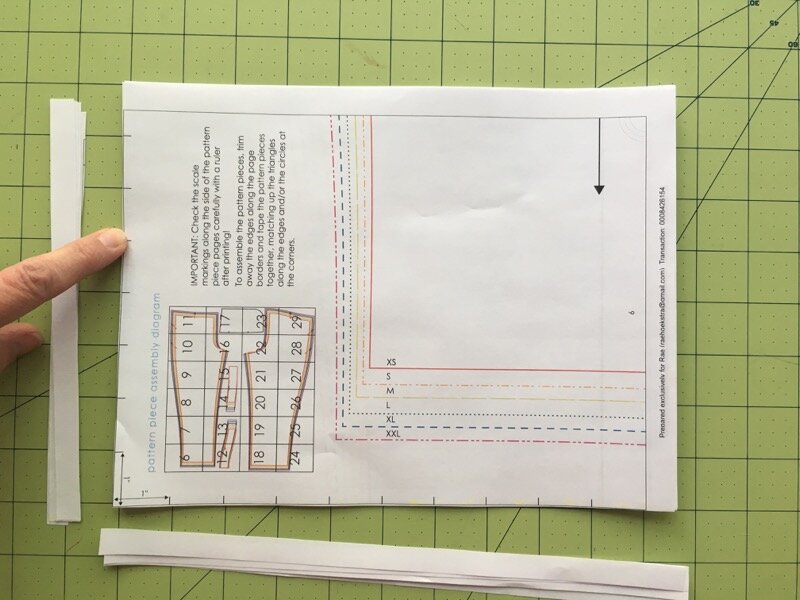
Next, you’ll want to assemble the pattern if you’ve printed it out at home. You will need:
a paper scissors
tape
Trim off the top and sides of the pattern pages, then assemble them using the assembly diagram provided on the first page of the pattern pieces (or page 6 of the instructions). Tape the pieces together!
Check out the post I wrote about this: How to print and assemble a PDF sewing pattern

Measure and choose size
If you haven’t already, measure yourself and choose a size from the size chart. You will need:
a flexible tape measure
narrow elastic to mark your waist
the size charts for Rose (find them here or in your pattern)
Some handy posts: How to measure for sewing pants and How to blend sizes for Rose

TRACE YOUR PATTERN
Once you’ve determined your size, trace your pattern pieces. You will need:
Tracing paper (I recommend Swedish tracing paper; Wawak usually has it at a good price)
Ruler
Pencil
Check out this post about how to trace patterns: How to trace a pattern
Note that I always recommend tracing your pattern pieces and leaving the printouts intact — that way if you have to make any adjustments, you can always refer to the original printout to grade between sizes, check markings, shorten or lengthen, you name it.
If you are going to blend two sizes, I recommended you trace both outlines onto the same tracing first, then draw in your blend lines separately. If your hip and waist measurements put you between sizes, see How to blend sizes for Rose.
If you are making other adjustments to your pattern pieces (like adding rise, subtracting length), I still recommend always tracing the original pattern line, but then I write notes to myself directly on the traced pieces — something like “added 1/2” to rise” for example.

Prep your fabric
Finally, if you haven’t already, make sure to wash and dry your fabric. Pull it straight out of the dryer to avoid wrinkles, and then go ahead and press your fabric to get it ready to cut.
Don’t forget to tag me @madebyrae and use the #rosepantsalong tag if you’re sewing along with us!
Get pattern details, view size and yardage charts, and materials on the Rose Page