
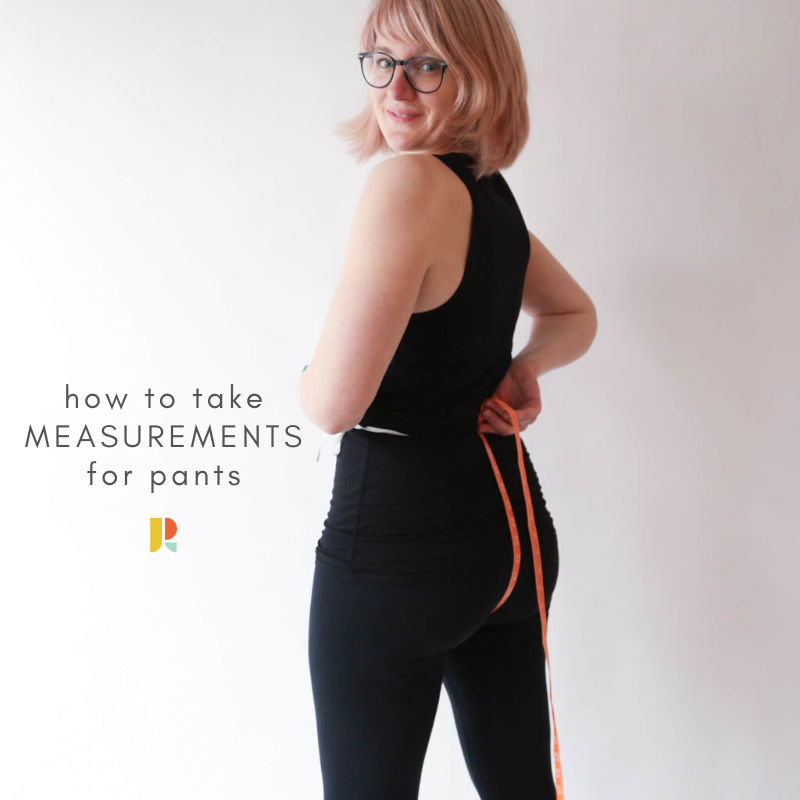
How to take measurements for pants
We recently relaunched Luna in new sizes (sidenote: Luna has really turned out to be the perfect stay-at-home slash quarantine project: I love seeing everyone making their Luna #secretpajamas), and I am nearly ready to post a Rose Sewalong, so I wanted to review the basic body measurements to take when you want to sew yourself a pair of pants.
You will need a flexible measuring tape, a piece of narrow elastic to mark your waist, and a place to write down your measurements.
It’s a good idea to either wear close-fitting, thin clothing, or take the measurements in your undies in order to get the most accurate numbers. I like wearing leggings when I’m measuring myself for pants because they also give me a reference point for seams.
It’s also worth mentioning how important it is to take your body measurements every time you sew a new pattern, so you can compare your body measurements to both the size chart and the finished measurement chart. This gives you a good idea — before you even trace your pattern — of which size to choose, whether you will want to blend sizes, or lengthen or shorten the pattern pieces.
If seeing numbers associated with your body is hard for you, know that you’re not alone. Do know though that learning how to use those numbers as a tool to create a custom-fit garment that fits you perfectly and makes you feel fantastic can be incredibly empowering (while guessing at your size from the chart and ending up with something ill-fitting is…not).
Mark your natural waist with elastic

Tie the narrow elastic (1/4-1/2” wide) around your waist, not too tight. Then bend over side to side a few times and move around a bit to let it settle on your natural waist.
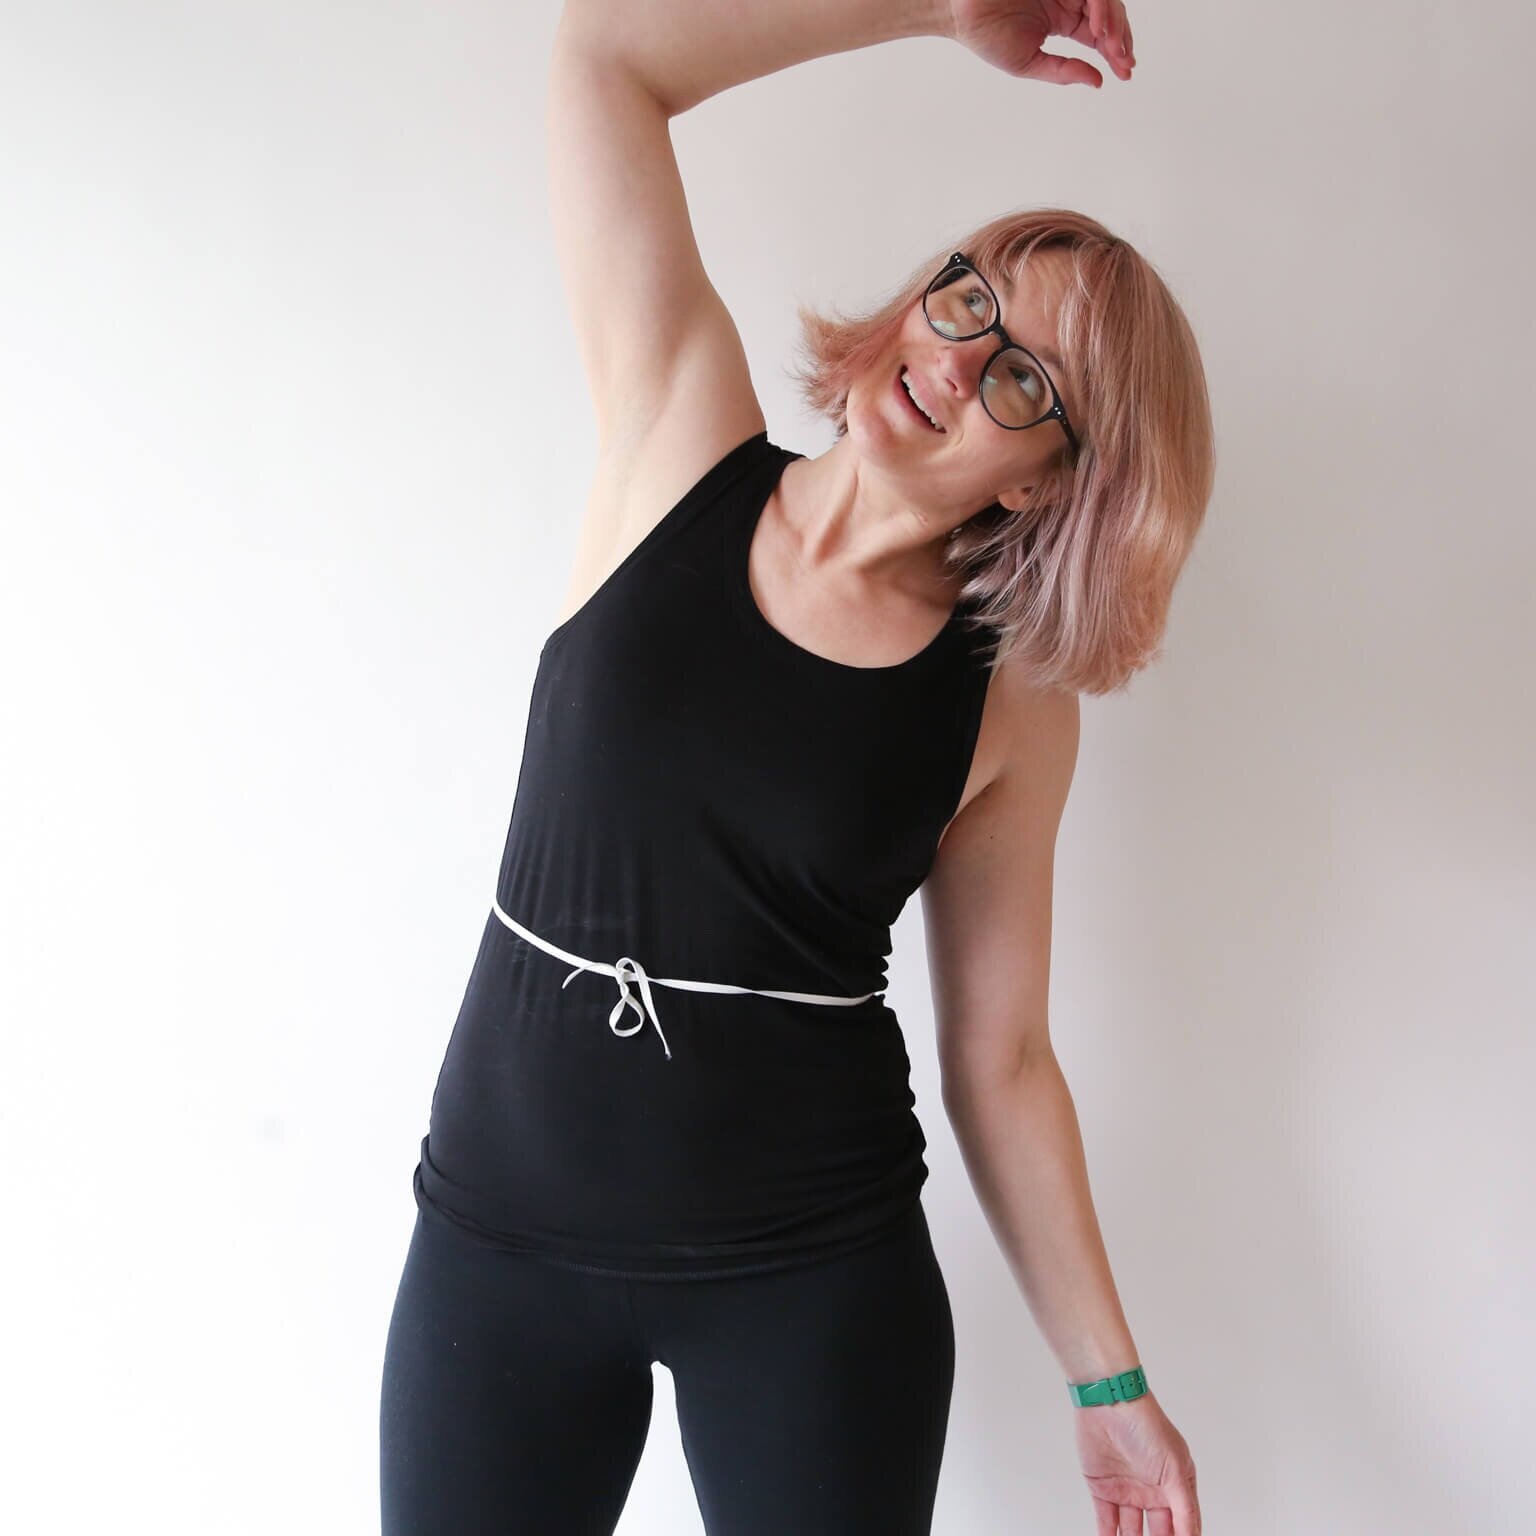
If you’re pear- or hourglass-shaped, your natural waist should be pretty easy to find. If you’re apple-shaped or banana-shaped (like me) or carry a good deal of your weight around your waist, though, it may be a bit harder to locate, and may actually be larger than your hip measurement. In this case, place the elastic between your lowest rib and the top of your hip bones. This will mark your natural waist, which will serve as a reference point for some the measurements below.
Measure Hip
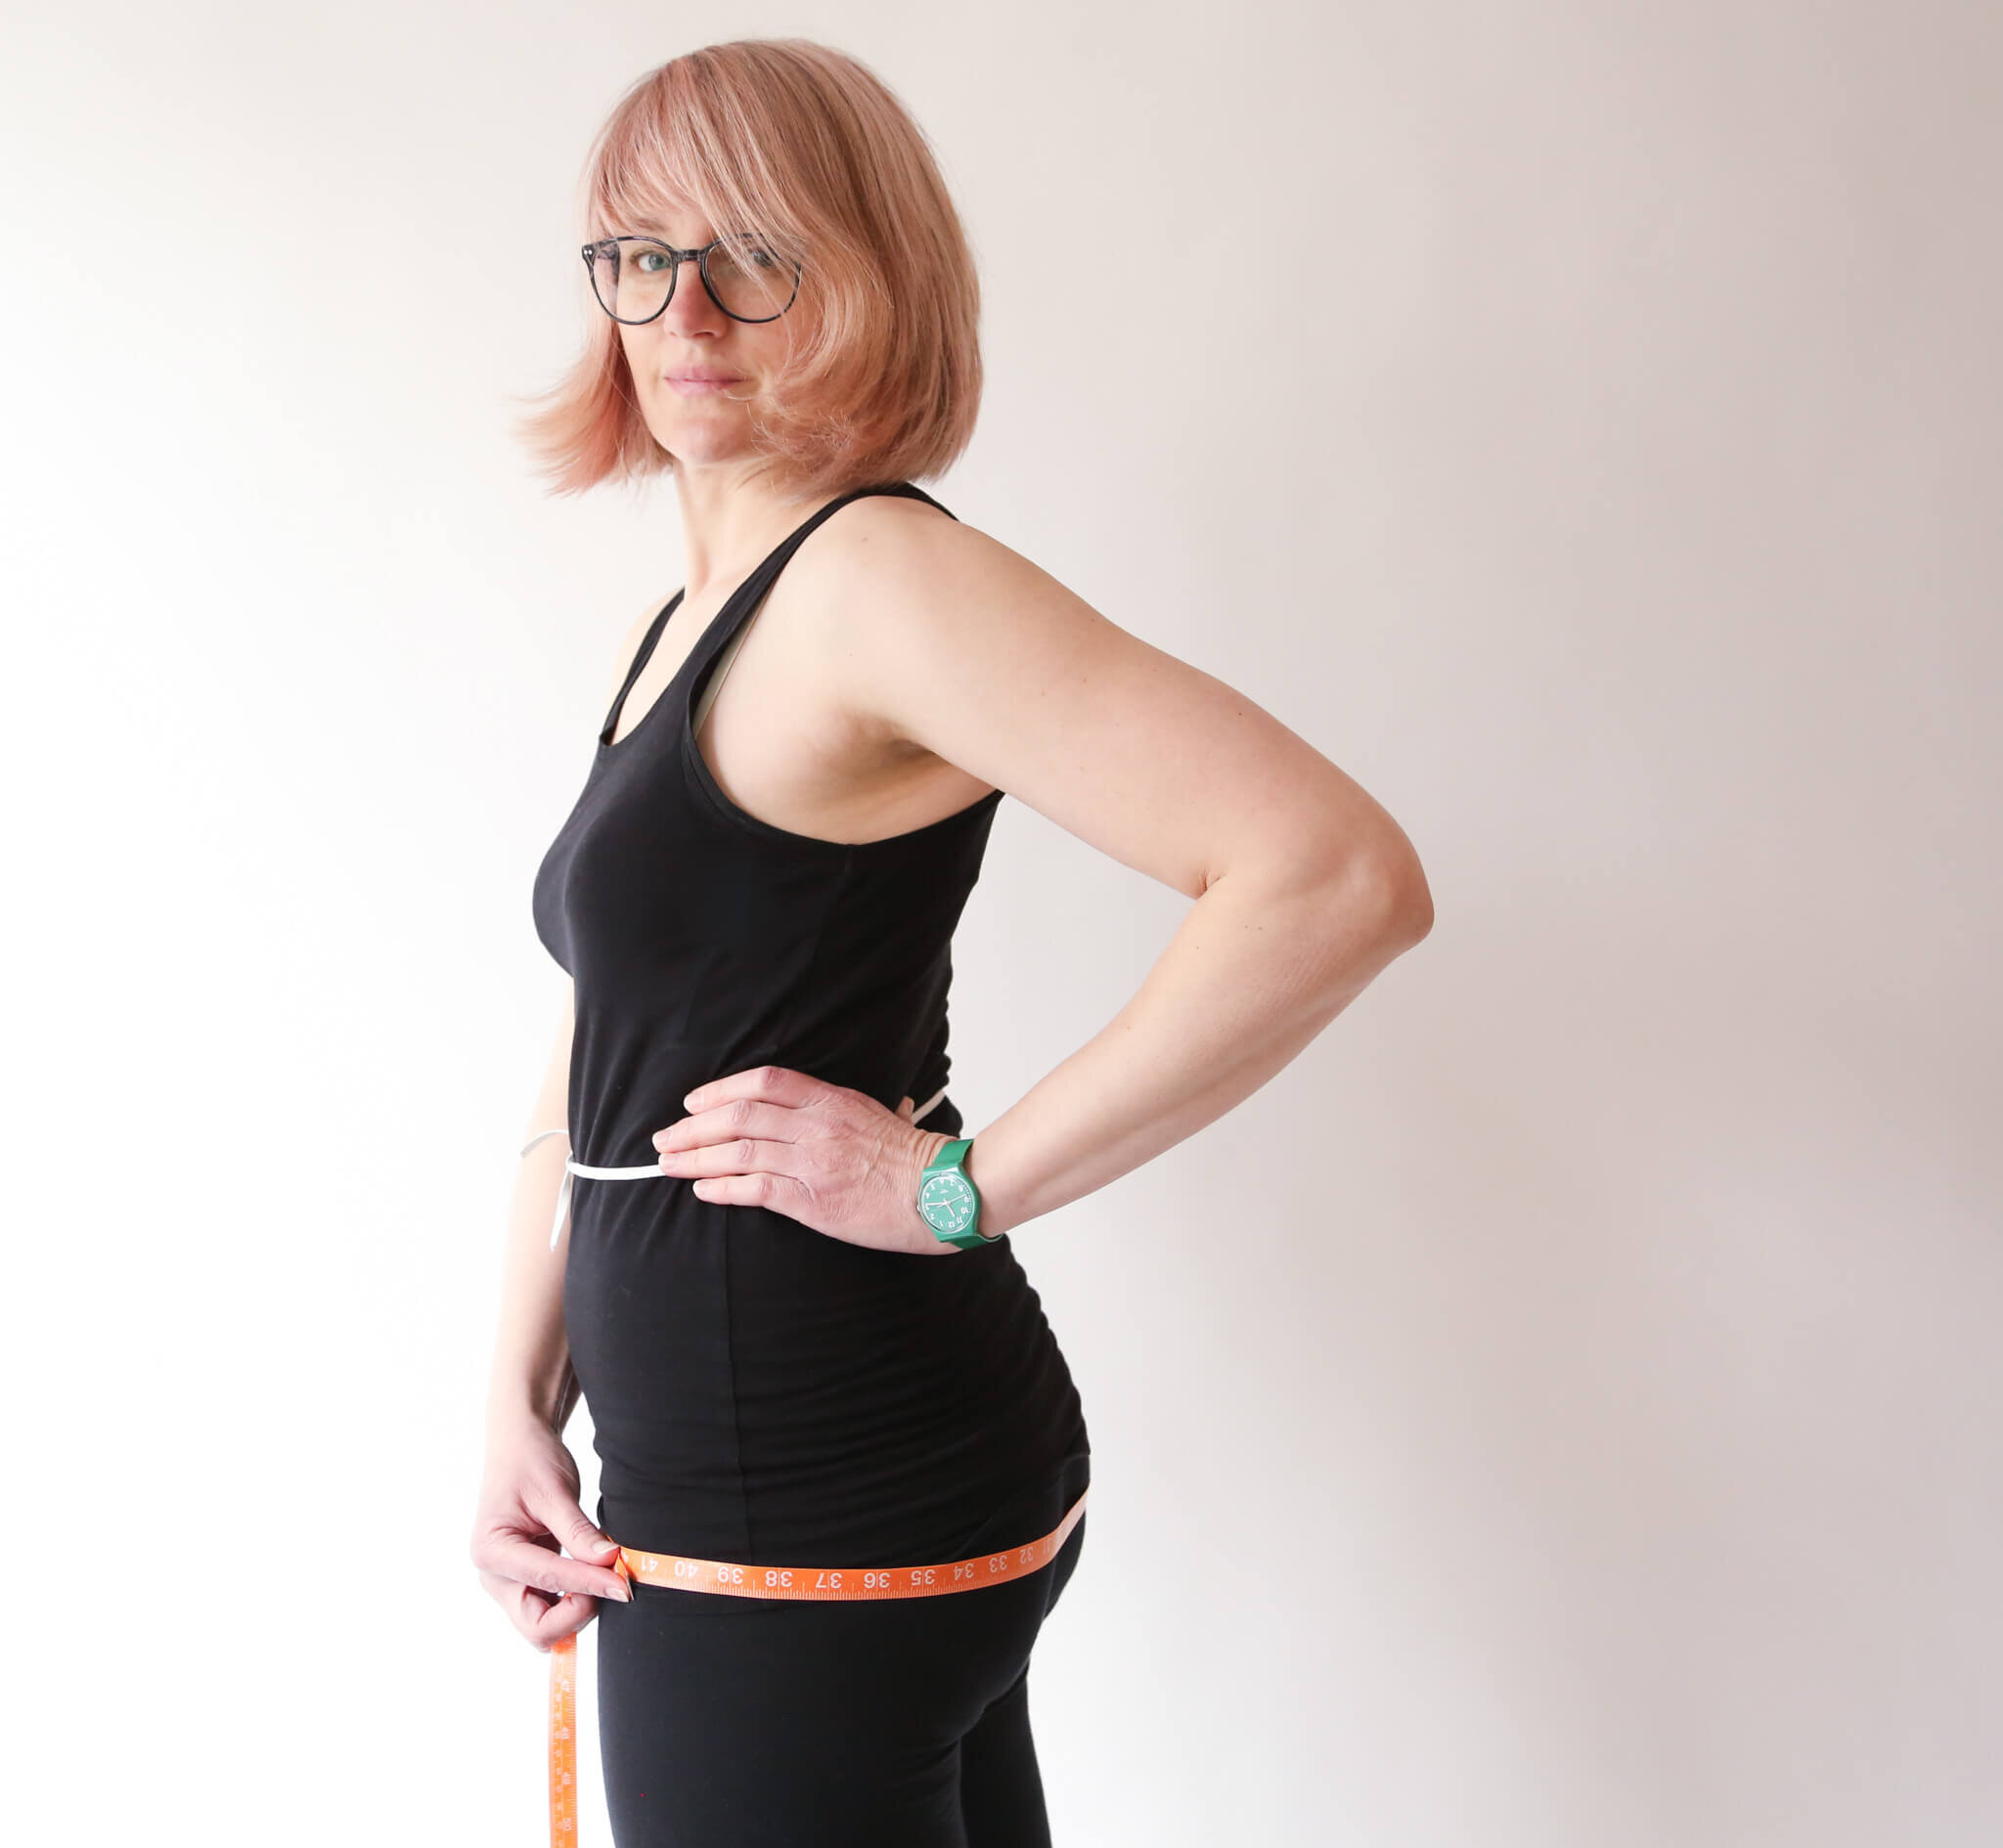
The key body measurement when sewing pants is the full hip.* Place the tape measure loosely around the biggest part of your booty, tight enough that it just stays put without falling down, and record this number. Then select your size from the size chart using your hip measurement.
*The exception to this is if your waist measurement puts you in a larger size than your hip does, in which case, use your waist to choose your size instead - see the next section.
Note that the full hip measurement is not taken (usually) in the same location as your hip bones. The hip bones are located at what is sometimes called “high hip” but you want the full hip measurement to choose your size for pants.
You can also get what’s called a “seated hip” measurement by sitting down once you have the tape measure at the fullest spot. For some folks (curvy and plus size especially — thank you Cashmerette for teaching me this!!) this is a truer hip measurement as it approximates the room you will need for your hip when sitting, which can be larger than when standing. Experiment a little to see which one works best for you!
Measure Waist
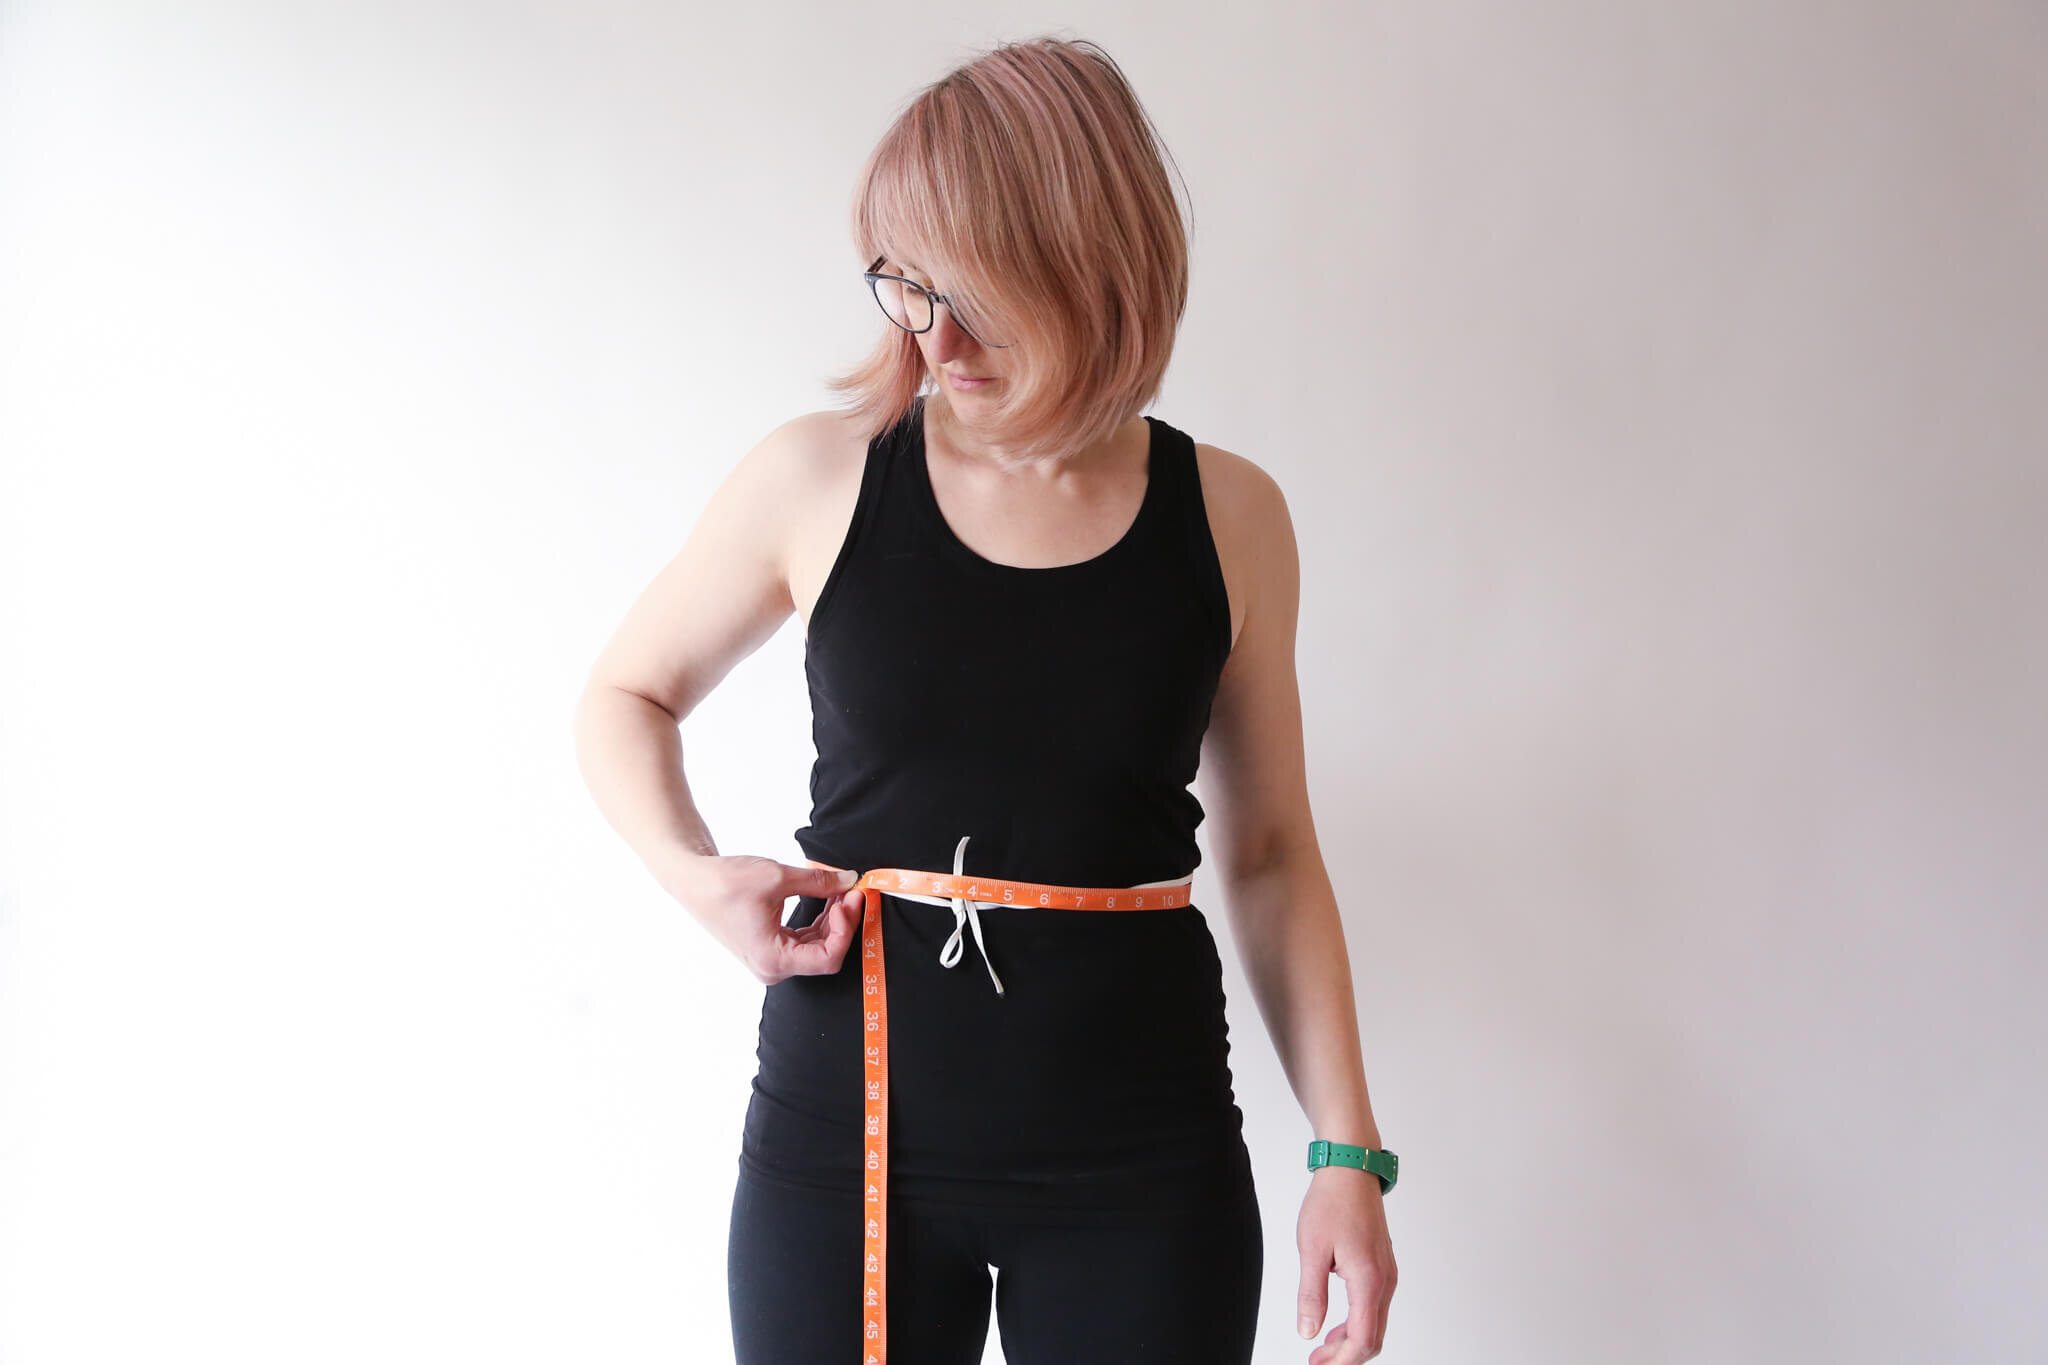
Now it’s time to measure your waist. Once you’ve chosen your size from the size chart, it’s a good idea to check which size your waist puts you in for comparison. Without pulling the tape measure too tight — you want to be able to breath easily and place a finger inside the tape comfortably — measure your waist, where the elastic is located, and record this number.
Just a note that this measurement is usually taken WELL ABOVE THE BELLY BUTTON, and that unless you wear high-waisted pants, this is not where the waistband of your pants are. Often pant waistbands sit closer to the “low waist” which is different than the “natural waist” that you are measuring right now.
If your waist measurement puts you in a larger size than your hip measurement, you’ll want to use that larger size instead, or consider blending sizes between the waist and hip (in other words, trace the larger size at the waist, then blend to the smaller size at the hip).
If your waist measurement puts you in a smaller size than your hip (especially if it’s 2 or more sizes different), I would definitely recommend blending sizes (from the smaller waist to larger hip size), but do check the finished waist measurement of the smaller size to make sure that you’ll still be able to pull the pants on over your hip!
Measure Rise
With the Luna pants update and the Rose pants, we added additional rise numbers to the finished (garment) measurement charts to help you decide if you might want to add or subtract height to the rise on the pattern pieces.
This is because I have made a surprising discovery during the past couple years of testing pants with folks of many different heights and proportions: that a person’s height is not a good indicator of whether they will need to add or subtract length from a pant pattern.
However, comparing your rise measurements and inseam/outseam measurements to the finished measurement chart can offer a great comparison! So here’s how to measure rise:
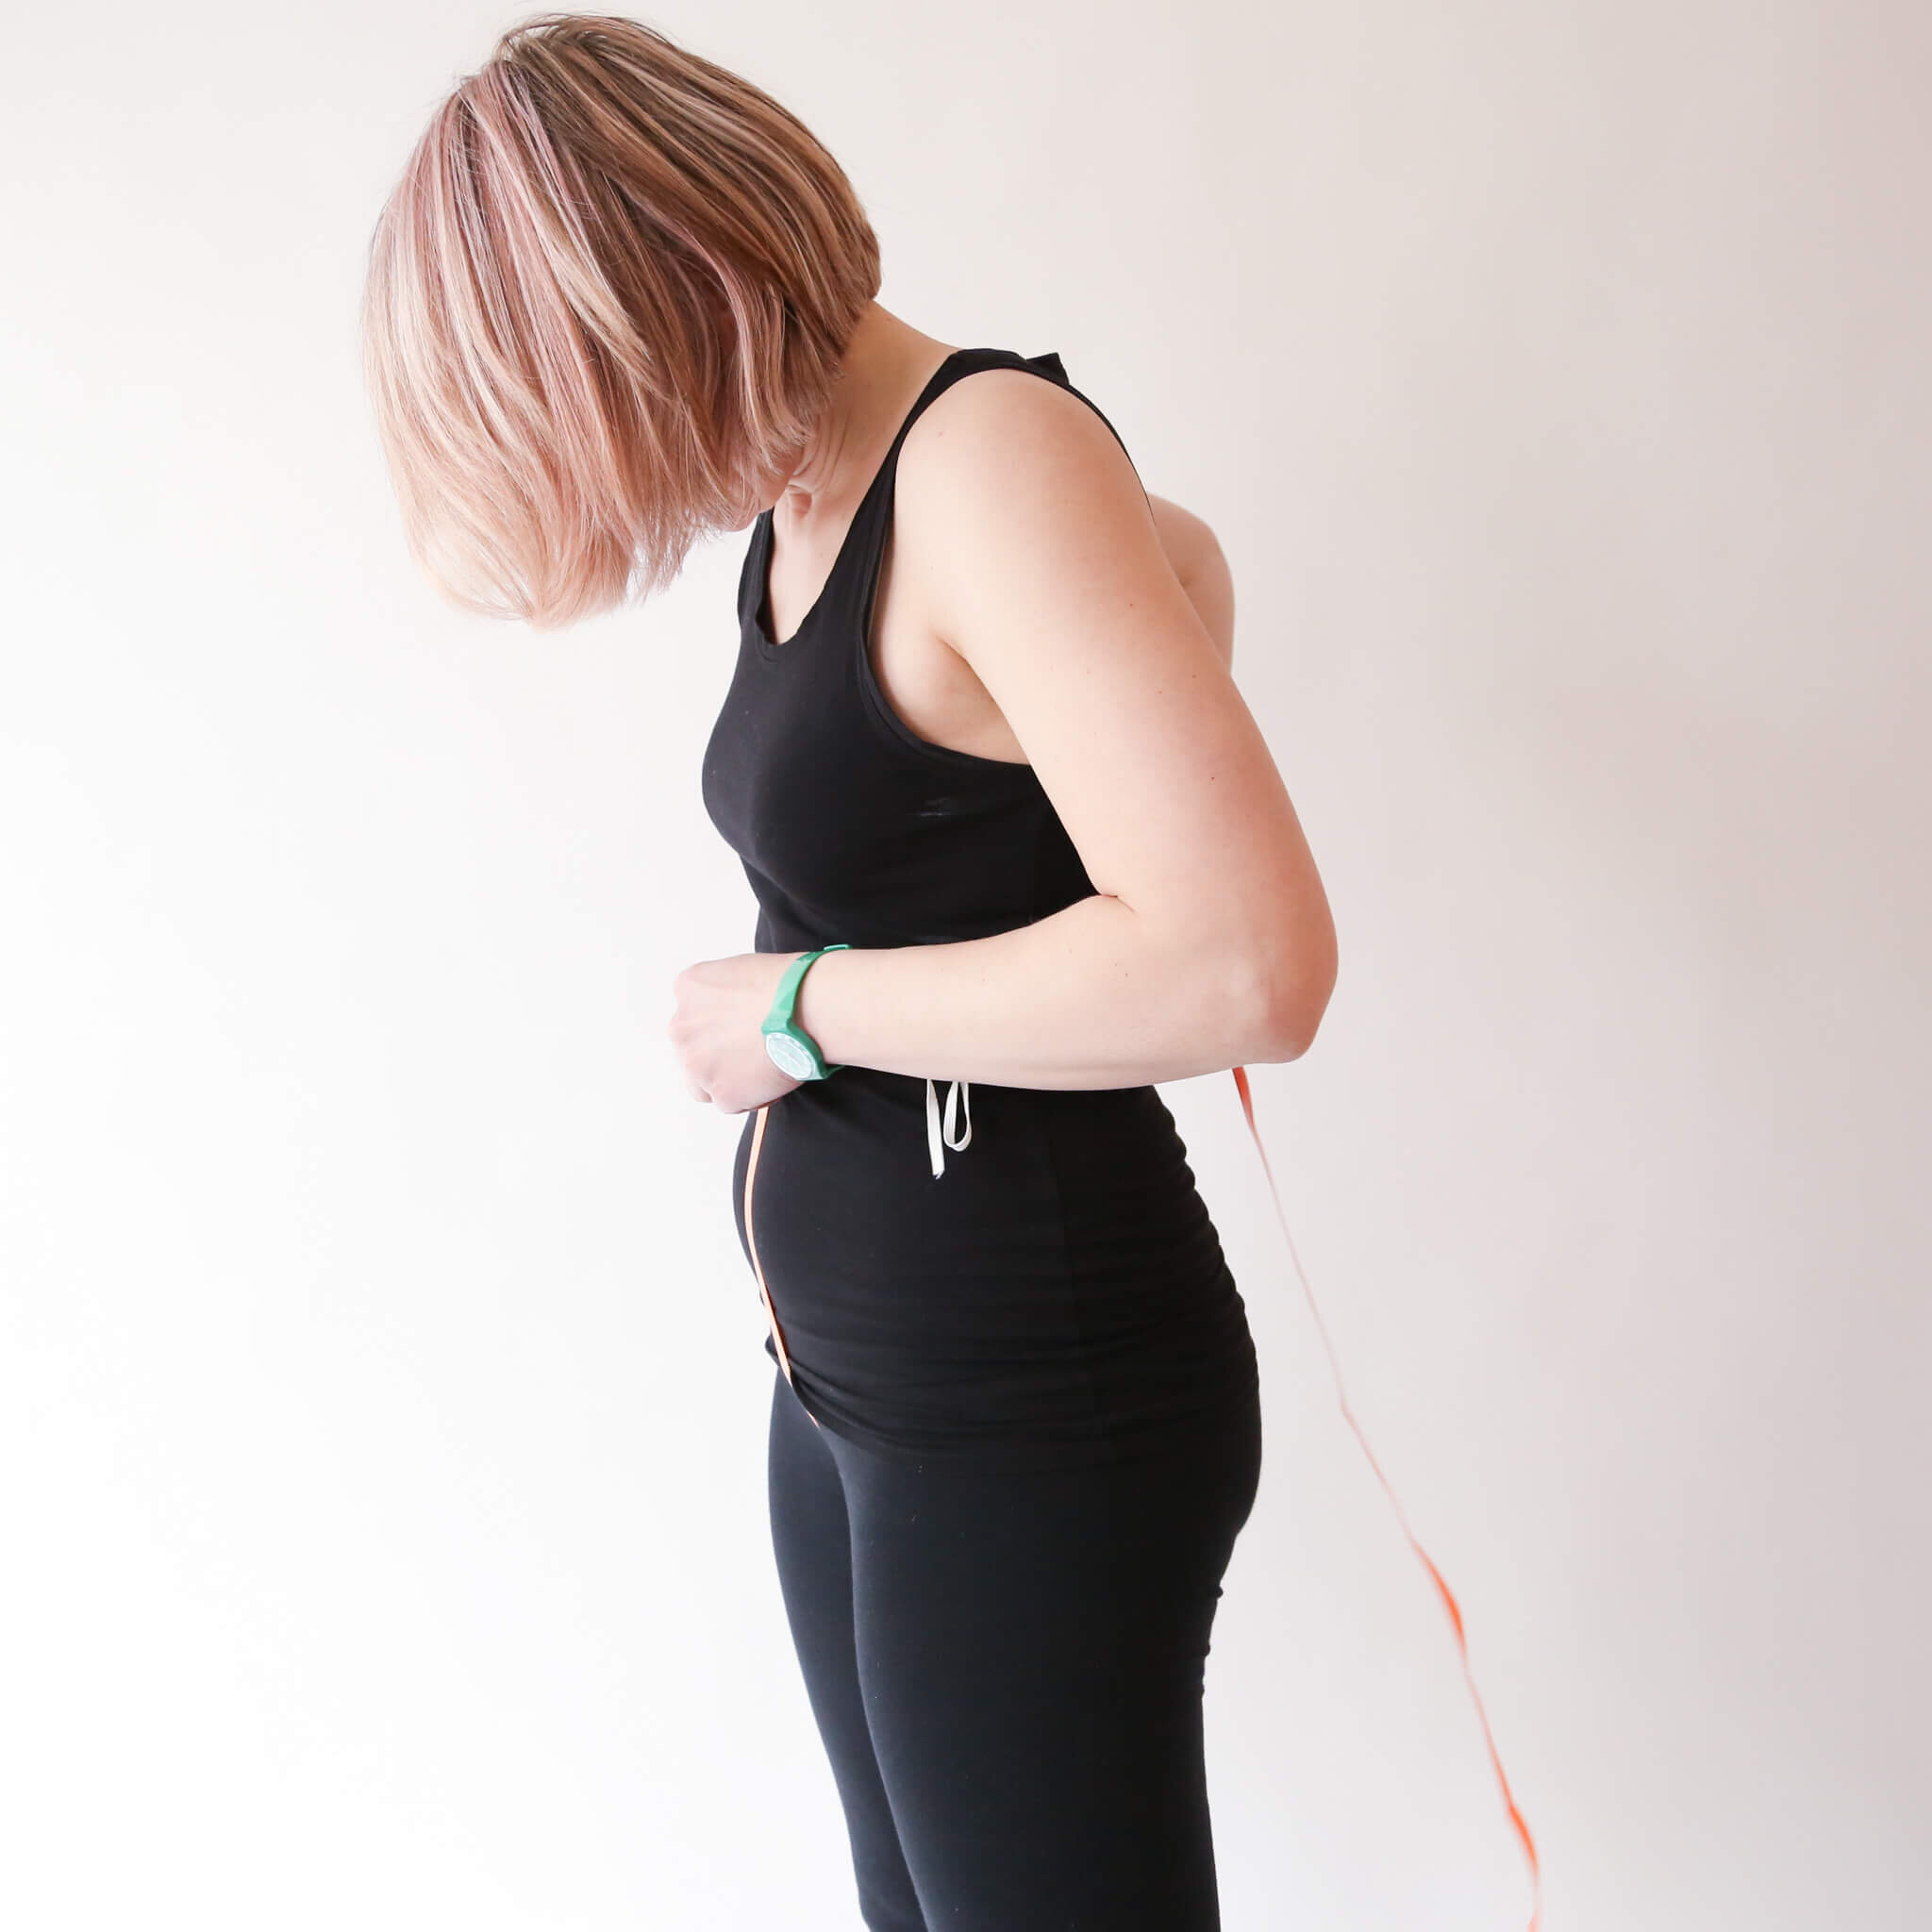
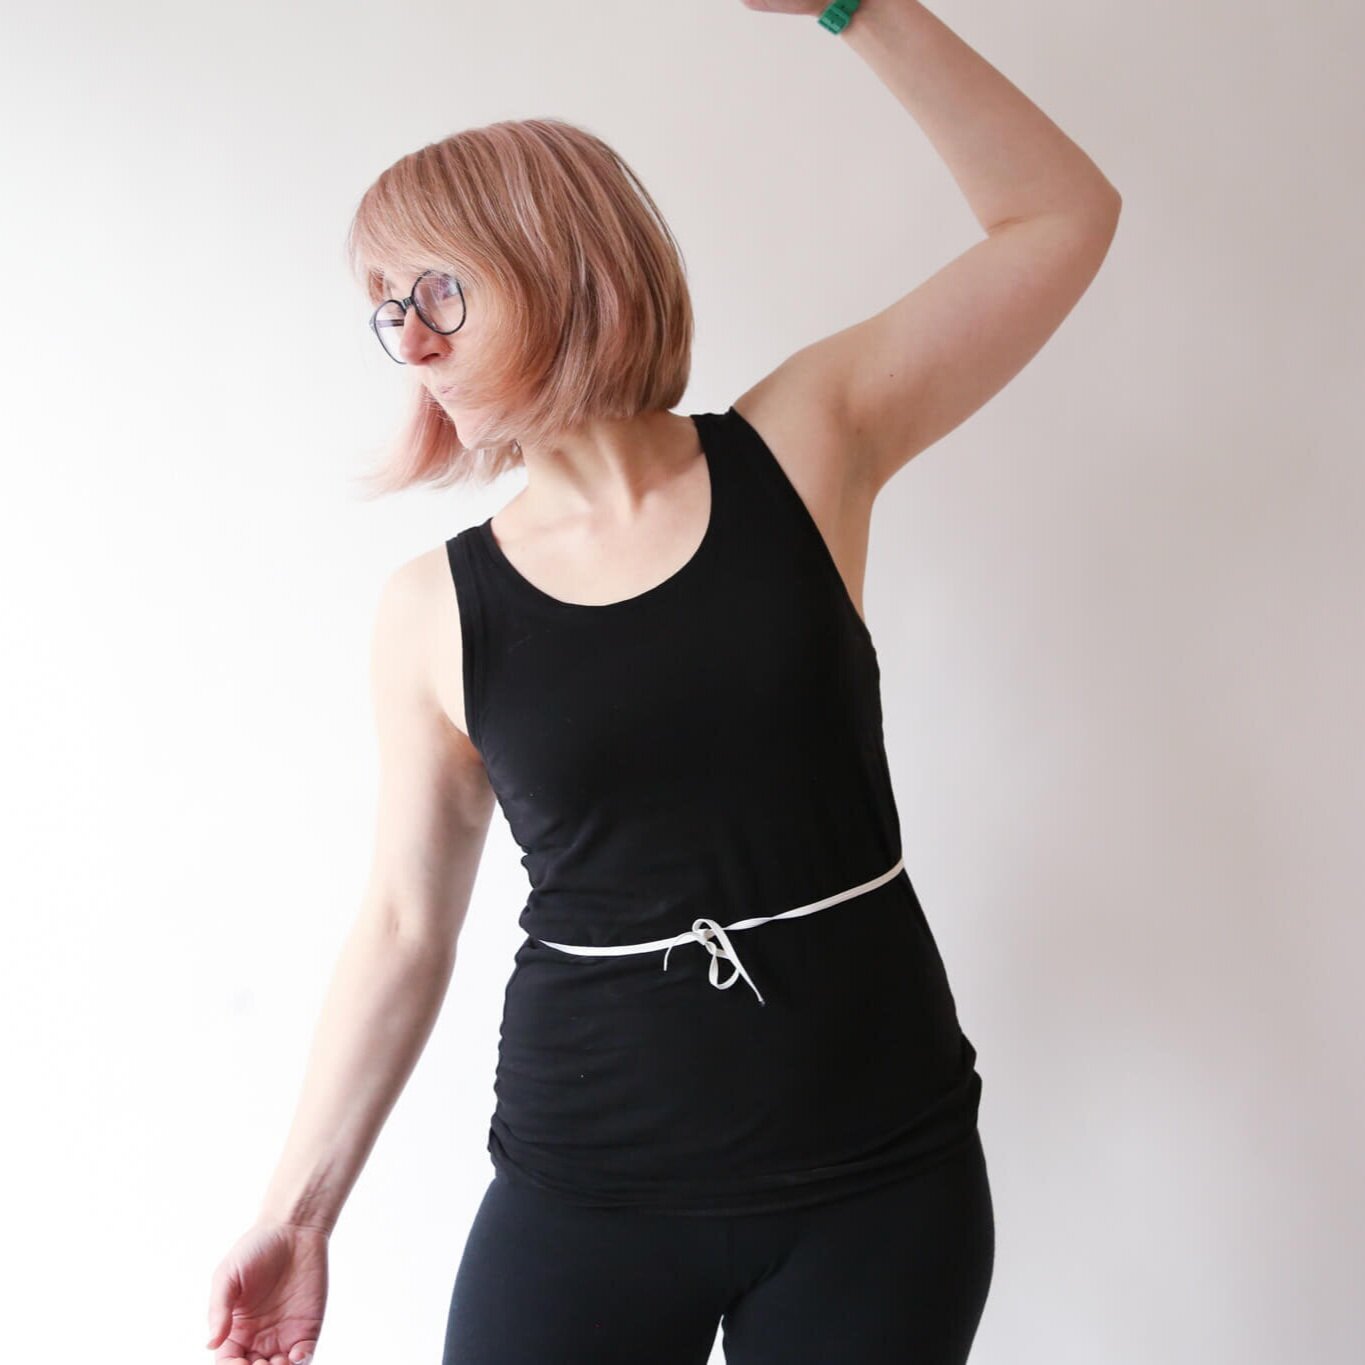
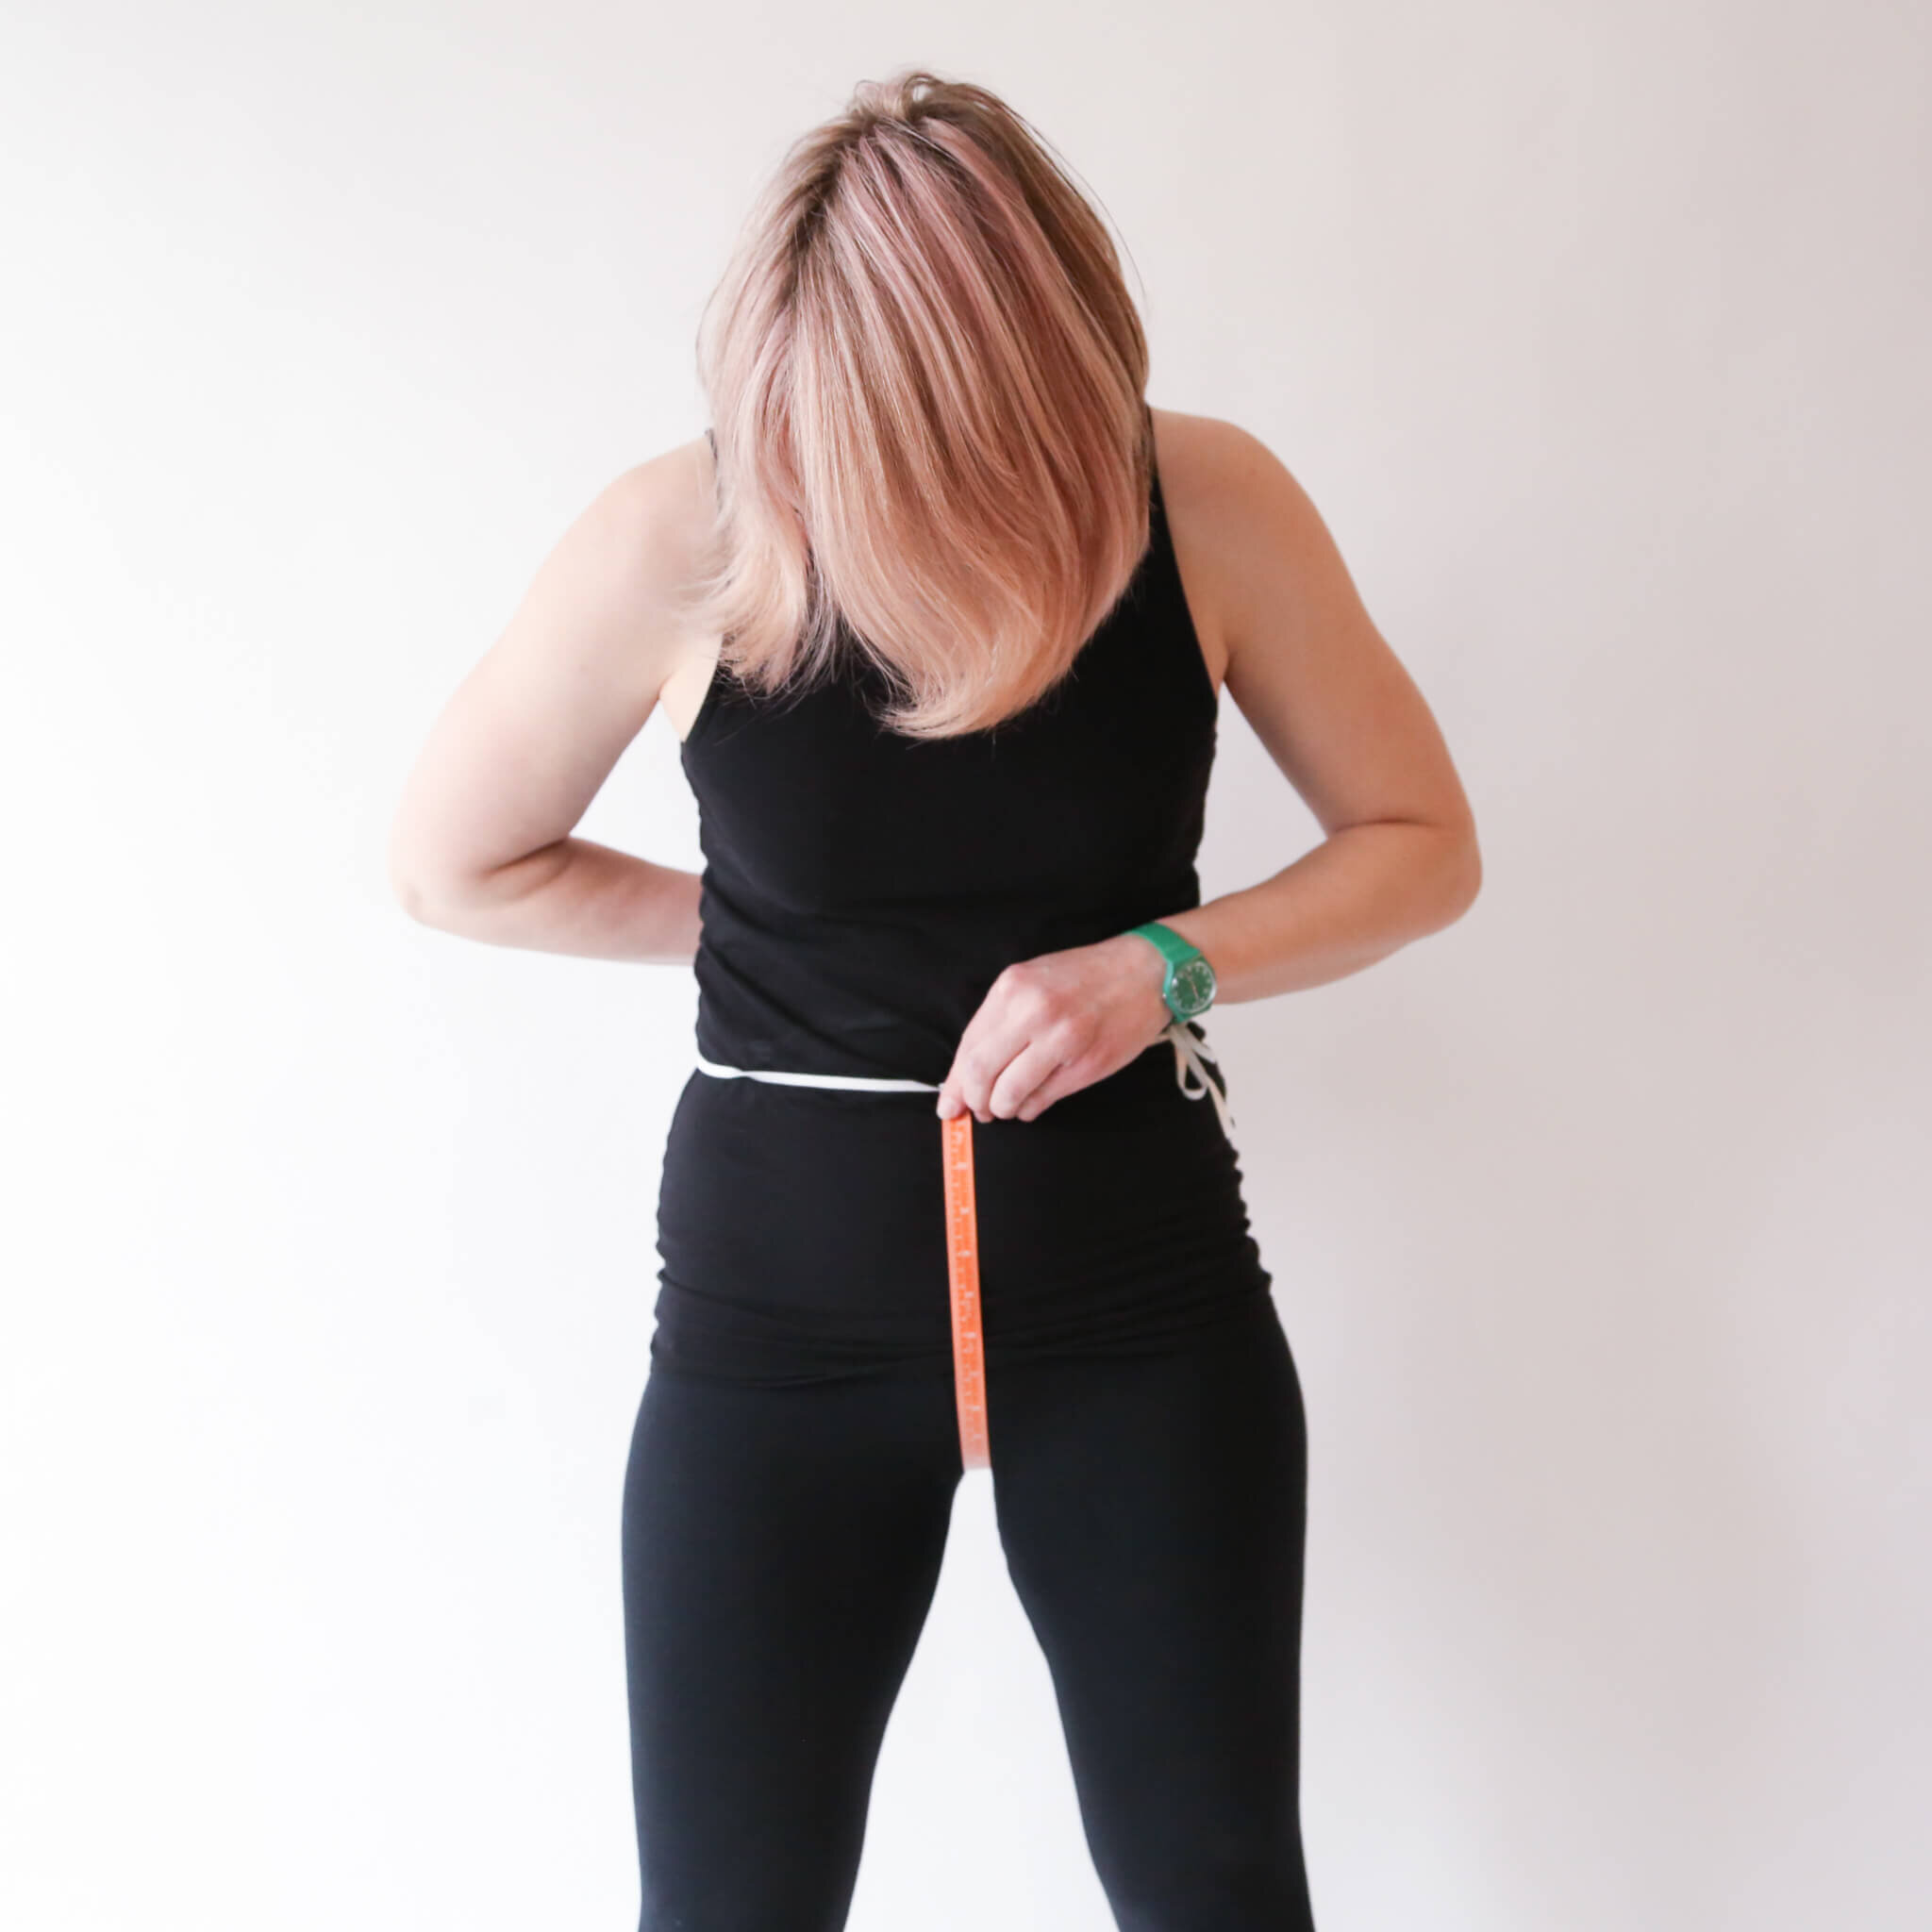
Place the tape measure between your legs, beginning at the waist elastic in the front (shown above), and ending at the waist elastic in the back (shown below). This will give you your full rise measurement.

Next, separate your full (total) rise measurement into front and back rise numbers, so you can compare them to the rise numbers in the pattern charts. To do this, measure front rise along your crotch curve from your waist elastic to the inseam, then subtract from your full rise to get back rise.
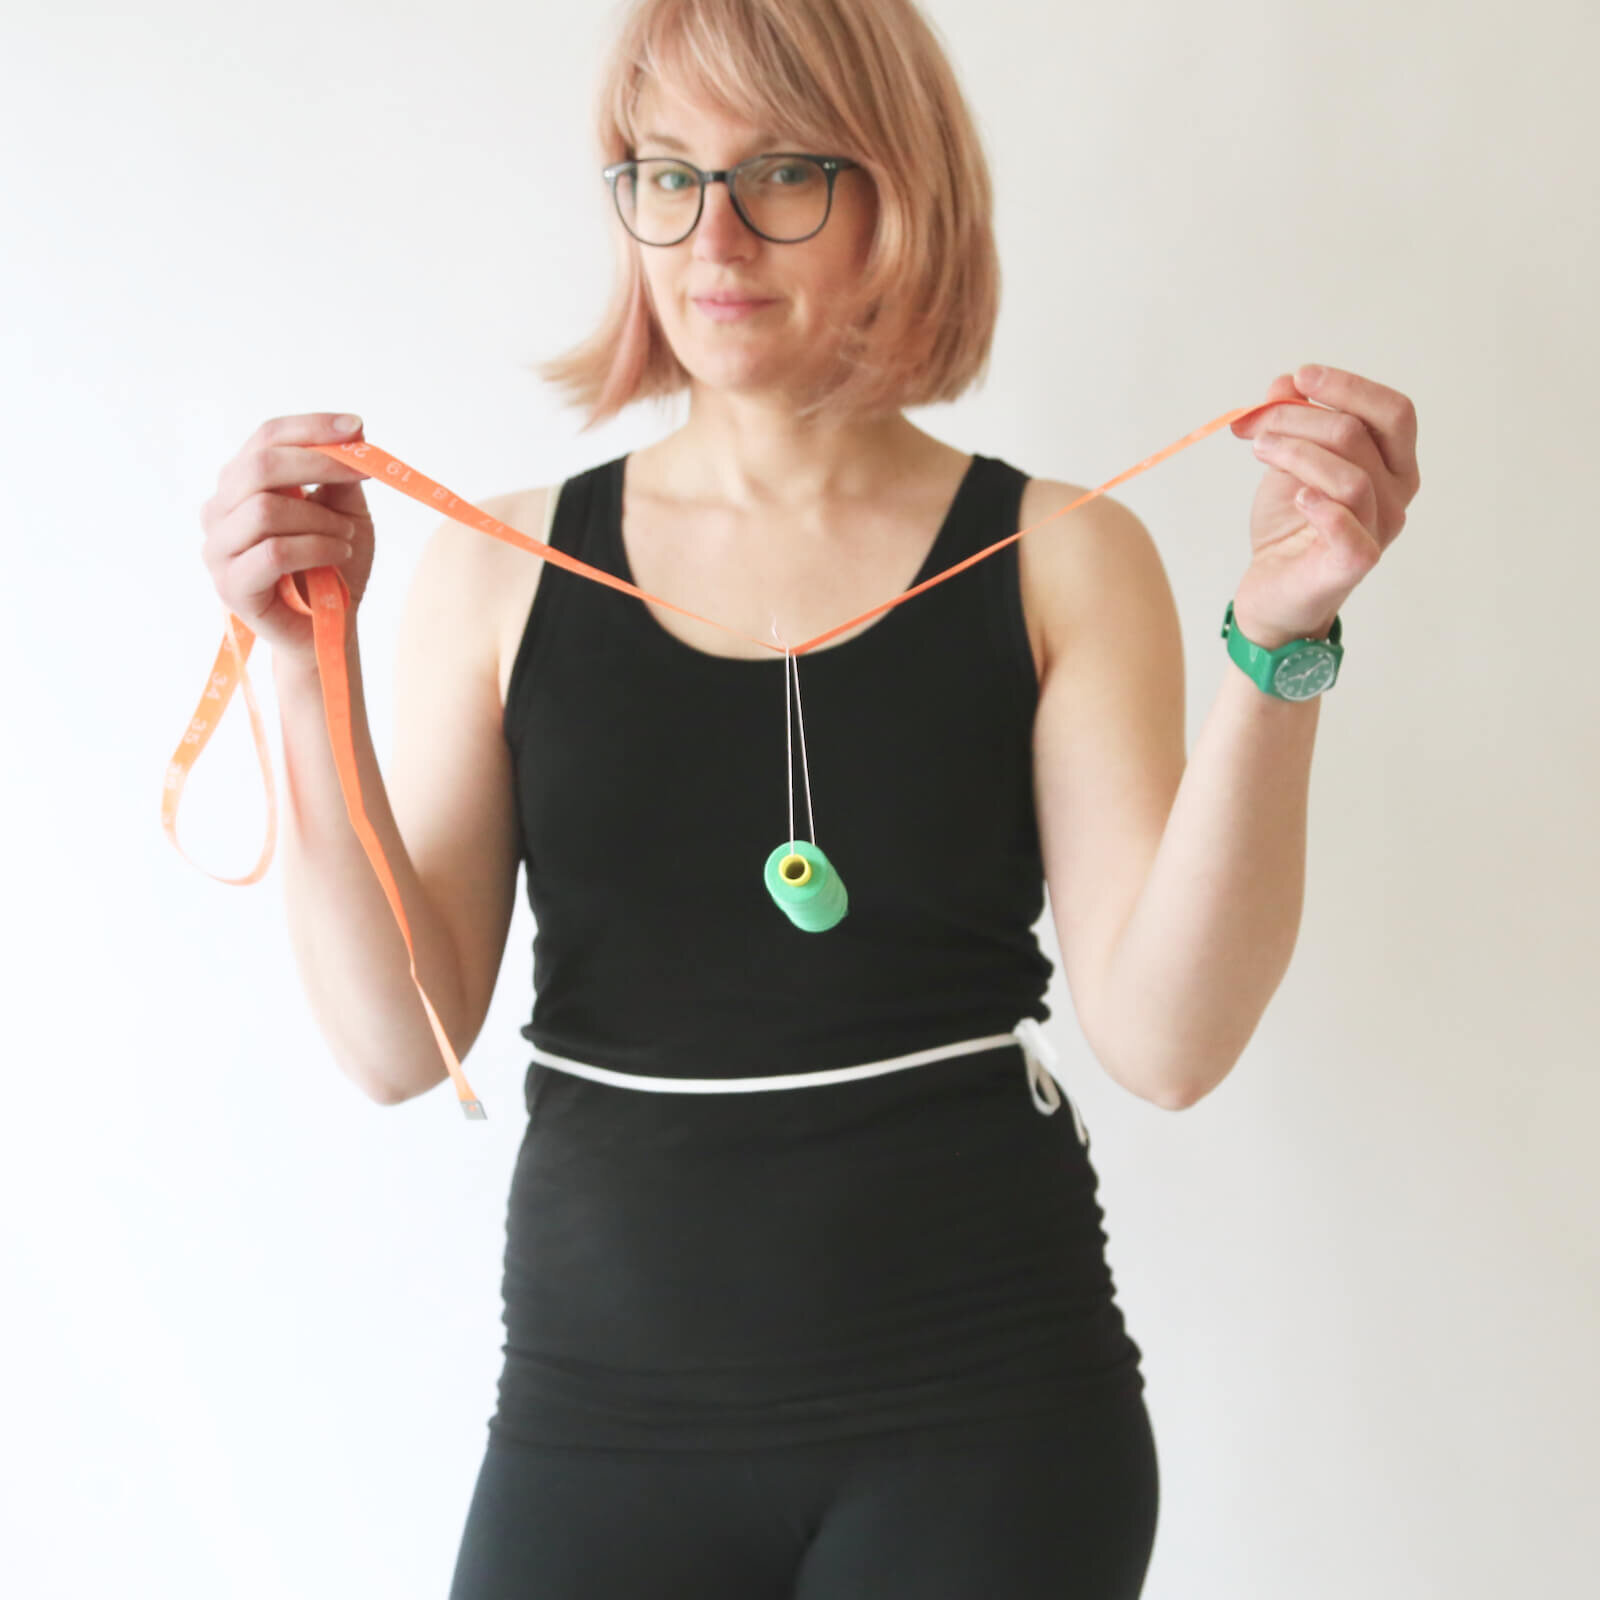
OR, try my handy trick for finding front rise: thread a piece of string through a spool of thread or other weight like a washer to form a loop, then put the tape measure through that loop before taking your rise measurement. The loop will slide to the lowest spot (at your inseam), so if you slowly lower the measuring tape, you’ll be able to see your front rise number. Then subtract from your full rise to get your back rise. (shoutout to Threads magazine for giving me this idea with their - slightly different — crotch length measuring tips on page 12)
Now compare your body rise measurements to the finished measurements in the pattern chart to determine whether you may want to add or subtract length from the rise of the pattern before you start.
Cutting lines and instructions are provided in both the Rose and Luna sewing patterns to show you how to do this.
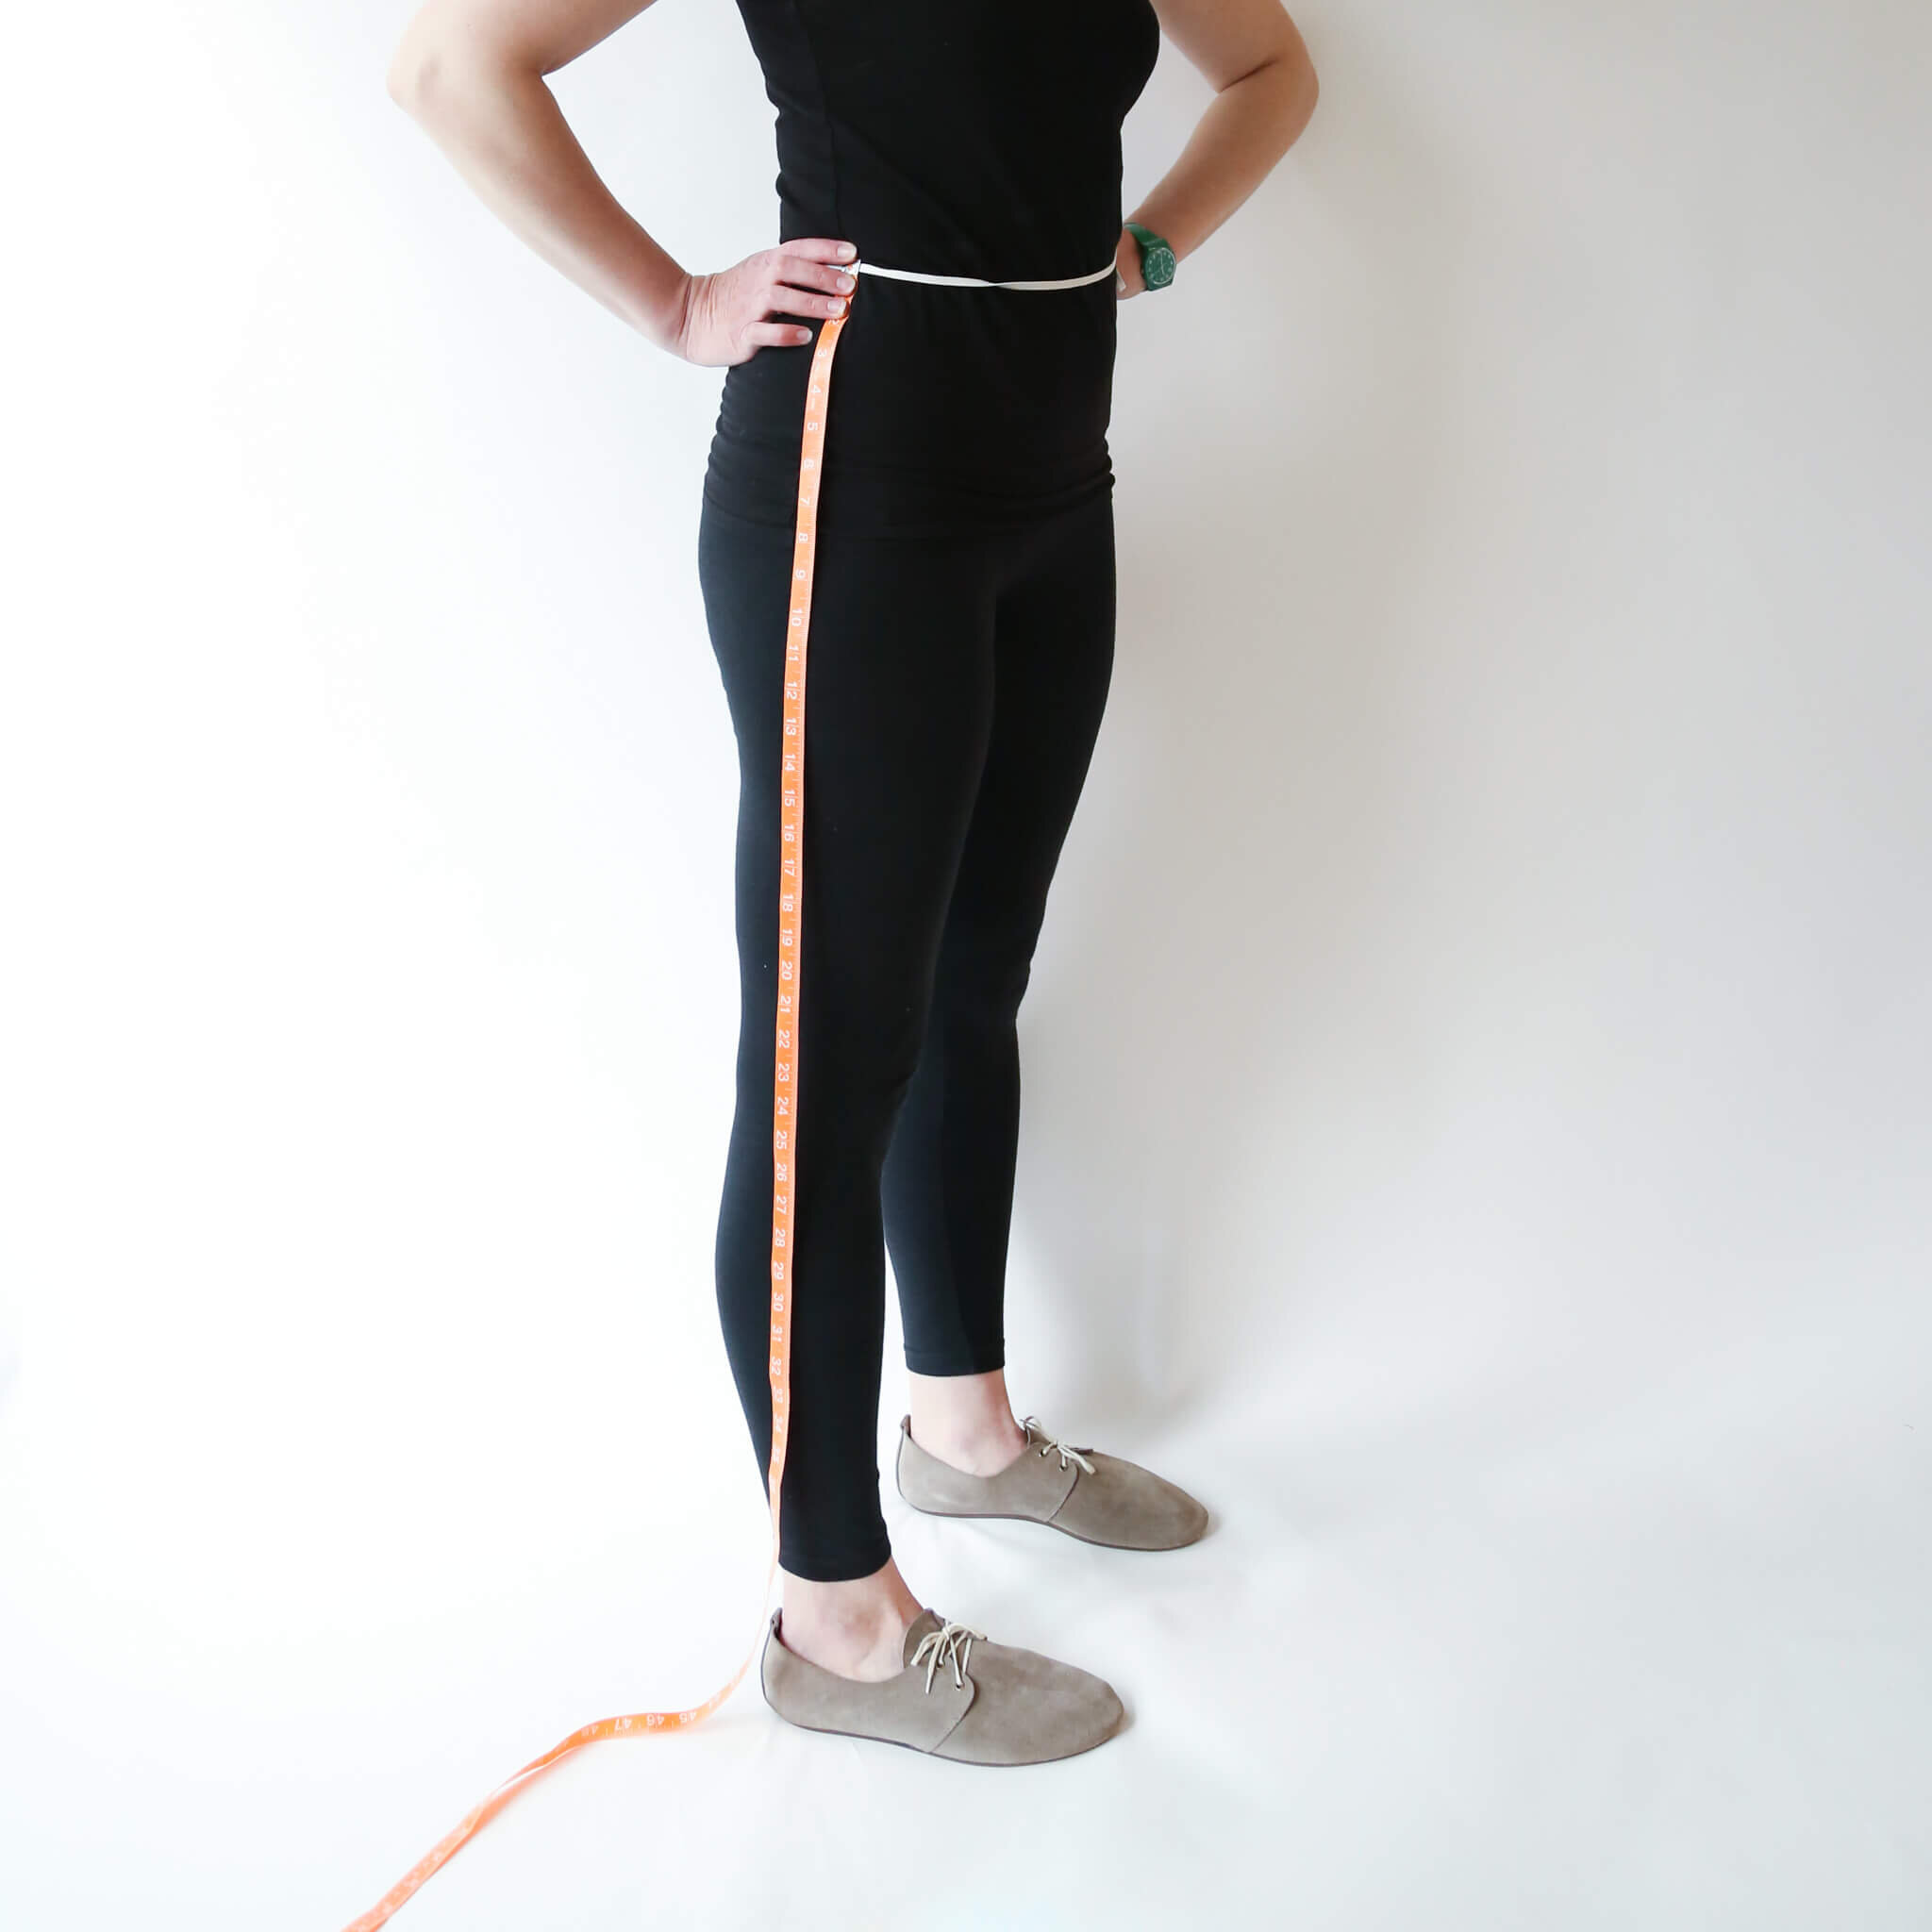
Measure inseam
Inseam is another measurement that gives you an idea of how long a finished pant will be on your body. This is helpful for determining whether to lengthen or shorten the leg of a pattern before you cut your pieces out.
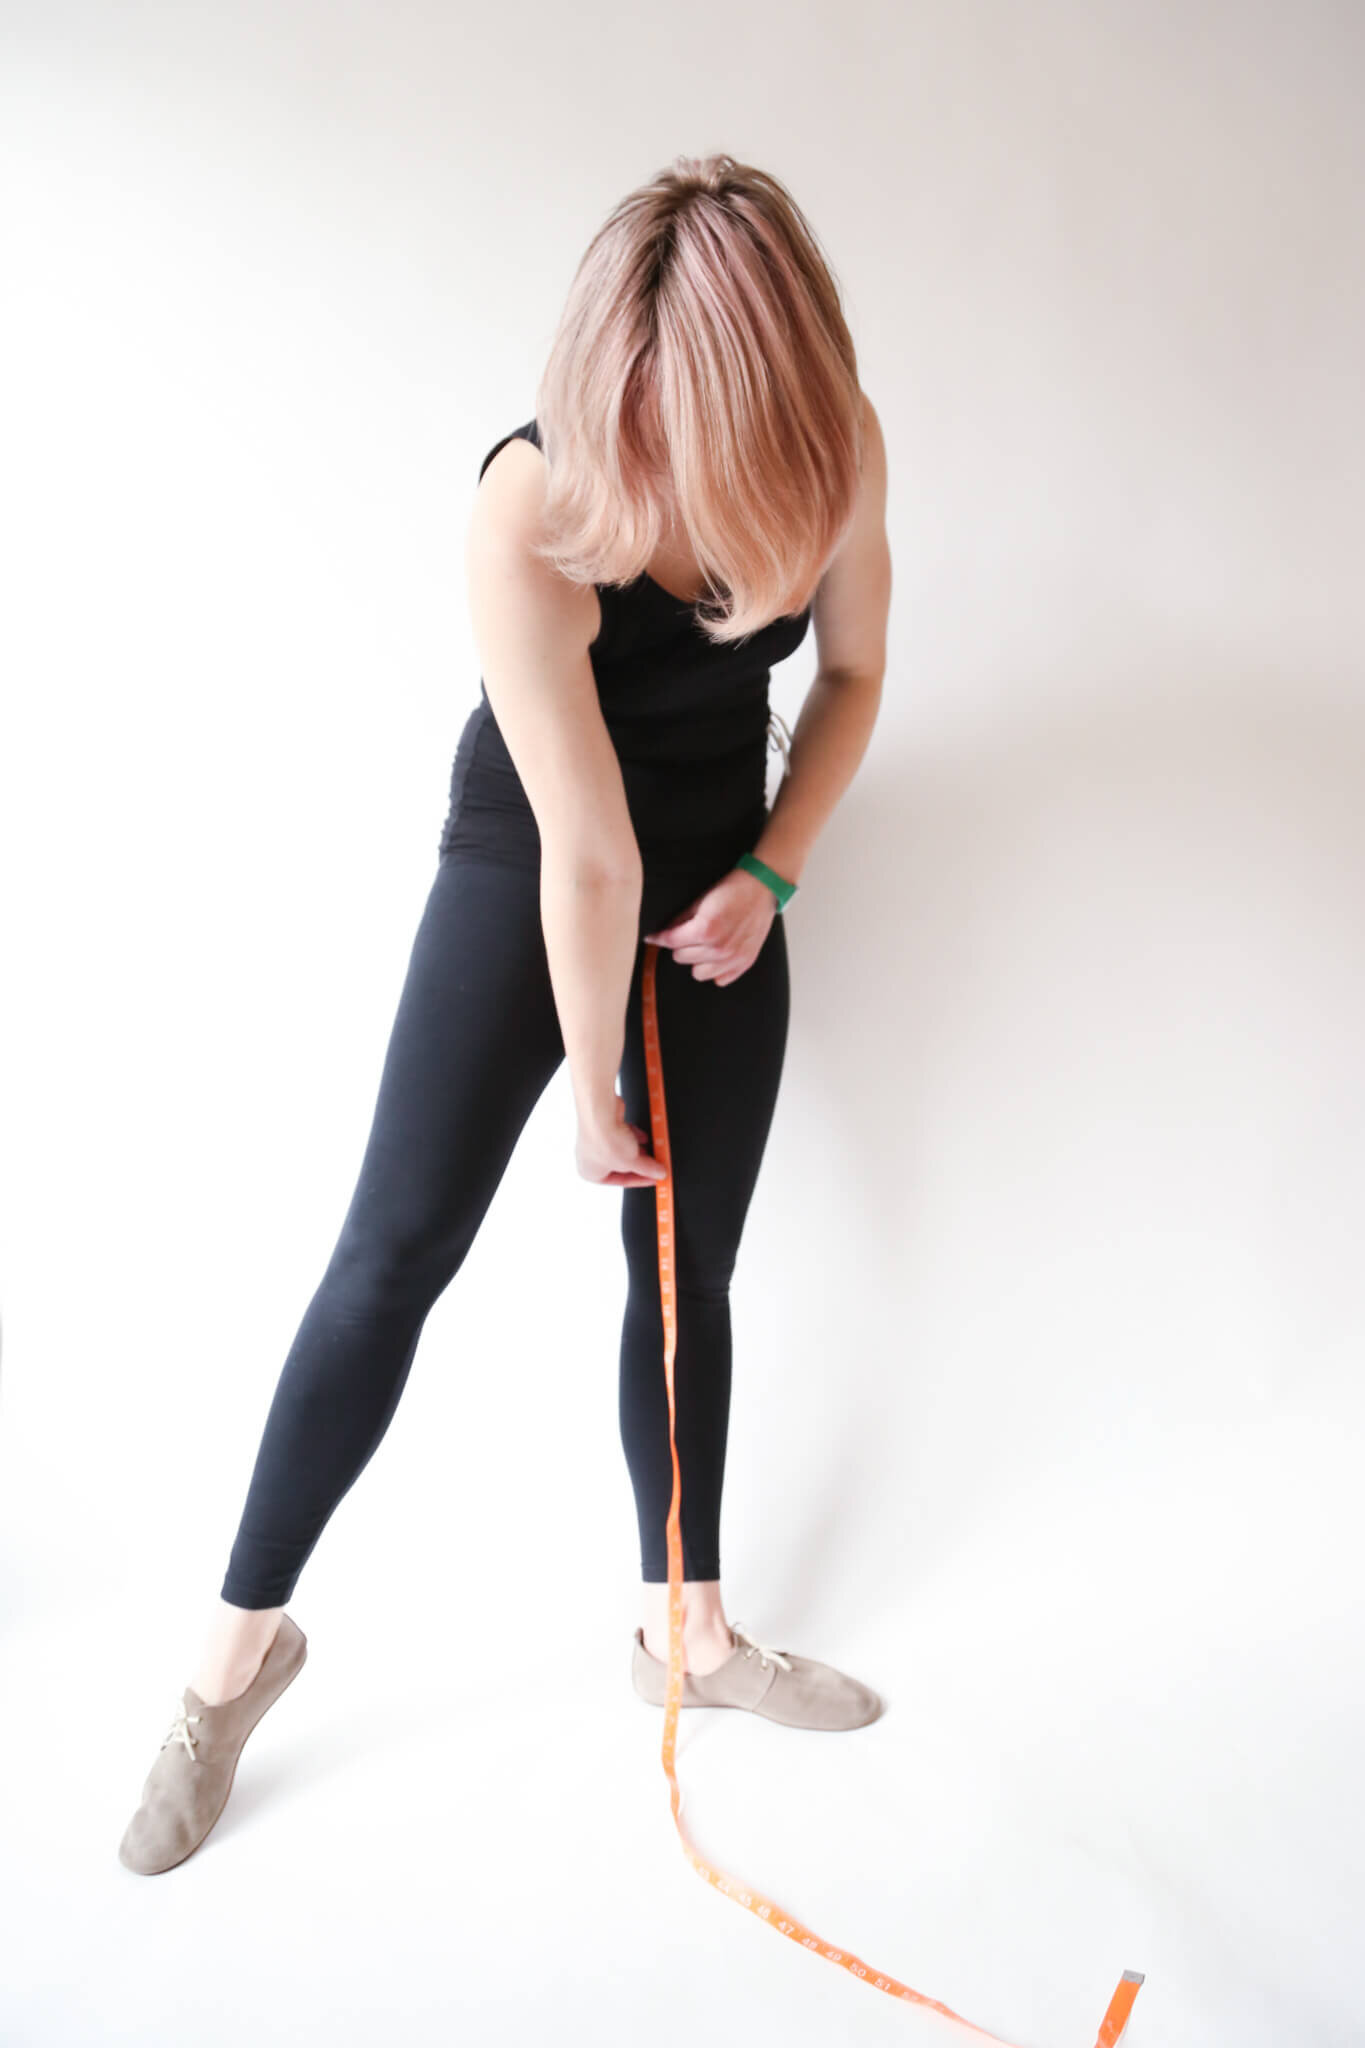
To measure inseam, place the measuring tape at the point where your center (crotch) seams intersect your inseam. This intersection is really easy to find on a pair of leggings, which is why I like to take pant measurements while wearing leggings. Hold, pin or tape the measuring tape in this spot, then stand up straight while you take this measurement. Read the bottom of the tape measure using a mirror or have someone else read it for you (this is recommended if possible as they can then pull the tape straight). Conversely, you could hang the tape so that the end of the tape falls where you want your pants hem to land, then read the measurement at the crotch.
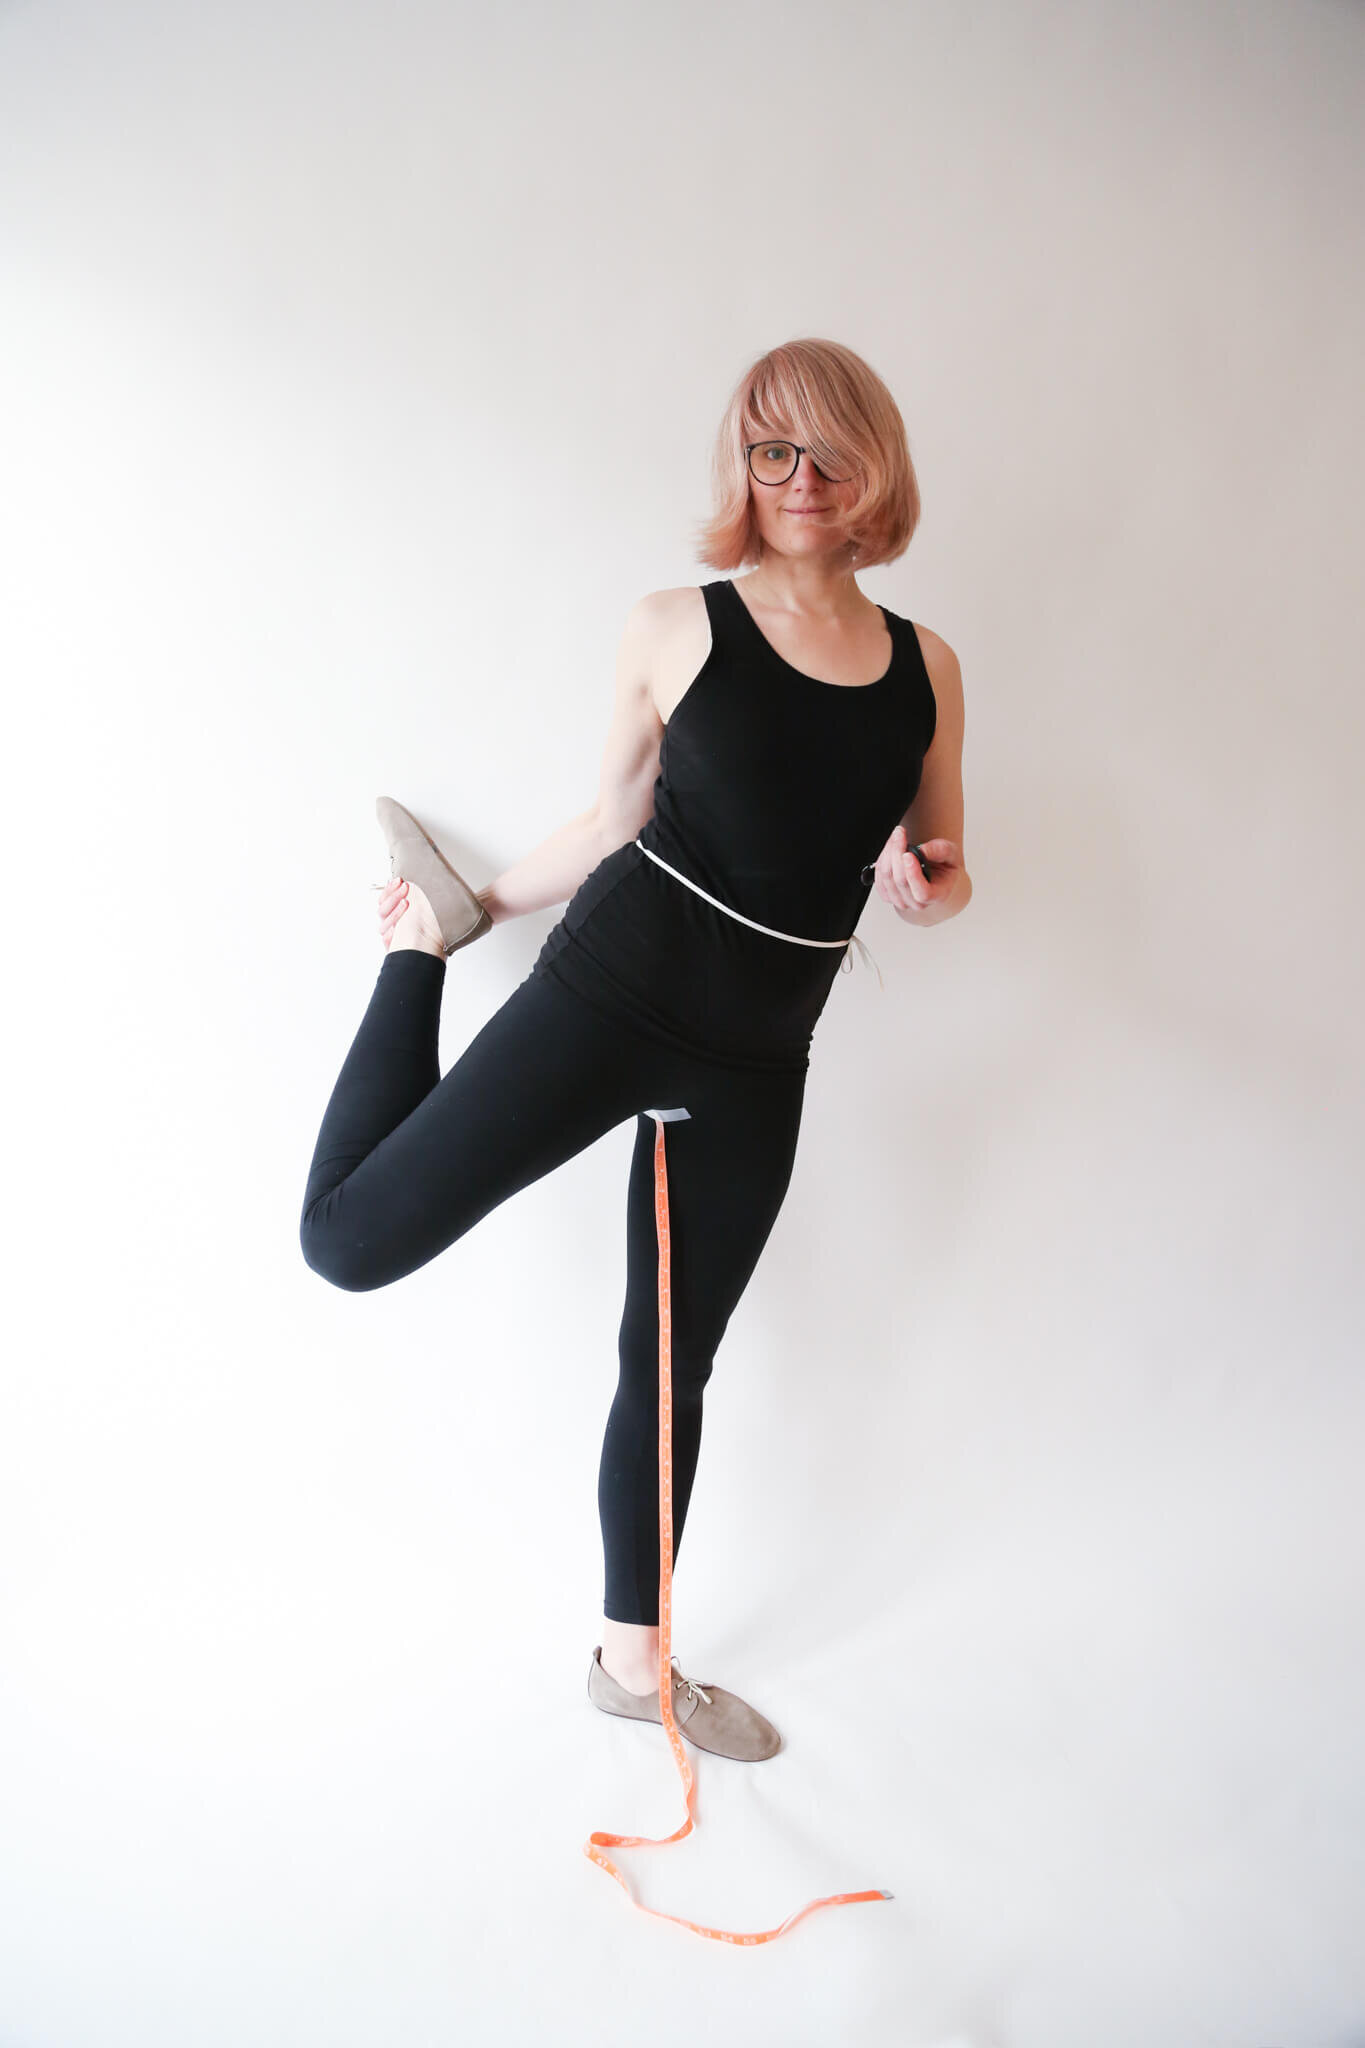
[This is nothing. Pay no attention to the weirdo in Flamingo Pose.]
The bottom of the tape measure should be read where you want the hem of your pants to land, so for ankle length pants, measure at the ankle bone. For long pants, measure at at the instep; for a cropped pant, measure somewhere mid-calf (I like my cropped pants to hit 3-4” above the ankle). For a floor length pant (if you might wear your Rose pants with heeled boots, for example), measure to the floor. Not sure? Measure all of them and take some notes. Just remember to record these numbers somewhere.
Measure Outseam
Similar to inseam, except this time you are measuring from the waist elastic to hem along the outside of the pants. Again, measure to mid-calf, ankle, instep, and/or floor as desired. Having a buddy help you with this if possible is again recommended.
Once you have measured your inseam and outseam, compare those measurement to the finished inseam and outseam measurements in the pattern chart, and decide whether to add or subtract length to the leg in your size.
Let’s review!
For sewing pants, take these key measurements:
HIP - to select size
WAIST - verify size, cut waist elastic correct length, and/or decide to blend sizes
RISE (front/back) - compare your measurements to the finished measurements of a pattern and decide whether to add/subtract length to the rise of the pattern
INSEAM/OUTSEAM - compare your measurements to the finished measurements of a pattern and decide whether to add/subtract length to the leg of the pattern
Now that you have your key measurements, you can choose a size for your pant pattern!
Ready to make pants? You can find the Rose pattern here, Luna pattern here, and stay tuned for a Rose Sewalong, coming soon!