
Crayon Box Quilt Tutorial
Rae here again with another repost of a colorful tutorial I wrote for Sew Mama Sew back in 2010. Sad story, actually: I mailed this cute baby quilt to my cousin when he and his wife had a new baby, and the package was lost or stolen and never made it to them. I can only hope that someone somewhere is enjoying this little Crayon Box Quilt.
At the very least, now you can make one too. Enjoy!
I have always looked at quilts with triangular pieces and imagined that it took forever to cut out and piece all those triangles. Then I made a bowtie (or “hourglass” as it’s more traditionally called) quilt for my baby girl last summer and couldn’t believe how simple it was. The secret to this quilt is that you start with 36 squares so you don’t have to cut out any triangles.
You’ll be amazed at how simple and quick this is; plus, it makes a great gift for a new baby. I decided to use only solid colors in this quilt, so it reminds me of a box of crayons, but you can also use near-solids or crazy prints like I did on this one for a more eclectic look.
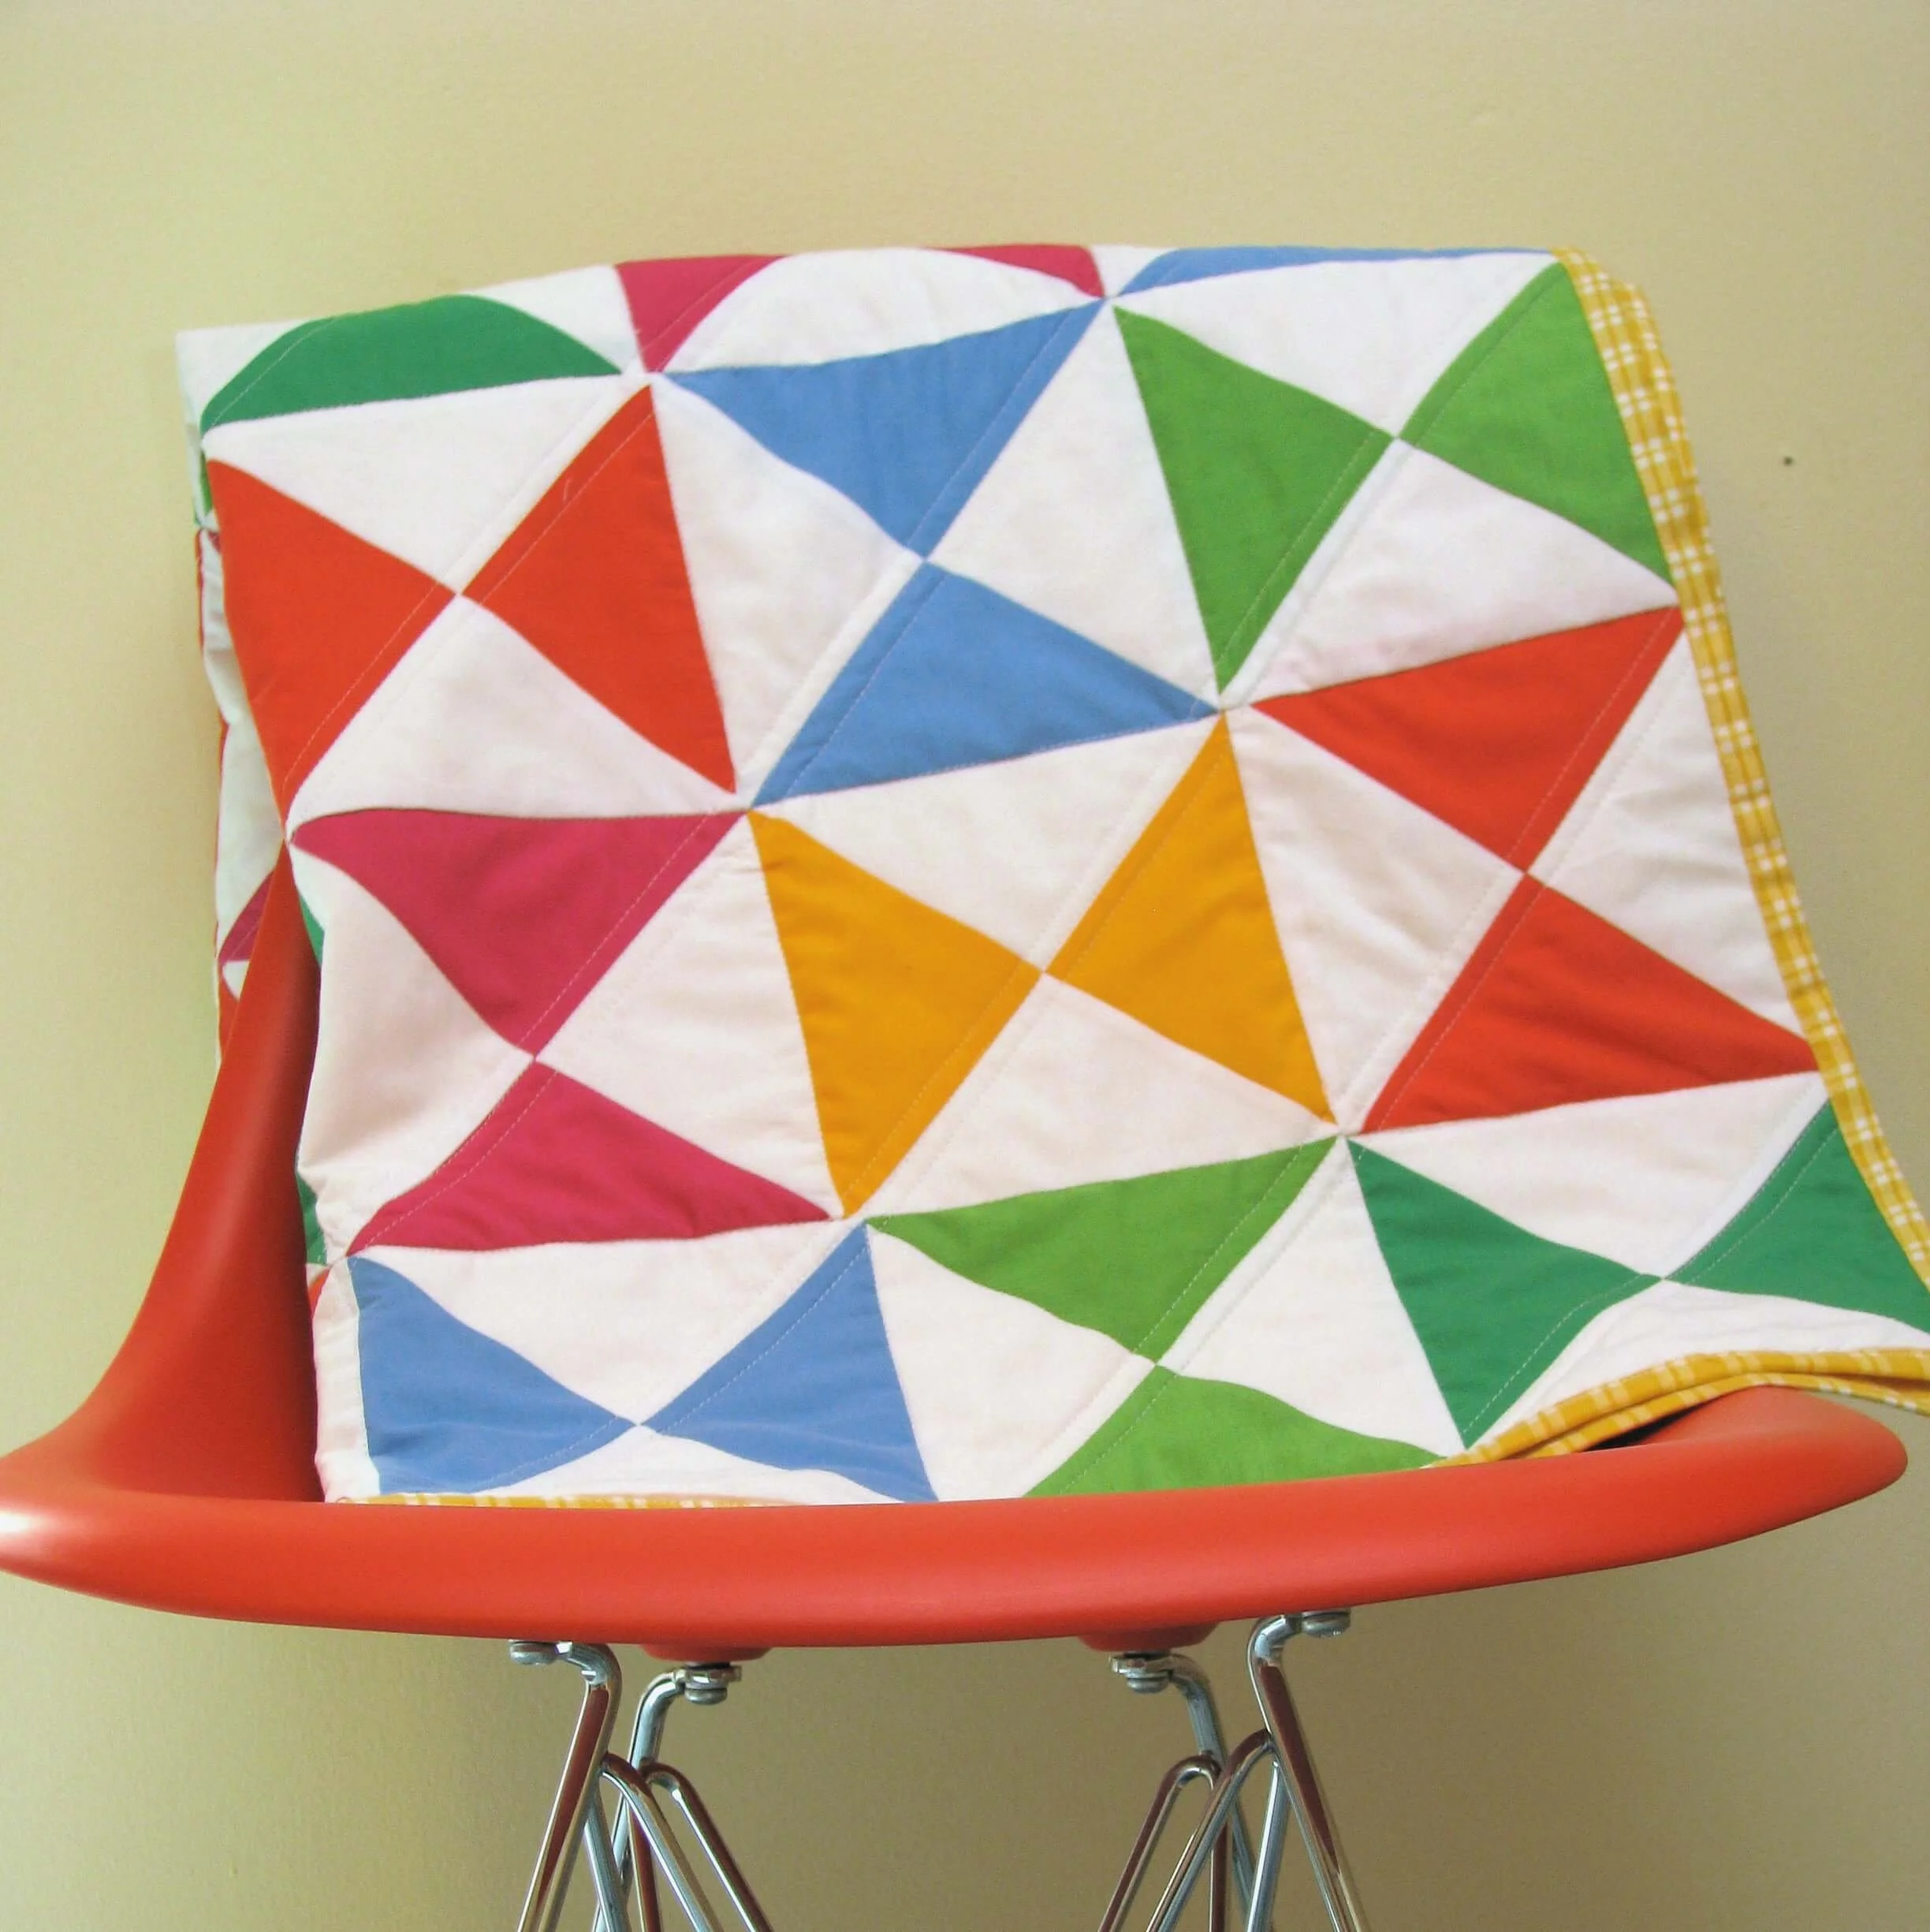
Finished Dimensions:
36x36”
Materials
1 yard of white quilting cotton for base color
1/4 yard of solid broadcloth in six different colors (regular quarters or fat quarters)
1 1/4 yard solid or near solid quilting cotton for back of quilt
1 square yard square of cotton or bamboo batting (a little extra is helpful though, so you might want to cut a 42” square)
TOOLS
rotary cutter with self-healing mat
fabric marking pen with disappearing ink
safety pins or spray starch
sewing instructions
Cut out 7” squares:
Make a square template 7x7” out of a piece of cardboard or a manila folder. Fold the quarter yards in half and then fold again in thirds, place the template on top, and cut through all three layers at once. Repeat for the other solid colors. You will have 18 colored squares, three of each color.

Using the same template, cut 18 white squares. When you are finished you should have 36 squares total (18 solid color, 18 white).

Match each of the colored squares to a white square, lining up the sides.

Take a fabric marking pen and make a line diagonally from one corner to the other as shown.

Sew the squares together by stitching on either side of the center line with a 1/4” seam. Backstitch at the beginning and end of each seam.

Cut down the center line, being careful to leave enough allowance next to each seam (if you get too close to a seam, the fabric can pull apart and fray when you wash the quilt)

Press seams towards colored half of square. As you press, keep the iron pointing parallel to the seam so that the squares don’t warp.

Repeat for the rest of the squares.

Side note: At this point you could put the quilt together as shown below if you like. I like how this looks too and sometimes you just want to be done!
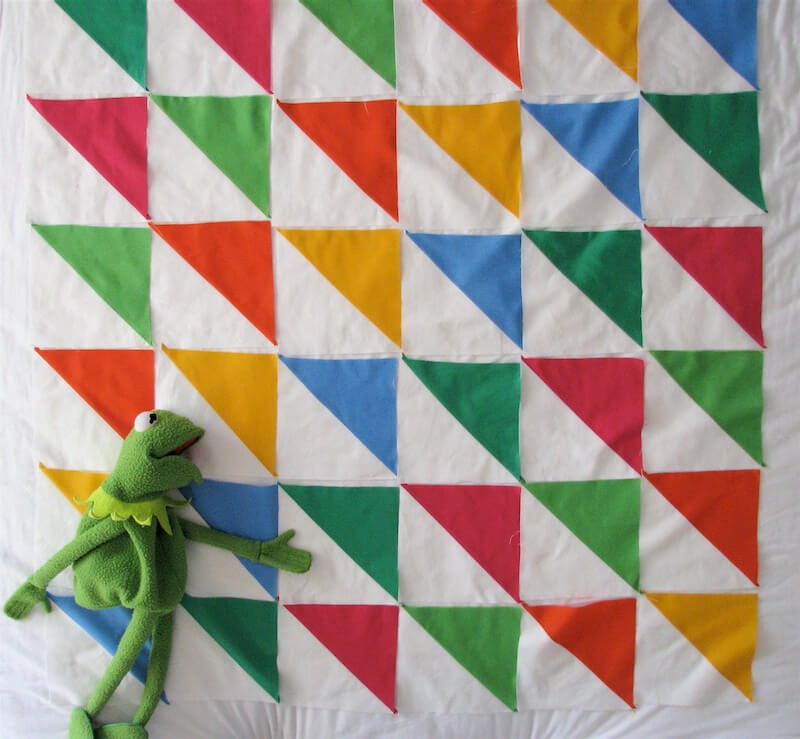
Or you can keep on keep on going to finish the blocks…
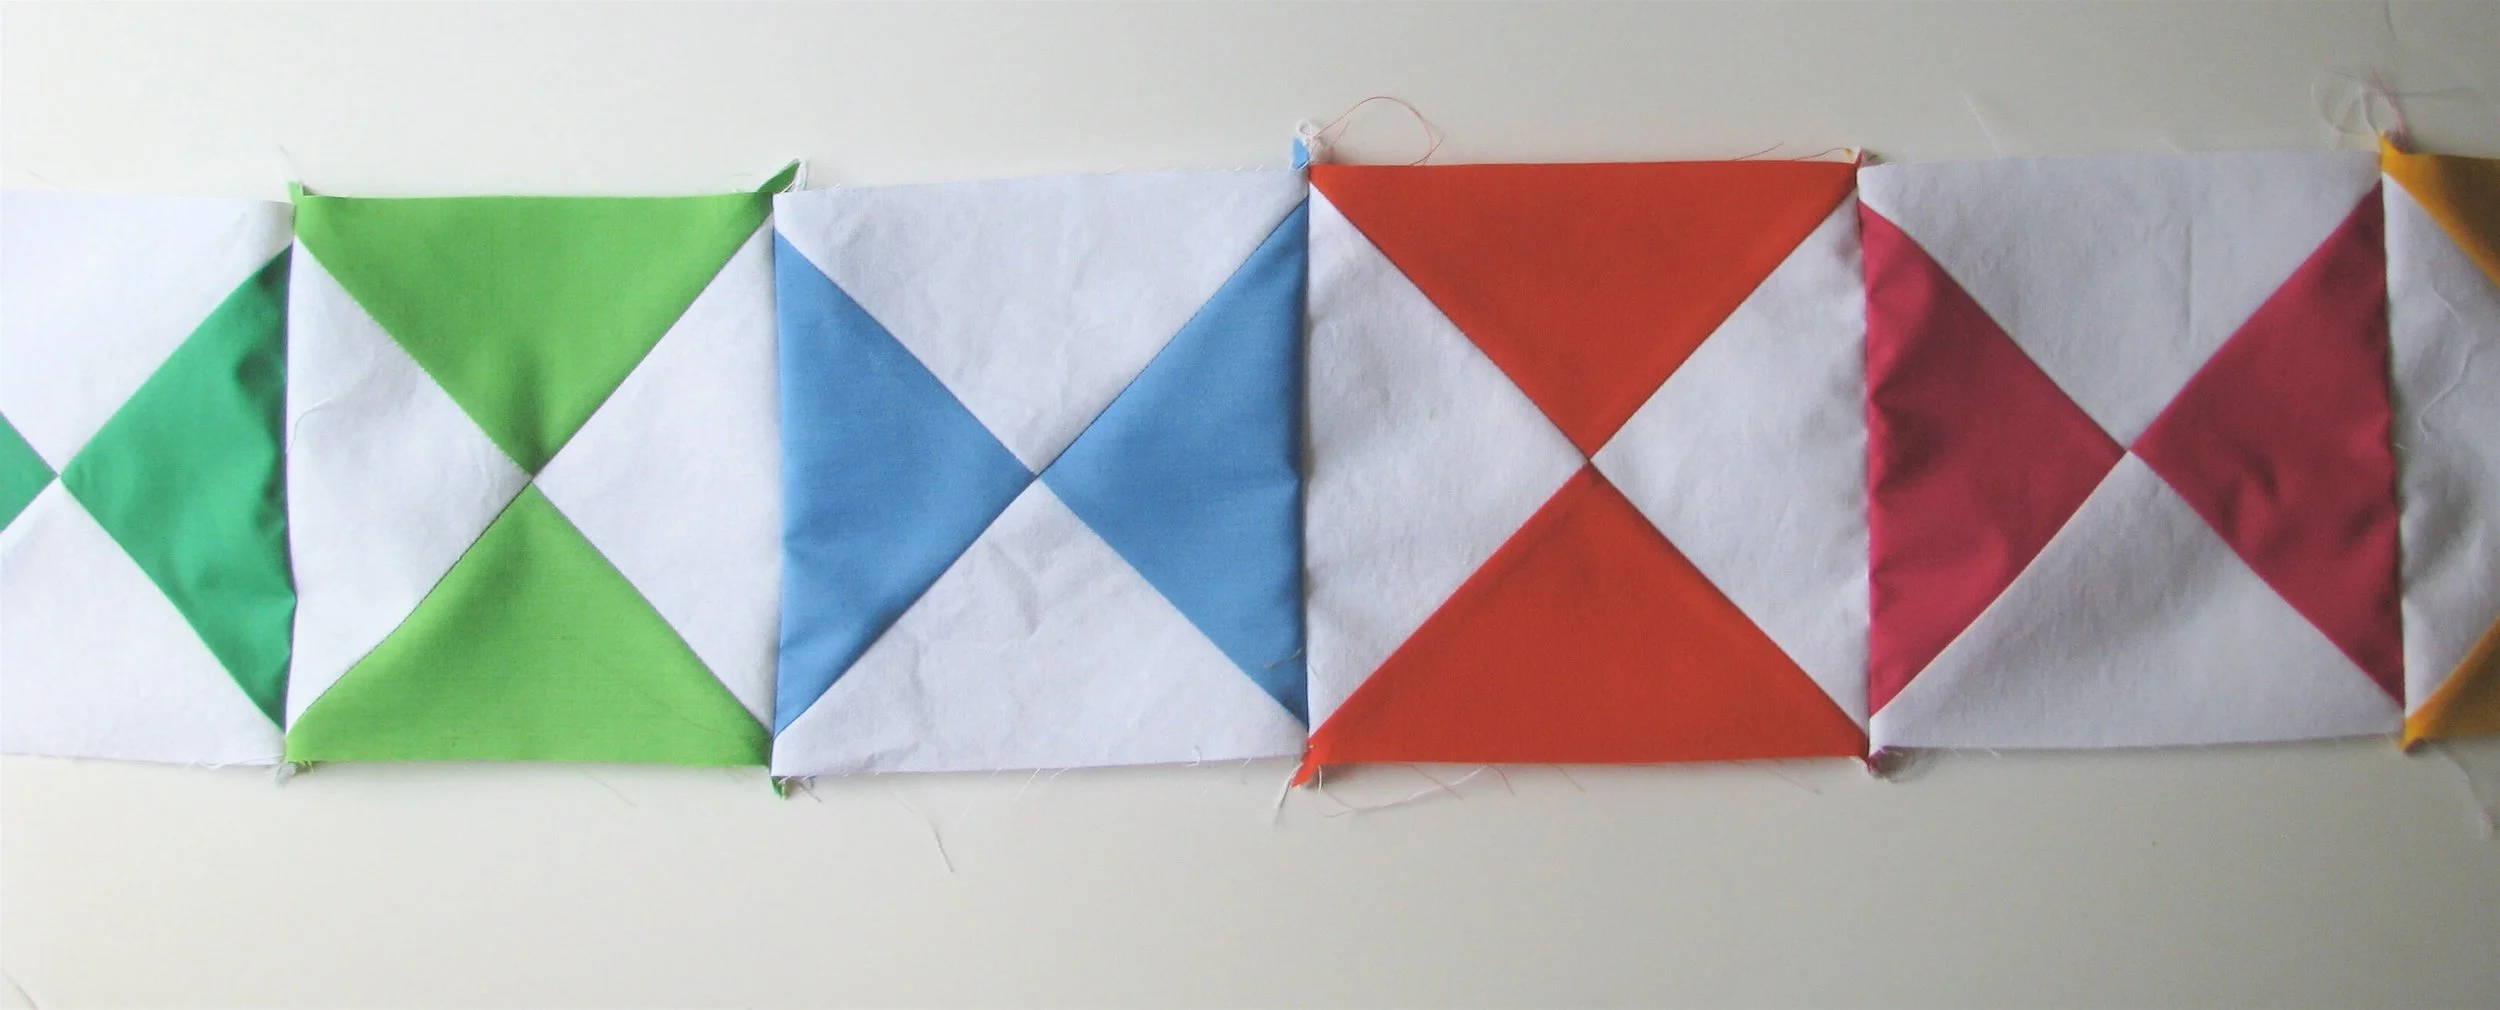
Take two matching squares and cut them in half down the center diagonal line:

Swap the right side of one square for the left side of the other:

And match the two new triangles up right sides together with contrasting fabrics opposite from each other. Repeat with the rest of the squares until they are all cut in half, swapped, and re-matched.

Line the center seams up carefully before sewing the two sides together:

Sew your triangles together with a 1/4” seam. I start with a stack of matched triangles and sew them all together in one go without lifting my presser foot or clipping my thread. It makes a big bunting-like string of triangles and goes really quick!


Cut the them apart and press the seam you just sewed open (results in a better looking quilt) or to one side (faster), remembering to keep the iron pointed along the seam to reduce warping on your square.

It is worth your time at this point to evaluate the size and evenness of your squares. I usually trim any squares that are not exactly square or those that are a little bigger than the others. Taking the time to do this will help your quilt top look even and neat.
Next arrange your squares in a pleasing manner in six rows and six columns. For me this means placing them as randomly as I can without like colors touching.
Sew each row of six squares together
Take the first two squares in the first row and sew them together with 1/4” seam and right sides facing. Repeat until you have a strip of six squares sewn together. I find it helpful to sew from left to right across each row and always place the right square on top of the left so I don’t forget what order they go in.
The ends of these seams always end up with little points on them, and I clip these off (be careful not to clip too close to the seam though).

Then press all of the seams in each strip in the same direction, say to the left. Press the seam (back) side first, then flip the row over and press the front side too.
Repeat with the next row and press all of the seams the other way, in this case to the right.* Continue sewing the rows together and pressing in alternating directions until all six rows are complete.
*When you alternate the direction you press each row’s seams, it will reduce the bulk at the corners when it comes time to sew the rows together.
Take a rotary cutter and trim the edges of each row of squares so that it is as even as possible.

Sew the rows together to complete the quilt top
Take two rows and place them right sides together. You will probably notice that the individual seams between each square don’t exactly line up across the entire row. That’s OK! I sew one square at a time as I go across the row, matching the seams up with my fingers. This means that I sometimes have to stretch my squares a little to make the seams line up, but it still works.
Press the seams open. Using your rotary cutter, trim along the edges of the quilt top so that they are as even as possible. My finished quilt top was 36”x35.5”

Quilting and binding
Place quilt top on top of the batting square and the 1.25 yard of backing cotton and center as much as possible. Pin your layers together (you can also use spray starch). I quilt my layers together by stitching in the ditch along my horizontal and vertical seams.

To finish the edges of my quilt, I trim my batting to the edge of the quilt top, trim my cotton backing to 1” all the way around my quilt, then fold over my backing 1/2” twice, and sew the whole thing down. More details on this binding method (including how I do the corners) are in my Cheater Bind-off Tutorial.

I know this probably breaks some rules about binding your quilt and has some of you real quilters spitting out your coffee, but I have found this to be a quick and painless way to bind my quilts. It certainly doesn’t look as nice as home-made bias tape binding, but it makes me love quilting more. And that’s worth something, isn’t it?


Voila! You’re a quilter!!
PS. You can see more quilts I’ve made - plus a free quilt pattern — here on my quilts page!