
How To: Fold Up and Snap Bib
Hello friends!!
Today I’m reposting a tutorial that was originally posted on Sew Mama Sew. SMS was one of the OG sewing blogs from back in the day which used to host regular sewing tutorials of all sorts and at one point an online shop, but has since shut down. So, I’m reposting the tutorials that I wrote for their site here to my blog
This tutorial features a baby bib that I used to use ALLLL the time for my kiddos. The pocket on the bottom is pretty brilliant, IMHO. First you make a super-simple template (at one point someone had made a printable for this, but I have no idea where that is now), and then you use two small pieces of fabric to create the bib. Add a few snaps to the neck and bottom for the pocket, and you’re done. This makes a great baby shower gift, by the way. Enjoy!
xo, Rae
This is a truly handy invention. I saw a vintage fold-up bib on friend's toddler a few years ago and the idea stuck with me...it's just so much better than a regular bib. Perhaps I should remind those of you who aren't in the trenches with toddlers right now: when they eat, more food usually ends up on their lap and on the floor than actually in their mouths.
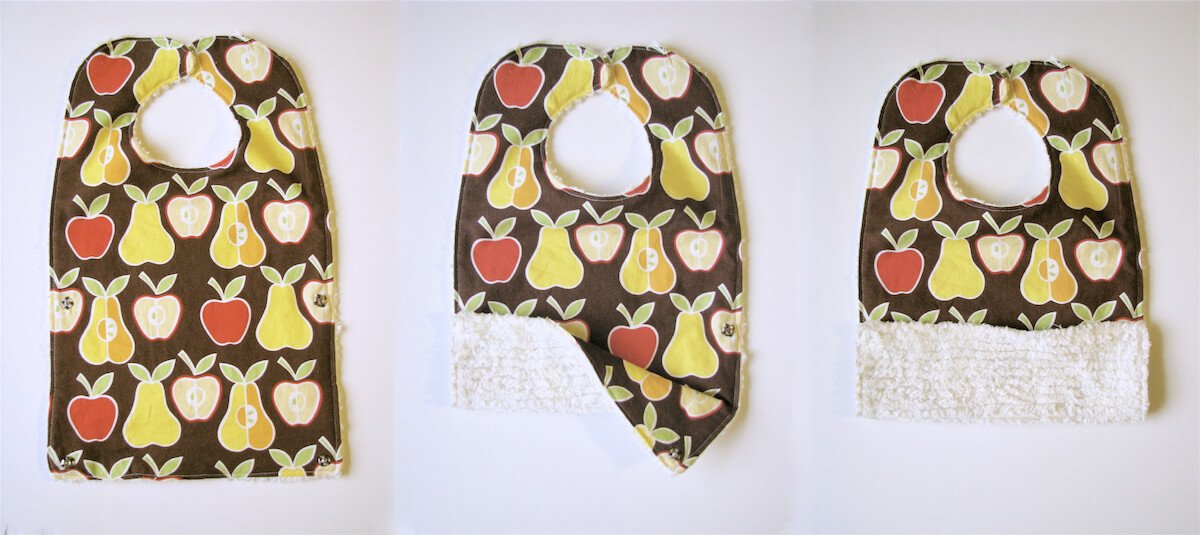
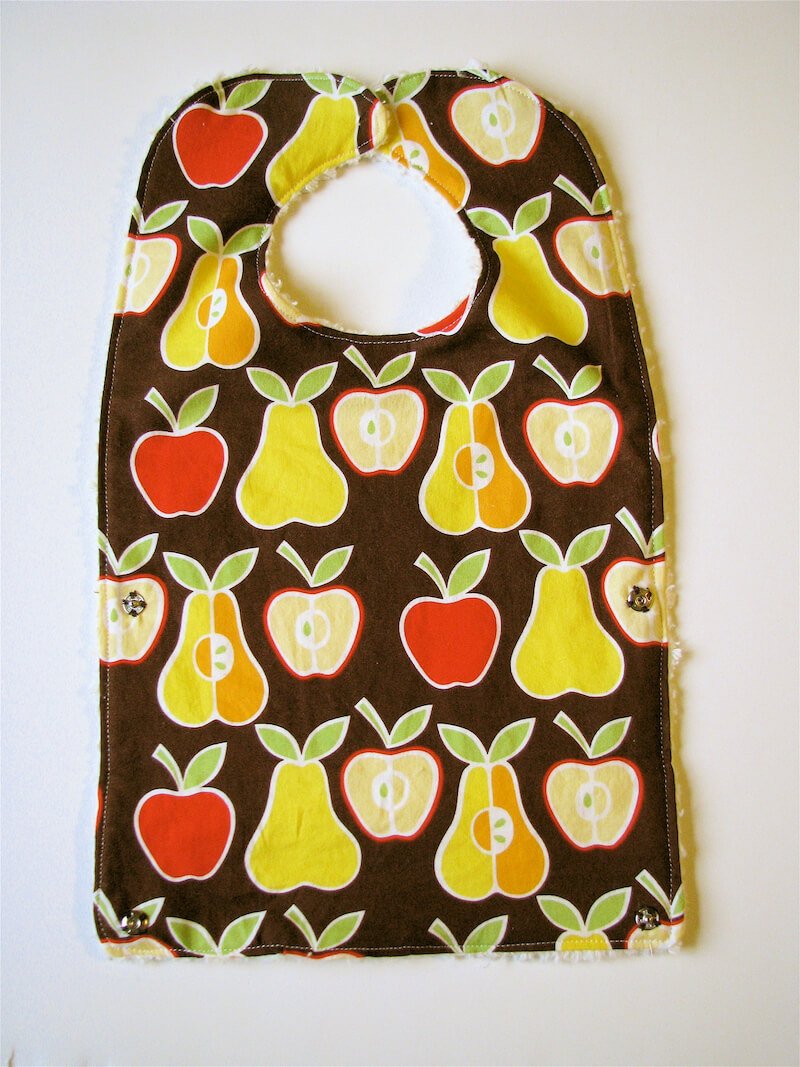
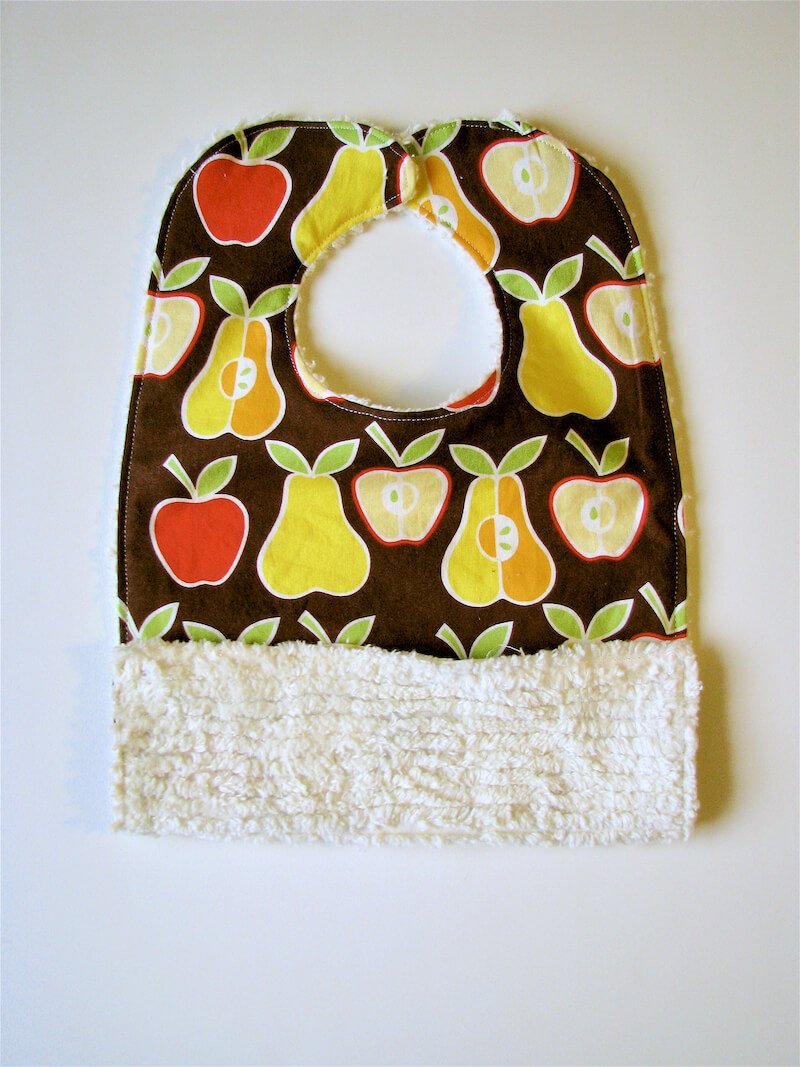
This bib is perfect for messy babies! The bottom folds up and snaps to make a pocket for catching crumbs. After mealtime’s finished, just unsnap the pocket and shake it out over the trash, and toss it in the wash! Or you can leave it un-snapped during the meal for more toddler-body-coverage (think: applesauce).
I put hand-sewn snaps on this bib to show you don't need any special equipment to make this, but you could easily replace these with pressed snaps, buttons/buttonholes, or velcro tabs. I backed this bib with chenille but you could recycle an old terry cloth towel or some other absorbant fabric for the back as well. I've found that dark or busy fabrics make the best selection for the front. I had no idea that banana could leave such crazy stains until I had children.
Materials:
fat quarter of quilter’s cotton for bib front (dark or busy prints hide food stains best!)
fat quarter of soft absorbent fabric for bib back (chenille/terrycloth/minkee)
three snaps (size 1)
needle and thread
paper, ruler, pencil, and marker (for making your bib pattern)
Pattern notes:
The seam allowance for this pattern is 1/2.” Make sure you prewash and dry your fabrics before cutting your pieces.
Make Your Bib Pattern:
Step 1. Cut a 10” x 17” rectangle out of paper (or use a 10×17” sheet if you have one)

You will need two circular objects (think jar lids, glasses, bowls) to make the curves on the bib pattern. The larger needs to be about 6” in diameter (this will be used to make the outer edge of the bib) and the smaller needs to be about 3” in diameter (this will be used to make the neck hole):

Step 2. Choose one of the short sides of the rectangle to be the top. Take the 6” circular object (I used a bowl) and position it in one of the top corners of your rectangle. Trace around the bowl with a pencil until you reach the center of the bib. Move the bowl to the other top corner and repeat. Your two curved lines will cross in the middle of the bib (shown with a dot).

Step 3. Make a mark in the center of the rectangle, 5” down from the top.
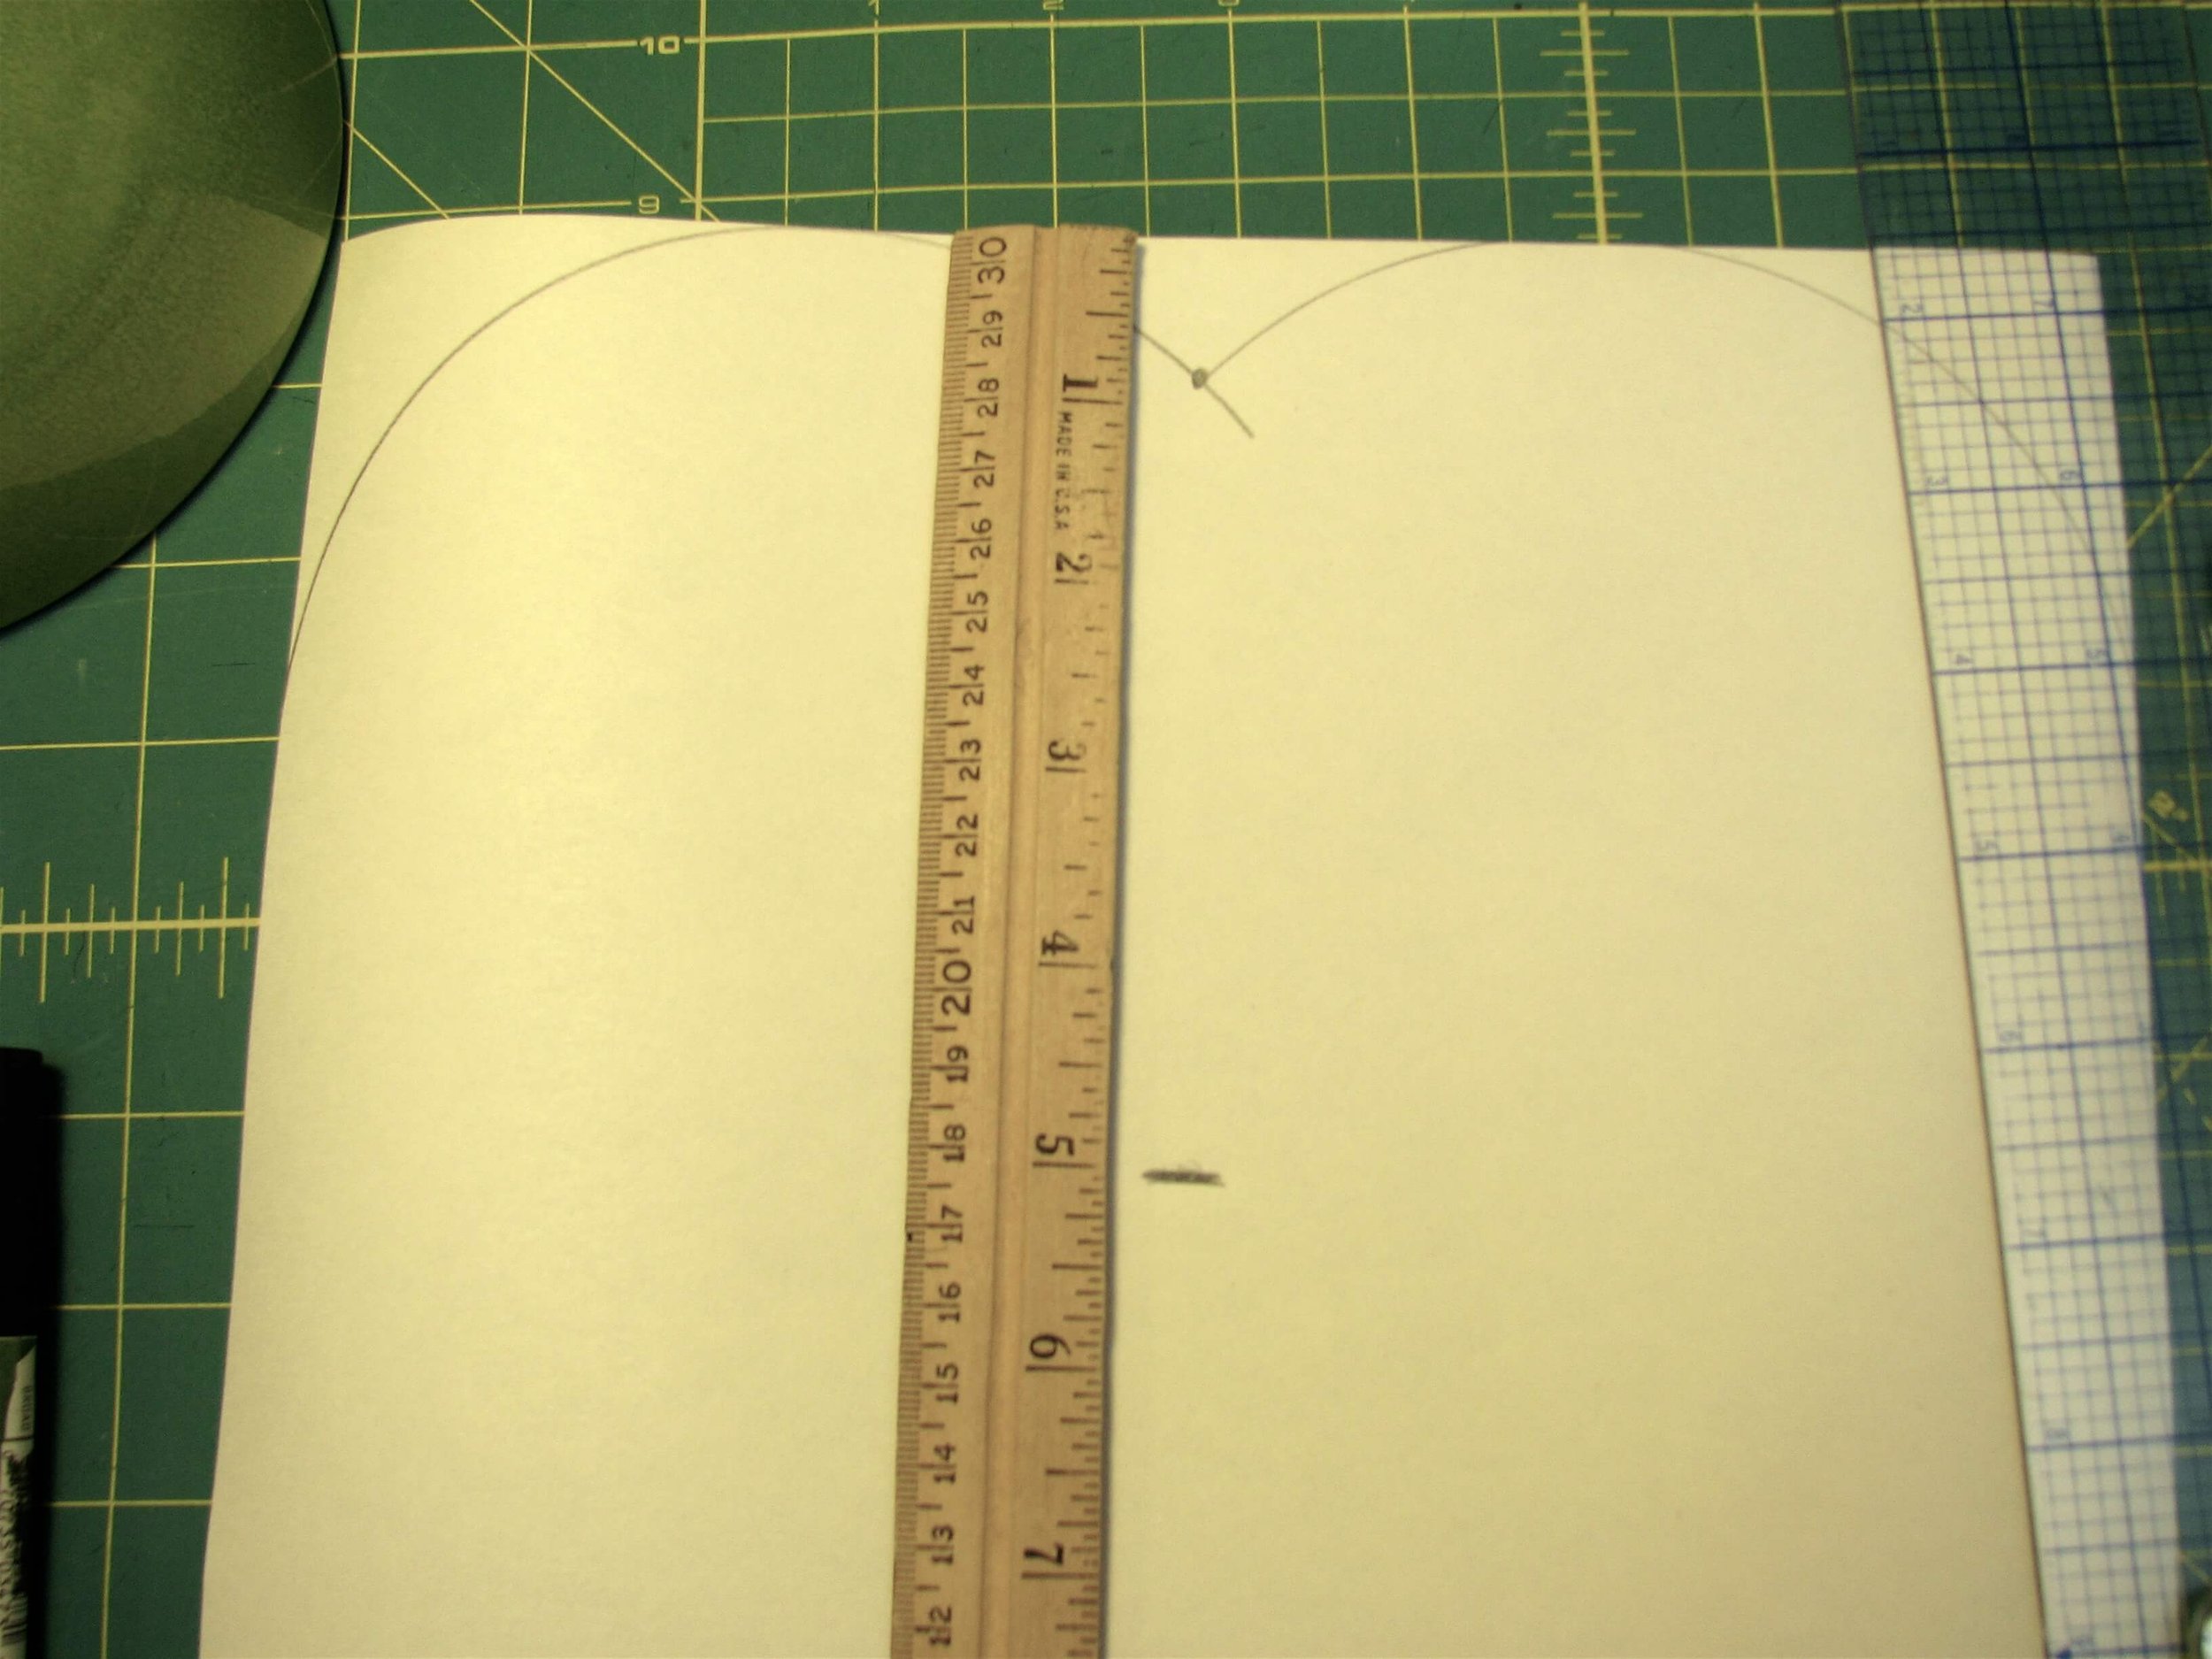
Step 4. Take the 3” circular object (I used a drinking glass) and center it so that the bottom edge of the circle lines up with the mark you made in the previous step.

Trace all the way around this circle.

Step 5. Using a marker, trace around the marks you just made as shown below. Trace the outside curve but just before you get to the dot, curve the line downward to make an S-curve that connects to the neck hole.
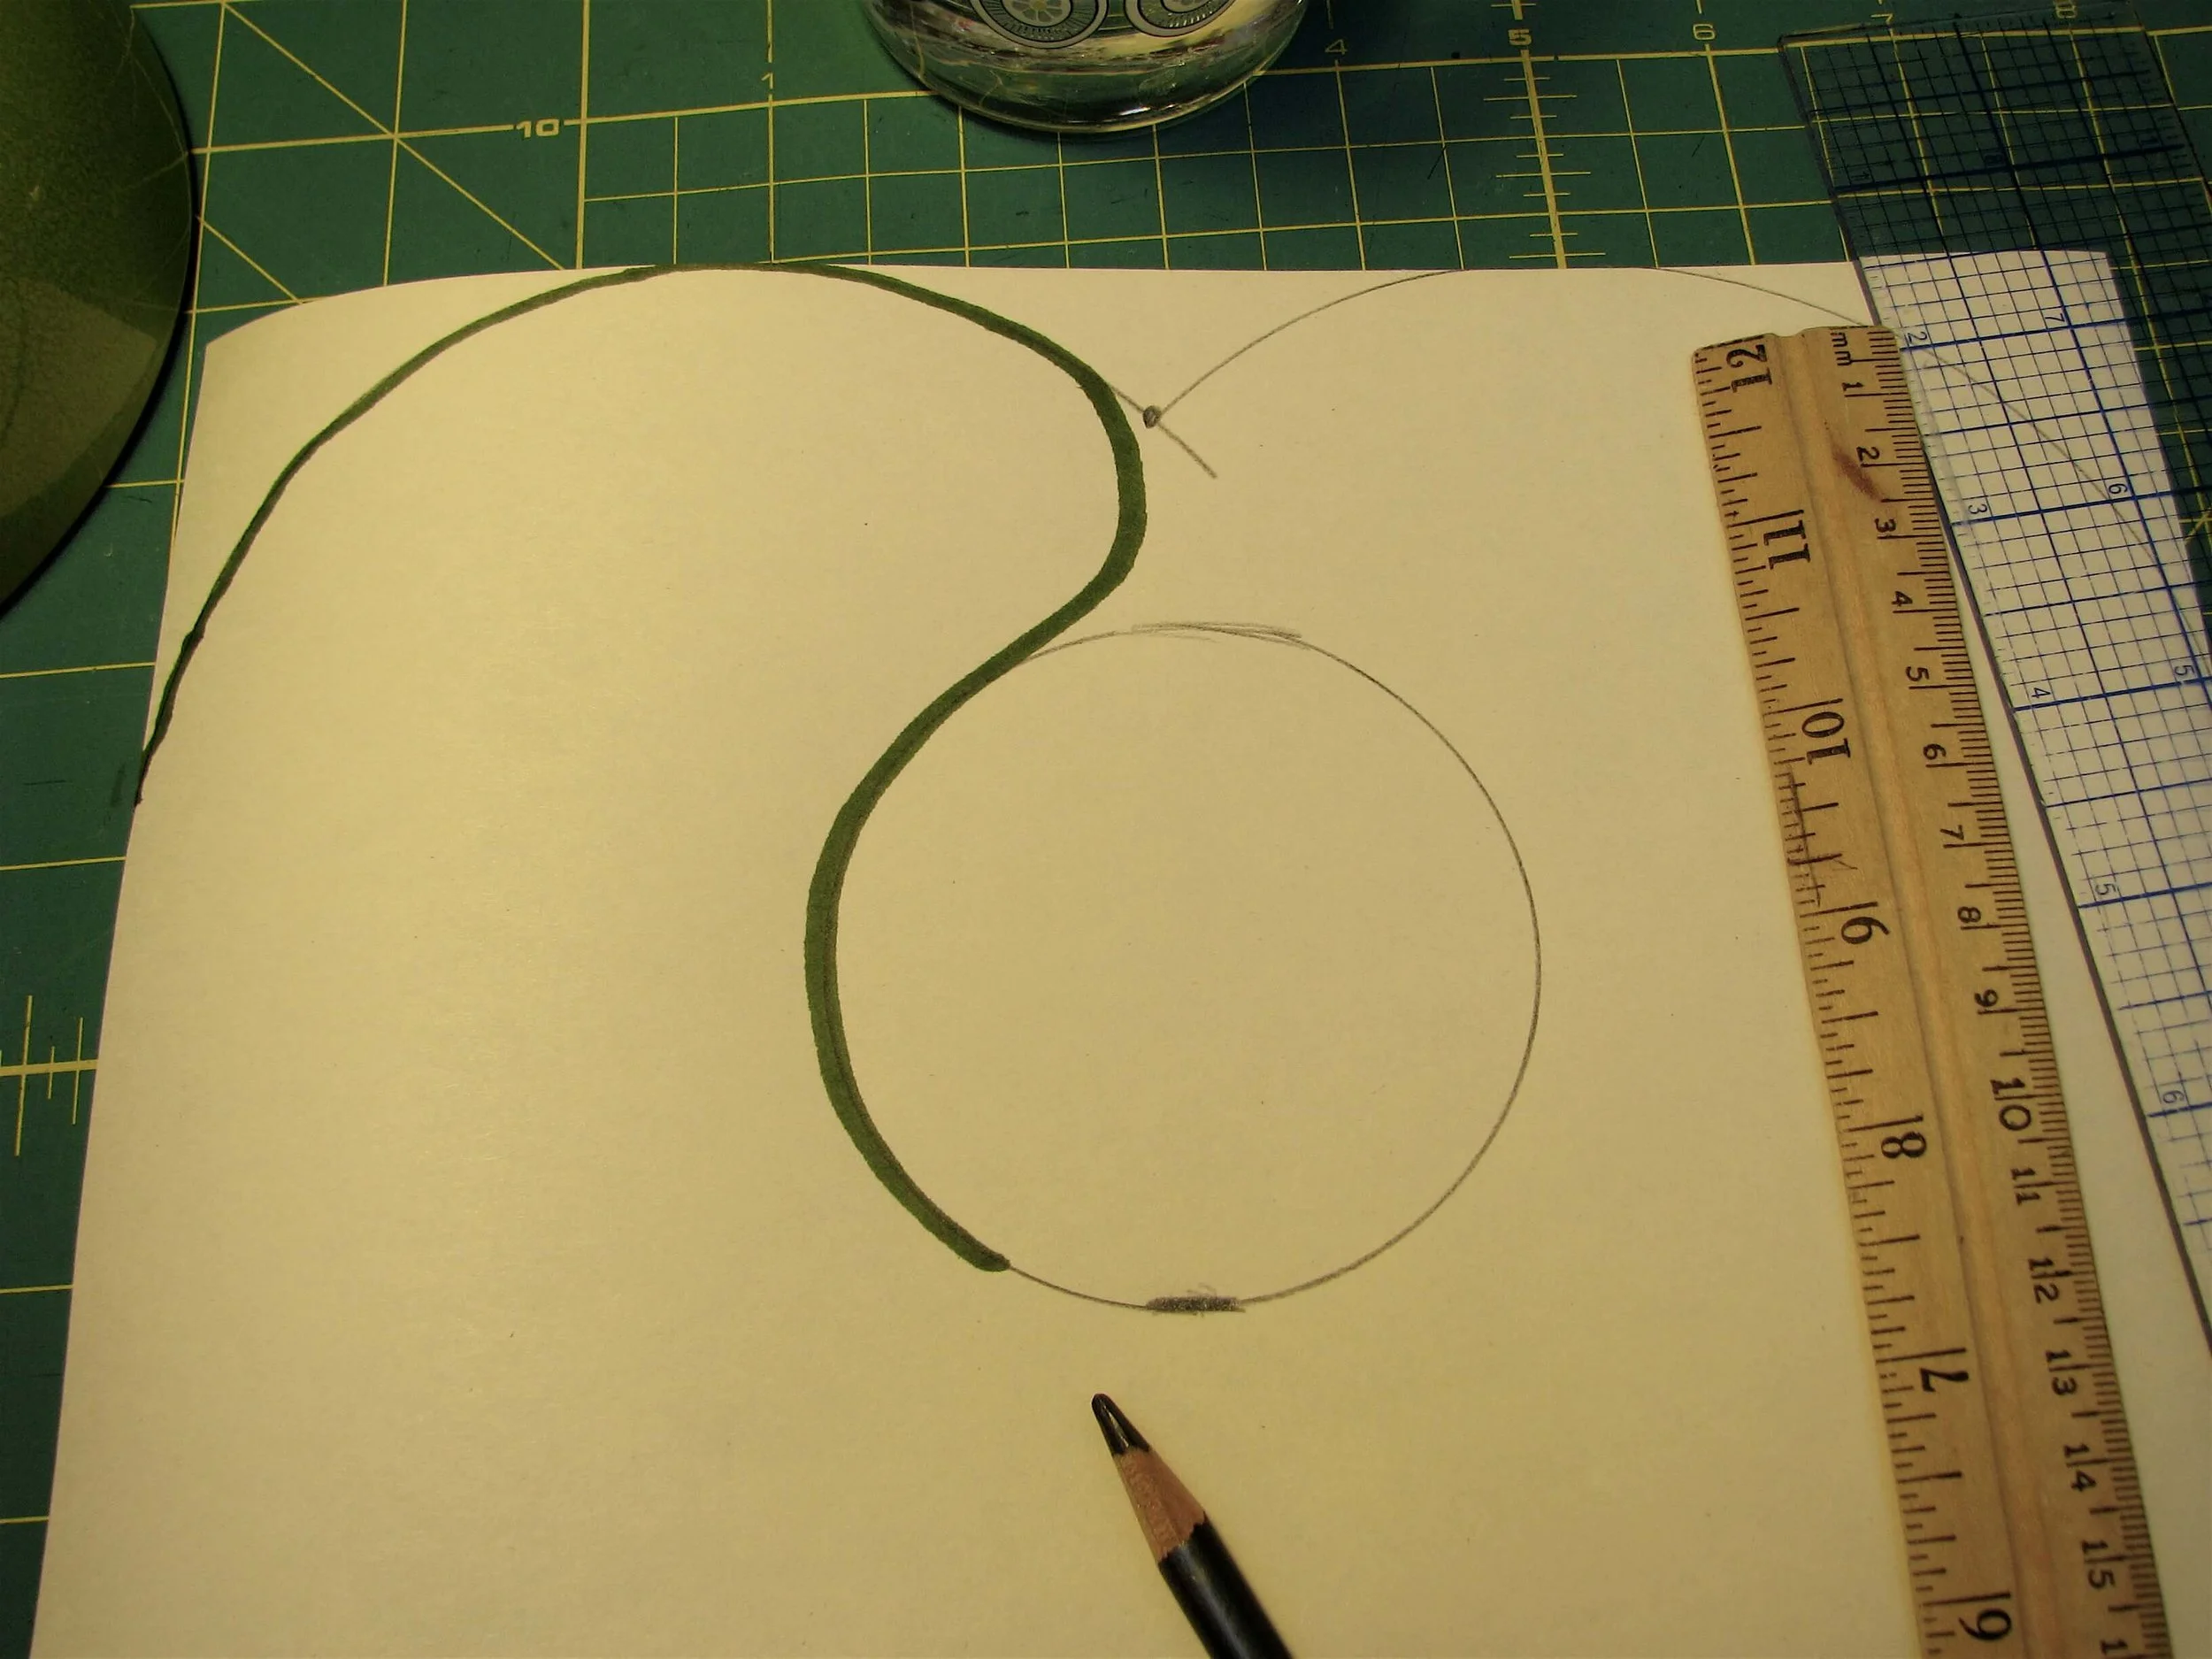
Repeat for the other side.

Step 6. Make a line across the width of the bib, 7” from the bottom of the rectangle. Add four dots to mark the placement of the snaps. The top dots are one inch below the line and one inch from each side. The dots on the bottom are one inch above the bottom and one inch from the each side.

Step 7. Cut out the pattern along the lines. Use a hole punch to punch out the snap position marks.
Cut out your bib:
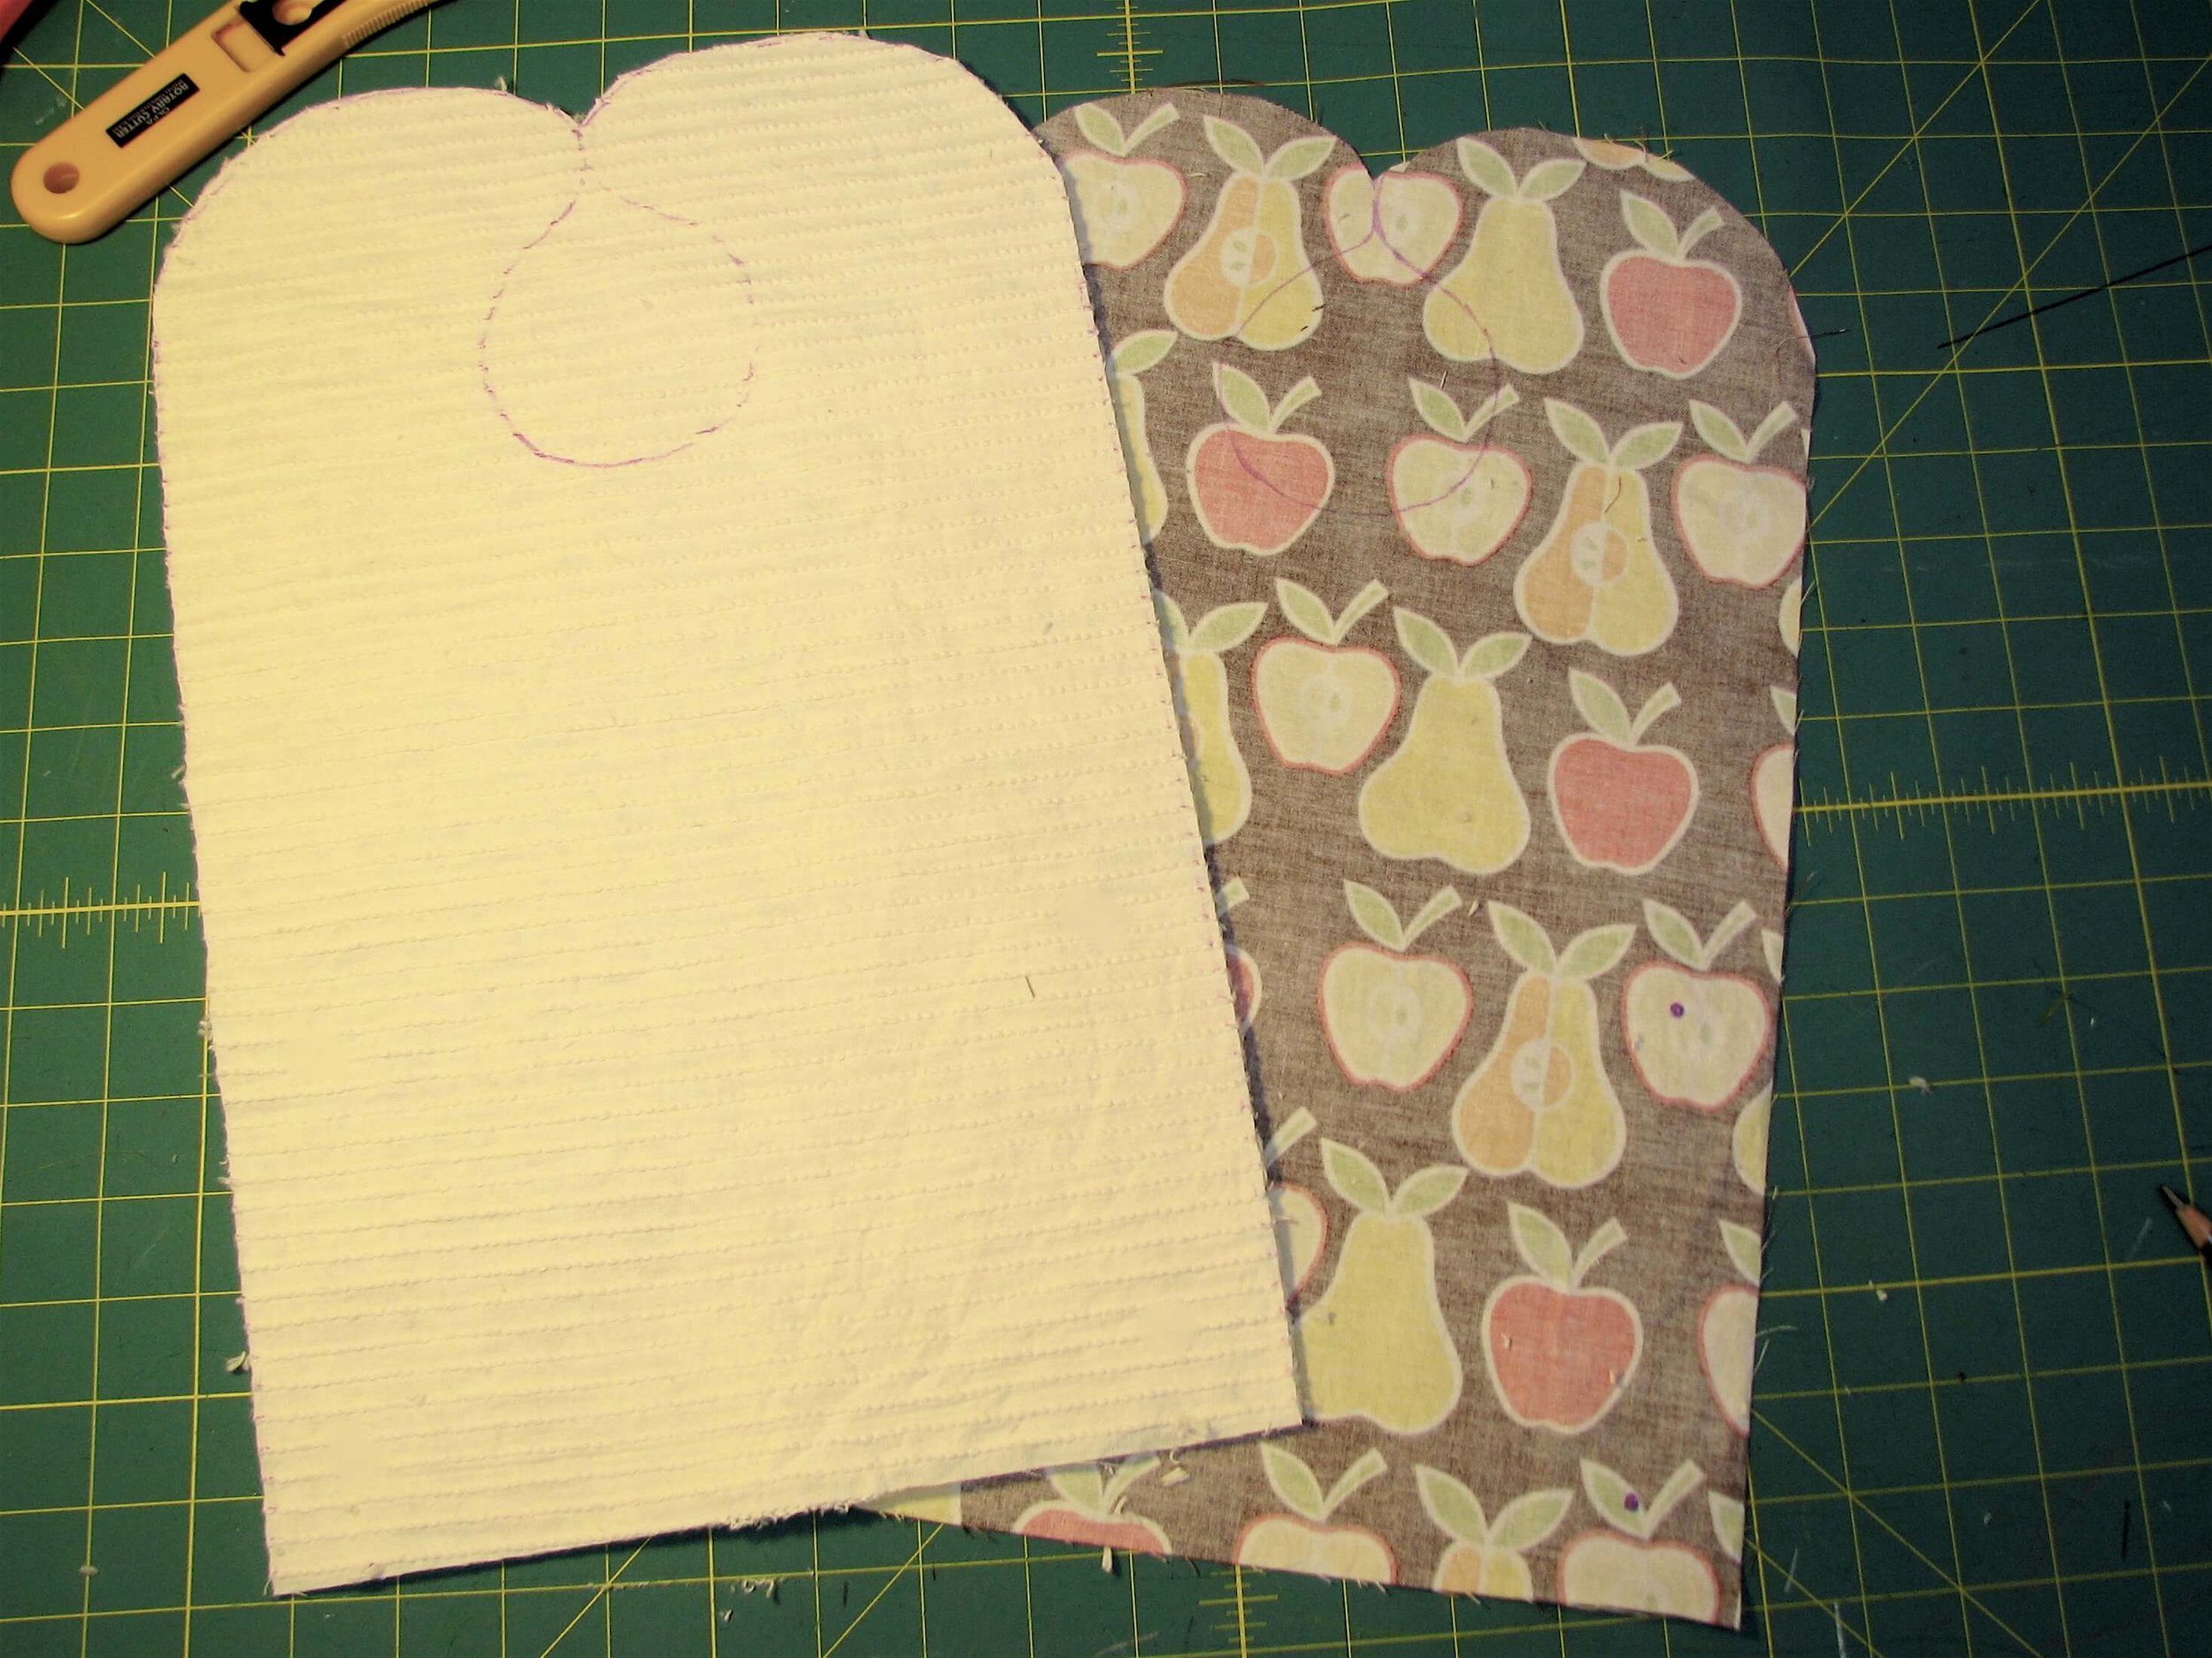
Step 8: Trace your pattern onto the cotton (front) and the chenille (back). Mark snap positions on the front piece. On both pieces, cut around the outside of pattern outline…

But (and this is very important) leave the neckhole uncut!
Sew snaps on:
Step 9. Sew snaps to the front of the bib at marks. Before sewing them on, be sure that the halves of each snap will match up properly when you fold the bottom of the bib up (If you look carefully you will notice I accidentally sewed the bottom left snap on backwards…don’t worry, I went back and fixed it).

Note: You could also use a snap press or velcro here instead of sewing snaps by hand if you prefer.

Sew front and back together:
Step 10. Pin front and back together with their right sides facing. Mark a 3” gap at the bottom center of the bib and leave this unpinned to remind you not to sew it shut.

Step 11. With the cotton side of the bib facing up, sew around the entire outside of the bib with a 1/2” seam allowance, leaving the 3” gap at the bottom unsewn between the marks. Do not let your seam allowance get too small around the neckhole or the neck will be too tight. It’s better to err on the side of making the neckline seam allowance too big rather than too little.
Step 12. Clip the neckline curves and the bottom corners. Trim seam allowances around the entire bib to 1/4.”

Step 13. Turn bib right side out through the hole at the bottom. Use a pencil or turning tool to push out the corners and top part of the bib.
Step 14. Press the entire bib, tucking the raw edges of the turning hole under so they don’t show.
Step 15. Sew around the outside of the bib 1/4″ away from the edge, stitching the turning hole shut as you sew across the bottom of the bib.

Add closure at neck:
Step 16. Sew a snap on to the top of the bib (you could also use velcro, a snap press or a button/buttonhole here), remembering that one half needs to go on the front side of the bib and the other on the back.

Snap up that bib on your baby and enjoy!