
How to print and assemble a PDF sewing pattern
how to print and assemble a PDF pattern
It still surprises me sometimes to discover that many people have never used (or even heard of) a PDF sewing pattern. Occasionally I’ll get an email from someone who has purchased one of my patterns and needs some assistance figuring out what on earth to do with it once they’ve bought it.
So here’s a step by step primer to help you get from purchasing to sewing with your PDF sewing pattern! Even if you’ve used a PDF pattern before, you might pick up some pointers in this post.
Step 1. Download and save your pattern file
After you purchase a PDF pattern, you’ll be directed to a download link, you’ll get an email with a download link, or both (this is how it works in my pattern shop). Click on the link to download your pattern file to your computer. Once you’ve downloaded the file, open it from your downloads folder and save it in a private folder where you can find it again later (usually this requires going to “File -> Save As” and selecting a different folder or creating a new folder).
The beauty of a PDF pattern is that you can use it over and over and it never gets worn out. But it is not the responsibility of the pattern maker to hang on to your pattern for you. And…it’s a bit of a hassle to have to email the designer later to ask for a resend, right? SO TAKE A SECOND AND SAVE YOUR FILE!
Once you save your file, you can bring the pattern file to a copy or print shop (drag it over to a USB drive, or upload it to the print shop’s website) to be printed on wide-format paper. If you go the copy shop route, be sure to read my post: how to use a copyshop file. If you are printing at home, continue!
Step 2. Print a test page
First, open your file in a PDF reader such as Adobe Acrobat or Preview for Mac. Do not print directly from the browser window after you download the file; instead, reopen the pattern in a PDF viewer before printing.
Then set your printer to print just the first page at 100% (or “No Scaling” or “None” for scaling). This step is OH SO CRITICAL. If you print the pattern at the wrong scale, your garment will not fit!
Here’s a screenshot of what the print preview (in Preview for Mac) looks like for me:

print-at-home PDF pattern
If the percentage is a number other than 100%, change it to 100%!
Step 3. Check Scale
My newer patterns have scale marks along every pattern piece page borders at 1-inch intervals (a few of the older ones have a scale box with labeled dimensions) so you can check the scale of each page. Place your ruler or use a cutting mat to check these marks. In the photo below, they line up nicely. Another way to check is along the length of the page: the long edge should be exactly 10″ or 254 cm.

Print and check scale
Step 4. Print the rest of the pattern
When you are absolutely sure the scale is right, choose the remaining pages indicated for the size and version of the pattern you’re making, and set the print dialog again to print at 100% (I always forget the second time!) and print the rest of the pattern pages.
Step 5. Trim Edges
Now use scissors or a paper trimmer to remove the print margins on the TOP and LEFT edges of each page.

Beatrixalong Day 1
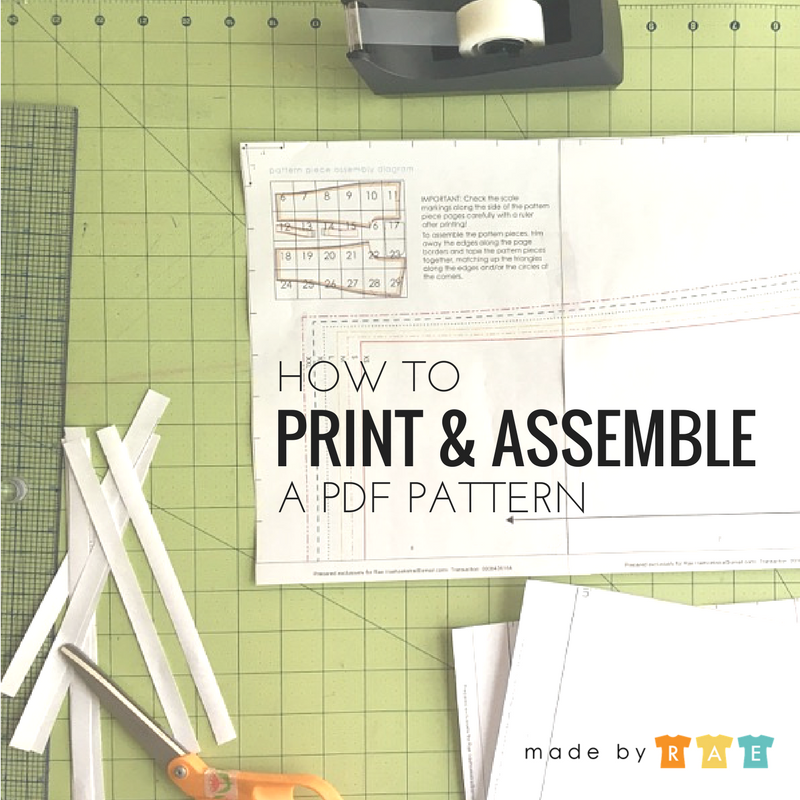
Step 6. Assemble the pattern
Place the pages together as shown in the pattern assembly diagram so that the circles in the corners (or in some patterns, the black triangles) line up nicely. If you go from left to right and top to bottom, like you’re reading a book, each page you set down will cover up the print margin from the previous page.

Beatrixalong Day 1
Step 7. Tape it together
Finally, tape it all together, making sure the edges stay straight! For very large patterns, I often tape each row together first, then tape the rows together to assemble the entire pattern.

Beatrixalong Day 1
Now your pattern is ready to trace! I always recommend tracing a pattern rather than cutting into it. Take a look at my How to trace a pattern post if you need a quick how-to!
This post is part of my Building a Handmade Wardrobe Series, a set of posts to help you get from start to finish with one of my patterns.