
How to sew a Hong Kong (bias-bound) seam finish
For this tutorial, I used the Emerald Sewing Pattern. You can find the pattern in my shop!
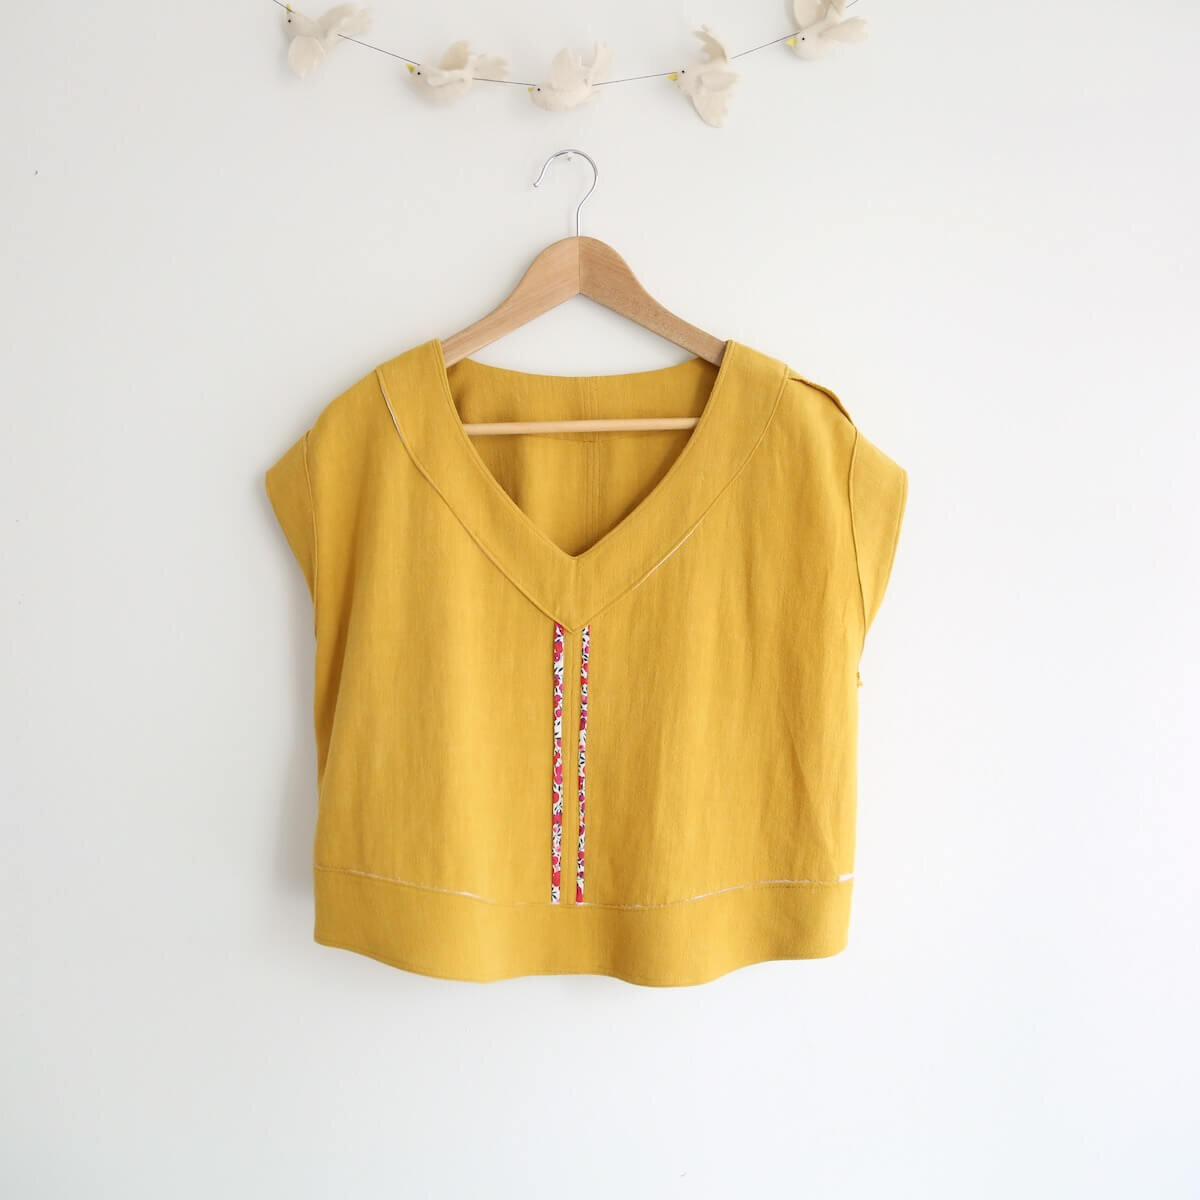
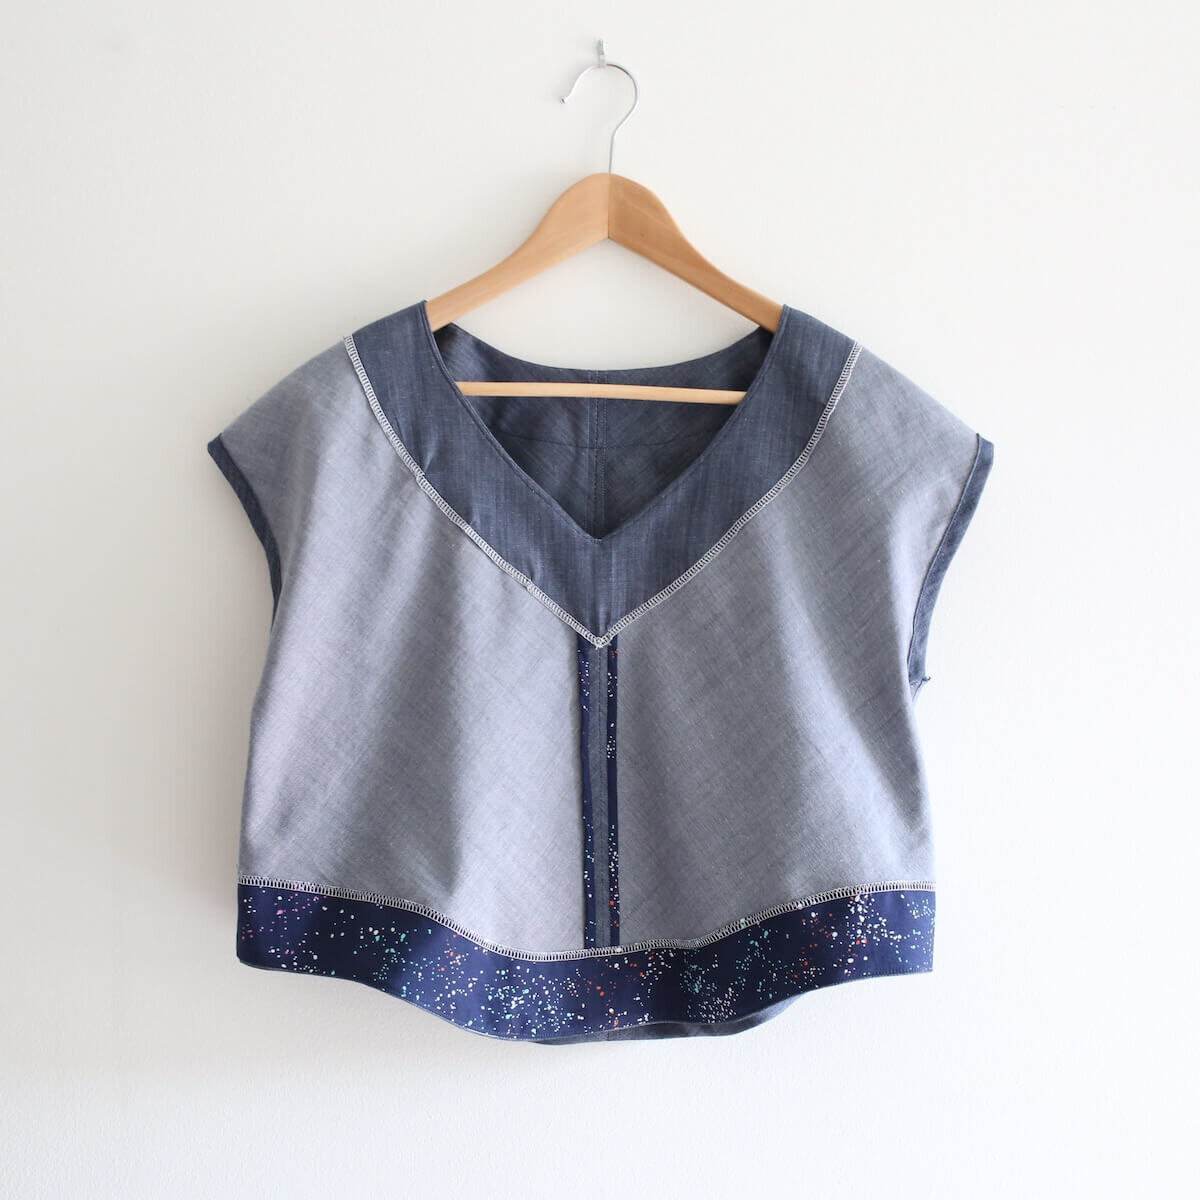
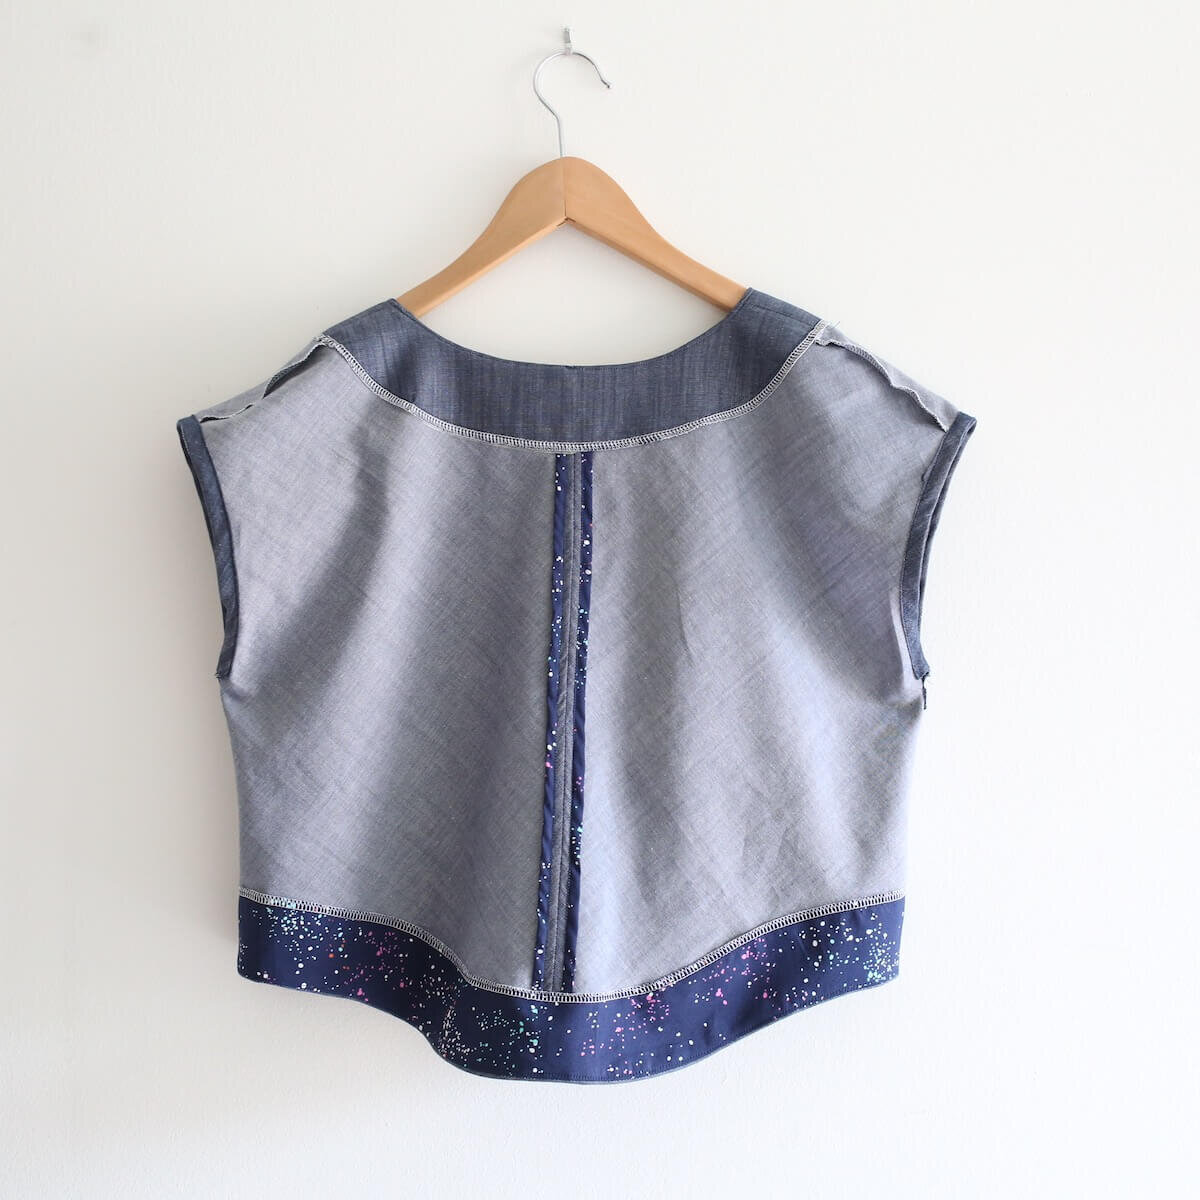
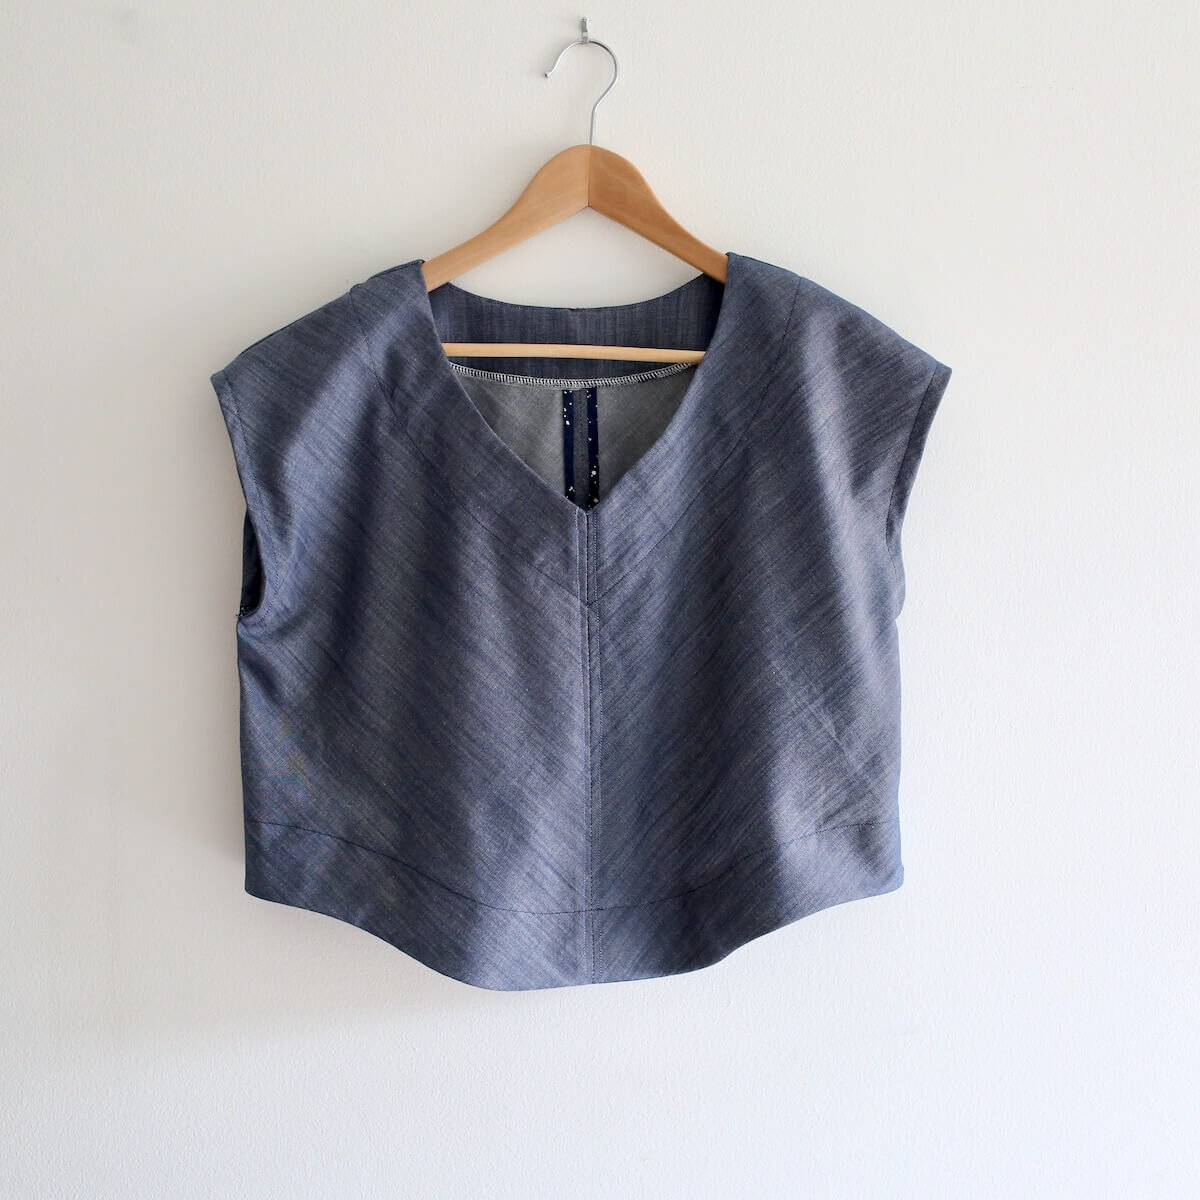
This is my favorite way to finish both sides of the center front and back seam of the (just released!) Emerald pattern; it uses bias strips to bind the raw edges of the seam allowances on either side of a seam. It looks beautiful and adds a little special detail to both the inside and the outside of the garment.
I first learned this finishing technique from my friend Meg of Sew Liberated when I took her Matcha workshop back in 2017 at Squam. In these photos, you can see my inside-out yellow Emerald top, with bias strips of Liberty lawn adding a fun surprise to the center seam (PS. I used my Super Fun Facings Trick for the facings).
This seam finish is nearly identical to a Hong Kong seam finish, but differs in that the seam allowances are sewn to the garment at the end rather than with the seam allowances left free, which I like a lot. For a true — and even more in-depth — Hong Kong seam finish tutorial, check out this fantastic Hong Kong seam finish tutorial from Kennis on the Itch to Stitch blog!
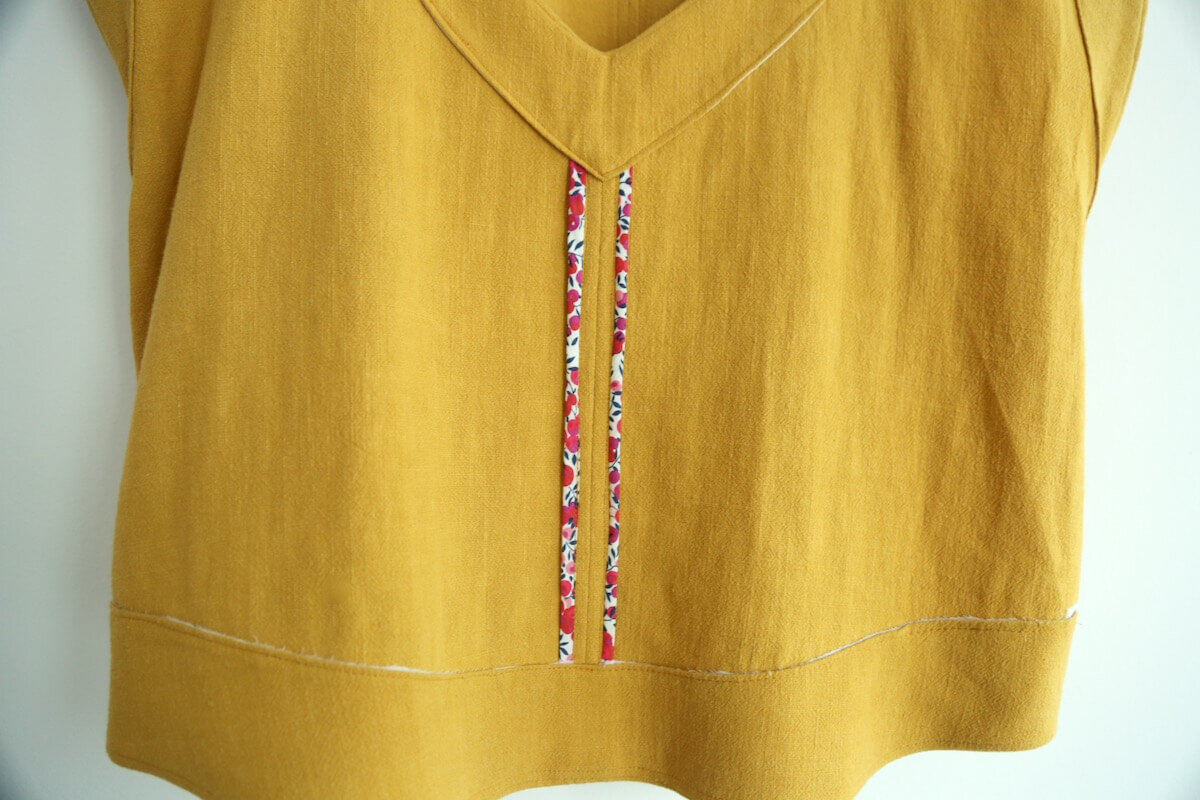
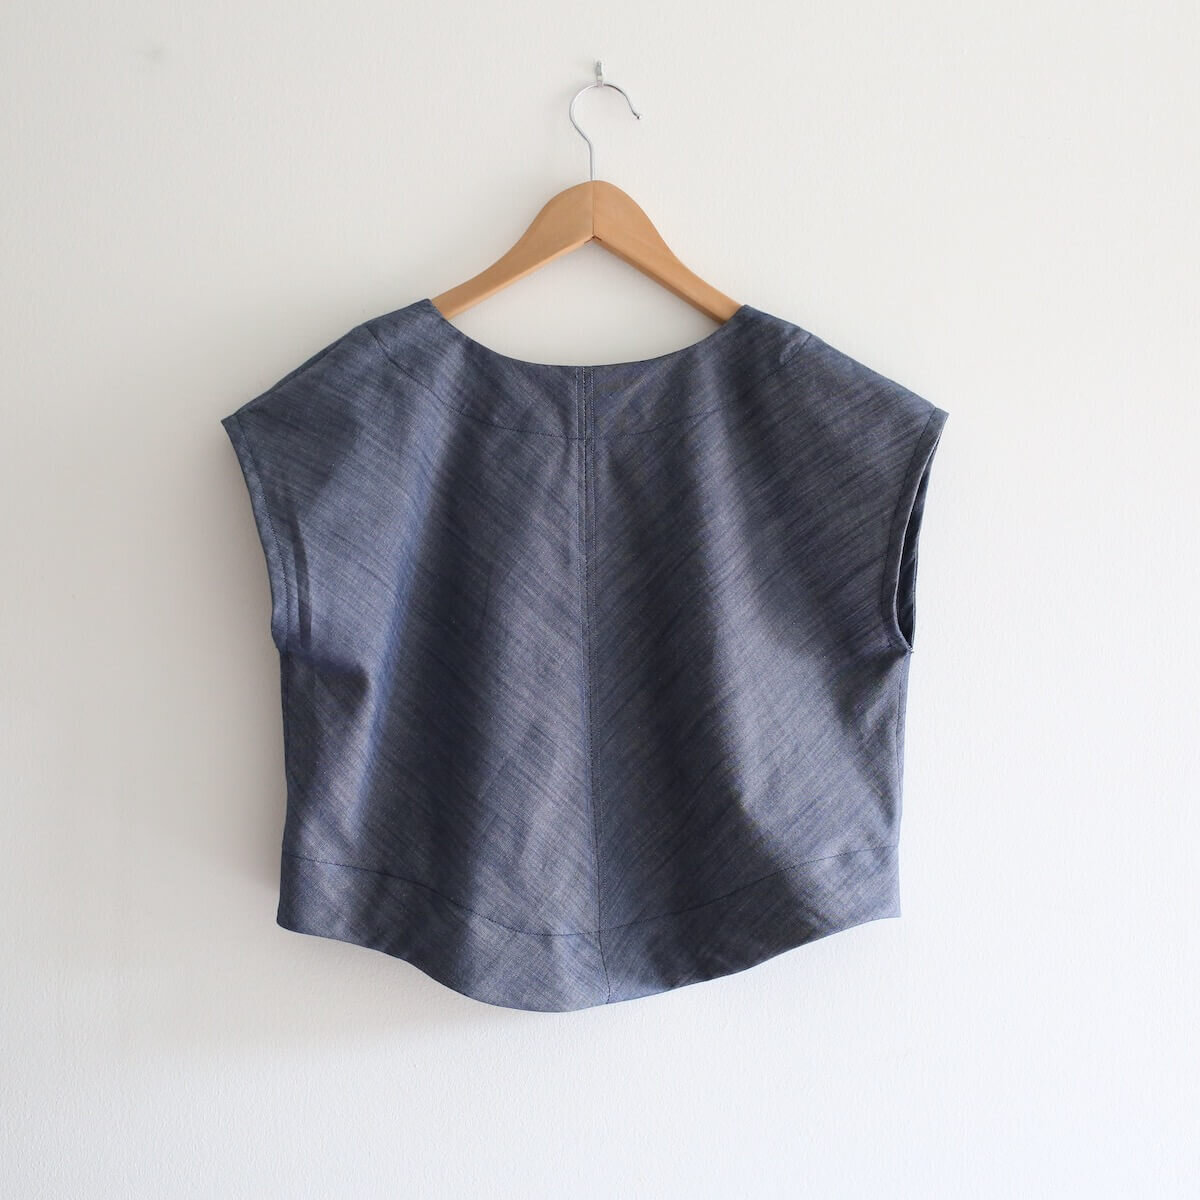
This finish also creates two lines of stitches on either side of the seam that are visible on the outside of the garment, which to me are a lovely visual detail (and again: if you’d prefer to have an invisible finish, check out the Itch to Stitch tutorial instead)!
For this tutorial, you first will need to make some 1”- or 1.25”-wide bias binding — enough length to match the length of both of the center seams x 2, between 2-3 yards. (See also: Tutorial: How to Make Bias Binding)
Before you begin, sew the seam you want to finish with this technique, and press it open. If you’re sewing Emerald, sew your garment through Step 3 (sewing center seams), and then follow these steps.
Note: This tutorial requires at least a 1/2” seam allowance. The seam allowance shown in this tutorial is 1/2” wide.
STEP 1. CUT BIAS STRIPS
Cut two bias strips for the front, and two for the back. The lengths should be slightly longer than the lengths of the seam you want to finish.

STEP 2. ATTACH BIAS STRIP TO SEAM ALLOWANCE
Pin (or clip) one of the bias strips to ONE of the two seam allowances on the seam you want to start with. Right sides should be together, and make sure to only pin through TWO LAYERS (bias, seam allowance), not through the garment.

Keeping the garment out of the way of the needle (I find it helps to place the garment to the left, while keeping your seam allowance / bias strip to the right), sew the bias strip to that seam allowance with a 1/4” seam. Again, you should be sewing through just TWO LAYERS of fabric.
STEP 3. PRESS BIAS STRIP AWAY FROM SEAM ALLOWANCE
(Optional) If I’m using 1” bias binding, I like to trim the seam allowance down to 1/8.” I find that this makes it easier to fold it under in the next step.
Use an iron to press the seam open again, pressing the bias binding away from the seam in the same direction as the seam allowance it’s sewn to. You should now see the right side of the bias binding, along with the remaining seam allowance.
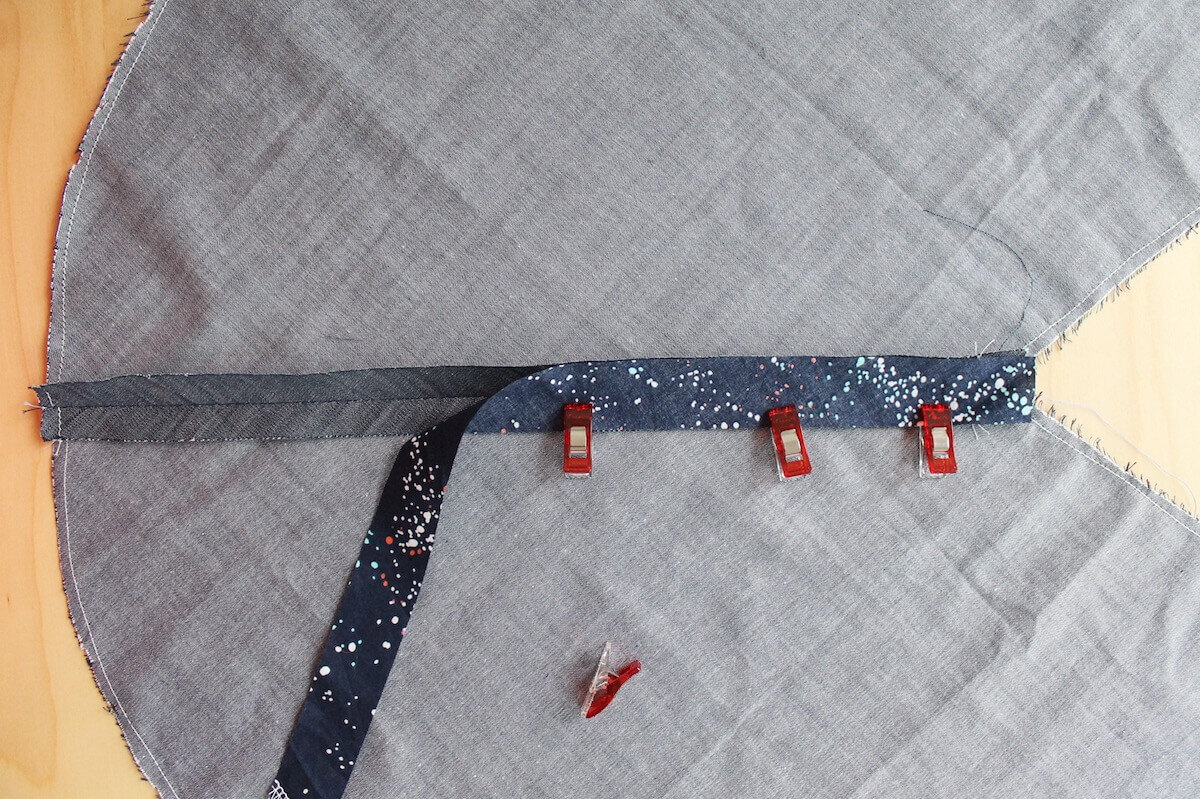
STEP 4. TUck BIAS STRIP UNDER SEAM ALLOWANCE AND STITCH DOWN
In this step, the raw edge of the bias binding is tucked under the seam allowance it is attached to, pinned in place, and stitched down.
Start by folding the edge of the bias binding underneath the seam allowance, so that its edge nestles right up against the center seam.
Next, press and then pin along the length of the bias seam, through the layers of the seam allowance and the garment. Make sure to secure the bias strip underneath your seam allowance as you pin.
Next, stitch down the length of the seam, keeping the needle “in the ditch” between the seam allowance and the bias strip.

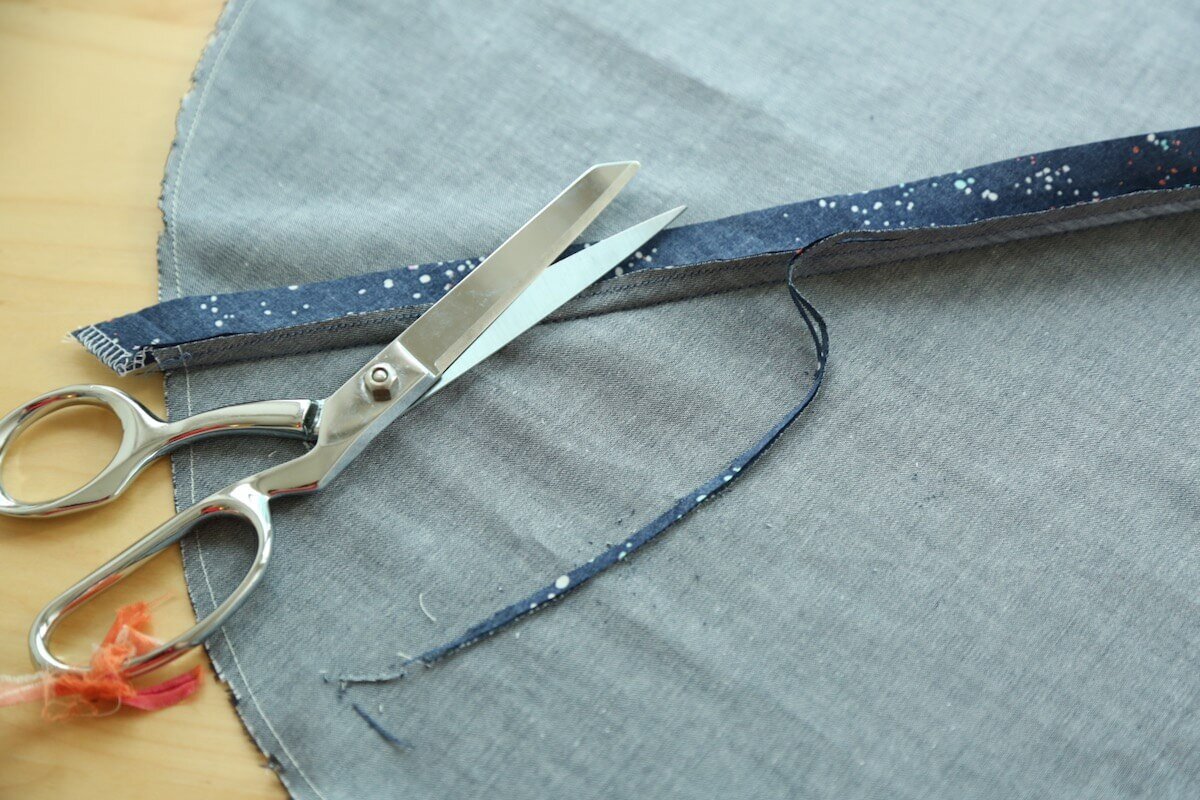
STEP 5. TRIM BIAS TO EDGE OF GARMENT
Finally, trim the excess bias strip along the edges of the garment.
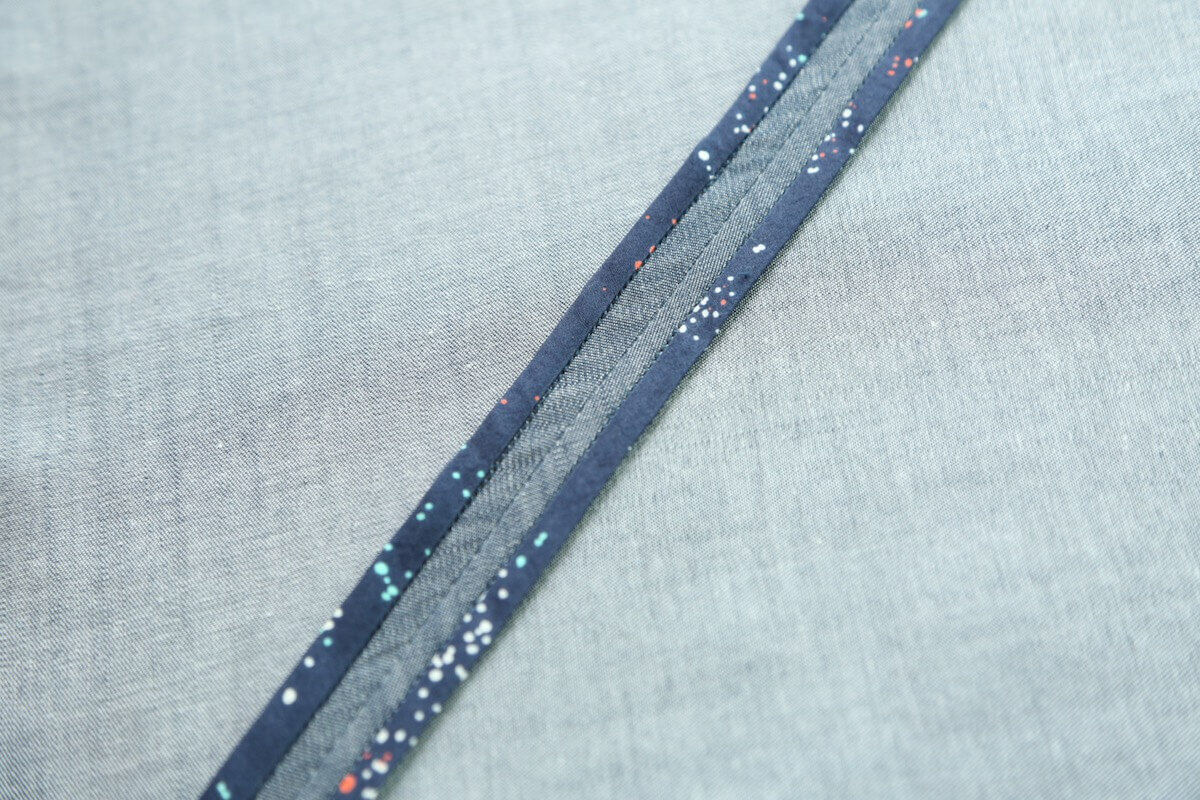
When you’re finished, you’ll have a nearly invisible seam on the inside of the garment, and a line of visible stitches next to the seam on the outside of the garment. It should look like this:
STEP 6. REPEAT FOR THE OTHER SEAM ALLOWANCE
It’s worth noting that since it’s best to always keep the bias strip on top when sewing it to the seam allowance, you might find it easier to sew the other side of the seam from bottom to top, rather than from top to bottom. However, I would still recommend sewing the final line of stitches in the same direction as the first side, to avoid causing any warping around the seam.
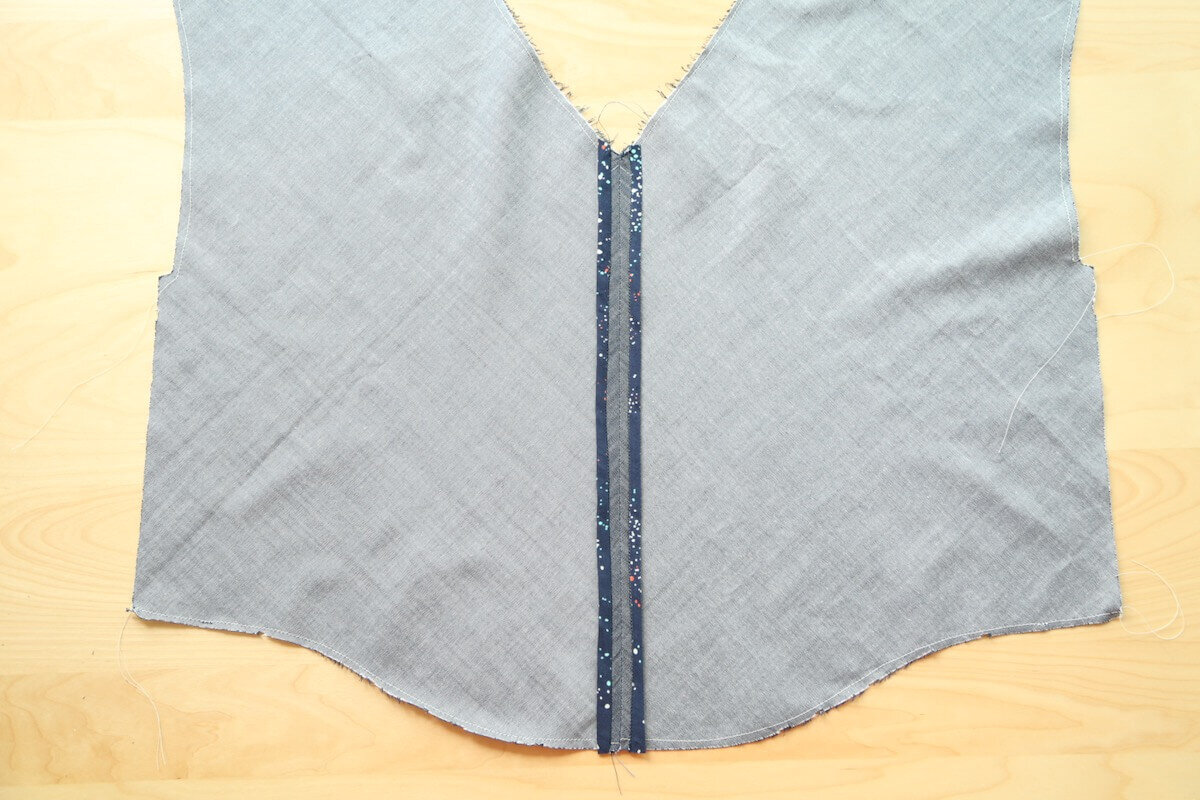
I repeated this finish for both the front and back center seams on my Emerald tops, which looked like this when I was completely finished:
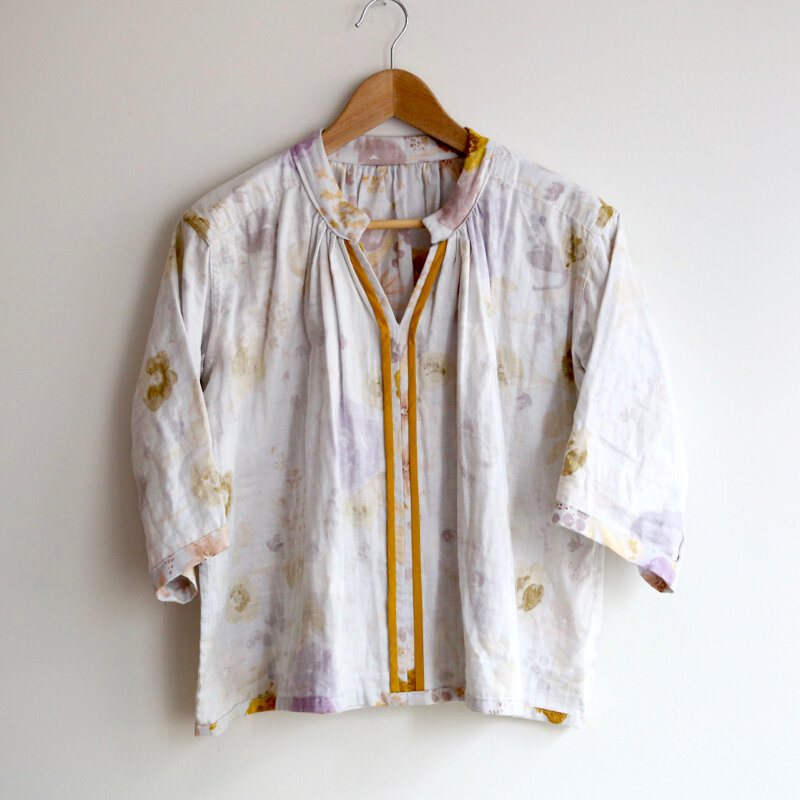
Voila! Bias-bound seams!! Here’s another example of this seam finish in action, from the Matcha top I made back in 2017 at Meg’s workshop:
Looking for the Emerald pattern? You can find it in my shop:
You might also want to check out my tutorial page for more tutorials like this one.
PS. If you liked this tutorial, you might also like my Super Seams tutorial for some other handy seam finishes.