
Brushstrokes Emerald maxi dress


Months before Emerald was released, I started dreaming about a reversible, on-grain maxi version that I could wear as a swim coverup this summer. I love to play around with and modify patterns beyond their original design (and I love it when you do too); it’s just one of the absolute best things about sewing. Sometimes my ideas flop between concept and reality, but other times they’re better than I expected.

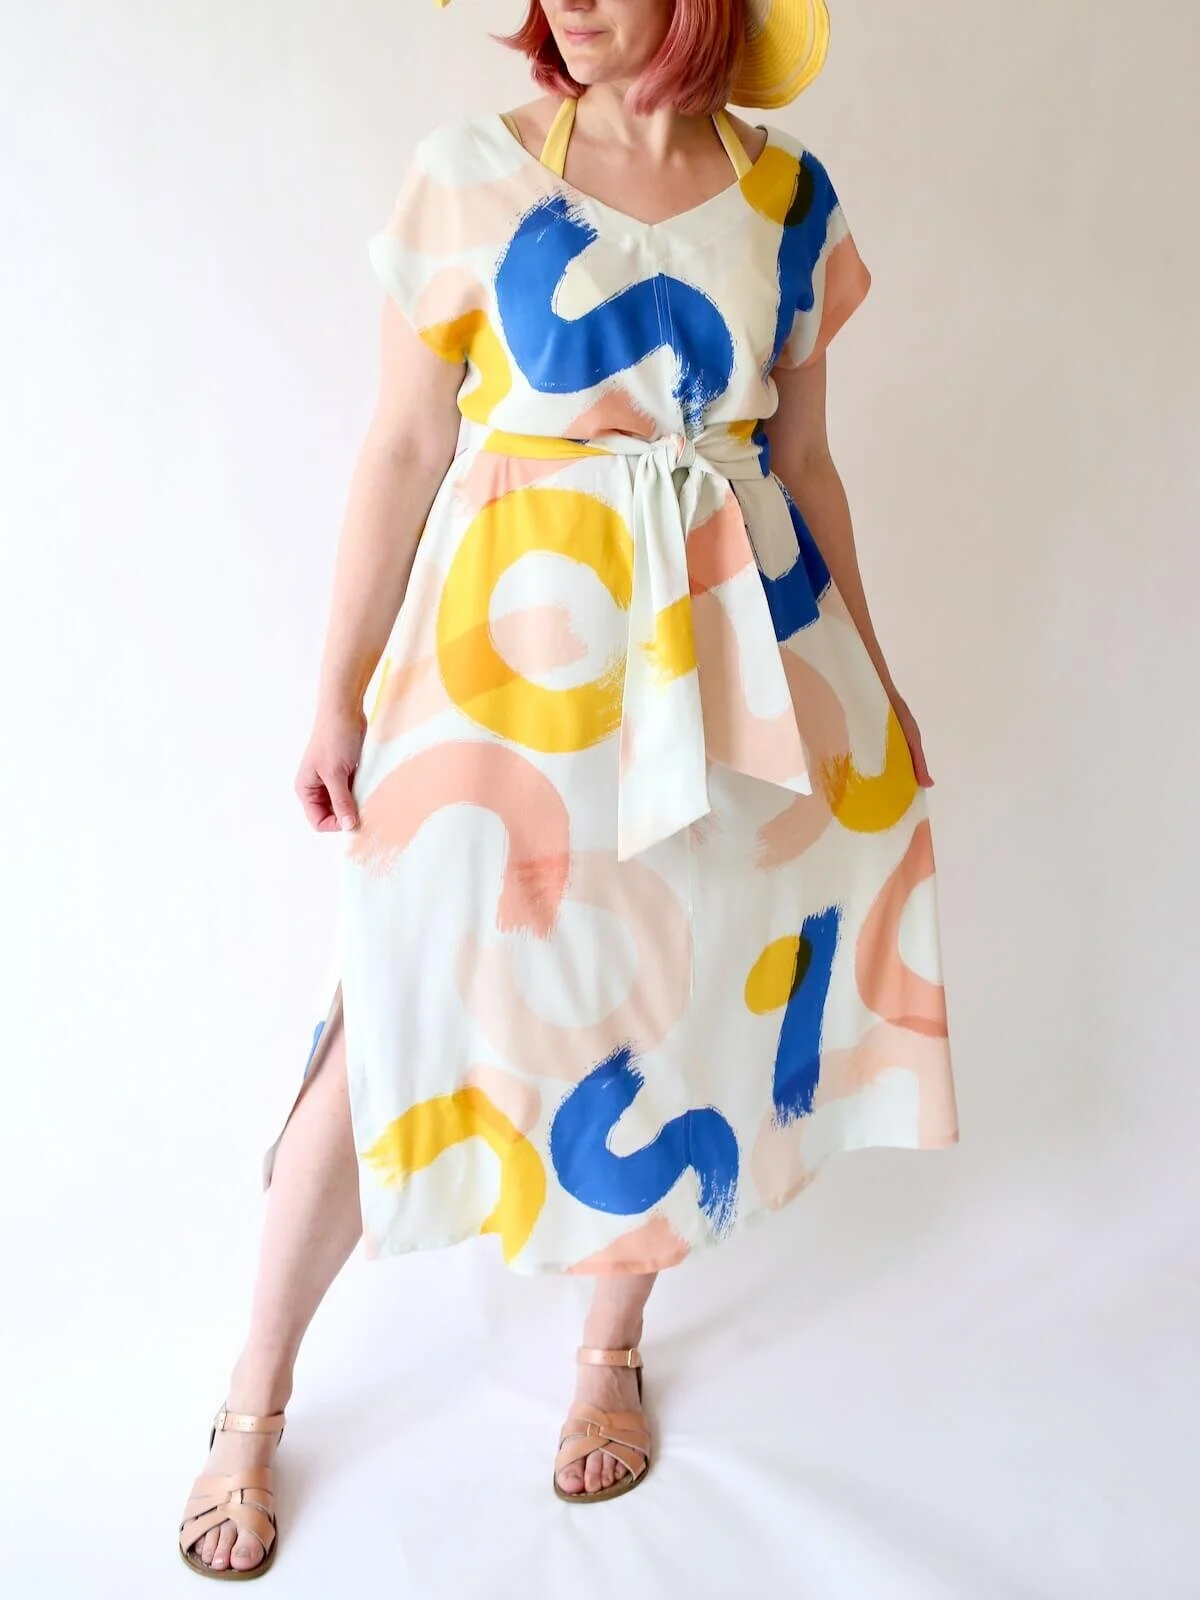
I adore the drama of having the V-neck in the back, and the brushstroke design (by Rashida Coleman Hale for Ruby Star Society - purchased at Fancy Tiger online) is a total stunner.

The design is printed on a lightweight flow-y rayon fabric, which is a bit on the sheer side. Rashida used to design for Cotton+Steel, and the rayons C+S produced were thicker/heavier, in case you’ve sewn with those before and need a reference point. Now that they’ve moved over to Ruby Star, the rayon substrate is lighter; similar to the weight that Robert Kaufman uses for their “rayon lawn” substrate — fairly thin and light, very flow-y.


I had barely enough fabric left over to create a sash. Even then, it was not quite enough; it’s 10” shorter than it should be (normally you could tie it into a bow). I also added a bit of interfacing to the center of the sash so that it would hold its shape around the waist.

HOW TO MAKE THIS VERSION
Here are some notes on how I modified the Emerald pattern so that you can make a fun summer maxi Emerald of your own!
MAXI LENGHTH & HEM CHANGES:
- lengthened hem - extended the side seams by 15", extended the center edges by 11"
- smoothed out hem (made it less curved) and hemmed the dress by folding up and stitching rather than using hem facings.
DESIGN CHANGES - ADDED SLIT AND BACK V-NECK:
- reversible - used only the front pattern piece for the main panels, both front and back
- added a side slit (added extra seam allowance to the side seams, so that I could add a strip of interfacing under the SA at the slits, and then fold under and stitch down the slit edges.
ON GRAIN, ON FOLD:
- cut it out on-grain - I made this choice because with a flowy lightweight fabric such as a rayon challis, I didn’t need the extra added bias stretch and in fact it would have made it much more difficult to cut and sew. I’m not sure I a bias-cut maxi would be a great idea, not only because of the difficulty cutting such a long piece of fabric on the bias, but also since standard fabric widths limit how long you can make something that is bias-cut. Just be sure check the finished bust and hip measurements first to make sure you’ll have enough ease when it’s cut on-grain in your size.
- cut it out on the fold - again, I did this since it was rayon, and cutting on the fold eliminates the need to finish the center seam - note that I didn't skip sewing the center seam, so I included the center seam allowances when cutting along the fold.
Here’s a rough cutting diagram of how the two fronts look, laid on grain, and on the fold, with the red line indicating where I added length:

ARMHOLE CHANGES:
Added 0.75" [2 cm] to the armhole edges
- WHY: So I could skip the sleeve facings. Instead, I folded under and stitched the armholes to finish them rather than using the facings.
- HOW: Add 0.75" [2 cm] extra along the edge of the entire armhole portion of the pattern, making sure that you mirror the angle at the top and bottom of the armhole so that you'll be able to fold it entirely in without bunching. When sewing the shoulders together, put your needle down and pivot 1" from the edge of the fabric to create a clean angle along the fold line.Lowered the armhole by 1"
- WHY: To create a more open/airy armhole. I was going for pool-side suit cover up with this dress so I wasn't concerned with the armhole being too low.
- HOW: After tracing the pattern as-is onto my fabric, I slid the pattern down 1" vertically, and retraced the bottom of the armhole to be lower.
YARDAGE NOTE
To my surprise, this version didn’t require more yardage, because I cut it on-grain, and omitted the hem and sleeve facings, which gives you back enough yardage to add the length without needing more fabric. However, if you wanted to use all of the facings, be aware that this would take additional yardage than the chart indicates.


Emerald is available as a PDF pattern, in both print at home and copyshop formats, with layers, in our full size range (hip range 35”-59”).
Looking for the Emerald pattern? You can find it in my shop:
If you make this dress, please tag me (@madebyrae) so I can see what you've made with this pattern!!