
Spring Ruffle Top Tutorial

Hello!
Today I’m reposting a third (and final) tutorial that was originally posted on Sew Mama Sew. SMS was one of the OG sewing blogs from back in the day which used to host regular sewing tutorials of all sorts and at one point an online shop, but has since shut down. Many of you have emailed to ask where this tutorial went!!
I also recently reposted the Crayon Box Quilt Tutorial and the Fold-up-and-Snap Bib Tutorial if you’re interested. This one was by far the most popular of the three, as it was also part of the Spring Top Sewalong event that I used to host in the spring.
One caveat: this is a free tutorial, and as such it was never tested on a variety of body sizes and shapes. A piece of feedback I received over the years was that it maybe isn’t the best design for those with fuller chests. If you do make it, I recommend flowy fabrics for best results!
xo, Rae
This spring top is perfect for layering under cardigans in cool spring weather and can be worn right into summer! Choose two contrasting fabrics for extra pizzazz. The instructions here can be tailored to any size.

Step 1: Take your chest and hip measurements
Measure around your chest, with the measuring tape under your armpits and above your bustline (this is NOT the fullest part of your chest).

Round this number to the nearest inch, add 1” for ease, divide by two, then add 1” for seam allowances.
Example: My chest measurement is just over 35 inches. So:
35” + 1” (ease) = 36” / 2 = 18” + 1” (seam allowances) = 19” (we will call this “X”)
Here is the formula for you to use:
___ + 1” = ___ / 2 = ___ + 1” = ___ inches
Next measure around your hips at their fullest point. Divide this number by 2 and add 1” for seam allowances.
Example: My hip measurement is 41 inches. So:
41” / 2 = 20.5” + 1” (seam allowances) = 21.5” (we will call this “Y”)
Step 2: Cut your pieces out
For the chest and straps: Cut 4 rectangles, each 5” by X.” Note: most quilting cotton fabric is stretchier in one direction than the other (pull lengthwise and widthwise on your fabric to test). Since this top is a pullover, make sure you cut the long edge of each rectangle in the direction that stretches the most. Two of the rectangles will be for the chest band (front and back), and two of these will be for the straps (only two are shown in diagram).

For the pockets: Cut 2 rectangles, each 6” x 12” (not pictured).
For the ruffles: Cut 2 rectangles, each 3” x 22”.

For the body of the shirt: Cut 2 trapezoids as shown in diagram.
For the width of the top, take X and add 6” for pleats/gathers. For the bottom width, take Y and add 6” for ease (you don’t want it to be skintight at your hips). For height: 20” is more than enough height for a person who wears a size S, M, or L. In fact this will probably be too long (it’s actually more of a tunic length at that point), but remember you can always shorten but it’s much harder to lengthen. If you are unsure, you may want to measure vertically from your bustline to hipline, add a few inches for seam allowance and go from there.
For example: My trapezoid was 19 + 6 = 25 inches along the top, 20.5 + 6 = 27 inches along the bottom (I rounded up to the nearest inch), and 20” tall.


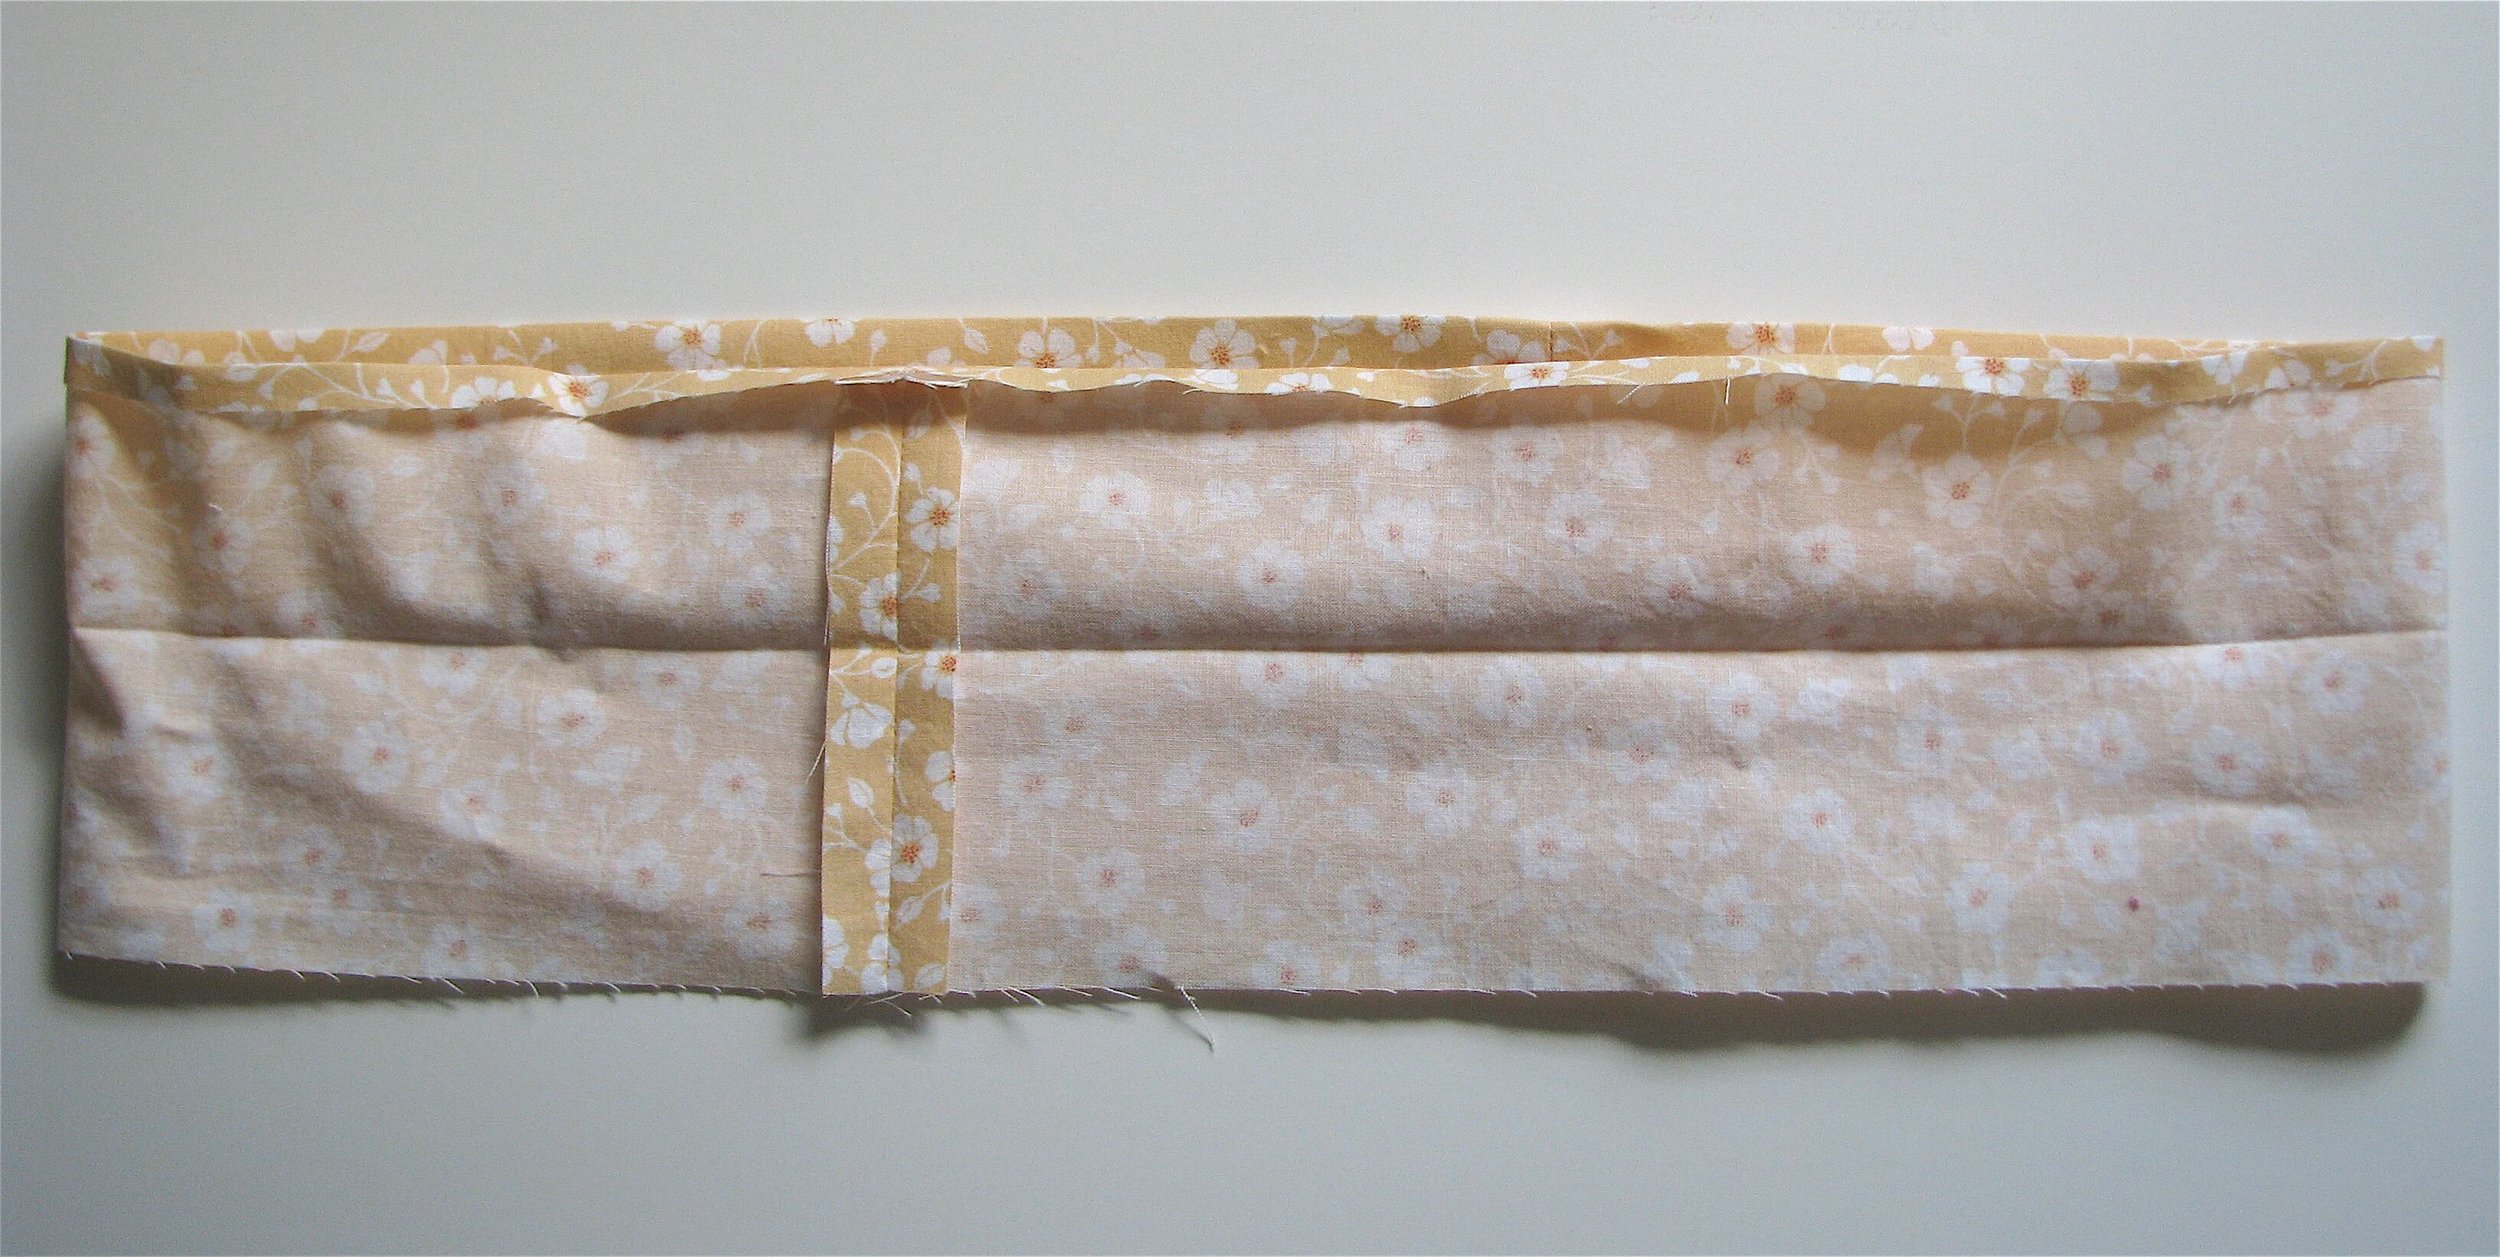
Step 3: Sew chest band and mark strap positions
Take the two chest band rectangles and place right sides together. Sew together with ½” seam along each side. Press seams open, fold in half along the length of the loop and press. Press under ¼” along one edge of the loop; this will be the inside of the chest .
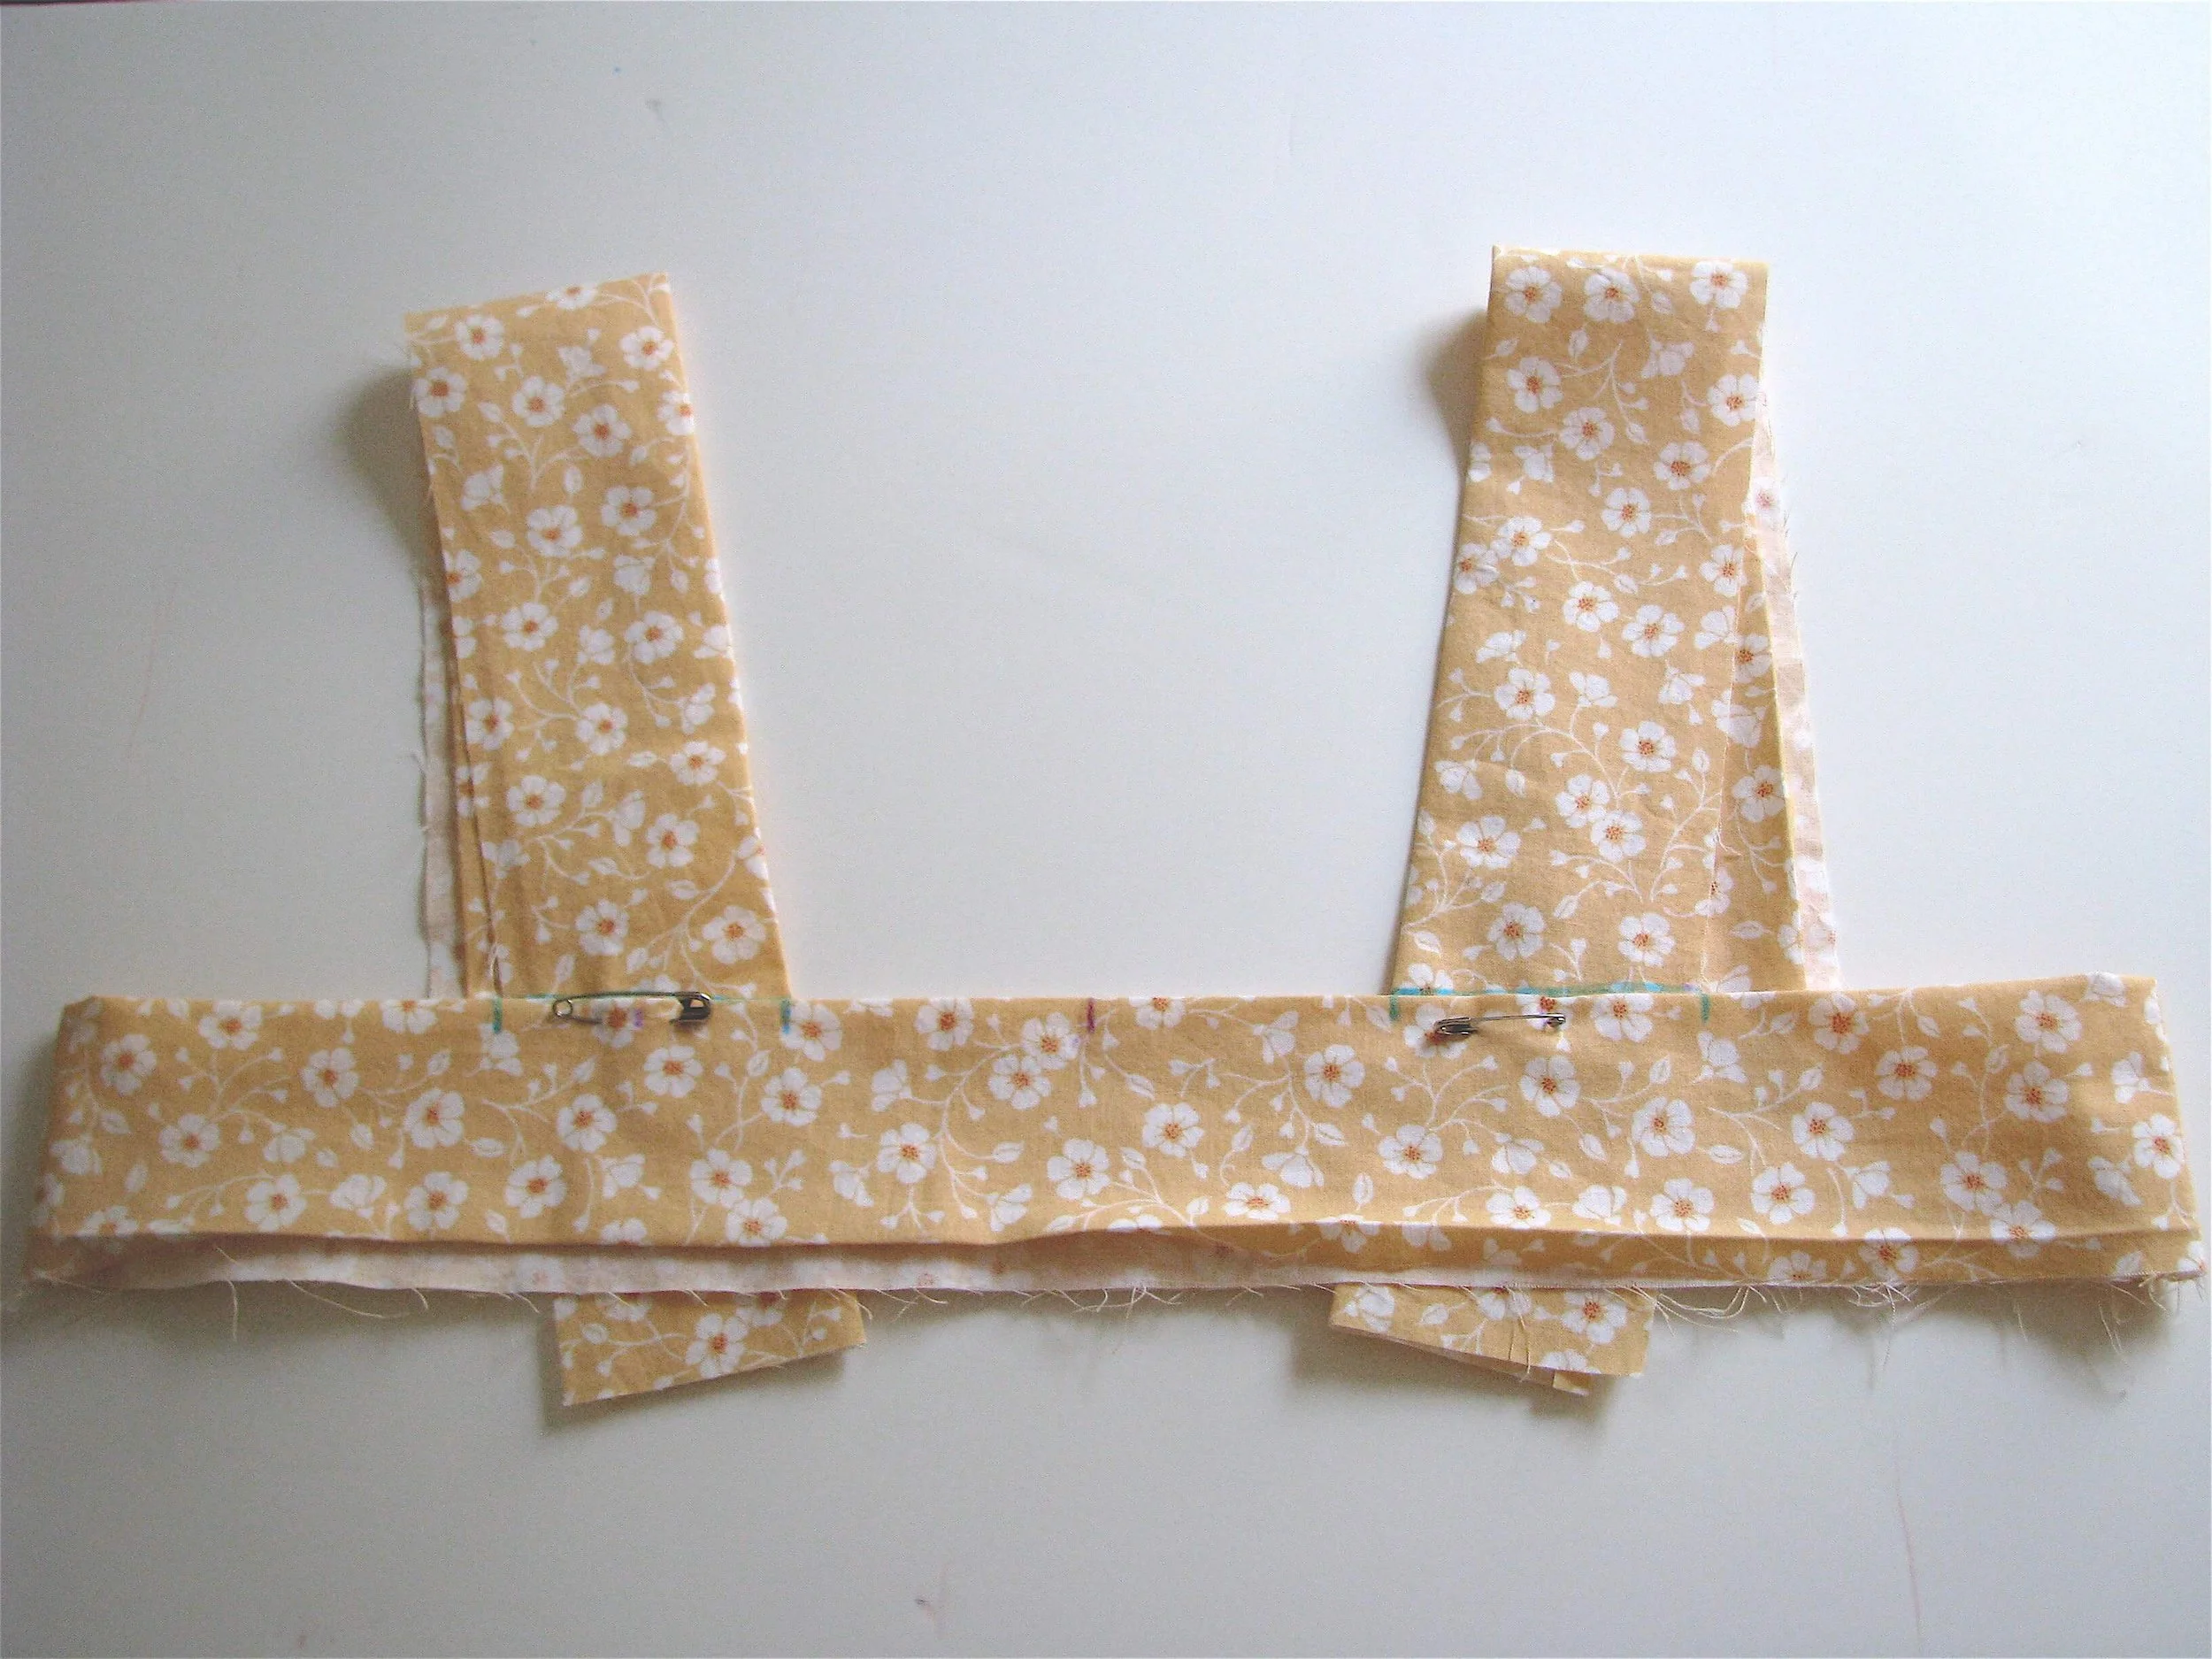
Fold each of the strap pieces in half lengthwise and press. Press under ¼” along one of the long edges of each strap (this folded edge will be on the underside.

Mark the center front and center back of the chest band with a fabric marker. Safety pin each strap to the front of the chest band, equal distances from the center (mine were 3.5” from center), with about 1” of the end of the strap inside the chest band. Leave the back of the straps loose for now.

Try the chest band on and adjust strap spacing if necessary (remember that the ruffles will also take up about 2 more inches on each side). If possible have someone else pin the back of the straps in place, again equal distances from the center. It may help to slant the straps in the back slightly so they don’t pucker.
Mark the chest band where the sides of the straps hit. Mark straps where chest band overlaps. Trim straps.

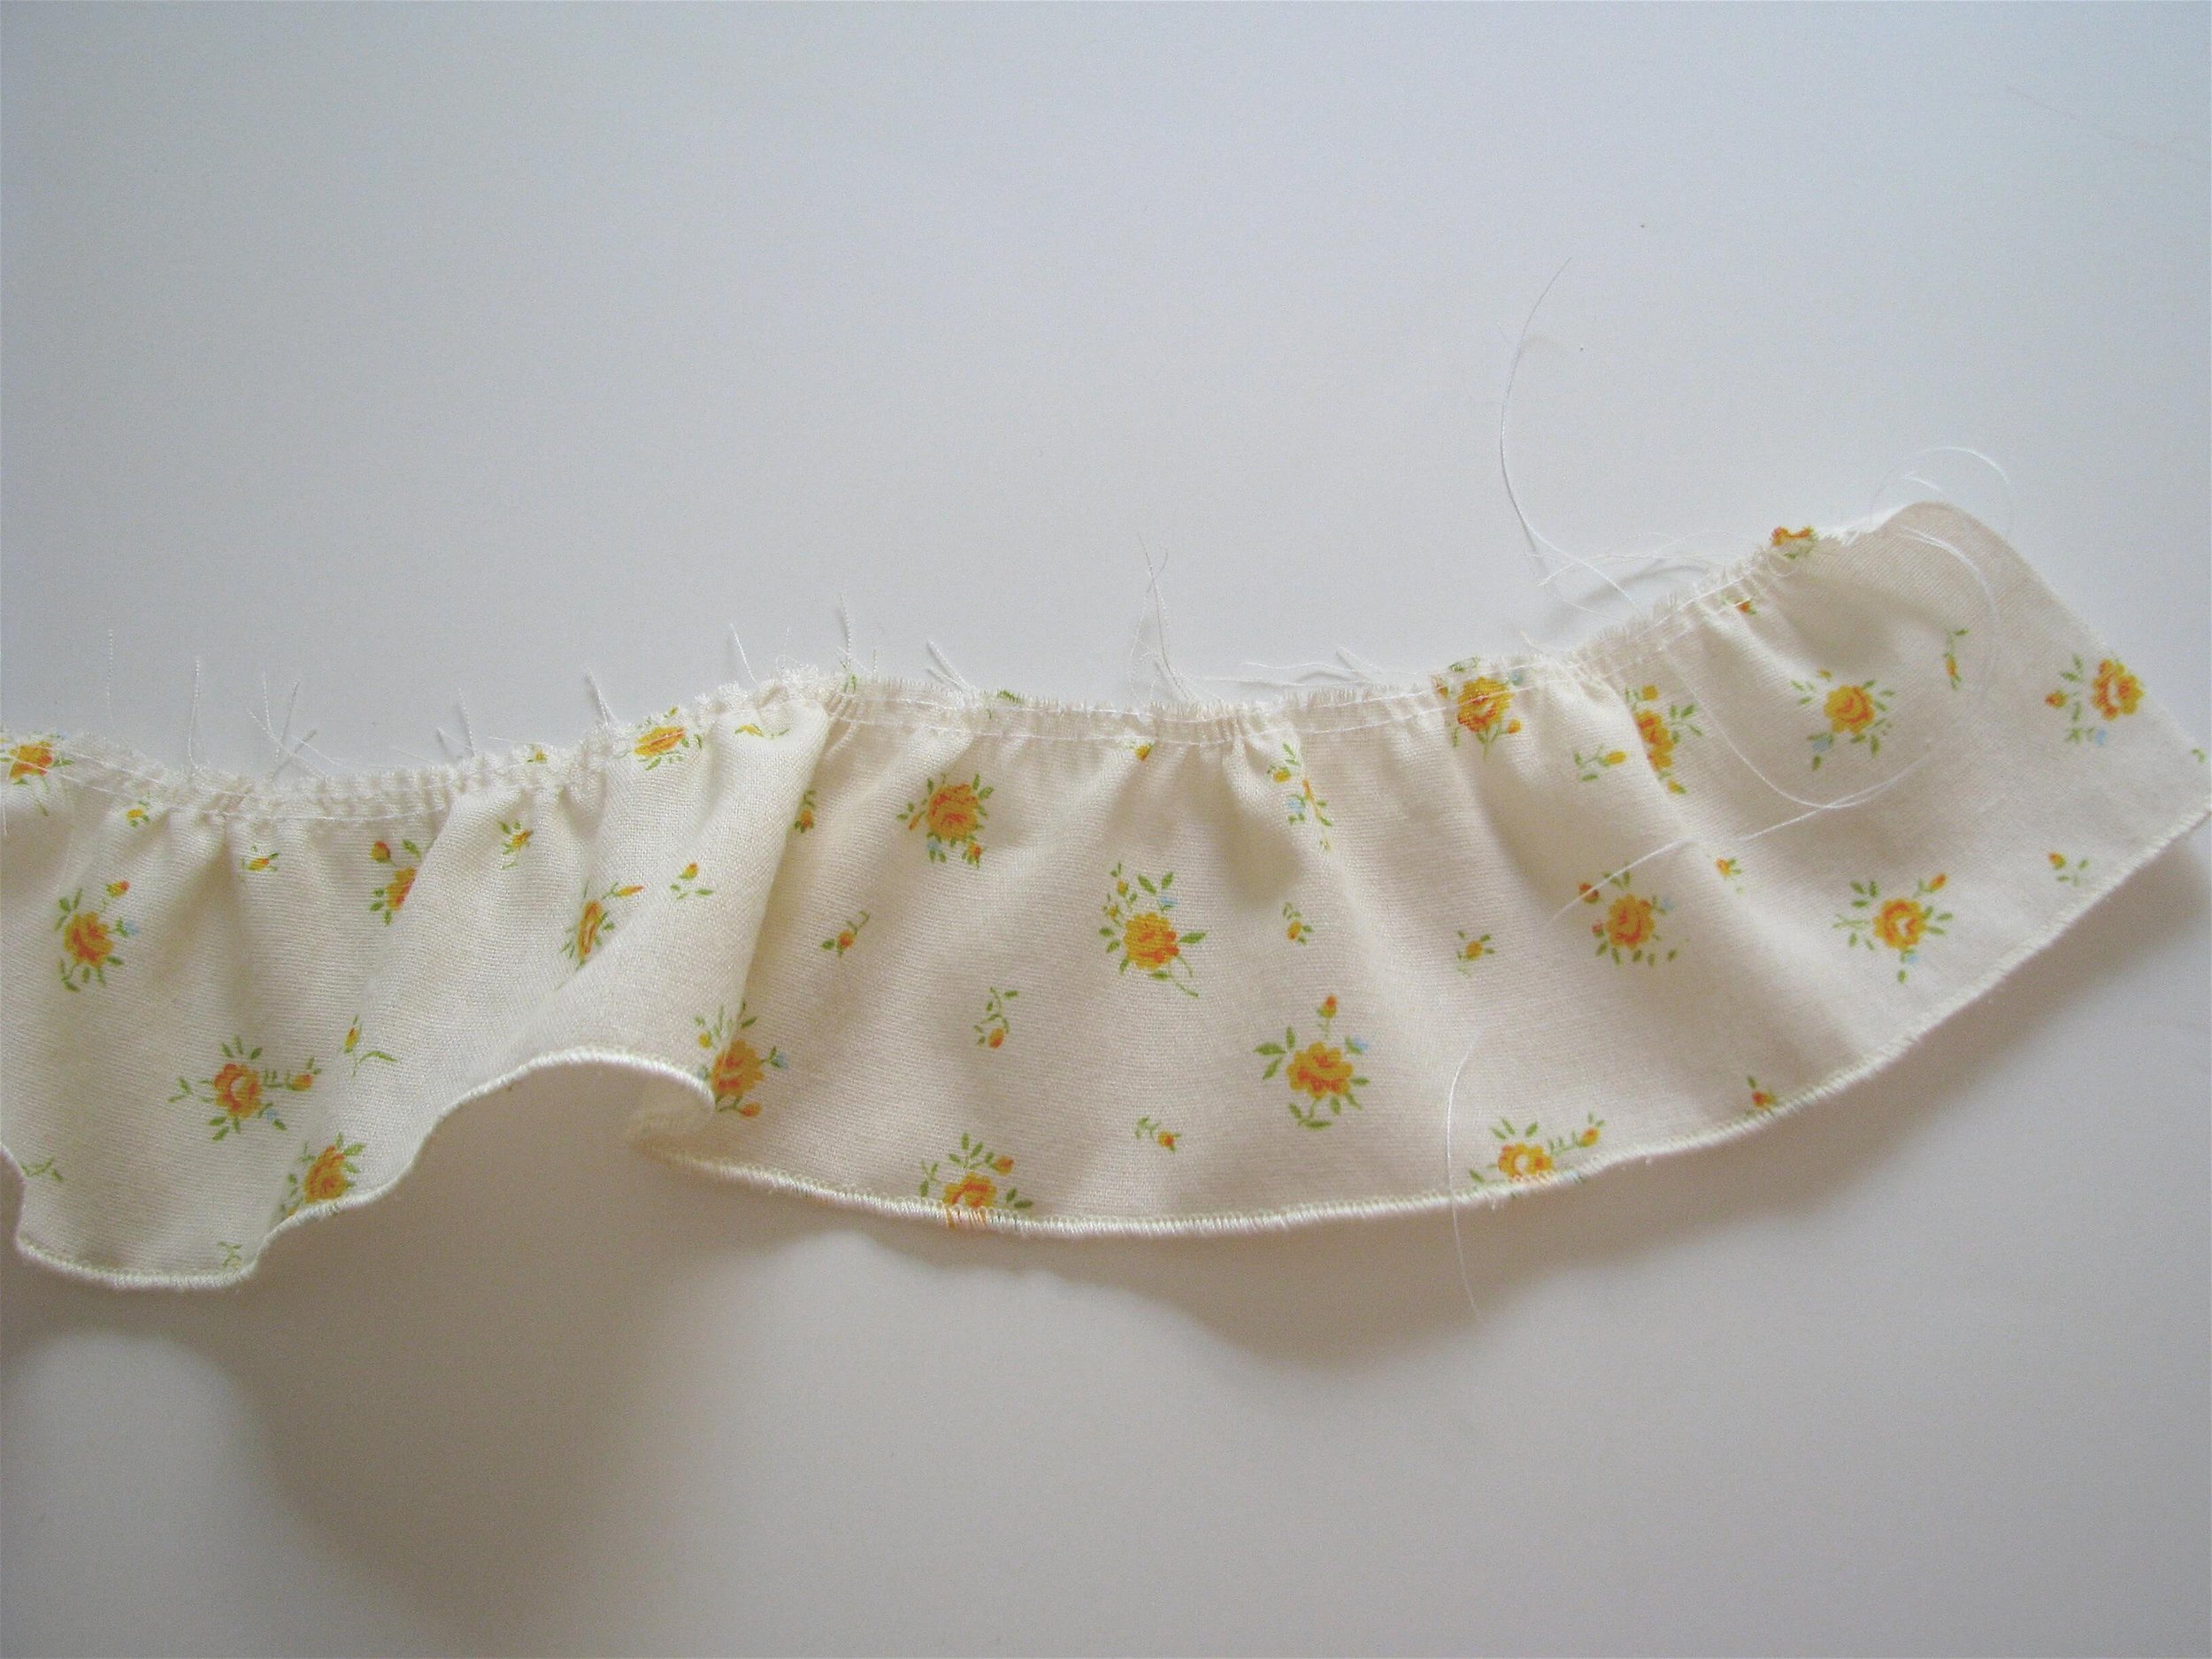
Step 4: attach ruffles (optional)
Finish outside edge of ruffle by folding and pressing ¼” under twice and sewing down (alternative shown in photo: finish edge with rolled hem on serger). With a long straight stitch, sew two lines of stitching along opposite edge at 1/8” and ¼” away from edge. Gather edge of ruffle (left photo, below). Finish short edges of ruffle by folding under ¼” and stitching down (alternative: finish hem with serger).
Line up ruffle along unfolded edge of strap and pin in place with right sides together. Adjust gathering as necessary to make ruffle the correct length (right photo, below).
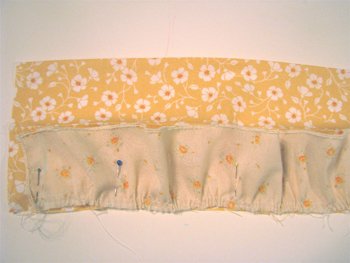
Sew ruffle to strap with 3/8” seam. Turn to right sides, press seam towards strap, refold strap so folded edge overlaps seam in back. Carefully topstitch along seam to close strap.

Tuck in short ends of strap and sew closed. Repeat for other strap.

Step 5: Create arm divots (optional).
Mark where ruffle edges end on chest band.

Transfer marks to inside of chest band. Turn chest strap inside out. With fabric marker, draw a semicircle between the two marks at each side, with the bottom of the semicircle 1” away from fold.

Sew along this line. Trim seam, clip top corners, turn right side out and press.

Step 6: Pleat front and back of top
Mark center of front (purple mark in diagram). Starting 1” away from center, make three pairs of marks 1” apart, skipping 1.5” in between each pair. In other words, the spacing would be 1, 1, 1.5, 1, 1.5, 1 inches from the center going outward (blue marks on diagram; note that only right side is shown).

Repeat for other side of center; note that this diagram shows all of the pleat marks.

Each blue mark in the diagram is the edge of a pleat. Fold fabric so that the blue marks overlap and pin in place. Each pleat will now be ½” wide. Fold the fabric so that the folds face away from the center on either side.

Before sewing pleats in place, measure along top of pleated edge to make sure it is exactly X inches wide (see Step 1). Adjust pleat widths if necessary. Sew down 2” along each pleat and press. Note: those with larger busts may want to leave pleats unsewn, and should instead sew across the top of each pleat to hold in place. Repeat pleats for back of top.

Sew front and back together with ½” seam along sides. Press seams open.

Step 7: Attach chest band to front and back of top
Unfold chest band as much as possible. Pin front and back to chest band along unfolded edge, lining up side seams. Sew together with 3/8” seam. Press seam towards chest band, refold chest band so that folded edge covers seam. Carefully sew along seam, catching folded edge of chest band on the underside as you sew to close it. More-time-consuming-yet-more-foolproof-alternative: Baste the folded edge down first, topstitch in the ditch on the outside, remove basting.

Step 8: Attach straps to chest band
Reposition straps on chest band using marks. Topstitch in place several times back and forth along edge of chest band to secure.
Step 9: Shape sides (optional) and finish hem
The shaping step is included to give the top a slightly more fitted look. Try it! If you don’t like how it looks you can always pull out the stitching.
Turn top inside out and find center of side seam. Make a mark at center 1” away from seam. Now draw a slightly curved line from the chest band to the center mark, and from the center mark to the hem.

Sew along this line. Trim fabric along seams, press open.

Hem bottom edge. Fold ½” under along raw edge, press. Repeat (raw edge is now hidden). Sew along edge of fold. Alternative: use blind hem foot to create an invisible hem or use serger to finish edge with a rolled hem.
Step 10: Make and attach pockets (optional)
Fold pocket piece in half lengthwise with right sides together. Sew around edge with ¼” seam, leaving 2” open at bottom of pocket. Press, clip corners, turn right-side-out, press again. Place pockets where desired on outside of top (I centered mine along the side seams). Topstitch sides and bottom of pocket to attach, sewing opening shut as you go.

Step 11: Put on your new top, stand back, and admire!
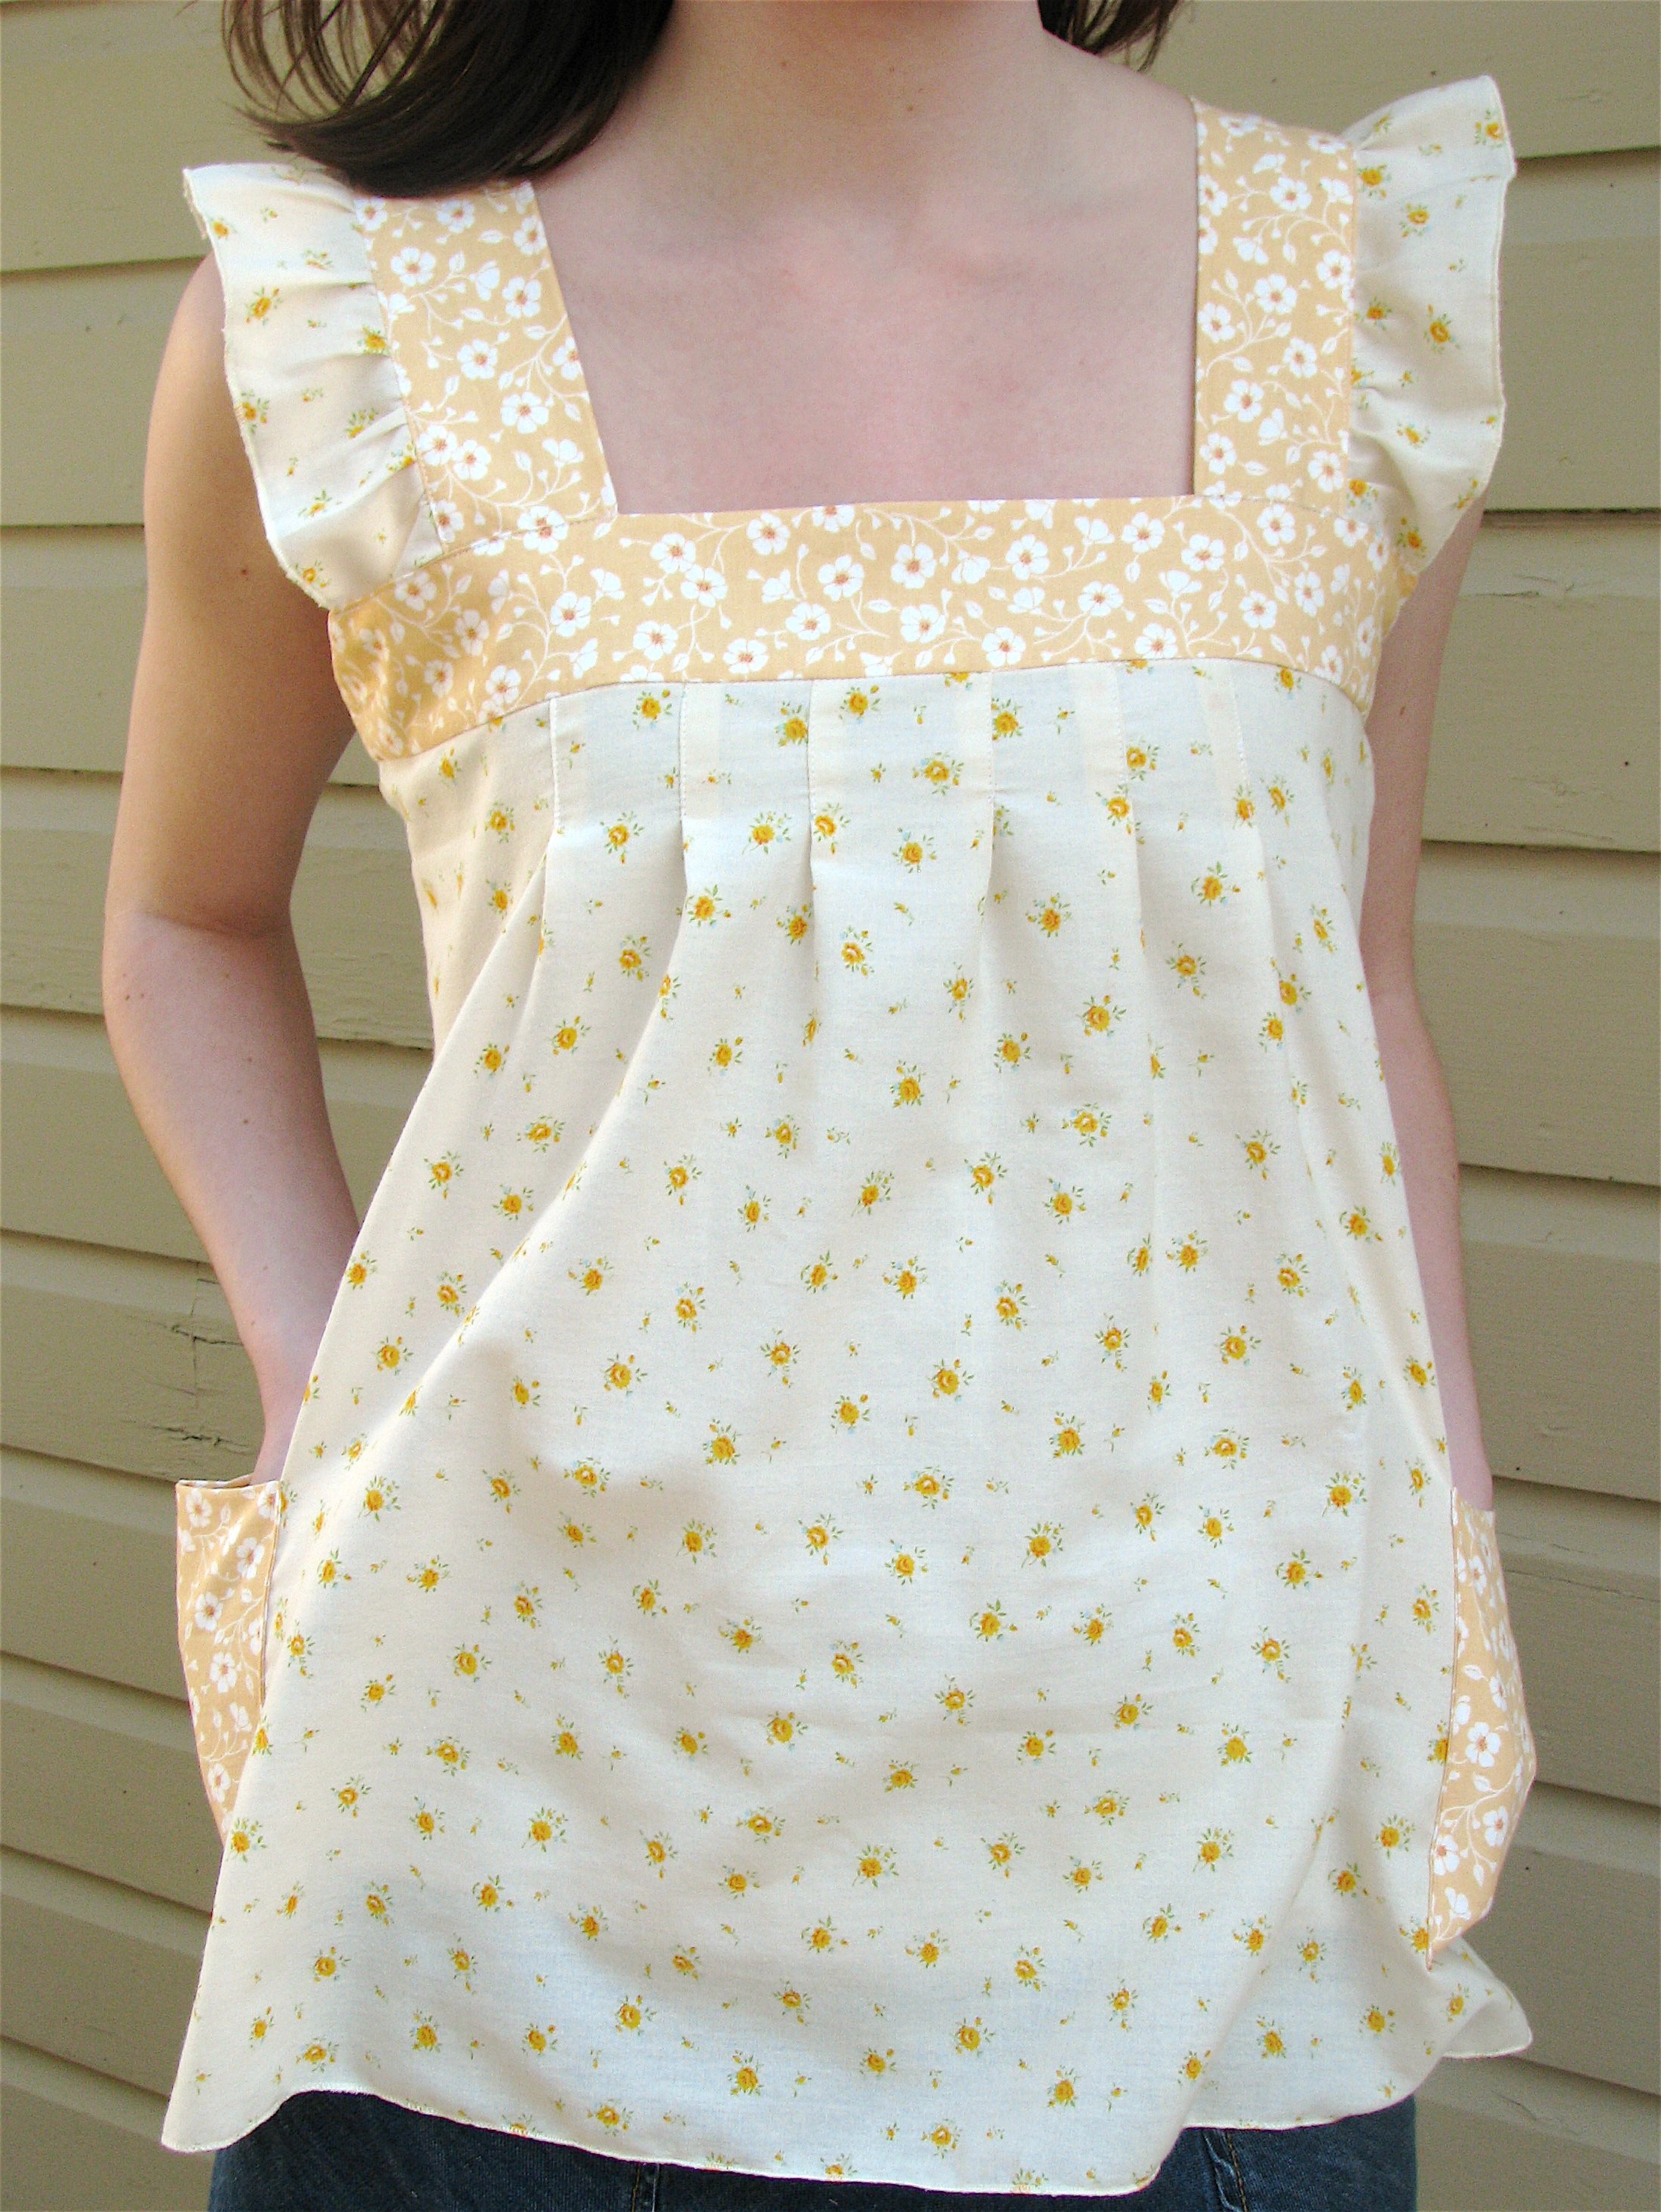
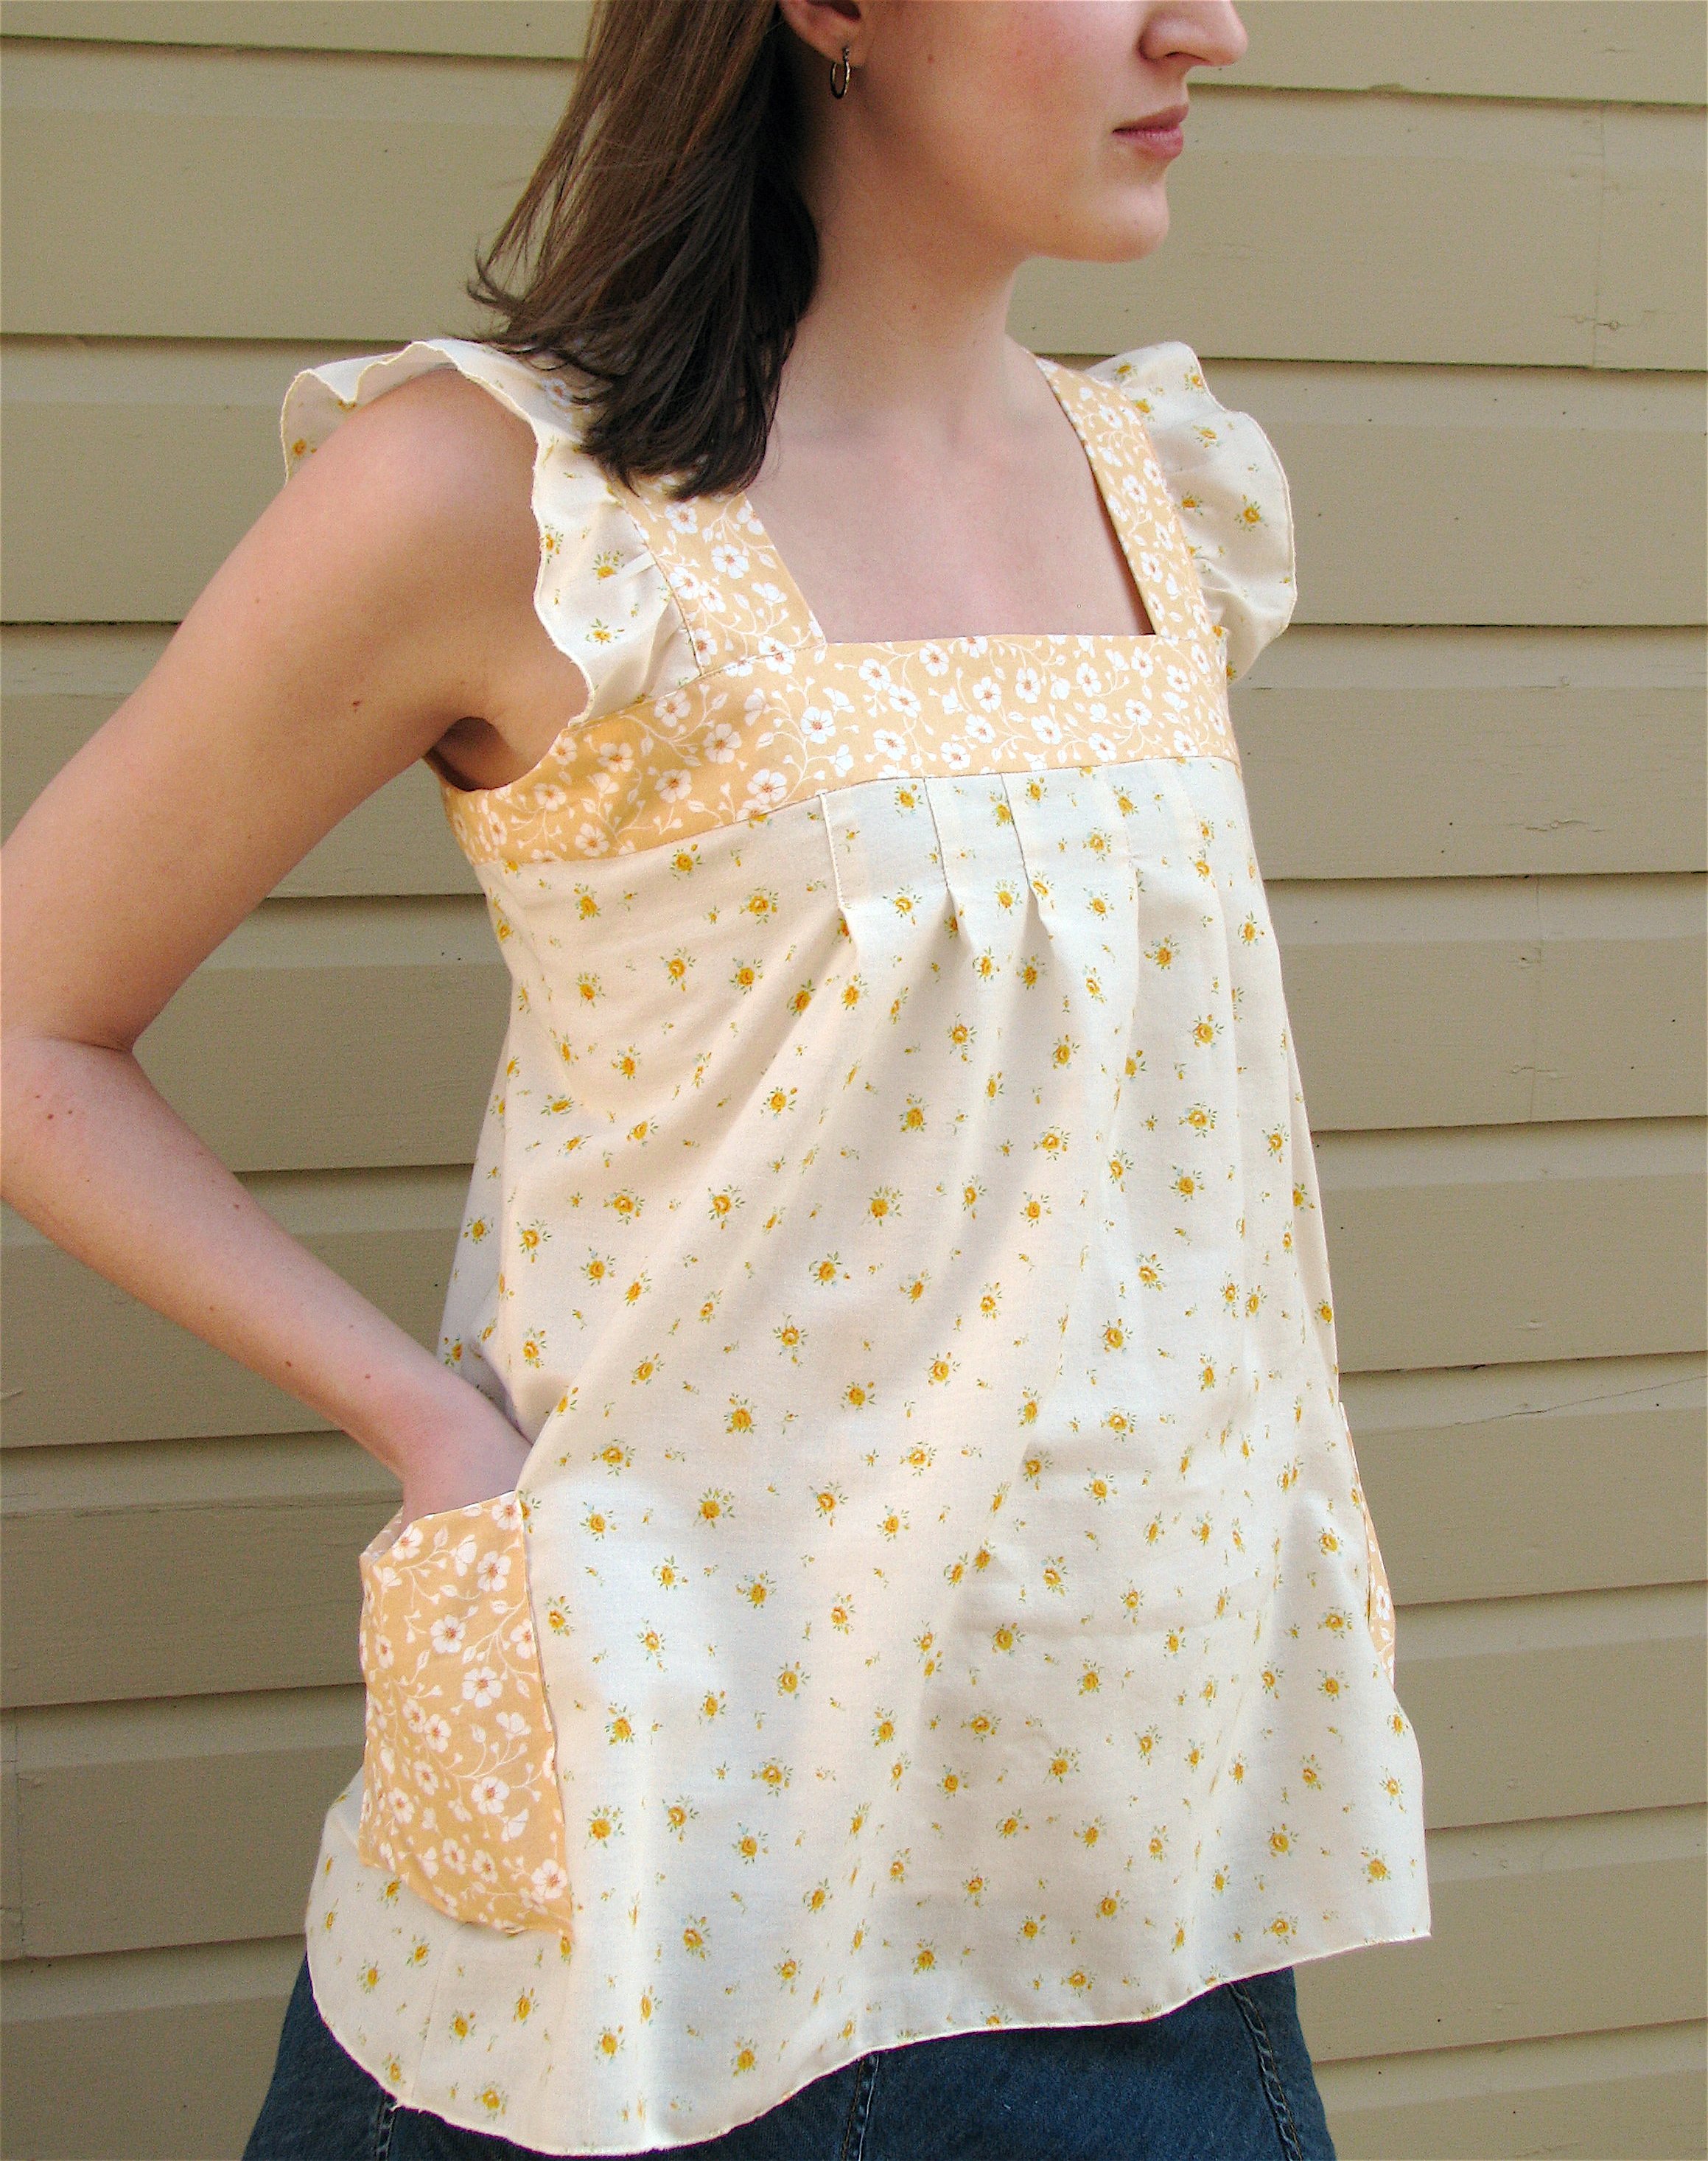
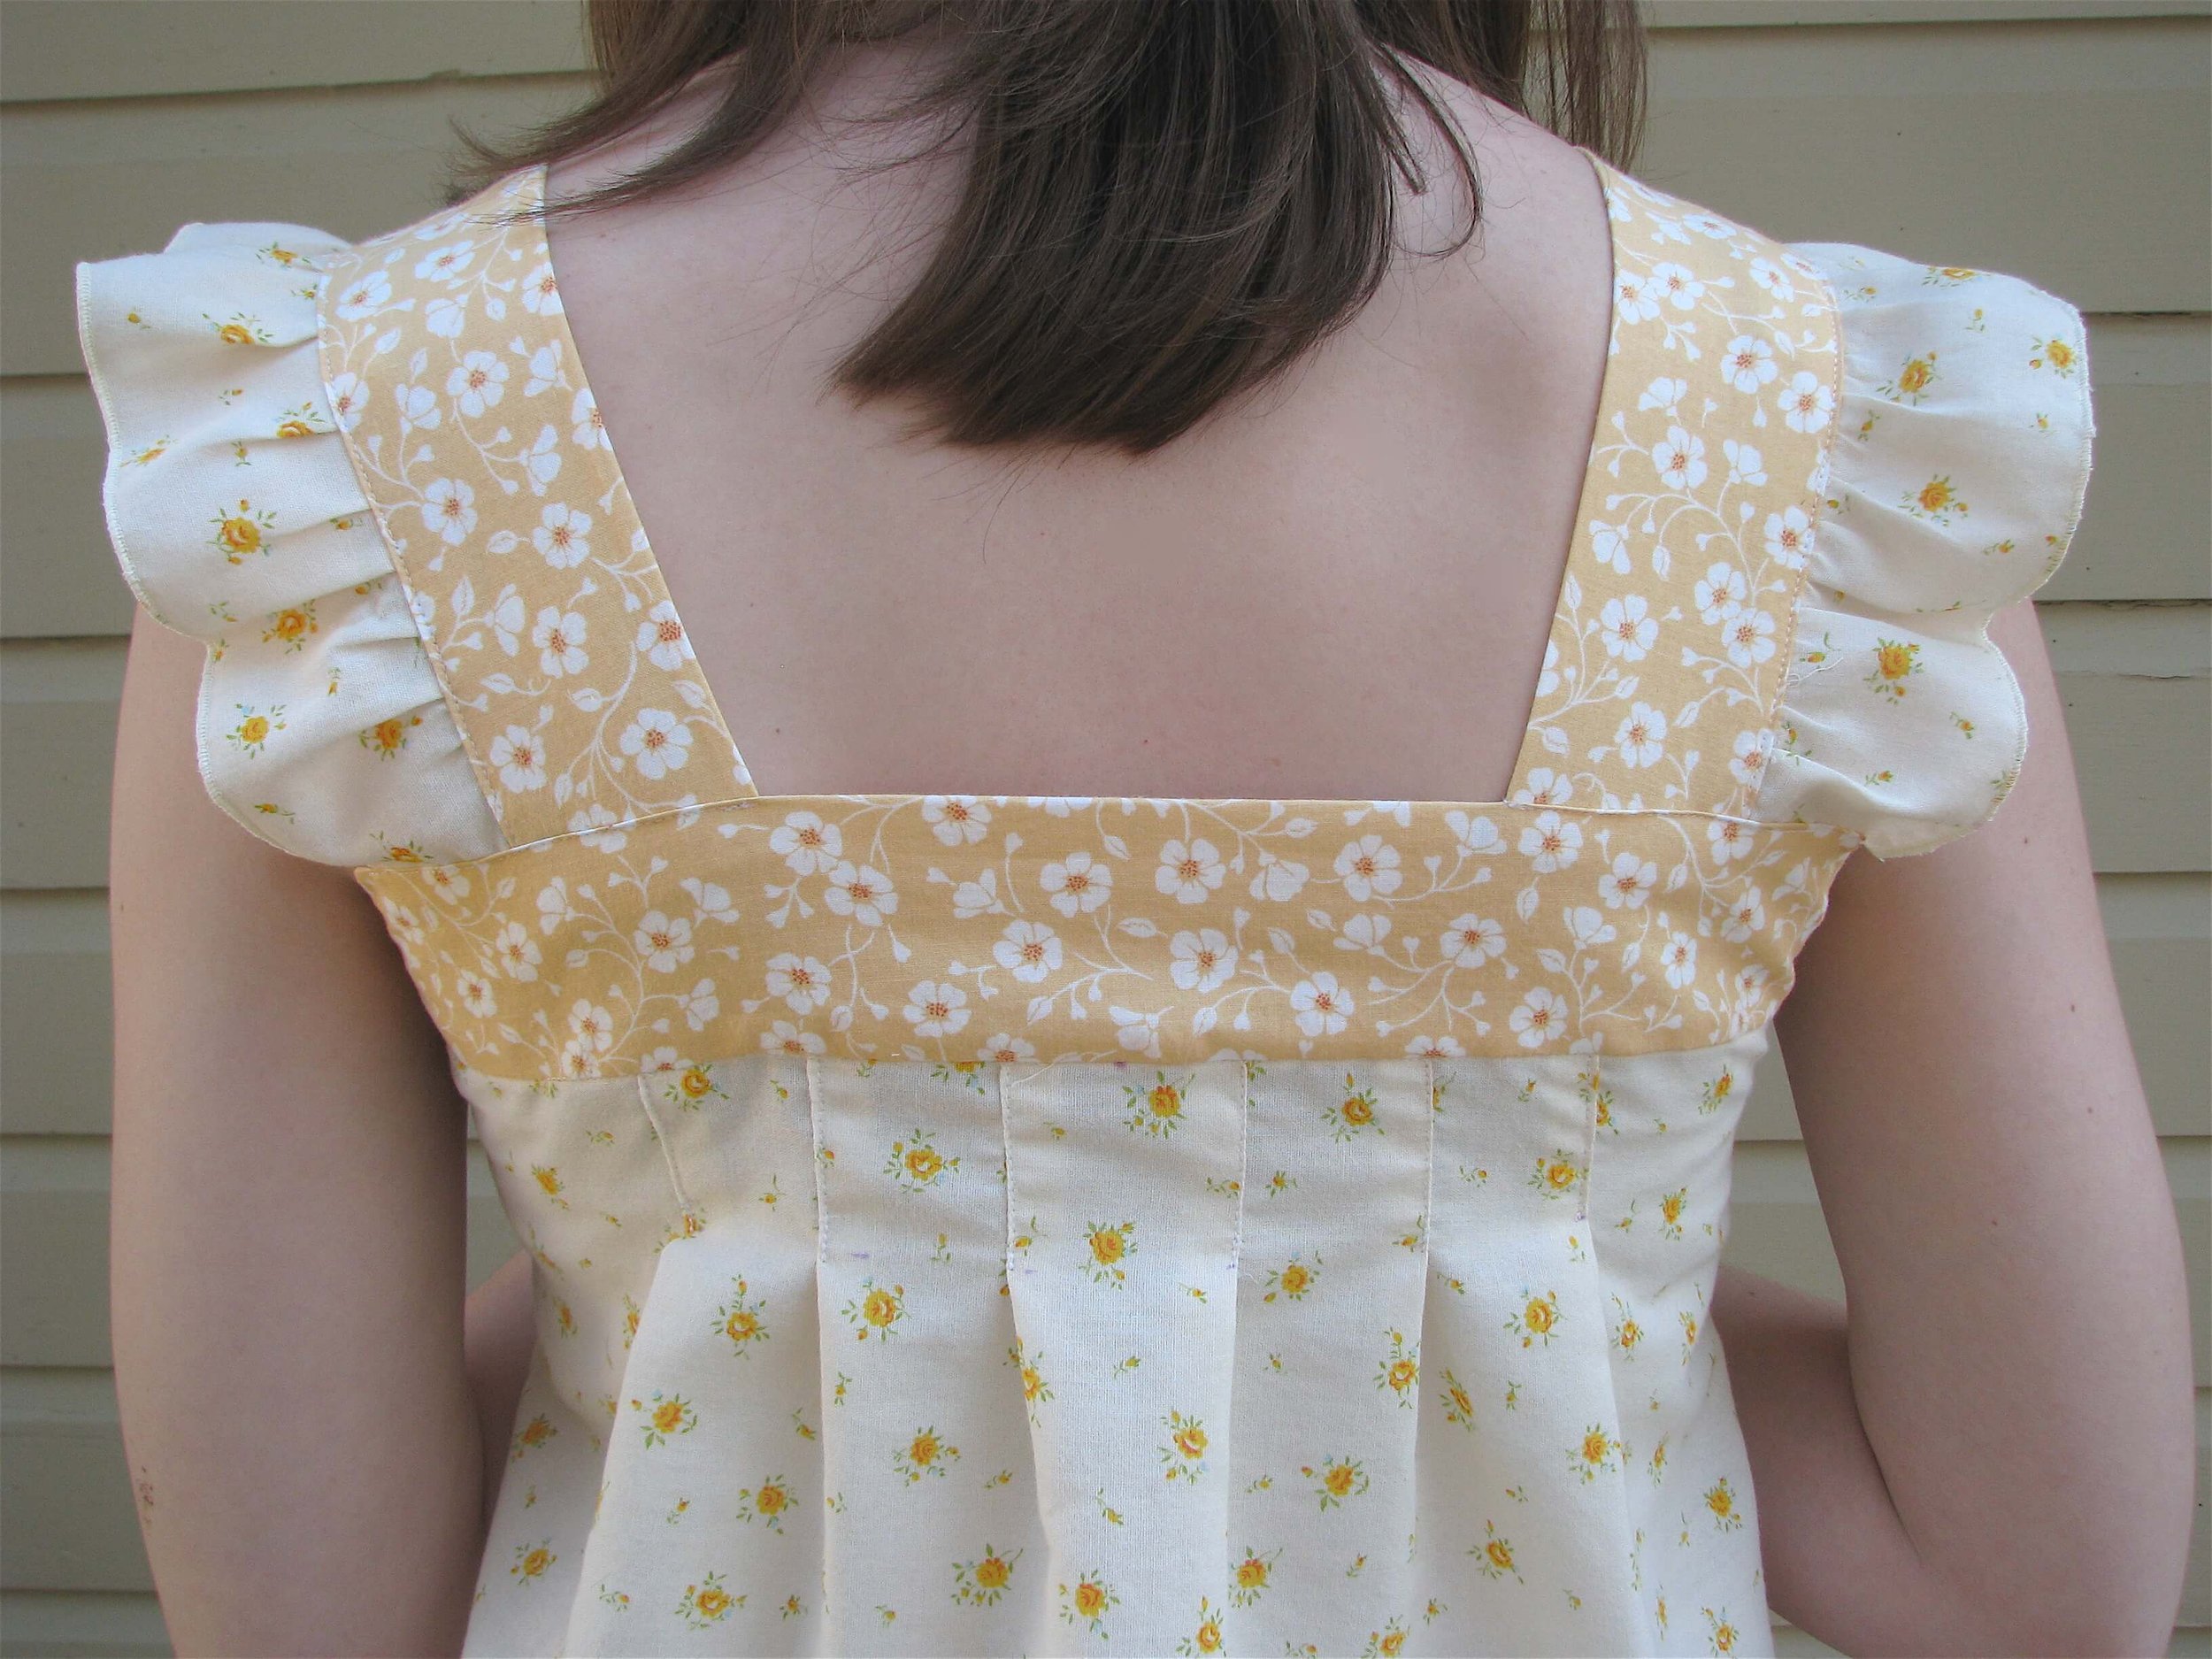
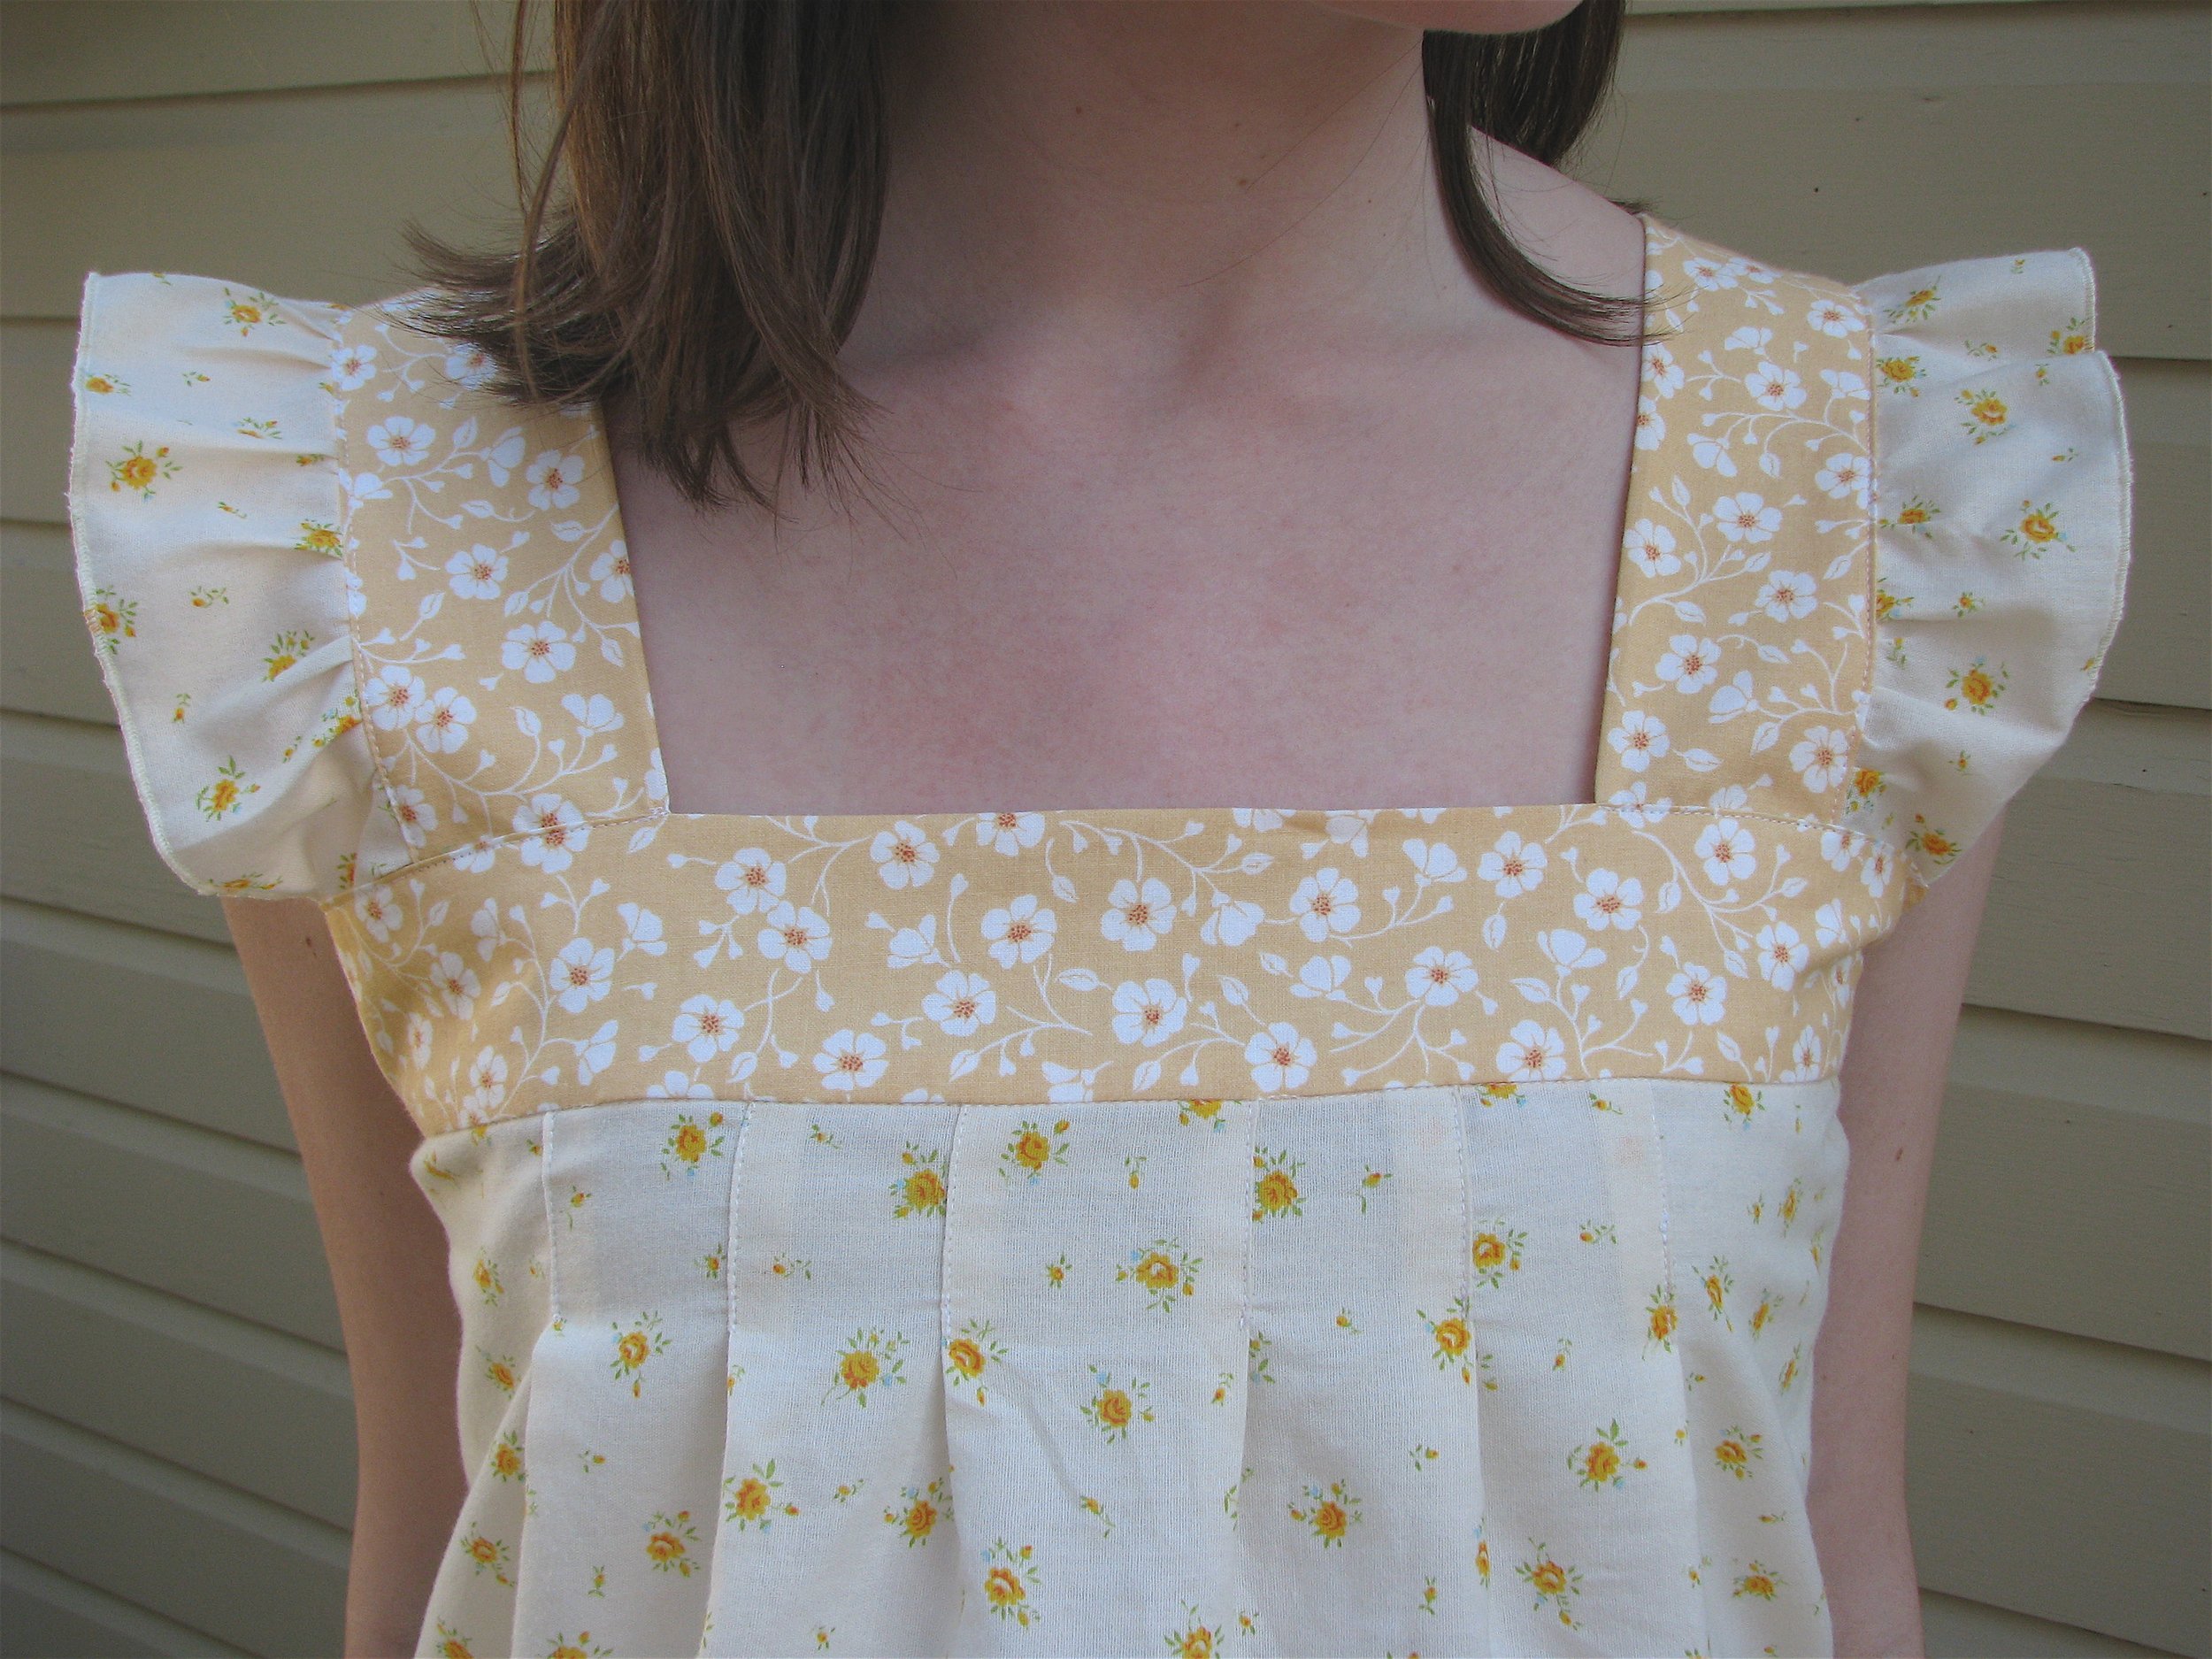


For the yellow top:
The ruffles, pockets and arm divots were omitted. Instead, a piece of 1/4″ bias tape was sewn 3/8″ away from the unfolded edge of both the straps and the chest band pieces. Gathering was done in place of pleats: make a mark along the top edge 7″ away from either side of center (for both front and back). Gather between marks until size matches chest band, then sew front and back together and continue as in pleated version.
