
Luna Pantsalong Day 5: Steps 5-9
In this post I’m going to cover the second half of the Luna Pants sewing instructions. These steps include attaching the waistband and finishing the cuffs. Once you’ve completed these steps, you’ll have a wearable pair of Luna Pants!

Luna Pantsalong Day 5
Here are the previous Pantsalong posts:
Let’s have a Luna Pantsalong!
Luna Pantsalong: Inspiration
Luna Pantsalong: Planning
Luna Pantsalong Day 1: Measure, Print, Tape, and Trace
Luna Pantsalong Day 2: Make a Muslin
Luna Pantsalong Day 3: Cutting
Luna Pantsalong Day 4: Steps 1-4
(you can find the Luna Pants sewing pattern here if you need it)
Check fit
Before you attach the waistband, I’d recommend that you try the pants on and check the fit, both width-wise and length-wise. If adjustments are necessary at this point, it’s much easier to make them now than after the waistband and cuffs are finished.
Step 5: Sew Facings together
Sew the front and back waistband together at the sides, making sure that the notches are pointing up on both pieces (you don’t want to accidentally attach one upside down). I like to remember that the front will curve downward, and the back will curve upward, so it’s like attaching a smile to a frown.

Luna Pantsalong Day 5
Press the seam allowances apart, then press up ½” along the botttom edge of the facings (the edge without notches).
Step 6: Attach facings to pants
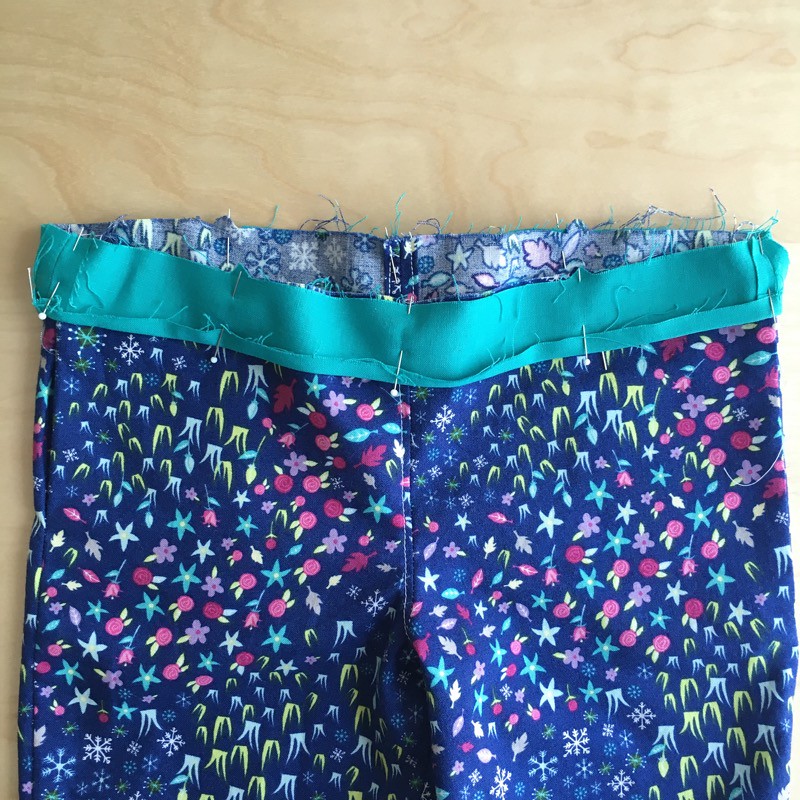
Place the facings over the top of the pants with right sides facing and raw edges together.

Luna Pantsalong Day 5
Pin them together, matching up the side seams and notches, then sew the top edges together with a 1/2″ seam.
Luna Pantsalong Day 5
After the facings are sewn to the pants, press everything upward, away from the pants (seam allowances included). Trim the seam allowance down to 1/4″, then stitch 1/8″ above the seam, through the facing and the seam allowances (so, through three layers of fabric) to understitch this seam. This keeps the facing inside the pants and prevents it from rolling upward and showing on the outside of the pants.

Luna Pantsalong Day 5
Here’s a closeup of what the understitching looks like:

Luna Pantsalong Day 5
Press the waistband facing down into the inside of the pants and pin the lower edge in place, capturing and hiding the tops of the pockets under the edge of the waistband (IMPORTANT: MAKE SURE THEY ARE ON THE FRONT OF THE PANTS AND NOT THE BACK. ASK ME HOW I KNOW).

Luna Pantsalong Day 5
Stitch down the lower edge of the waistband.

Luna Pantsalong Day 5
Remember to leave 1-2” gap at back for elastic! I like to use two vertical pins to remind myself where to start and stop stitching.

Luna Pantsalong Day 5
Step 7: Sew cuffs
Press the cuffs along the fold lines you pressed earlier. Then sew along the top folded edge to create a casing for the elastic, leaving 1″ open at the inseams for the elastic.

Luna Pantsalong Day 5
I find this step is easiest to sew if you turn the pants right side out, and sew “inside the tunnel” created by the end of the pant leg, as shown here.

Luna Pantsalong Day 5
Steps 8 and 9: Add elastic
Thread the elastic through the waistband and cuffs with a safety pin or bodkin. Pin the ends together, ovelapping them by 1/2,” and try on the pants to check the fit for comfort. Adjust the elastic in both locations as needed, then stitch the ends of the elastic together.

Luna Pantsalong Day 5

Luna Pantsalong Day 5

Luna Pantsalong Day 5
Close the elastic hole at the back of the waistband by stitching the bottom edge of the waistband down. Stitch the cuff openings shut as well.
Hint: Add a tag to help tell front from back by sliding a piece of ribbon or twill tape into the elastic hole before stitching it shut.

Luna Pantsalong Day 5
Finally, stitch through all layers of the waistband at the side seams to prevent the elastic from rolling in the waistband when it’s worn or washed. You can do this at the front and back center seams too if you’d like.

Luna Pantsalong Day 5

Luna Pantsalong Day 5
Congratulations! You’ve completed your Luna Pants!! I’m dying of cute over these microscopic demo pants — they’re only 20″ tall — I sort of wish I had a full-sized pair. Good thing I have so many other pairs.

Luna Pantsalong Day 5
Don’t forget to snap a photo of your pants when you wear them and email it to me, or tag them on Instagram or Facebook or Twitter with #lunapantsalong or #lunapantspattern; it also helps to tag me (@madebyrae) so I’ll see them!