
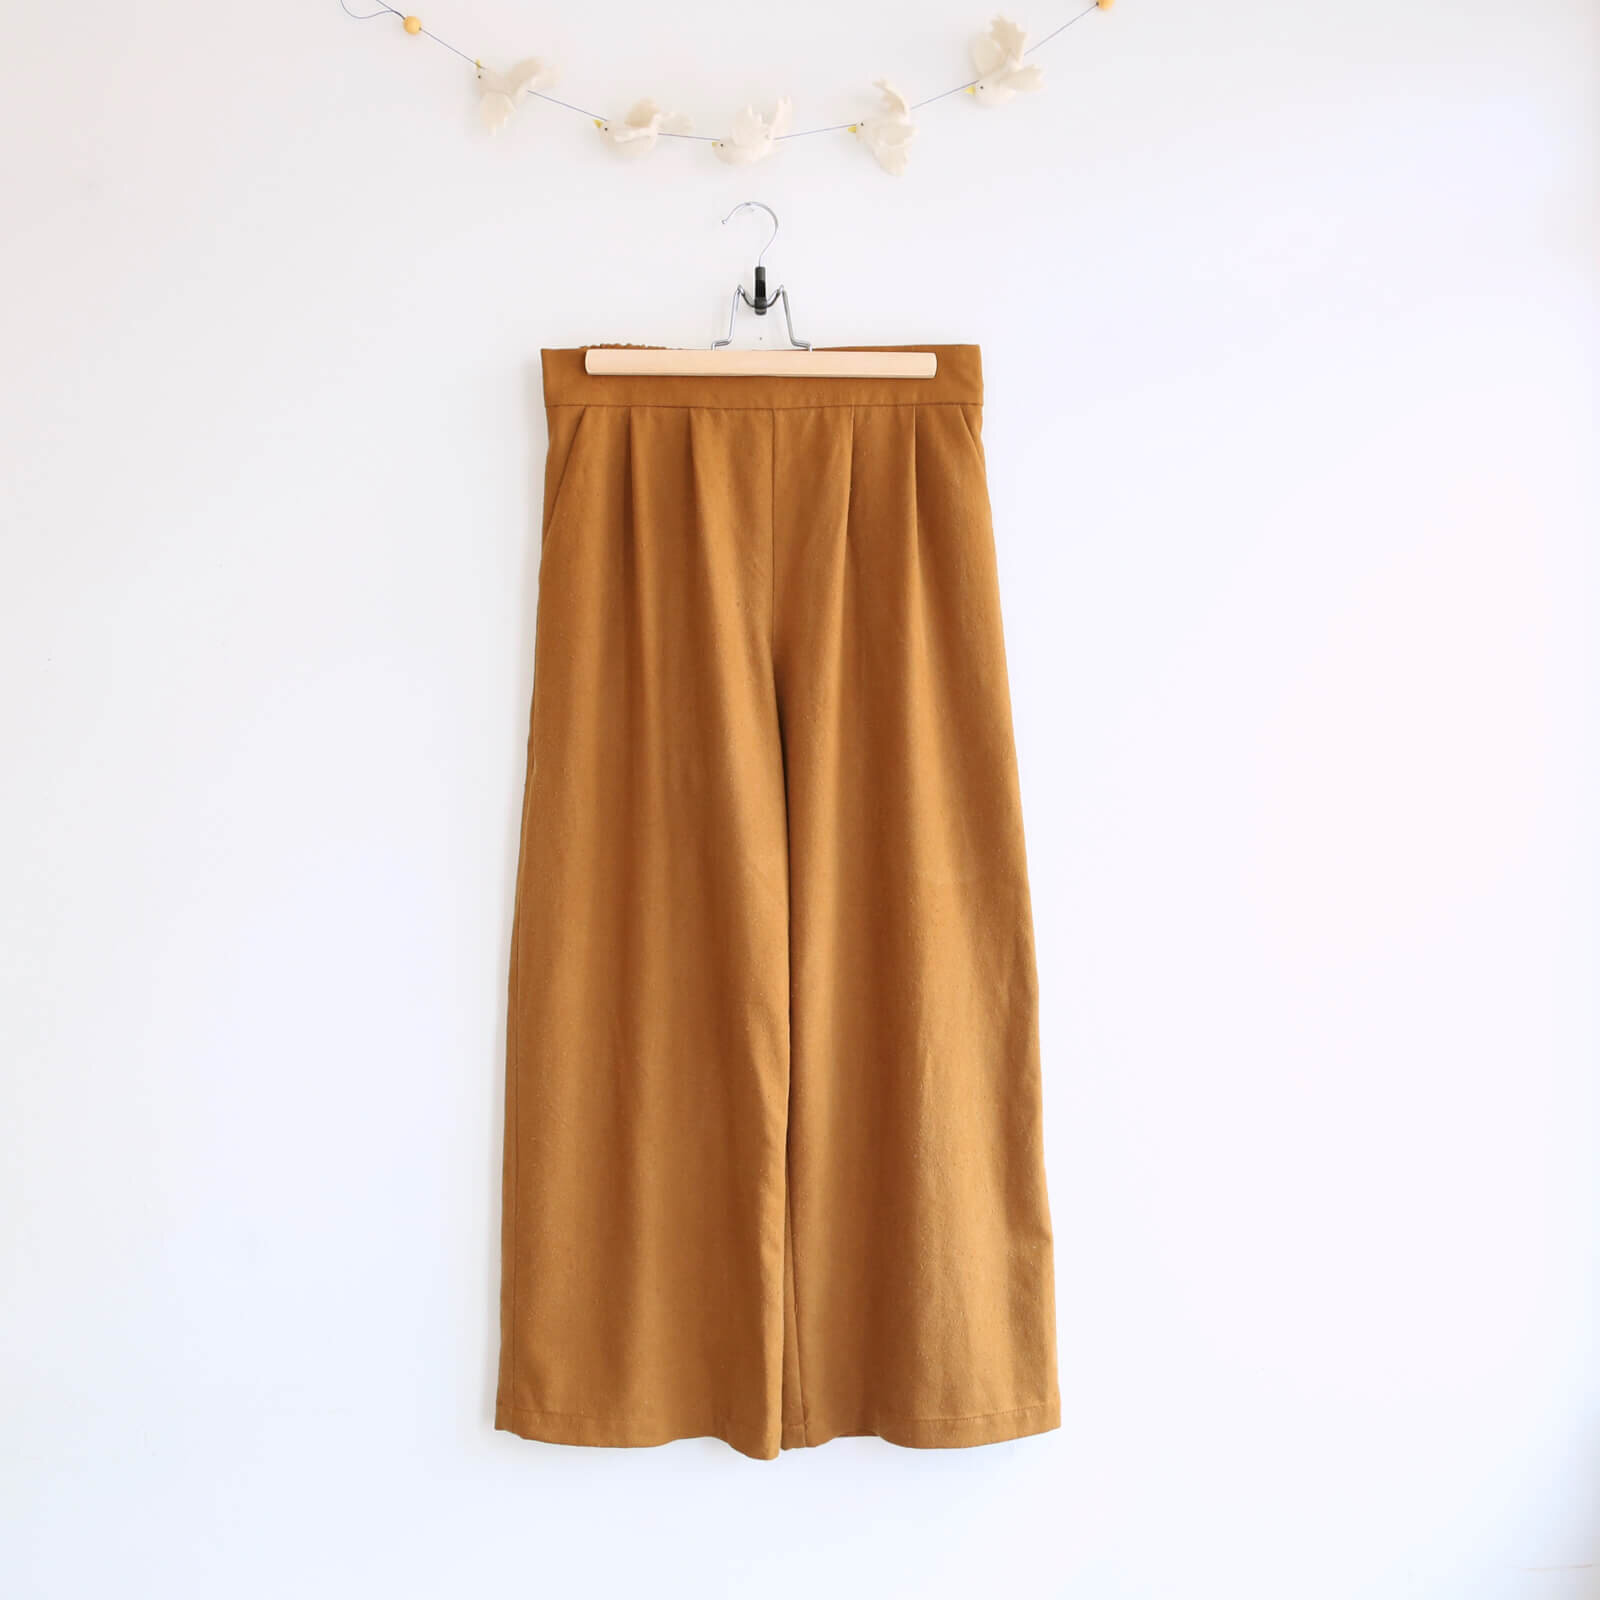
Rose Pants Sewalong: Steps 8-11
Welcome to the last day of the Rose Pantsalong! We’re on the final steps to complete our Rose Pants! Today we’ll attach the waist band, add elastic to the back waist, and hem our pants! The goal for today is to finish your pants.
Here are the previous Pantsalong posts just in case you need to go back:
Get Ready for a Rose Sewalong
Rose Sewalong: Print, Assemble, Trace your pattern (Day 1)
Rose Sewalong: Cut and Prep Pattern pieces (Day 2)Rose Sewalong: Steps 2-4 (Day 3)
Rose Sewalong: Steps 5-7 (Day 4)
Need the Rose pattern? Buy it in my shop: Rose Pattern PDF (we also have printed Rose pattern sheets available!!)
Step 8 - Prepare waistband
Find the waistband pieces that you prepared in Step 1. Sew the (unfolded) front and back waistband pieces together along the short ends.
hint
If you made any width adjustments to the main pants after sewing the previous step and trying them on, make sure you’ve also made those width changes to the waistband pieces!
Press the seam allowances open (no need to finish these seams, as they’ll be enclosed in the waistband), and fold the top edge back down.
With the pants right side out, place the waistband over the pants, right sides together, pinning at the side seams and matching waistband notches to pant center seams at front and back.
check fit
Baste the waistband to the pants and try them on again. Pinch the fabric together at the back to get an idea of how they’ll fit after you’ve added elastic. Here you can check how the pleats (or gathers) look and assess rise. Adjust the rise if necessary by reattaching the waistband at a lower spot on the pants, or by sewing the crotch curve(s) deeper (note: you can do some minor adjustments to the rise at this point, such as the things I’ve just suggested; please see the section on “Adjusting Rise” at the beginning of the pattern if you need more than small rise adjustments).
Once you’re pleased with the fit, sew the waistband to the pants with a regular straight stitch.

Press seam allowance toward the waistband and trim seam allowances to 1/4 inch [6mm]. Remove any visible basting stitches.

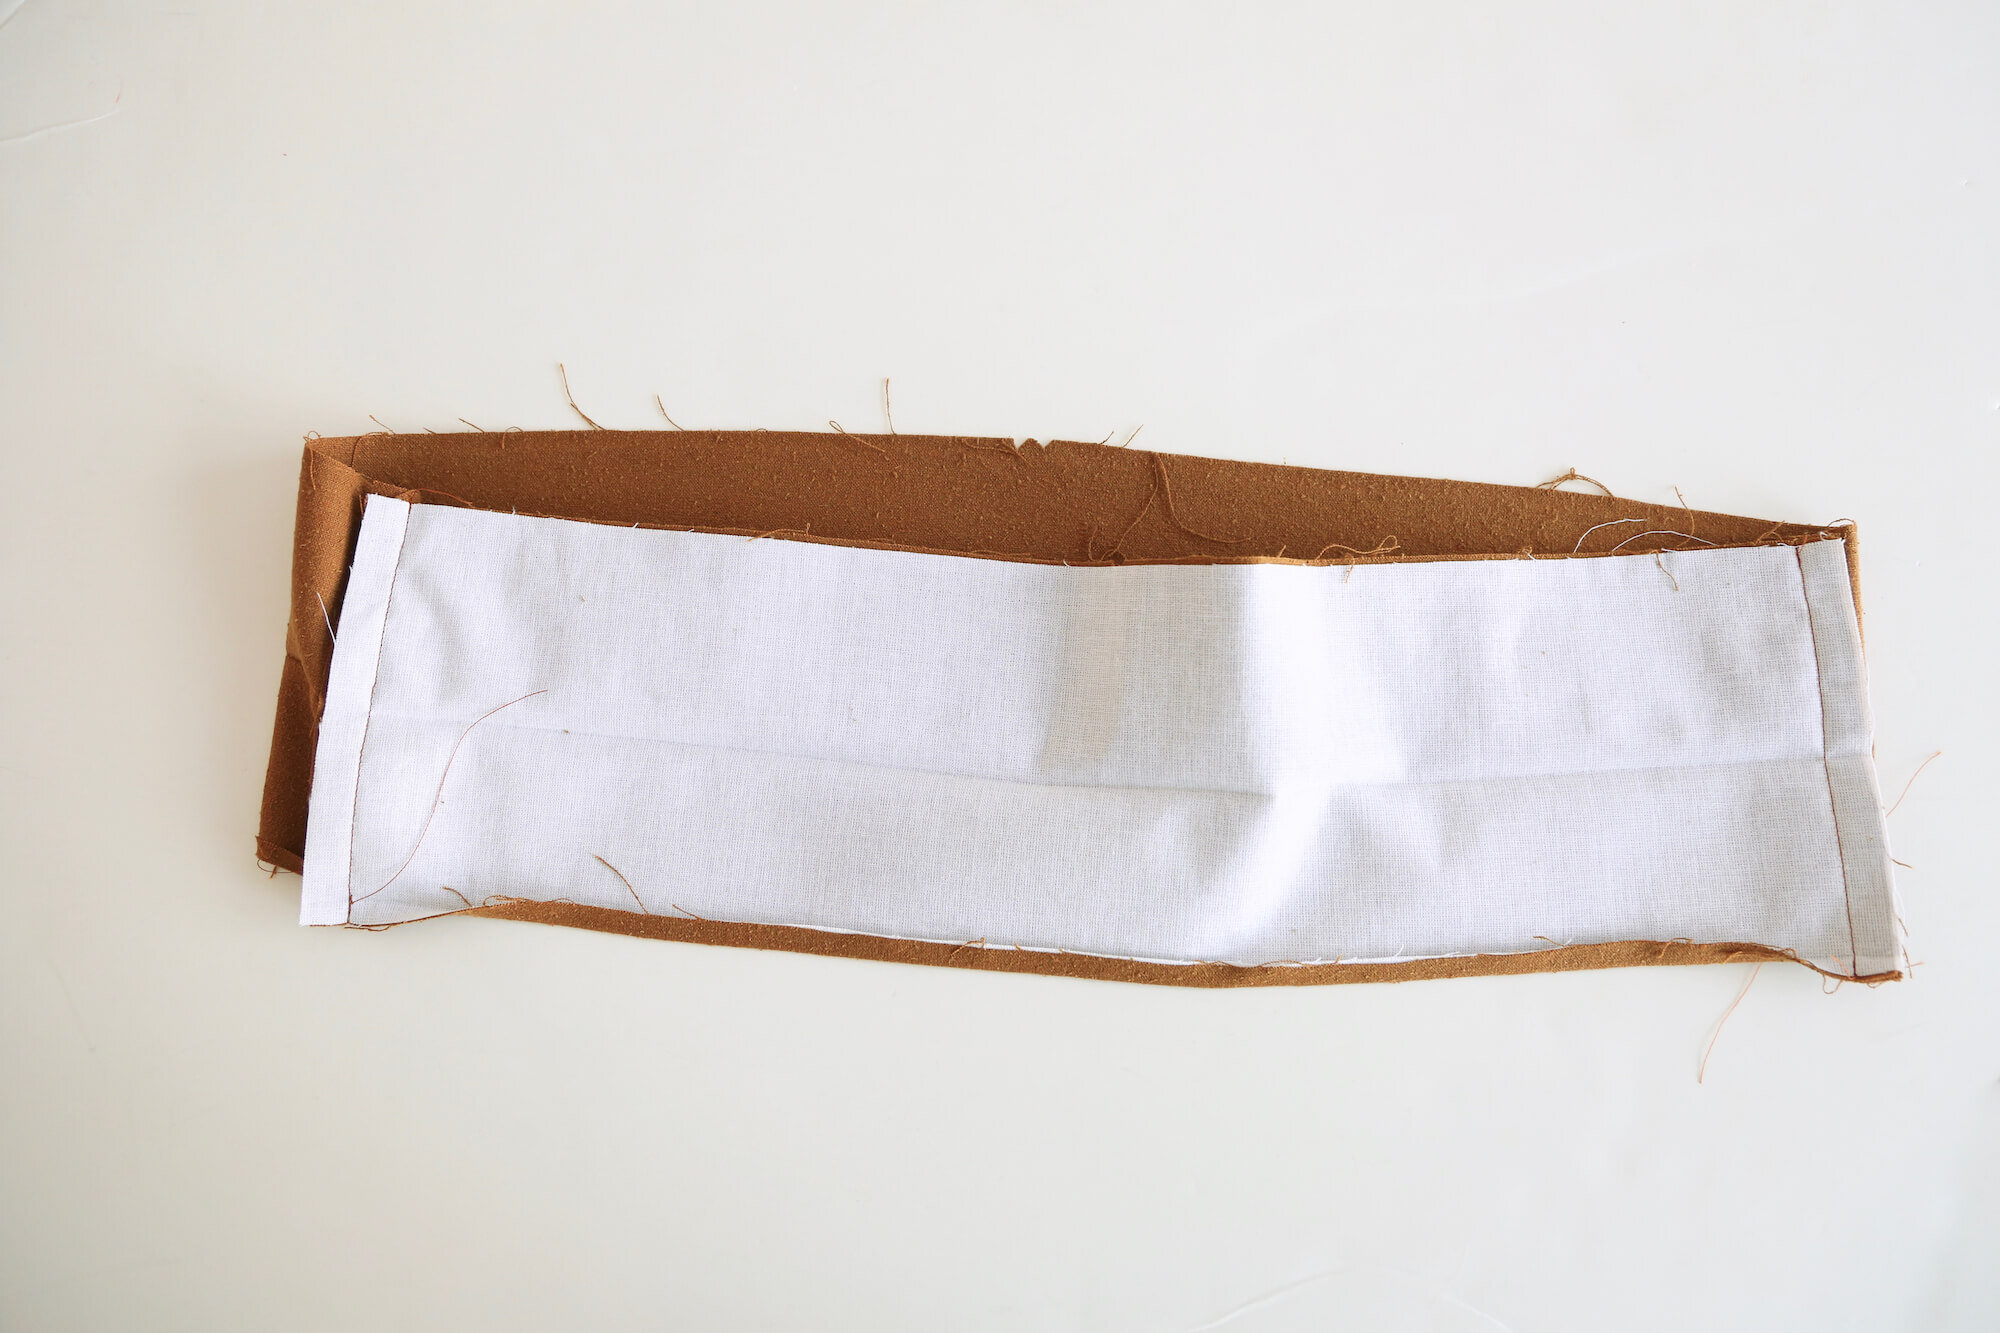
Step 9 - Sew back waistband casing
Note that in this step we’ll work on the back waistband only. Fold the back waistband down along its center fold line, toward the inside of the pant. The bottom folded edge will lie about 1/8 inch [3 mm] below the waistband seam.
Pin from the outside to secure the folded edge to the inside of the pant as shown. The pins should catch the fold on the inside of the pant (not shown). In the photo below, notice that the back is pinned, but NOT the front:

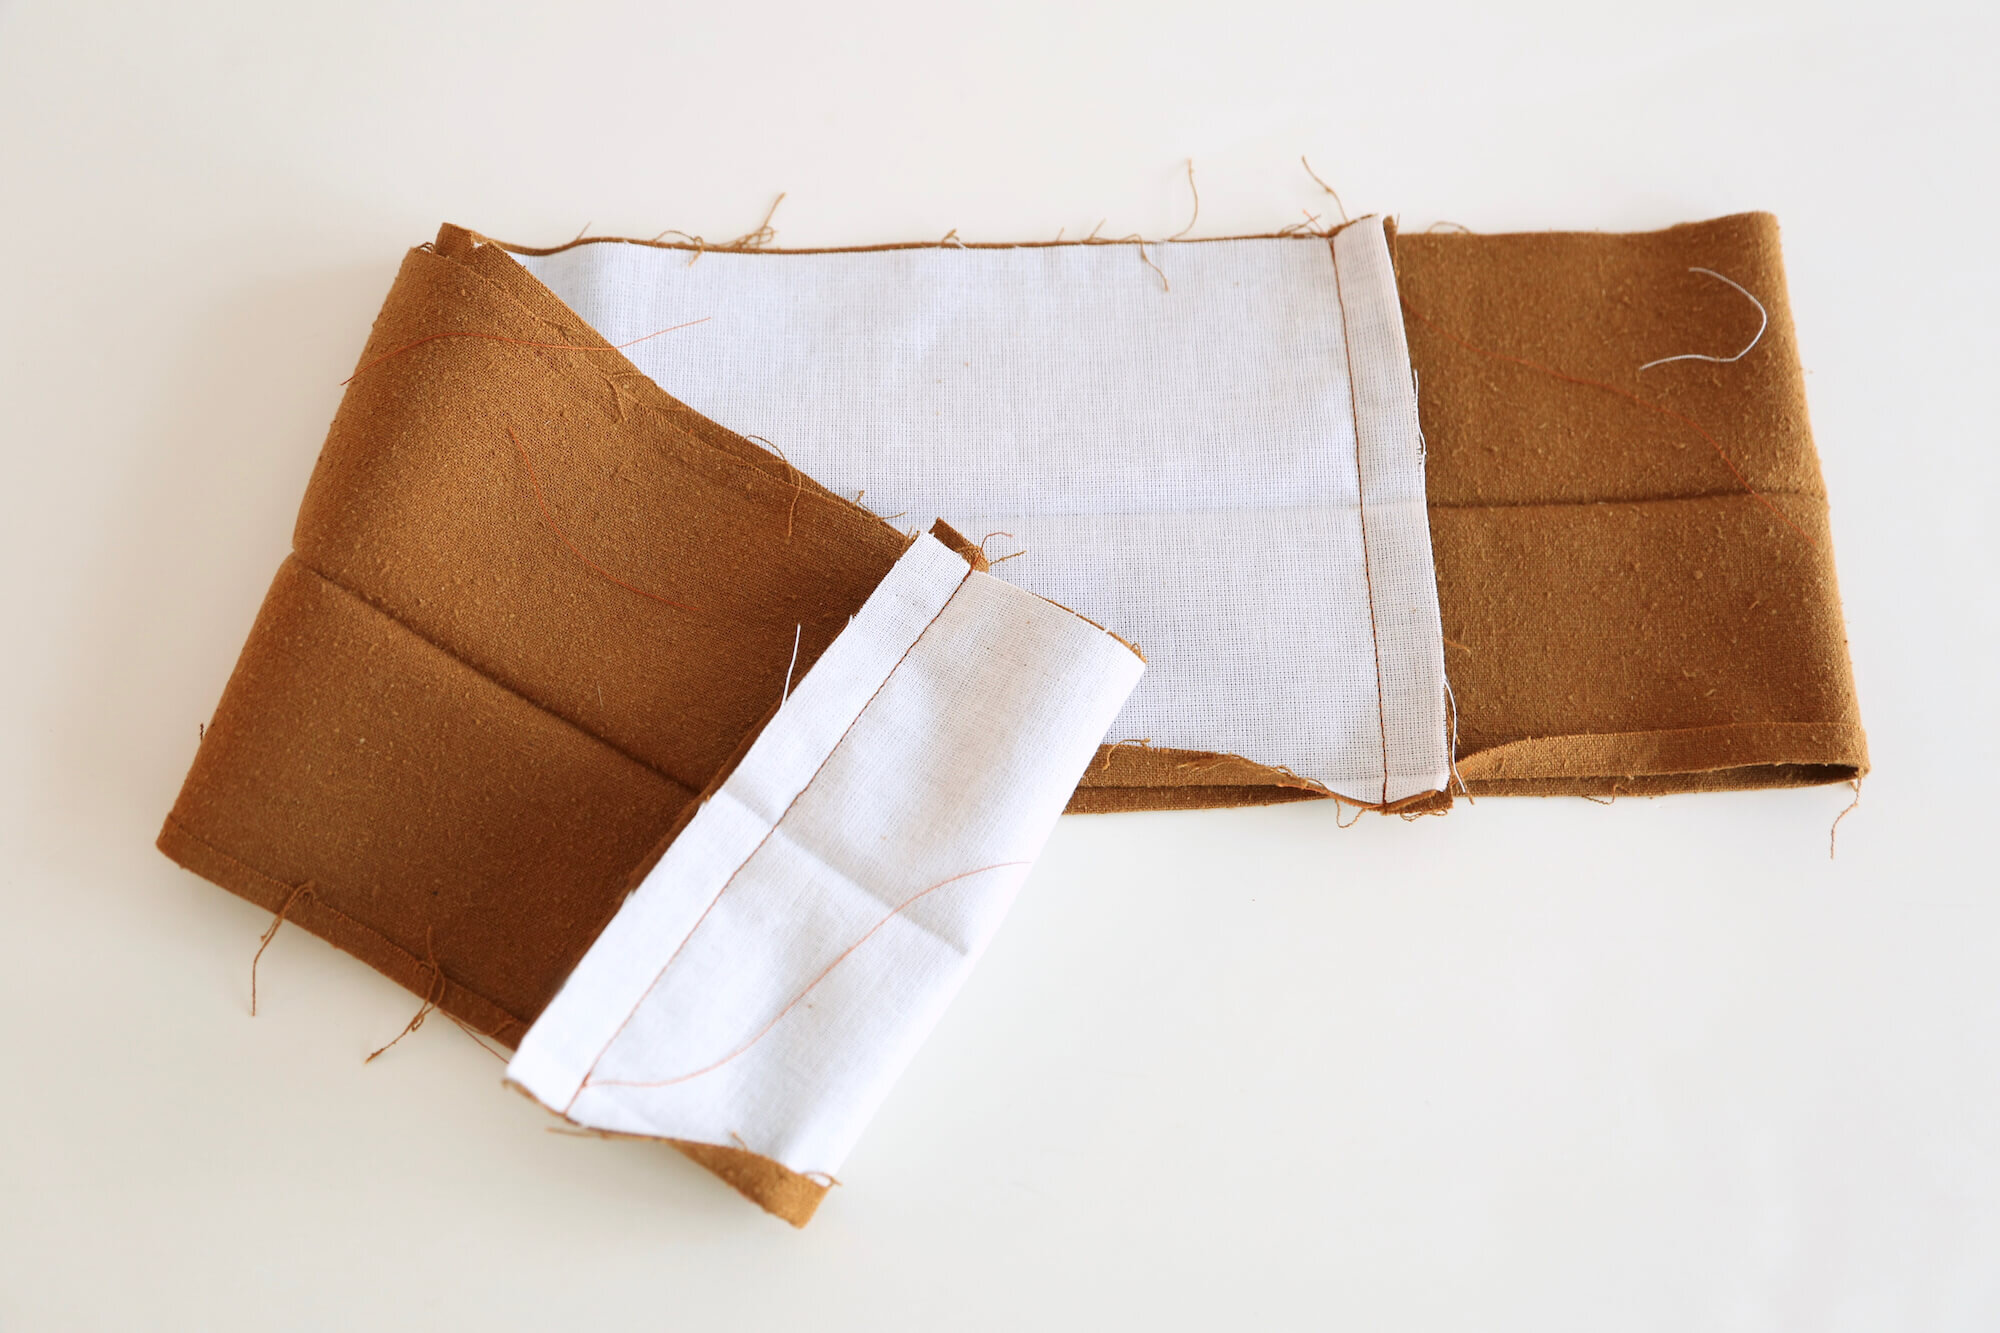
Topstitch (“stitch in the ditch”) directly over the back waistband seam from the outside of the garment, catching the folded waistband edge underneath. This forms the elastic casing.
Next, to form two channels for the elastic, topstitch along the center of the back waistband from one side seam to the other, 1 inch [2.5 cm] from the top of the pant. You can use the seam allowance guide on your sewing machine for this, or help yourself out by using a straight edge and chalk to mark this line before sewing, as shown here:

note
If you’re using 1.5 inch [38 mm] wide elastic, skip the topstitching and leave just one channel!

Step 10 - Add elastic and close front waistband
Cut two pieces of 3/4 inch [19 mm] wide elastic to the length indicated in the chart in your PDF instructions (or a single piece of 1.5 in [38 mm] if you left a single channel in the back waistband).
Using a safety pin or bodkin, thread the elastic through each channel.

Secure both ends with safety pins at the side seams, with the elastic ends extending about 1/2 inch [1.3 cm] beyond each side seam.

check fit
Try the pants on to check fit and length, and adjust elastic as needed. For the best fit, tighten the elastic until the waistband rests at your natural (high) waist rather than your low waist. Depending on your elastic, you may need to use less than the recommended amount in order to get a good fit. When checking length, remember that the hem allowance is 2.5 inches [6.5 cm].
Once the elastic fits well, secure at both side seams by stitching through all layers of fabric and elastic.
Now finish the front waistband in the same way as the back: pin the folded edge to the inside of the pants and stitch from the outside to secure.


Step 11 - Hem pants
Along the bottom edge of each pant let, fold and press 1/2 inch [1.3 cm] toward the wrong side, then fold and press another 2 inches [5 cm] for pants (1.5 inches [3.8 cm] for shorts), or to desired length. Pin in place.

Edgestitch along the first folded edge (or hand stitch for a dressier look).

And we’re done! Hurray!!! You did it!!
Now stand back and admire your handiwork. And then take a pic and send it to me!
WAY TO GO!!!
How did your Rose Pants turn out? We’d love to see how you’re rocking this pattern. Tag me (@madebyrae) and use the hashtags #rosepantsalong and #mbrrose to share! And if you’ve been following along with these posts, thank you for joining in our sewalong!
Get pattern details, view size and yardage charts, and materials on the Rose Page.